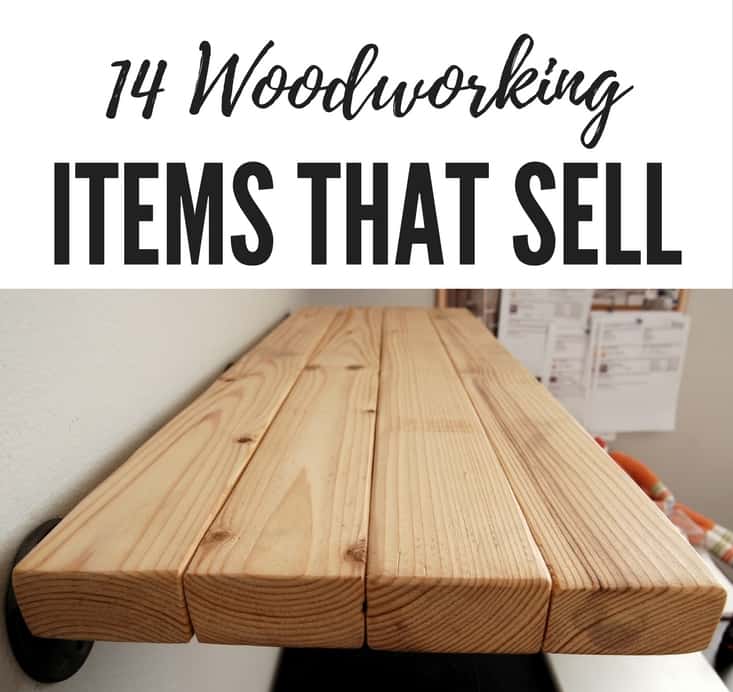
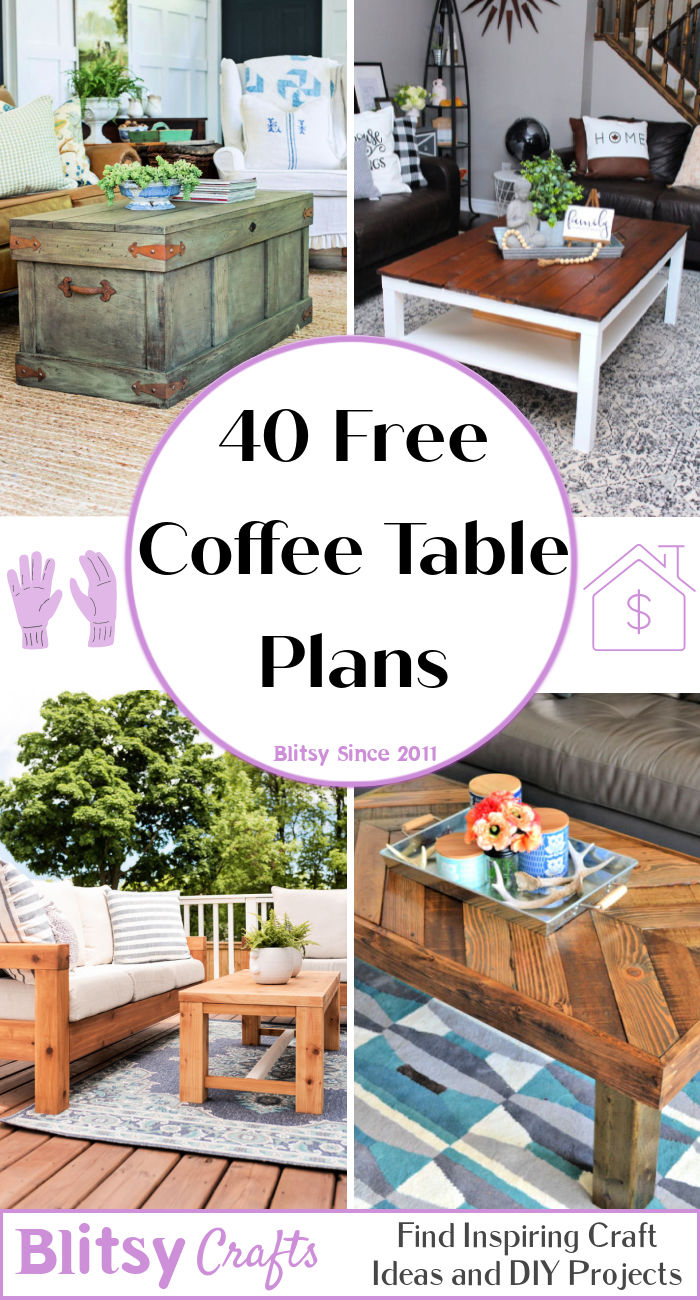
Easy and budget-friendly woodworking ideas for creating personalized wood crafts and home accents.

How to Build Wooden Benches with a Modern or Rustic Look

How to Build Wooden Benches with a Modern or Rustic Look

Building a Wooden Bench: Modern or Rustic, Your Choice!

So, you're thinking about adding a bench to your outdoor space, huh? Maybe you're craving a cozy reading nook, or you want a stylish place for guests to hang out. Whatever the reason, building a wooden bench is a fantastic project, especially if you're a DIYer at heart. The best part? You can tailor it to your style, whether you prefer a sleek modern aesthetic or a rustic, farmhouse vibe. Let's dive in!

Choosing Your Style: Modern or Rustic?

The first step is deciding what kind of bench vibes with your personality and your space. Here's a quick breakdown to help you choose:

Modern Bench: Sleek Lines & Simplicity

  • Clean, Straight Lines: Think geometric shapes, minimal ornamentation, and a focus on smooth, polished surfaces.
  • Materials: Opt for hardwoods like walnut, maple, or cherry. These woods offer durability and a beautiful natural grain that can be left exposed for a minimalist look.
  • Color: A natural wood finish or a dark stain like ebony or walnut can create a contemporary feel.
  • Rustic Bench: Warmth & Character

  • Natural Imperfections: Embrace knots, cracks, and the unique grain patterns of reclaimed wood. This adds character and a sense of history.
  • Materials: Reclaimed lumber, cedar, or rough-cut pine are perfect choices. They often have a weathered, natural patina that adds to the rustic charm.
  • Color: Natural oil finishes or a weathered gray stain can enhance the rustic look. Consider adding a touch of color with distressed paint or a vintage-inspired finish.
  • Essential Tools & Materials

    Before you get started, make sure you have the following tools and materials on hand. I've broken them down into categories:

    Tools:

  • Measuring Tape & Pencil: Accuracy is key! You'll need to measure your lumber and mark your cuts precisely.
  • Saw: Choose a saw that's suitable for your materials. A circular saw, miter saw, or handsaw will all work well.
  • Drill & Bits: You'll need a drill to pre-drill holes for screws and to create pilot holes for dowels (if using).
  • Screwdriver: A cordless screwdriver or drill driver with a good selection of bits is essential.
  • Clamps: These are crucial for holding your pieces together securely during assembly.
  • Level: A level ensures your bench sits straight and even. A spirit level or laser level will both work.
  • Safety Gear: Safety first! Wear safety glasses, a dust mask, and work gloves to protect yourself.
  • Materials:

  • Lumber: The type and dimensions of lumber will depend on your design, but you'll need planks for the seat, legs, and supports. Calculate your lumber needs based on your bench dimensions.
  • Screws: Use screws specifically designed for woodworking. Choose screws that are long enough to securely fasten your pieces together.
  • Wood Glue: Wood glue adds strength and durability to your joints. Use a high-quality wood glue designed for outdoor applications.
  • Wood Finish: Select a finish that complements your style and protects your wood. Options include stains, oils, varnishes, and paint.
  • Optional: Dowels, brackets, hardware for attaching the bench to a deck or wall.
  • Let's Build! A Basic Bench Design

    Now for the fun part! I'll walk you through a simple bench design that can be easily customized to match your style. This basic design features a rectangular seat supported by four legs. You can adjust the dimensions to create a bench that's just the right size for your space.

    Step 1: Cut Your Lumber

  • Cut your lumber to the following dimensions (adjust as needed):
    • Seat: Two pieces (length of your bench) x width of your bench.
    • Legs: Four pieces (length of your legs) x width of your legs.
    • Supports: Four pieces (length of your supports) x width of your supports (you'll need to adjust the length to connect the legs to the seat).

    Step 2: Assemble the Base

  • Position two legs at each end of the bench seat, ensuring they are parallel and spaced evenly.
  • Use wood glue and screws to attach the legs to the seat. Pre-drill holes to prevent splitting the wood. Use wood glue for a strong bond, especially if you're using reclaimed wood.
  • Install the supports between the legs and the seat. These will add stability and prevent the bench from wobbling.
  • Step 3: Attach the Seat

  • Place the second seat plank on top of the base, ensuring it aligns perfectly with the first seat plank.
  • Attach the top plank to the base using wood glue and screws.
  • Step 4: Finishing Touches

  • Sand down your bench, smoothing out any rough edges and ensuring a smooth, even surface.
  • Apply your chosen wood finish. Allow the finish to dry thoroughly before using your bench. Give the wood plenty of time to absorb the finish for a more durable result.
  • Adding Your Personal Touch: Customization Ideas

    Okay, you've got the basics down. Now let's talk about making your bench truly your own!

    Modern Touches:

  • Sleek Lines: Use a table saw to cut perfectly straight edges and create smooth, rounded corners.
  • Minimalist Design: Avoid excessive ornamentation. Keep the focus on the natural beauty of the wood.
  • Unique Materials: Consider using metal accents, such as a steel frame for the base, or a sleek metal benchtop.
  • Bold Finishes: Embrace dark stains or an oil-based finish that highlights the natural grain.
  • Rustic Charm:

  • Reclaimed Wood: Use wood with visible knots, grain patterns, and signs of weathering to add a touch of history.
  • Distressed Finish: Create a worn, vintage look with sanding techniques, paint stripping, or a weathered gray stain.
  • Rustic Hardware: Use heavy-duty iron brackets, hand-forged nails, or salvaged hardware to add a touch of old-world charm.
  • Unique Details: Incorporate natural elements like branches, stones, or even woven baskets for a cozy, rustic feel.
  • Beyond Basic: Creative Design Ideas

    Looking for something more than a standard bench? Here are a few creative design ideas to get your imagination flowing:

  • Curved Bench: Create a flowing, organic shape by using a router or handsaw to cut curves into the seat and legs.
  • Bench with Storage: Build a bench with drawers or a built-in storage compartment beneath the seat. Perfect for storing cushions or tools.
  • Bench with Backrest: Add a backrest to create a comfortable spot for relaxing.
  • Double Bench: Build a longer bench that can seat several people.
  • Corner Bench: Design a bench specifically for a corner space, making the most of awkward angles.
  • Trestle Bench: Use a trestle design with a single central support for a minimalist aesthetic.
  • Commonly Asked Questions

    What kind of wood is best for a bench?

    For a long-lasting outdoor bench, hardwoods like cedar, oak, redwood, or teak are excellent choices. They are naturally durable and resistant to moisture and rot. For a rustic look, consider reclaimed wood like barnwood or pallet wood. Just be sure to treat it properly with a sealant to prevent decay.

    How do I prevent my wooden bench from rotting?

    The key is to use a wood finish that protects the wood from moisture. Water-based finishes are generally best for outdoor use, but oil-based finishes also offer good protection. Always apply the finish according to the manufacturer's instructions, and reapply it every few years for maximum protection.

    How can I make my bench more comfortable?

    Add cushions or a padded seat top! You can use outdoor fabric cushions, foam padding, or even a layer of sheepskin for a cozy, rustic feel.

    Is it better to use screws or nails?

    For most bench designs, screws are the best choice. They offer greater holding power than nails, especially when working with hardwoods. Make sure to use screws specifically designed for woodworking.

    And there you have it! Building your own wooden bench is a project that combines creativity, practicality, and a touch of rustic charm. So, grab your tools, gather your lumber, and let your imagination run wild. Enjoy the process and the beautiful, handcrafted bench you'll have to show for it!

    Share:

    How to Build Shoe Racks with a Modern Design for Sale

    How to Build Shoe Racks with a Modern Design for Sale

    How to Build Shoe Racks with a Modern Design for Sale

    Alright, so you want to build shoe racks with a modern design to sell. That's awesome! You're stepping into a fantastic niche with huge potential. The key is to create pieces that are both functional and visually appealing, and that's where we come in.

    This guide will walk you through everything you need to know, from choosing the right materials to designing and building your modern shoe racks. Let's get started!

    Step 1: Choosing Your Materials

    The materials you choose will directly impact the look and feel of your shoe racks. Here are some of the most popular choices:

    Wood:

    Wood is a classic choice for shoe racks. It's durable, versatile, and can be stained or painted to match any aesthetic. Here are a few wood options:

    • Oak: Strong and beautiful, oak is a great choice for a more traditional or rustic modern look. It's also very durable, so it's great for high-traffic areas.
    • Walnut: Walnut offers beautiful, rich grain patterns and a naturally dark color that adds a touch of sophistication. It's a bit more expensive than oak but holds its value well.
    • Pine: A lighter, softer wood that is readily available and affordable. Pine is great for a clean, modern look. However, it may be less durable than oak or walnut, so it's best for lighter use.
    • Plywood: A cost-effective and surprisingly strong option. Plywood comes in various grades and finishes, allowing for a lot of design flexibility.

    Metal:

    Metal offers a sleek, modern look, and it's incredibly durable. Here are some metal options:

    • Steel: A sturdy and affordable option. Steel can be powder-coated in a variety of colors to match your designs.
    • Aluminum: Lightweight, corrosion-resistant, and easily recyclable. Aluminum can be polished or brushed for a different aesthetic. It's a great option if you're looking for a lighter and more contemporary look.
    • Iron: A strong, industrial-looking metal that can be used to create a unique and robust shoe rack. Iron can be painted or left in its natural state for a more rustic feel.

    Other Materials:

    You can also explore other materials like acrylic, leather, or even recycled plastic. Just be sure to choose materials that are sturdy enough to handle the weight of shoes.

    Step 2: Designing Your Shoe Rack

    Now that you've chosen your materials, it's time to design your shoe rack. Here are a few things to consider:

    • Function: How many pairs of shoes will the rack need to hold? Will it need to store different types of shoes (sneakers, heels, boots)?
    • Style: What kind of aesthetic are you going for? Modern designs often feature clean lines, minimalist details, and a focus on functionality.
    • Dimensions: What will be the overall size of the shoe rack? How much space do you have to work with?
    • Storage Options: Will the rack have shelves, drawers, or a combination of both? Consider adding features like a tilted shelf for boots or a dedicated section for sneakers.
    • Assembly: Will the shoe rack be assembled by the customer, or will it come fully assembled? If it's assembled by the customer, ensure it's easy and straightforward.

    Getting Inspiration:

    Don't reinvent the wheel! Look at existing modern shoe racks for inspiration. Browse online marketplaces like Etsy and Pinterest for ideas, and visit furniture stores to see what's trending.

    Step 3: Building Your Shoe Rack

    Once you have your design finalized, it's time to build your shoe racks. Here's a breakdown of the process:

    Cutting and Preparing Materials:

    Start by cutting your chosen materials to the required dimensions. Use a saw, a jigsaw, or a laser cutter depending on the materials and the complexity of your design.

    Assembling the Frame:

    Assemble the main frame of the shoe rack using screws, dowels, or glue. Make sure all the joints are secure and stable.

    Adding Shelves and Storage Features:

    Attach shelves, drawers, or other storage features to the frame. Make sure they are properly aligned and secured.

    Finishing Touches:

    Once the shoe rack is assembled, it's time to give it the final touch. This might include:

    • Sanding: Sand the wood to create a smooth finish.
    • Painting or Staining: Apply a stain or paint to the wood or metal to match your design.
    • Finishing: Apply a protective finish, like a sealant or varnish, to protect the shoe rack from scratches and water damage.

    Step 4: Marketing and Selling Your Shoe Racks

    With your shoe racks ready, it's time to get them in front of customers! Here are a few ways to market and sell your products:

    • Online Marketplaces: Etsy, Amazon Handmade, and Shopify are great platforms to reach a wider audience. Take high-quality photos of your shoe racks and write compelling descriptions.
    • Social Media: Use platforms like Instagram and Facebook to showcase your designs and engage with potential customers. Run contests or giveaways to generate excitement.
    • Local Craft Fairs and Markets: Connect with local shoppers at craft fairs and farmers markets. This is a great way to build relationships and get feedback.
    • Your Own Website: If you're serious about selling your shoe racks, create a website to showcase your products and provide information about your brand.

    Commonly Asked Questions

    How much can I sell my shoe rack for?

    Pricing depends on factors like materials, design complexity, and the market for modern shoe racks. Research competitor pricing and consider your costs for materials, labor, and marketing. Start with a price that reflects the value you're providing and adjust it based on customer feedback.

    What kind of business structure should I choose?

    The best structure depends on your individual needs and goals. Sole proprietorships are easy to start but offer limited liability protection. An LLC provides more protection but requires more paperwork. Consult with a lawyer or accountant to determine the best option for you.

    What are some tips for taking good product photos?

    Good photos are crucial for selling online. Use natural light whenever possible, and use a tripod to ensure sharp images. Style your shoe rack in a way that highlights its features. Include shots from different angles and close-ups of details.

    What are some tips for writing good product descriptions?

    Write descriptions that are clear, concise, and engaging. Highlight the key features and benefits of your shoe racks. Use strong verbs and adjectives to create a sense of excitement.

    Building shoe racks with a modern design can be a rewarding experience. It's a fun and creative endeavor that allows you to express your artistic side while creating practical products that people love. With a little effort and creativity, you can build a successful business selling modern shoe racks. Remember, you're not just selling a product, you're selling a solution to an everyday problem, and that's a powerful thing.

    Share:

    The Best Types of Wood for Cutting Boards to Sell

    The Best Types of Wood for Cutting Boards to Sell

    The Best Types of Wood for Cutting Boards to Sell

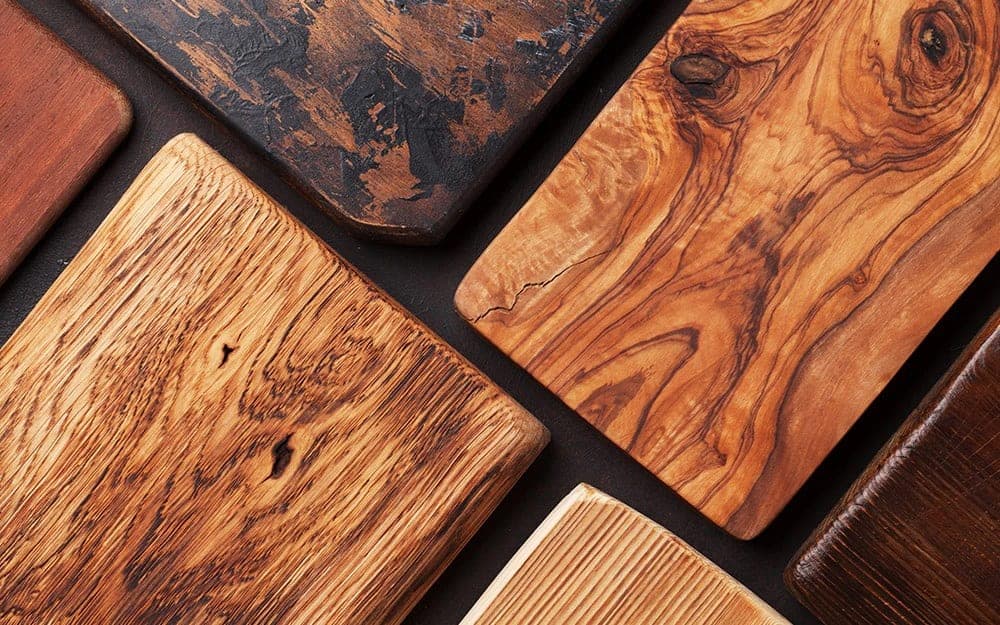
    Cutting boards are an essential kitchen tool, used for everything from chopping vegetables to carving roasts. Choosing the right type of wood for your cutting board is crucial, as it will impact its durability, longevity, and performance. While many wood species are suitable for crafting cutting boards, some stand out as the best choices for both functionality and aesthetic appeal.

    When selecting wood for cutting boards, consider factors such as hardness, grain pattern, resistance to moisture, odor absorption, and cost. Understanding these properties will help you choose the right wood for your needs and target market.

    Hardwoods for Cutting Boards

    Hardwoods are generally denser and more resistant to wear and tear than softwoods. This makes them ideal for cutting boards that will see heavy use. Here are some of the best hardwood options:

    Maple

    Maple is a popular choice for cutting boards due to its hardness, beautiful grain pattern, and resistance to moisture. Its tight grain structure makes it relatively resistant to scratches and dents. Maple is also a good choice for those seeking a light-colored board with a natural finish.

    Cherry

    Cherry wood offers a rich, reddish-brown hue that adds elegance to any kitchen. It is hard and durable, making it suitable for both everyday use and high-end cutting boards. Over time, cherry wood develops a warm, honey-like patina, enhancing its beauty.

    Walnut

    Walnut is a highly sought-after wood for cutting boards, known for its striking grain patterns and rich, dark brown color. It is hard and durable, offering excellent resistance to wear and tear. Walnut boards often feature dramatic figure, making them a stunning centerpiece in any kitchen.

    Hardwood Alternatives

    While traditional hardwoods are excellent for cutting boards, some alternative wood species offer unique characteristics and price points. Here are a few noteworthy options:

    Bamboo

    Bamboo is a rapidly renewable resource with excellent hardness and durability. It is also naturally antimicrobial, making it a safe choice for food preparation. Bamboo boards are often lighter and more affordable than traditional hardwoods, making them a popular choice for budget-conscious consumers.

    Acacia

    Acacia is a dense and durable hardwood with a distinctive golden-brown color and striking grain patterns. Its natural oil content provides a degree of water resistance, making it suitable for cutting boards. Acacia is a relatively affordable option compared to other hardwoods, making it a good choice for both functional and visually appealing boards.

    Softwoods for Cutting Boards

    Softwoods are generally less dense and more prone to scratches and dents than hardwoods. However, some softwood species offer unique advantages and can be used for cutting boards.

    Pine

    Pine is a soft and lightweight wood with a distinctive yellow-brown color. It is affordable and readily available, making it suitable for simple cutting boards. Pine boards are generally not recommended for heavy-duty use, as they can easily scratch and dent. However, they can be a good choice for decorative or serving boards.

    Cedar

    Cedar is known for its pleasant aroma and natural insect-repellent properties. It is a soft wood and should not be used for heavy-duty cutting. However, cedar boards can be used for serving boards or for storing items such as cheeses or breads. Their aroma can enhance the flavor of certain foods.

    Factors to Consider When Choosing Wood for Cutting Boards

    Beyond the basic properties of hardness and appearance, several other factors influence the suitability of wood for cutting boards. Here are some important considerations:

    Moisture Resistance

    Cutting boards are exposed to moisture during use, so choosing a wood with natural resistance to water damage is essential. Woods like maple and walnut are known for their low water absorption. However, even the most water-resistant woods should be treated with oil or wax to enhance their protection.

    Odor Absorption

    Certain woods, like cedar, have a natural ability to absorb odors. This can be desirable for food storage but is undesirable for cutting boards used to prepare different foods. Choose woods with low odor absorption, such as maple or cherry, to prevent cross-contamination of flavors.

    Grain Pattern

    The grain pattern of wood can affect both its appearance and its durability. Tight-grained woods, such as maple, are more resistant to scratches and dents. Wide-grained woods, such as walnut, can be more prone to damage, but their distinctive patterns are highly sought after. Consider the intended use and aesthetic appeal when selecting a wood based on its grain pattern.

    Wood Finishing for Cutting Boards

    Once you've chosen the right wood for your cutting boards, applying a suitable finish is crucial for protection and longevity. Common finishing techniques include:

    Mineral Oil

    Mineral oil is a popular choice for finishing cutting boards because it is food-safe and helps prevent water absorption. It also creates a smooth, water-resistant surface. Apply mineral oil regularly to maintain its protective barrier.

    Beeswax

    Beeswax adds a natural protective layer to cutting boards, enhancing their water resistance and providing a subtle shine. It also helps repel stains. Beeswax is often combined with mineral oil for a more robust finish.

    Food-Grade Finishes

    Several commercially available food-grade finishes are designed specifically for cutting boards. These finishes often combine mineral oil with other protective ingredients like tung oil or polymer resins. Choose a food-grade finish that meets your needs and preferences.

    Conclusion

    Choosing the right wood for your cutting boards is an important step in creating durable, functional, and aesthetically pleasing products. By considering factors such as hardness, grain pattern, moisture resistance, odor absorption, and cost, you can select the ideal wood for your target market and needs. Whether you're crafting maple boards for everyday use or walnut boards for high-end customers, choosing the right wood and applying a suitable finish will ensure your cutting boards meet the highest standards of quality and performance.

    Share:

    Popular Woodworking Items to Sell Online and Locally

    Popular Woodworking Items to Sell Online and Locally

    Popular Woodworking Items to Sell Online and Locally

    Woodworking is a rewarding hobby and a potential source of income. The demand for handcrafted wooden items is consistently high, making it a viable business opportunity. This article explores some of the most popular woodworking items that you can sell online and locally, catering to diverse customer preferences and market needs.

    Home Decor and Furniture

    The home decor and furniture market is vast and brimming with possibilities for woodworking enthusiasts. Consumers increasingly seek unique and personalized pieces to enhance their living spaces, and handcrafted wooden items offer a perfect solution.

    Cutting Boards

    Cutting boards are a staple in any kitchen, offering functionality and aesthetic appeal. They are relatively simple to make, making them a great starting point for beginners. You can experiment with different wood types, sizes, and designs to create a variety of cutting boards that appeal to diverse customers.

  • Wooden Serving Trays: Elegant wooden serving trays can elevate the dining experience. They are versatile, suitable for serving appetizers, desserts, or drinks. You can add decorative elements like handles or inlays to enhance their appeal.
  • Wooden Wall Shelves: Functional and stylish, wooden wall shelves provide a unique storage solution. They come in various sizes and shapes, allowing you to cater to different customer needs. Consider adding a rustic or minimalist finish to enhance their appeal.
  • Wooden Coasters: Protect furniture surfaces with handcrafted wooden coasters. These small but essential items are easy to make and can be personalized with engraved designs or custom logos.
  • Wooden Picture Frames: Create personalized picture frames using different wood types and styles. You can add decorative elements, such as intricate carvings or painted details, to enhance their appeal.
  • Outdoor Furniture

    The demand for high-quality outdoor furniture is consistently strong. Woodworking offers a unique opportunity to create durable and stylish pieces that enhance outdoor living spaces.

  • Wooden Garden Benches: A classic outdoor staple, wooden benches provide a comfortable seating option in gardens, patios, and parks. You can customize their design with different wood types, finishes, and embellishments.
  • Wooden Birdhouses: Birdhouses are popular gifts and garden accents. They are relatively easy to make and can be customized with various designs, colors, and sizes to attract specific bird species.
  • Wooden Planters: Add a touch of rustic charm to your outdoor space with handcrafted wooden planters. They come in various sizes and styles, allowing you to grow flowers, herbs, or small vegetables.
  • Wooden Picnic Tables: Perfect for outdoor gatherings, wooden picnic tables offer durable and spacious seating options. You can customize them with different sizes, shapes, and finishes.
  • Personalized Gifts and Keepsakes

    Handmade wooden gifts and keepsakes offer a personal touch that is highly valued. They serve as lasting mementos that can be cherished for years to come.

    Engraved Wooden Boxes

    Engraved wooden boxes are perfect for storing jewelry, keepsakes, or other small treasures. They can be personalized with names, dates, or special messages, creating a sentimental and unique gift.

  • Wooden Ornaments: Custom-made wooden ornaments add a unique touch to Christmas trees or year-round decorations. They can be personalized with names, initials, or festive designs.
  • Wooden Keychains: Practical and personalized, wooden keychains make a great gift for friends, family, or colleagues. You can add custom engravings, logos, or designs to create a unique piece.
  • Wooden Jewelry Stands: Wooden jewelry stands offer a stylish and functional way to display and organize jewelry. They can be crafted in various designs, from minimalist to intricate, to suit different preferences.
  • Kitchenware and Utensils

    Handcrafted wooden kitchenware and utensils are becoming increasingly popular as consumers seek sustainable and aesthetically pleasing options.

  • Wooden Spoons and Spatulas: Wooden spoons and spatulas offer a natural and durable alternative to plastic or metal utensils. They are gentle on cookware and can be customized with unique designs and finishes.
  • Wooden Salad Bowls: Wooden salad bowls add a touch of elegance to any dining table. They come in various shapes, sizes, and wood types, offering a range of options to suit different needs.
  • Wooden Rolling Pins: Wooden rolling pins are essential for baking and are often cherished as heirloom pieces. They can be customized with different wood types, sizes, and designs.
  • Other Popular Woodworking Items

    Beyond the categories mentioned above, several other woodworking items are consistently in demand. These include:

  • Wooden Toys: Handcrafted wooden toys provide a safe and engaging play experience for children. They can be designed in various shapes, sizes, and colors, promoting creativity and imagination.
  • Wooden Clocks: Wooden clocks add a rustic charm to any home. They can be crafted in various styles, from traditional to modern, and personalized with custom designs or engravings.
  • Wooden Lamps: Wooden lamps offer a warm and inviting ambiance to any space. They can be customized with different wood types, shapes, and finishes, creating a unique statement piece.
  • Wooden Wine Racks: Wine racks are essential for wine enthusiasts. They can be crafted in various styles, from simple to elaborate, to suit different preferences and storage needs.
  • Marketing and Selling Strategies

    Once you've chosen your niche, it's crucial to develop effective marketing and selling strategies to reach your target audience.

    Online Marketplaces

    Online marketplaces such as Etsy, Amazon Handmade, and eBay provide a platform to reach a global audience. These platforms offer tools for creating online storefronts, managing inventory, and promoting your products.

    Social Media Marketing

    Social media platforms like Instagram, Facebook, and Pinterest are excellent for showcasing your woodworking skills and promoting your products. Use high-quality images, engaging captions, and stories to create a compelling brand presence.

    Local Craft Fairs and Markets

    Participating in local craft fairs and markets provides a valuable opportunity to connect with potential customers in person, showcase your products, and generate sales.

    Word-of-Mouth Marketing

    Word-of-mouth marketing is powerful. Encourage satisfied customers to recommend your products to their friends and family. Offer referral discounts or bonuses to incentivize positive referrals.

    Conclusion

    Woodworking offers a fulfilling and potentially profitable business opportunity. By selecting popular items, mastering your craft, and developing effective marketing strategies, you can tap into the growing demand for handcrafted wooden goods, both online and locally.

    Share:

    How to Finish Wooden Benches for a Professional Look

    How to Finish Wooden Benches for a Professional Look

    How to Finish Wooden Benches for a Professional Look

    You've built a beautiful wooden bench, and now you're ready to give it the perfect finish to truly make it shine. But with so many options, it's easy to feel overwhelmed. Don't worry, I'm here to help!

    In this guide, we'll explore the different steps and considerations for finishing your bench like a pro. From choosing the right stain and sealant to applying them properly, we'll cover everything you need to know to create a long-lasting, stunning finish.

    Choosing the Right Finish

    The first step is deciding what kind of finish you want. There are three main types:

    1. Stains

    Stains penetrate the wood, enhancing its natural grain and color without hiding it completely. They come in a variety of shades and finishes, from light washes to deep, rich hues.

    • Oil-based stains are known for their deep penetration, durability, and rich colors. They take longer to dry and require proper ventilation, but offer a classic, high-quality finish.
    • Water-based stains are easier to clean up and dry faster, making them a good choice for beginners. However, they may not penetrate as deeply as oil-based stains and may not be as durable.
    • Gel stains are thicker and more pigmented, offering better coverage and less blotching on porous woods. They are also easier to apply and can be used on vertical surfaces.

    2. Paints

    Paints provide a solid, opaque coating that completely covers the wood, allowing you to create a variety of colors and effects.

    • Latex paint is a popular choice for its quick drying time, ease of cleanup, and low odor. It's also durable and water-resistant.
    • Oil-based paint offers a high-gloss finish and better durability, but it takes longer to dry and requires solvents for cleanup.

    3. Finishes

    Finishes are applied over stains or paints to protect the wood and enhance its appearance. They come in a variety of types, each with its own benefits and drawbacks.

    • Polyurethane is a popular choice for its durability, water resistance, and ease of application. It comes in different sheens, from matte to gloss.
    • Varnish is another durable option that offers a high-gloss finish. It's often used on furniture and other pieces that will receive heavy use.
    • Lacquer is a fast-drying, durable finish that offers a hard, protective layer. It's often used on floors and other high-traffic surfaces.
    • Wax provides a natural, low-gloss finish that helps protect the wood from moisture and scratches. It's often used on furniture and other pieces that will receive moderate use.

    Preparing the Bench for Finishing

    Before applying any finish, it's essential to prepare the wood properly. This involves sanding, cleaning, and addressing any imperfections.

    1. Sanding

    Sanding smooths the surface and removes any rough edges or imperfections. Start with a coarse-grit sandpaper (80-120 grit) to remove any major blemishes or scratches. Then, gradually move to finer grits (150, 220, and 400 grit) for a smooth, consistent finish.

    2. Cleaning

    After sanding, clean the bench thoroughly with a tack cloth to remove dust and debris. This ensures a smooth, dust-free surface for the finish to adhere to.

    3. Filling Imperfections

    If you have any holes or cracks in the wood, fill them with wood filler. Let the filler dry completely, then sand it smooth for a seamless finish.

    Applying the Finish

    Now it's time to apply the finish you've chosen. Follow these steps for best results:

    1. Stain (if using)

    If you're using a stain, apply it evenly to the wood with a brush, cloth, or sponge. Work in thin, even coats, and avoid over-applying. Let the stain dry completely before moving to the next step.

    2. Paint (if using)

    If you're using paint, apply it evenly with a brush or roller. Make sure to cover the wood completely and avoid leaving any streaks or brush marks. Let the paint dry completely before applying any finish.

    3. Finish

    Apply the finish in thin, even coats, following the manufacturer's instructions. Allow each coat to dry completely before applying the next.

    4. Final Touches

    Once the final coat of finish is dry, you can add any finishing touches. This might include applying a wax coat, sanding the edges for a softer feel, or adding hardware.

    Commonly Asked Questions

    1. How long does it take for a wooden bench to dry?

    The drying time for a wooden bench varies depending on the type of finish used. Stains can take anywhere from a few hours to a day to dry, while paints and finishes can take longer. Check the manufacturer's instructions for specific drying times.

    2. How many coats of finish should I apply?

    The number of coats you apply depends on the type of finish and the desired level of protection. Typically, you'll need at least two coats of finish to achieve a good level of durability.

    3. Can I apply a stain over a paint?

    It's generally not recommended to apply a stain over paint. The stain won't penetrate the paint layer effectively, and the results may be uneven.

    4. How can I fix mistakes while finishing?

    If you make a mistake while finishing, you can usually sand the area and reapply the finish. For larger mistakes, you may need to use a paint remover or stripper to remove the finish entirely and start over.

    5. What are some tips for getting a professional look?

    Here are a few tips for achieving a professional look:

    • Prepare the wood properly by sanding, cleaning, and filling any imperfections.
    • Use high-quality stains, paints, and finishes.
    • Apply the finish evenly, working in thin, even coats.
    • Allow each coat to dry completely before applying the next.
    • Take your time and don't rush the process.

    With a little patience and effort, you can finish your wooden bench to a professional standard. Just remember to choose the right finish, prepare the wood properly, and apply the finish evenly. And don't be afraid to experiment to find what works best for you!

    Share:

    Budget-Friendly Modern Coffee Table Projects That Are Easy to Build and Sell

    Budget-Friendly Modern Coffee Table Projects That Are Easy to Build and Sell

    Budget-Friendly Modern Coffee Table Projects That Are Easy to Build and Sell

    Hey there, crafty friends! Are you looking to tap into the lucrative furniture market without breaking the bank? Well, look no further because we're about to dive into some super cool and easy DIY coffee table projects that you can build and sell, turning your passion into profit.

    Why Coffee Tables?

    Okay, so why coffee tables? Well, they're a staple in most living rooms, and people are always on the lookout for stylish and affordable options. Plus, they're relatively simple to build, even for beginner woodworkers.

    The Magic of Modern Design

    Let's talk about modern design â€" it's all about clean lines, minimalist aesthetics, and a focus on functionality. It's timeless, adaptable, and super popular right now. So, let's tap into that trend and create some modern masterpieces that will make your customers swoon!

    Budget-Friendly Materials That Rock

    One of the best things about these projects is that you don't need to spend a fortune on materials. We're talking affordable options like:
    • **Pine wood:** It's readily available, easy to work with, and surprisingly strong.
    • **Plywood:** It's affordable, durable, and comes in a variety of finishes.
    • **Metal pipe legs:** You can find these at most hardware stores, and they're a great way to add a modern industrial touch.
    • **Recycled materials:** Let's be eco-conscious! Think reclaimed wood, vintage crates, or even old pallets.

    Coffee Table Project Ideas You Can Build and Sell

    Alright, enough talking, let's get to the good stuff! Here are a few coffee table project ideas that are easy to build, sell, and budget-friendly:

    1. The Simple Slab Coffee Table

    This one is a classic for a reason! Find a nice slab of wood (pine, oak, or even reclaimed wood), sand it down, apply a finish (stain, paint, or a clear coat), and add some simple legs. For a modern touch, go with sleek metal pipe legs. Bam! You've got yourself a stylish coffee table that's ready to rock any living room.

    2. The Industrial Pipe and Wood Coffee Table

    This one is a little more complex, but it's still doable! You'll use metal pipes to create the base, and you can choose a wood top (plywood, reclaimed wood, or even a thin piece of butcher block). The pipe legs can be welded together or joined with fittings. You can also paint the pipes black to create a more industrial look.

    3. The Pallet Coffee Table

    Want to save even more money and get a unique look? Use pallets! You can create a simple square coffee table by using two pallets or get creative and build a more intricate design. Sand the pallets, stain or paint them, and add some legs. If you're using old pallets, make sure to sand down any rough edges and clean them thoroughly.

    4. The Mid-Century Modern Coffee Table

    Embrace the retro vibe! A simple rectangular or round top with tapered legs or a floating shelf gives it that mid-century modern flair. Use a nice wood like walnut or cherry for a high-end look, or opt for a more affordable option like pine with a stained finish.

    5. The X-Frame Coffee Table

    This is a simple yet striking design. Use two pieces of wood for the top and bottom, then create an X-frame with two more pieces of wood for the base. The X-frame adds a unique and stylish touch. You can use a variety of wood types and finishes.

    Tips for Building and Selling Your Coffee Tables

    Now that you have some project ideas, here are some tips to help you build and sell your creations:

    • **Plan your design and gather materials:** Don't just jump in â€" take some time to plan out your coffee table design, measure your space, and gather all the necessary materials.
    • **Cut your wood to size:** Use a saw to cut your wood to the desired size. Don't forget to measure twice and cut once!
    • **Assemble the frame:** Depending on your design, you may need to assemble the frame with glue, screws, or nails.
    • **Sand the wood:** Use sandpaper to smooth down the wood, getting rid of any rough edges or imperfections.
    • **Apply a finish:** Give your coffee table a final touch with a stain, paint, or clear coat.
    • **Add legs:** Attach the legs to the base.
    • **Showcase your work:** Take high-quality photos of your coffee tables in a well-lit and stylish setting.
    • **Price your tables strategically:** Research the market to see what other coffee tables are selling for and set a competitive price.
    • **Sell online and locally:** List your coffee tables on sites like Etsy, Facebook Marketplace, or Craigslist, or set up shop at local craft fairs or flea markets.

    Marketing Your Creations

    Alright, now it's time to show off your creations! Here are some tips to get the word out about your fabulous coffee tables:

    • **Build a social media presence:** Create profiles on platforms like Instagram, Facebook, or Pinterest to share photos of your coffee tables and connect with potential customers.
    • **Use hashtags effectively:** Use relevant hashtags to reach a wider audience on social media.
    • **Run targeted ads:** Invest in some paid social media ads to reach specific audiences interested in your style of coffee tables.
    • **Partner with local businesses:** See if you can collaborate with local furniture stores, home decor shops, or interior designers to showcase and sell your coffee tables.

    Commonly Asked Questions

    You bet, let's address some common questions about starting a coffee table building business:

    1. What kind of tools do I need?

    You'll need some basic woodworking tools like a saw, drill, sander, measuring tape, and some clamps.

    2. What is the best way to protect the wood finish?

    Use a good quality wood sealant or polyurethane to protect the finish from scratches, spills, and water damage.

    3. How do I determine the price for my coffee tables?

    Consider the cost of materials, the time it takes to build the coffee table, and the market value of similar pieces. You want to make a profit, but also be competitive.

    4. How can I promote my coffee table business?

    Social media, online marketplaces, local craft fairs, and collaborating with local businesses are all great ways to promote your business.

    5. Is there a lot of competition in the coffee table market?

    Yes, but there's always room for unique and well-crafted designs. Find your niche, showcase your skills, and stand out with your creativity!

    So, there you have it! A whole world of coffee table building and selling awaits you. Get creative, tap into that modern design aesthetic, and start building your own profitable furniture business! Happy crafting!

    Share:

    How to Craft Jewelry Boxes with a Custom Design for Extra Value

    How to Craft Jewelry Boxes with a Custom Design for Extra Value

    How to Craft Jewelry Boxes with a Custom Design for Extra Value

    Hey there, jewelry lovers and crafty souls! Ready to add an extra touch of sparkle to your jewelry? Let's talk about crafting custom jewelry boxes - not just for storing your treasures, but for turning them into beautiful works of art that enhance their value.

    Why Custom Jewelry Boxes?

    Think about it: A custom jewelry box isn't just a box; it's a statement. It elevates your jewelry, making it feel even more special and valuable. Think of it like a personalized frame for your most prized possessions.

    Here's why custom boxes are such a great idea:

    • Makes a Perfect Gift: You can personalize the box to reflect the recipient's style or the occasion.
    • Adds Value to Your Jewelry: Think of it as an investment - a beautiful container that showcases your jewelry and makes it stand out.
    • Unique and Creative: Express yourself and showcase your design skills! There are no limits to what you can create.
    • Makes a Great Hobby: Get crafty and enjoy the process of building something beautiful with your own two hands.

    Crafting Your Custom Design: Unlocking Creative Possibilities

    Now, let's get into the fun part: creating your custom jewelry box. Think of this as a blank canvas for your creativity.

    Materials and Tools: Getting Started

    • Wood: Wooden boxes provide a classic and sturdy base. Choose from various wood types like pine, oak, or cherry, each with its unique look and feel.
    • Cardboard: A great budget-friendly option for practice or smaller boxes.
    • Felt: Perfect for lining the inside of your box to protect your delicate jewelry. You can choose a variety of colors and textures.
    • Paper: Get creative with patterned paper, decorative paper, or even old book pages to add unique touches.
    • Embellishments: Let your imagination run wild! Think about beads, buttons, ribbon, lace, fabric scraps, and even dried flowers to add extra flair.
    • Tools: You'll need basic tools like a ruler, pencil, scissors, glue, and a craft knife. If you're working with wood, consider a saw, sandpaper, and a drill.

    Design Inspiration: Finding Your Style

    • Inspiration from Nature: Look around you - the textures of tree bark, the intricate patterns of leaves, the colors of flowers. These natural elements can translate beautifully into your design.
    • Geometric Patterns: Simple lines and shapes can be incredibly elegant. Think of abstract patterns, triangles, squares, or even circles.
    • Favorite Artists and Styles: Do you admire the work of a particular painter or sculptor? Their style can inspire you to create something unique.
    • Your Personal Style: What speaks to you? What colors, textures, and patterns do you love? Let your own personality shine through in your design.

    Putting Your Design Together: The Steps

    • Sketch It Out: Start by sketching your design on paper. This will help you visualize the final product and make any necessary adjustments before you begin cutting.
    • Cutting and Shaping: Using your chosen materials and tools, carefully cut out your design elements. If you're working with wood, sanding the edges will create a smooth finish.
    • Assembly: Follow your design plan to assemble your jewelry box. Use glue, tape, or other fastening techniques to secure the different parts together.
    • Embellishments: Now's the time to add those special touches. Glue or sew on beads, buttons, ribbon, or any other embellishments that you have chosen.
    • Finishing Touches: Add the finishing touches. Consider adding a layer of varnish or sealant to protect the box, especially if you're working with wood.

    Adding Extra Value: Turning Your Box into a Treasure

    So you've got a beautiful custom jewelry box, but how do you make it even more special?

    The Power of Personalization

    • Engraving: Add a personal touch with an engraved message, a date, or even a special symbol. You can do this yourself with a handheld engraving tool or get it professionally engraved.
    • Custom Hardware: Give your box a touch of elegance with high-quality hinges and clasps. You can find a wide variety of options to complement your design.
    • Unique Linings: Go beyond basic felt. Consider using silk, velvet, or even a special fabric that reflects the recipient's interests.
    • Handmade Details: Take the time to hand-paint intricate details or add delicate handmade embellishments. These touches demonstrate a level of care and craftsmanship.

    Creating a Brand: More Than Just a Box

    Think about the overall experience you want to create.
    • Brand Name or Logo: If you're making these boxes for sale, consider creating a brand name and logo that reflects your style.
    • Branding Elements: Create a consistent visual identity using colors, fonts, and patterns. This will help you stand out from the competition.
    • Presentation: Make your boxes even more appealing by packaging them beautifully in a signature box or bag.
    • Marketing: Use social media, online platforms, or local craft markets to showcase your unique jewelry boxes.

    Crafting a Legacy: Sharing Your Passion

    • Turning Your Hobby into a Business: If you love crafting jewelry boxes, consider turning it into a small business. You can sell your creations online, at craft fairs, or even directly to jewelry stores.
    • Workshops and Classes: Share your knowledge and passion by teaching jewelry box crafting workshops or classes.
    • Giving Back: Use your crafting skills to support a good cause. Consider donating your creations to charity or organizing a fundraiser where people can purchase your boxes.

    Commonly Asked Questions

    • What's the best type of wood to use for jewelry boxes? * It really depends on your preference and budget. Pine is a softer wood that's easy to work with, while oak and cherry are more durable and have a beautiful grain.
    • How can I make my jewelry boxes more durable? * Using sturdy materials like wood, choosing high-quality hinges and clasps, and adding a protective layer of varnish or sealant will help to make your boxes more durable.
    • What's the best way to add a custom touch to a jewelry box? * Engraving, using personalized hardware, unique linings, and handmade details are all great ways to add a custom touch.
    • How can I find inspiration for my jewelry box designs? * Look around you for inspiration! Nature, art, and your own personal style can all be great sources of ideas.
    • How do I find a market for my custom jewelry boxes? * Explore online platforms like Etsy, social media, craft fairs, and local jewelry stores.
    Now, go forth and craft something beautiful! Remember, there's magic in creating something unique with your own hands. And who knows, you might even spark a new love for the art of jewelry box making. Have fun, be creative, and enjoy the journey!
    Share:

    人気の投稿

    Powered by Blogger.