Easy and budget-friendly woodworking ideas for creating personalized wood crafts and home accents.

How to Build Wooden Plant Stands with a Modern or Rustic Look

How to Build Wooden Plant Stands with a Modern or Rustic Look

How to Build a Wooden Plant Stand: Modern & Rustic Styles

Hey there, plant lovers! Ready to elevate your greenery game and give your plants the display they deserve? Building your own wooden plant stand is a fun and rewarding project that lets you express your style and create something unique. Whether you're drawn to the clean lines of a modern aesthetic or the cozy charm of a rustic design, this guide will walk you through every step. Let's get growing!

Choosing Your Style: Modern vs. Rustic

Before you grab your tools, let's define the vibe you're going for. Both modern and rustic plant stands have their own distinct appeal, and knowing your preferences will guide your material choices and construction:

Modern Plant Stands

  • Clean lines and geometric shapes: Think squares, rectangles, and circles.
  • Minimalist design: Avoid excessive ornamentation or fussy details.
  • Sleek materials: Opt for hardwoods like walnut, maple, or cherry with a smooth finish.
  • Simple color palettes: Natural wood tones, black, white, or metallic accents.

Rustic Plant Stands

  • Natural textures and imperfections: Embrace knots, grain patterns, and weathered finishes.
  • Rustic materials: Reclaimed wood, barn wood, or rough-cut lumber.
  • Distressed finishes: Whitewashing, staining, or applying a clear coat to highlight the wood's natural beauty.
  • Rustic accents: Twigs, branches, or metal hardware for a farmhouse touch.

Tools and Materials

Here's a list of common tools and materials you'll need for building your plant stand. You might already have some on hand, or you can easily pick them up at a local hardware store.

Tools

  • Measuring tape
  • Pencil or marker
  • Circular saw or jigsaw
  • Drill with various drill bits
  • Screwdriver or drill driver
  • Sandpaper (various grits)
  • Clamps
  • Safety glasses
  • Dust mask

Materials

  • Wood (depending on the size and design of your plant stand)
  • Wood screws
  • Wood glue
  • Finish (stain, paint, or clear coat)
  • Brushes or rags for applying finish

Construction Steps: A Modern Plant Stand

Let's build a sleek and modern plant stand. This design is a simple three-tiered stand, perfect for showcasing multiple plants.

  1. Cut the wood: Measure and cut your wood to the desired dimensions. You'll need three square or rectangular pieces for the tiers and four pieces for the legs.
  2. Sand the wood: Smooth the edges and surfaces of all wood pieces with sandpaper.
  3. Assemble the tiers: Align the three pieces of wood for the tiers and secure them with screws or glue.
  4. Attach the legs: Use wood glue and screws to attach the legs to the bottom tier. Ensure the legs are evenly spaced and positioned.
  5. Finish the stand: Apply a clear coat, stain, or paint to your stand. Let it dry completely before placing your plants.

Construction Steps: A Rustic Plant Stand

Now, let's craft a charming rustic plant stand. We'll create a simple A-frame design with a shelf for showcasing your leafy companions.

  1. Cut the wood: Measure and cut two long pieces for the A-frame sides, one shorter piece for the top shelf, and two shorter pieces for the base.
  2. Sand the wood (optional): Sand the wood lightly if you prefer a smoother finish. Or, embrace the natural texture for a true rustic look.
  3. Assemble the A-frame: Connect the two long pieces at an angle, forming an A-frame. Use screws or glue to secure the joints.
  4. Attach the shelf: Secure the shelf piece to the top of the A-frame, ensuring it's level and centered.
  5. Attach the base: Add the two shorter base pieces to the bottom of the A-frame for stability. Secure with screws or glue.
  6. Finish the stand: Apply a clear coat, whitewash, or stain to enhance the rustic charm of your stand. Let it dry thoroughly.

Tips for Building Your Plant Stand

  • Measure twice, cut once: Accuracy is key! Measure carefully before cutting your wood to avoid any frustrating mishaps.
  • Use quality wood: Choose wood that's free of knots and imperfections, especially for a modern stand. Rustic stands can embrace these features, so choose wood that complements your desired look.
  • Pre-drill holes: This will prevent wood from splitting when screwing it together. A smaller drill bit will ensure a smooth process.
  • Experiment with finishes: Have fun with different stains, paints, or clear coats to achieve your desired look.
  • Add personal touches: Decorate your plant stand with metal accents, greenery, or other decorative elements that reflect your style.

Commonly Asked Questions

Got questions about plant stands? Here are some frequently asked questions and answers to help you on your DIY journey:

What type of wood is best for plant stands?

Hardwoods like oak, maple, walnut, or cherry are durable and attractive choices. For a rustic look, reclaimed wood or barn wood can add unique character. Pine is affordable and lightweight, but it can be softer.

How do I choose the right size for my plant stand?

Consider the size of your plants and the space you have available. Measure the width and height of your plants and ensure the plant stand is large enough to accommodate them comfortably.

How can I make my plant stand more stable?

Ensure your stand has a wide enough base for stability. You can also add brackets or cross pieces for extra support. If you're using thinner legs, consider adding a center support beam for additional strength.

How can I clean my wooden plant stand?

Dust the stand regularly with a soft cloth. Avoid using harsh chemicals or cleaners that can damage the wood finish. For a more thorough cleaning, you can wipe it down with a damp cloth and mild soap. Always allow the stand to dry completely before placing plants back on it.

Happy building, plant lovers! Remember, crafting your own wooden plant stand is a journey of creativity and expression. Let your imagination run wild, enjoy the process, and get ready to showcase your beautiful plants in style!

Share:

Easy and Affordable Wood Project Ideas for Any Skill Level

Easy and Affordable Wood Project Ideas for Any Skill Level

Easy and Affordable Wood Project Ideas for Any Skill Level

Hey there, woodworking enthusiast! Are you itching to get your hands on some wood and create something beautiful? Maybe you're just starting out and looking for beginner-friendly projects. Or perhaps you're a seasoned woodworker looking for some quick and easy projects to fill those gaps between larger ones. Well, you've come to the right place! This article is packed with easy and affordable wood project ideas for every skill level.

We'll cover projects that are perfect for beginners, those with some experience, and even seasoned woodworkers looking for quick and satisfying projects. We'll also talk about the materials you'll need, tips for making the process easier, and some awesome ways to personalize your creations.

So, grab your tools, gather your supplies, and let's get woodworking!

Beginner-Friendly Projects

Starting out with woodworking can be a bit daunting, but don't worry, it's easier than you think! These beginner-friendly projects are perfect for getting your feet wet and building your confidence:

Simple Shelves

Who doesn't need more storage space? Building simple shelves is a great way to get started. You'll only need a few pieces of wood, some screws, and a drill. Choose a nice piece of wood for the shelf and add some decorative touches with paint, stain, or even decoupage.

Coasters

These little beauties are quick and easy to make! You can use scrap wood or even buy pre-cut pieces. Choose from a variety of wood types and shapes to create a set that matches your style. Add some personality with decorative paint, stencils, or even burnt designs.

Wooden Picture Frames

Show off your favorite photos in a personalized frame! Simply cut the wood to size, join the pieces, and add a picture hanger. Get creative with wood types, finishes, and even add decorative elements like beads or small carvings.

Birdhouse

Build a birdhouse to attract feathered friends to your yard! This project is great for learning basic woodworking skills like cutting, drilling, and assembling. Choose a simple design, and you'll be up and running in no time!

Intermediate Projects

Feeling confident with your skills? These projects are a bit more challenging but still manageable for intermediate woodworkers. They'll help you expand your skills and create something truly unique.

Wooden Cutting Board

Every kitchen needs a stylish and functional cutting board! This project involves using different wood types for a beautiful and durable surface. You'll learn to create a sturdy base and add decorative elements like a handle or a unique shape.

Small Wooden Bench

Build a charming bench for your porch or garden! This project involves working with larger pieces of wood and joining them together using mortise and tenon joints or dowels. It's a great way to practice your joinery skills and create a practical piece of furniture.

Wooden Jewelry Box

Spoil yourself or someone special with a handmade jewelry box! This project involves precise cuts, dovetail joints, and a touch of finesse. You can add intricate details like a hinged lid, a small drawer, and a soft felt lining.

Wooden Sign

Create a custom sign to personalize your home or gift to a loved one! You can experiment with various wood types, shapes, and designs. Add a personalized message, paint it in vibrant colors, or even use a wood-burning technique for a rustic look.

Advanced Projects

For the seasoned woodworker looking for a challenge, these projects will test your skills and create stunning pieces:

Wooden Coffee Table

Build a statement coffee table that will be the centerpiece of your living room! This project requires advanced joinery skills, intricate design elements, and possibly even custom-made legs. You can use various wood types and finishes to create a unique piece that reflects your style.

Wooden Desk

A handcrafted desk is a dream for any home office! This project involves building a complex structure with drawers, shelves, and a comfortable work surface. It's a great opportunity to showcase your woodworking skills and create a functional and beautiful piece of furniture.

Wooden Wall Clock

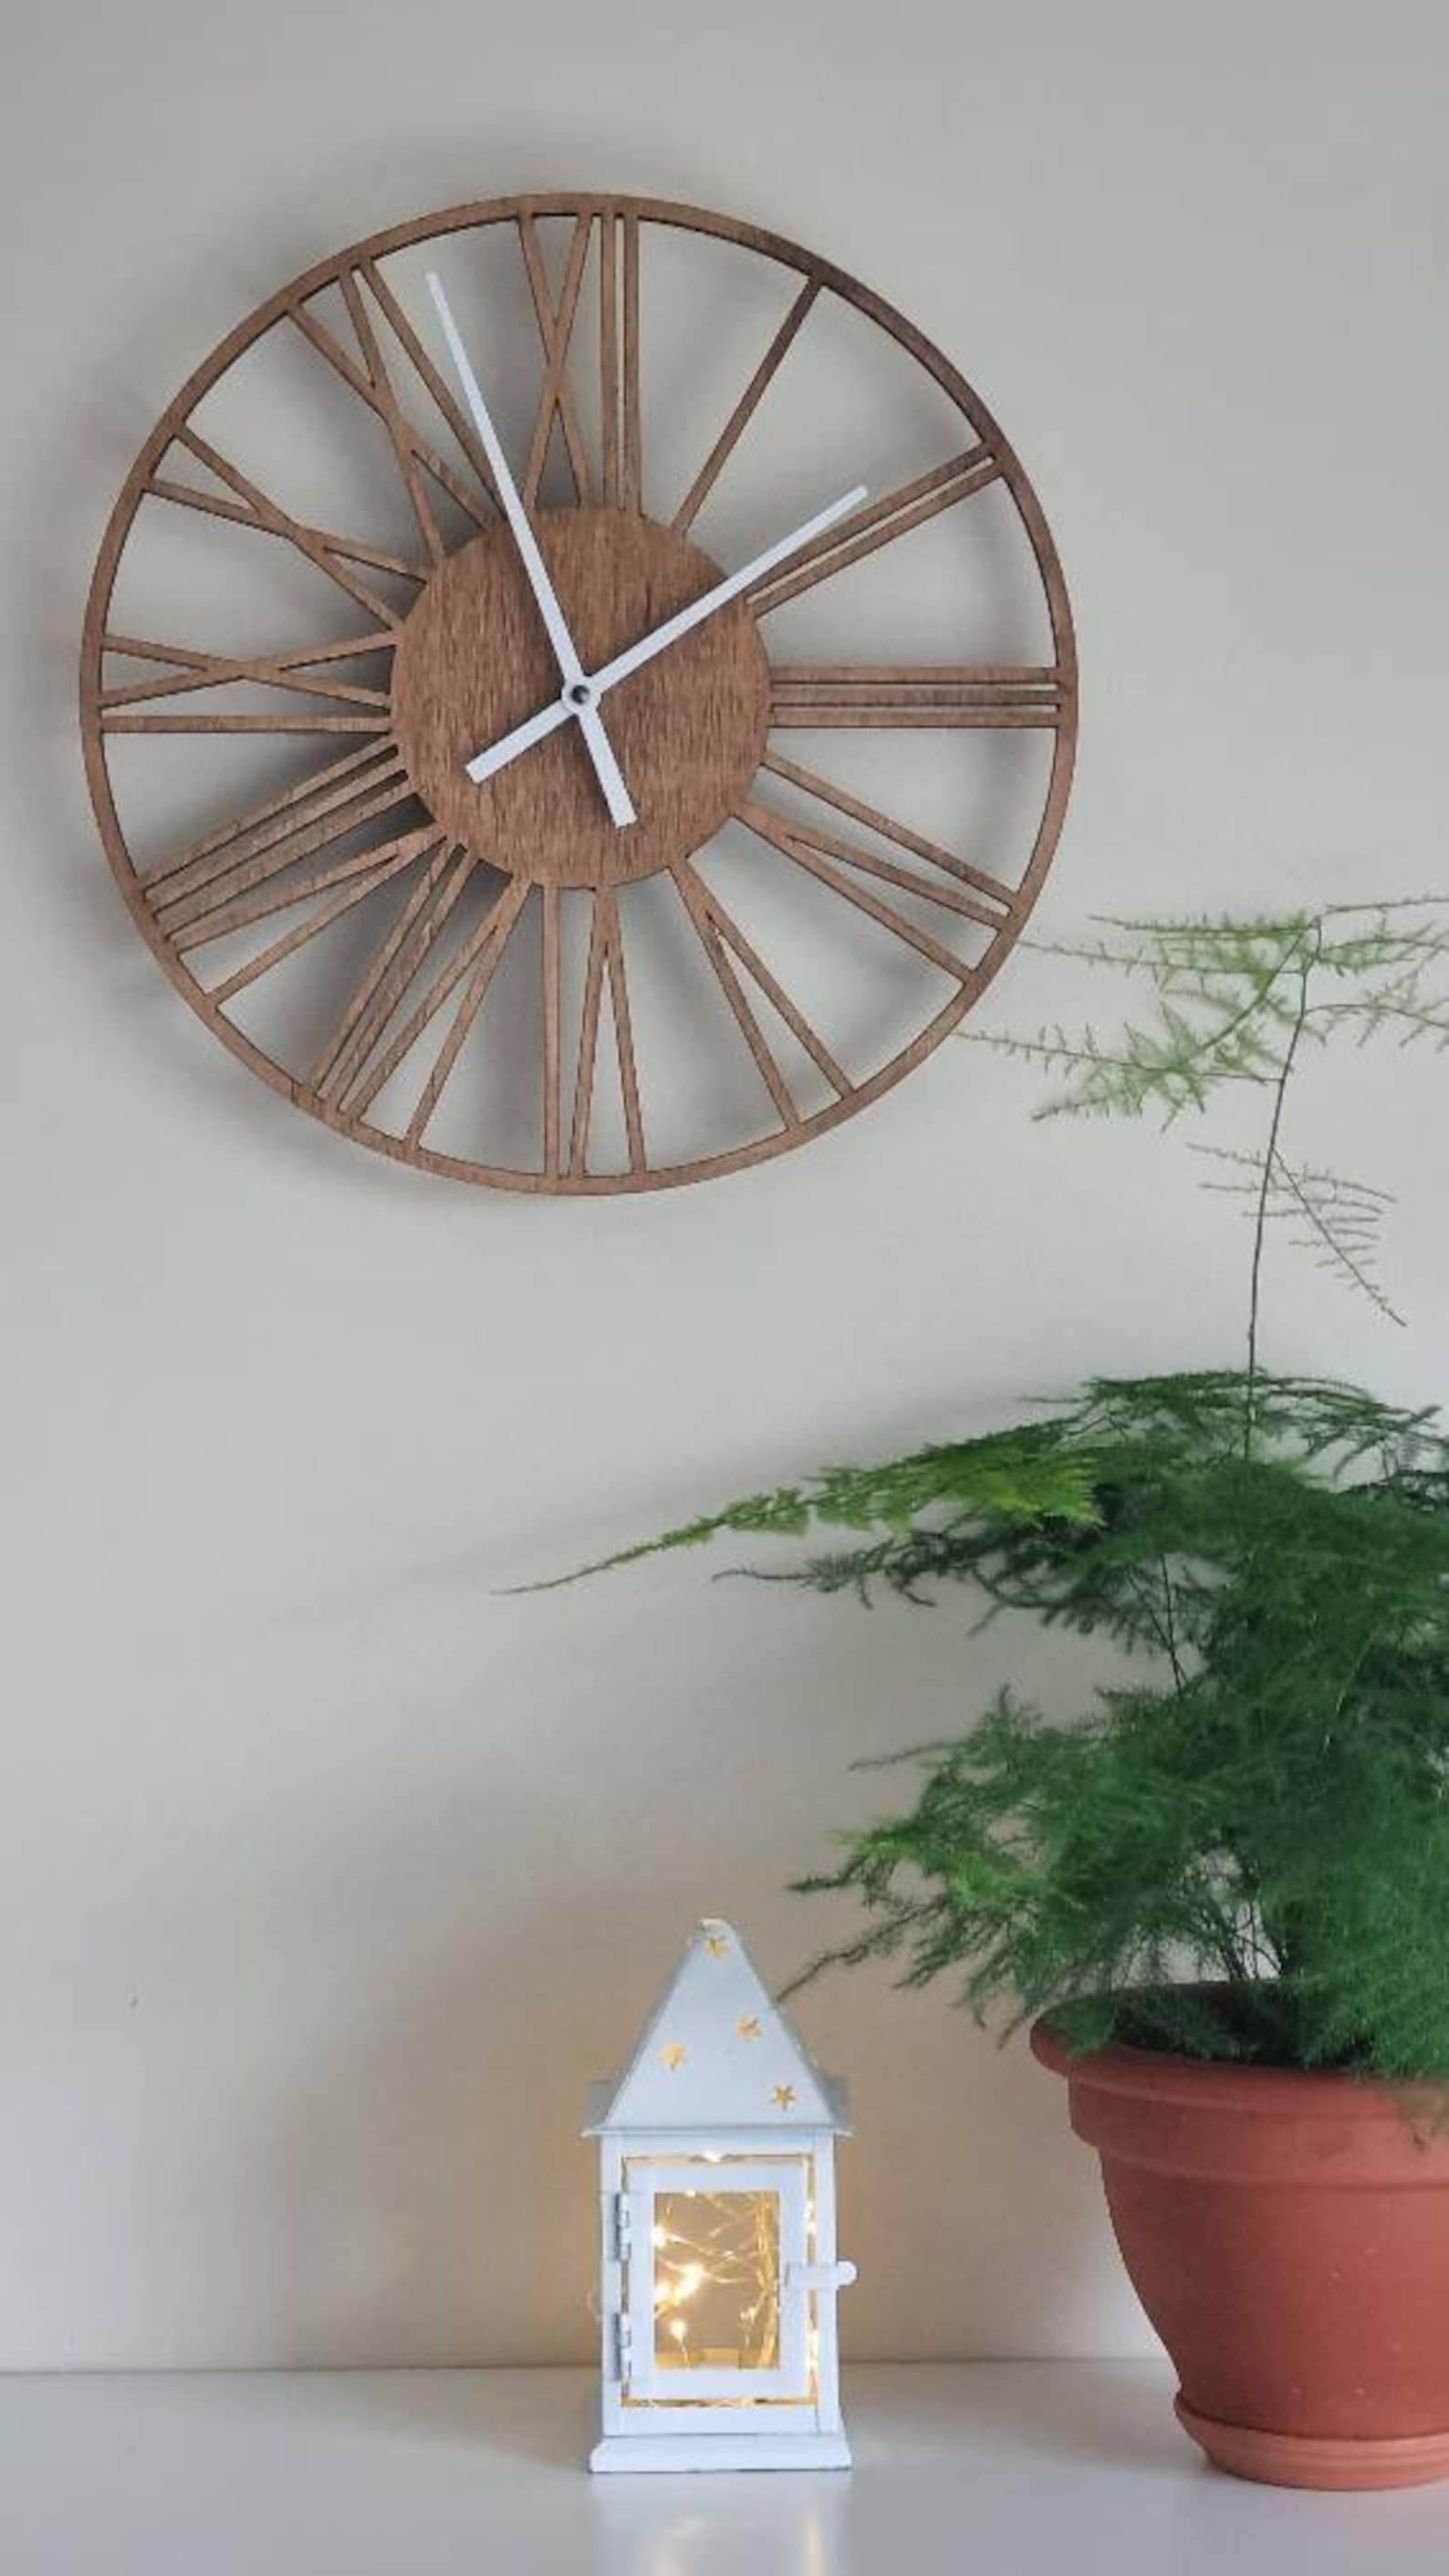
Create a unique and stylish wall clock that will impress your guests! This project requires precise cuts and a touch of creativity. You can use different wood types, shapes, and design elements to create a stunning and functional timepiece.

Wooden Wine Rack

For wine enthusiasts, a homemade wine rack is a must-have! This project requires working with larger pieces of wood and designing a system that can hold bottles securely. You can create a rack that fits perfectly in your kitchen or dining room, adding a touch of elegance to your space.

Tips for Choosing Wood and Supplies

Now, let's talk about the materials you'll need for your woodworking projects.

Wood: The type of wood you choose will depend on the project and your budget.

  • Pine: Affordable, soft, and easy to work with, perfect for beginners.
  • Redwood: Durable, naturally resistant to rot and insects, ideal for outdoor projects.
  • Oak: Strong, durable, and beautiful, good for furniture and other projects that require strength.
  • Cherry: Known for its rich color and beautiful grain patterns, ideal for furniture and decorative items.
  • Tools: You don't need a full workshop to get started. These basic tools are essential:

  • Saw (hand saw or circular saw)
  • Hammer
  • Screwdriver
  • Drill
  • Sandpaper (various grits)
  • Clamps
  • Measuring tape
  • Finishes: Choose from a variety of finishes to protect and enhance your wood projects:

  • Paint: Provides color and protection, available in various finishes.
  • Stain: Enhances the natural grain and color of wood, available in different shades.
  • Varnish: Creates a protective layer, available in gloss, semi-gloss, or matte finishes.
  • Polyurethane: Durable and water-resistant, excellent for furniture and outdoor projects.
  • Commonly Asked Questions

    Where can I find affordable wood for projects?

    You can find affordable wood at lumberyards, home improvement stores, and online retailers. Check for sales and discounts, and look for salvaged or reclaimed wood for unique and budget-friendly options.

    How do I get started with woodworking?

    Start with a simple project like a shelf or a coaster to gain confidence. Watch online tutorials, read woodworking books, and practice your skills. Don't be afraid to experiment and have fun!

    What are some tips for making woodworking easier?

    Use a sharp saw and drill bits for clean cuts. Take your time, measure twice, cut once. Sand your projects thoroughly to create a smooth finish. Don't be afraid to ask for help or advice from experienced woodworkers.

    What are some creative ways to personalize my wood projects?

    Get creative with paint, stain, and decorative elements like stencils, beads, or even carved designs. Use wood-burning techniques to add unique patterns. Get inspired by your surroundings and create something truly personal!

    Remember, woodworking is all about learning, experimenting, and creating something beautiful. So go ahead, grab your tools, and unleash your inner woodworker!

    Share:

    Easy Wood Serving Tray Designs to Make and Sell

    Easy Wood Serving Tray Designs to Make and Sell

    Easy Wood Serving Tray Designs to Make and Sell

    Looking for a woodworking project that's both functional and stylish? Look no further than a serving tray! These versatile pieces are always in demand, and with a little creativity, you can craft unique designs that will impress your customers. This guide will walk you through several easy-to-make serving tray ideas, perfect for beginners and seasoned woodworkers alike.

    Simple and Elegant Designs

    Sometimes, the most effective designs are the simplest. These basic serving trays require minimal tools and offer a blank canvas for personalization.

    Classic Rectangular Tray

    Start with a rectangular piece of wood and cut it to your desired dimensions. Use a router to create a decorative edge profile, or simply sand the edges smooth for a clean, minimalist look. Add a coat of varnish or paint for a polished finish.

    Round Serving Board

    A circular serving board adds a touch of elegance to any occasion. Cut a circle from a piece of plywood or hardwood, then sand the surface smooth. You can leave it plain or add a decorative detail like a laser-engraved design or a simple burned-in pattern.

    Adding Functionality and Style

    Elevate your serving tray designs with unique features that enhance usability and aesthetics.

    Handles and Knobs

    Incorporate handles or knobs for easy carrying. Choose from a variety of styles, including simple wood dowels, decorative metal pulls, or even leather straps. Make sure the handles are securely attached to the tray.

    Compartments and Dividers

    Create compartments within your serving tray to organize snacks or separate different types of food. You can use wood strips or a router to create these divisions, adding a touch of sophistication to your design.

    Unique and Personalized Touches

    Make your serving trays truly stand out by incorporating personalized elements that reflect your style or target market.

    Engraving and Burning

    Personalize your serving trays with laser engraving or wood burning. Create intricate patterns, custom messages, or even company logos. These details enhance the visual appeal and make your trays unique.

    Inlays and Mosaics

    Add a touch of artistry to your serving trays with inlays or mosaics. Use contrasting wood species or materials like tile to create visually stunning designs. This technique can transform a simple tray into a statement piece.

    Marketing Your Serving Trays

    Once you've crafted your beautiful serving trays, it's time to get them into the hands of customers.

    Here are some tips for promoting and selling your creations:

    • Social Media Marketing: Showcase your trays on platforms like Instagram and Facebook to attract potential buyers.
    • Local Craft Fairs and Markets: Participate in events where you can connect with customers in person.
    • Online Marketplaces: Sell your trays through platforms like Etsy or Shopify to reach a wider audience.
    • Collaborate with Local Businesses: Partner with coffee shops, restaurants, or home décor stores to sell your trays on consignment.

    Remember, the key to success is to offer high-quality, well-crafted serving trays that stand out from the crowd. With a little creativity and effort, you can turn your woodworking hobby into a profitable business venture.

    Share:

    DIY Multi-Photo Frames for a Stylish Home Decor

    DIY Multi-Photo Frames for a Stylish Home Decor

    DIY Multi-Photo Frames for a Stylish Home Decor

    In the realm of home decor, personalized touches hold immense power. A curated collection of cherished memories displayed beautifully can instantly elevate the ambiance of any space. This is where DIY multi-photo frames step in, offering a unique and creative way to showcase your most precious moments while adding a personal touch to your home. This article will guide you through the process of crafting stunning multi-photo frames, empowering you to transform ordinary memories into extraordinary displays.

    Gather Your Supplies

    Before embarking on your DIY journey, ensure you have all the necessary tools and materials at your disposal. Here's a list of essentials:

    • Wooden Frames: Choose a variety of sizes and shapes that complement your overall design vision.
    • Adhesive: Opt for a strong, long-lasting adhesive like wood glue or hot glue.
    • Paint: Select colors that harmoniously blend with your existing decor or create a vibrant contrast.
    • Paintbrushes: Choose brushes with varying sizes to achieve precise application.
    • Sandpaper: Use sandpaper to smooth out any rough edges and create a polished finish.
    • Scissors: Precisely cut the backing paper for a neat look.
    • Ruler: Accurately measure and mark the frame for accurate placement of photos.
    • Pencil: Lightly mark the frame for precise photo placement.
    • Photos: Choose your most cherished photographs to create a beautiful and meaningful display.
    • Optional: Decorative elements like beads, buttons, or embellishments for added flair.

    Choose Your Frame Design

    The beauty of DIY is the limitless possibilities for customization. Before you begin, visualize the final look you desire for your multi-photo frame. Consider the following design ideas:

    Classic Grid Design:

    This timeless design involves arranging photos in a symmetrical grid, often using frames of varying sizes for visual interest. A simple, yet elegant choice.

    Free-Form Collage:

    For a more eclectic and artistic approach, consider creating a free-form collage with frames of different shapes and sizes. This creates a dynamic and visually captivating display.

    Heart or Circle Design:

    For a touch of romance or whimsy, create a heart or circle design with frames strategically placed to form the desired shape. It can be a fun and unique way to display photos.

    Layered Frames:

    Layer frames upon each other, creating depth and dimension to your display. Experiment with varying frame sizes and colors for a visually appealing arrangement.

    Prepare and Paint Your Frames

    Once you've selected your frames and design, it's time to give them a fresh start. Clean the frames thoroughly with a damp cloth to remove dust and debris. If desired, sand down any rough edges to create a smoother surface for painting. Next, apply a coat of primer to your frames, allowing it to dry completely before painting.

    Now, unleash your creativity with paint! Choose colors that complement your photos and the overall aesthetic of your space. For a classic look, consider neutral tones or metallic finishes. If you're feeling bolder, experiment with bright, vibrant hues. Apply two coats of paint for a rich, even finish, allowing each coat to dry fully before applying the next.

    Arrange and Secure Your Photos

    With your painted frames ready, it's time to arrange your photos. Use a pencil to lightly mark the frames where you'd like to place each photo. This helps ensure accurate placement before you apply adhesive.

    Next, decide whether you want to adhere photos directly to the frames or create separate mounts. For a clean and polished look, cut backing paper to fit inside each frame. Carefully position your photos on the backing paper, making adjustments until you're satisfied with the arrangement. Secure the photos to the backing paper using photo corners or a light adhesive.

    Finally, carefully attach the frames to your wall, using a level for a perfect, symmetrical display.

    Adding Personal Touches

    Your multi-photo frame project is now complete, but you can always add more flair. To make it truly unique, consider adding some personal touches. Here are some ideas:

    • Decorative Elements: Add beads, buttons, or other decorative elements to frames for a unique and eye-catching touch.
    • Stencils: Use stencils to add patterns, quotes, or initials to your frames, creating a personalized and stylish display.
    • Fabric: For a more rustic or vintage look, cover your frames with fabric, such as burlap or linen, for a unique and tactile element.

    Conclusion

    Creating DIY multi-photo frames is a wonderful way to infuse your home with personality and warmth. Experiment with different design elements and personalize your frames to showcase your most cherished memories in a beautiful and artistic way. Enjoy the process and celebrate the joy of showcasing your unique style!

    Share:

    How to Craft Modern Coffee Tables with Glass and Wood Combinations

    How to Craft Modern Coffee Tables with Glass and Wood Combinations

    Crafting Modern Coffee Tables with Glass and Wood Combinations: A Comprehensive Guide

    The coffee table, a seemingly humble piece of furniture, serves as a focal point in any living room, dictating the overall aesthetic and functionality of the space. Modern design trends increasingly favor the elegant combination of glass and wood in coffee table construction, offering a sophisticated blend of transparency, durability, and visual warmth. This comprehensive guide explores the artistry and technical aspects of crafting such pieces, providing a detailed roadmap for both experienced artisans and enthusiastic beginners.

    I. Design Considerations: Balancing Form and Function

    Before embarking on the construction process, meticulous planning is crucial. The design phase involves careful consideration of several key aspects to ensure the final product aligns perfectly with the intended aesthetic and practical requirements.

    A. Style and Aesthetics

    The fusion of glass and wood offers a remarkable versatility in stylistic expression. A minimalist design might feature a simple, rectangular glass top supported by a slender, geometric wooden base. Conversely, a more ornate design could incorporate intricate wood carvings or a sculpted base, contrasting with the clean lines of the glass. Consider the existing décor of the room. Does the space demand a bold statement piece or a subtle, complementary addition? The chosen wood type significantly impacts the overall aesthetic. Light-colored woods like maple or birch impart a sense of airy lightness, while darker woods such as walnut or ebony provide a more dramatic and luxurious feel. The glass itself can contribute to the style; clear glass maintains a sense of openness, while tinted or textured glass introduces an element of sophistication or visual intrigue.

    B. Dimensions and Proportions

    The dimensions of the coffee table should be carefully considered in relation to the surrounding furniture and the available floor space. A table that is too large will overwhelm the room, while a table that is too small will appear insignificant. The proportions of the glass top and the wooden base should be harmoniously balanced. Consider the height in relation to the surrounding seating; a standard height typically ranges from 16 to 18 inches. The length and width should be proportionate to the size of the seating arrangement. Detailed sketches and potentially even scale models can prove invaluable in refining the dimensions and ensuring a pleasing visual balance.

    C. Material Selection

    The choice of wood and glass directly influences the table's durability, aesthetic appeal, and overall cost. Hardwoods such as oak, cherry, or mahogany are preferred for their strength and resistance to scratches and dents. These woods also offer a wide variety of grain patterns and colors, adding to the design possibilities. Softwoods, while more affordable, may require additional protection or reinforcement. The type of glass is equally important. Tempered glass is significantly stronger and safer than annealed glass, making it the preferred choice for coffee table tops. Consider the thickness of the glass; thicker glass provides greater stability and a more substantial feel.

    II. Construction Techniques: A Step-by-Step Guide

    The construction process involves several key steps, each requiring precision and attention to detail. Safety precautions must be observed throughout, particularly when working with glass and power tools.

    A. Preparing the Wooden Base

    This stage begins with carefully selecting and preparing the wood. The chosen wood pieces must be thoroughly inspected for knots, cracks, or other imperfections that could compromise the structural integrity. Accurate measurements are essential to ensure the base's components fit together perfectly. The wood may require planing, sanding, and finishing before assembly. Different joinery techniques â€" such as mortise and tenon, dowel joints, or even more contemporary methods like using metal fasteners â€" can be employed to construct the base, depending on the desired design complexity and strength requirements.

    B. Cutting and Shaping the Glass Top

    Precise cutting of the tempered glass is best left to professionals with specialized equipment. Tempered glass is difficult to cut and can shatter unpredictably if not handled correctly. The glass should be ordered to the exact dimensions required, allowing for a precise fit with the wooden base. The edges of the glass should be polished to prevent sharp edges and ensure a smooth, finished appearance. It is vital to wear appropriate safety glasses and gloves when working with or near glass.

    C. Assembly and Finishing

    Once the wooden base and glass top are ready, assembly can commence. The process involves carefully positioning the glass top on the wooden base, ensuring it rests securely and evenly. Depending on the design, this might involve using adhesive, clips, or other fastening mechanisms to secure the glass. The final stage involves finishing the wooden base. This may involve staining, painting, or applying a clear protective sealant to enhance the wood's natural beauty and protect it from moisture and wear. The chosen finish should complement the overall aesthetic of the coffee table.

    III. Advanced Techniques and Customization

    Beyond the fundamental construction methods, several advanced techniques can be employed to elevate the coffee table's design and functionality.

    A. Incorporating Integrated Storage

    Adding storage compartments to the wooden base can enhance practicality. Drawers, shelves, or hidden compartments can provide additional space for storing remotes, magazines, or other items. This requires careful planning during the design phase to ensure sufficient space and accessibility while maintaining a cohesive aesthetic.

    B. Implementing Lighting Features

    Integrating LED lighting beneath the glass top or within the wooden base can create a dramatic and inviting ambiance. This requires careful consideration of the wiring and power supply, ensuring safety and compliance with electrical codes. The lighting can be controlled via a switch or even integrated with a smart home system for added convenience.

    C. Exploring Unique Wood Finishes

    Experimenting with different wood finishes can significantly impact the coffee table's visual appeal. Techniques such as ebonizing, bleaching, or using metallic paints can create unique textures and colors. Applying multiple layers of stain or varnish can enhance depth and richness. Consider experimenting with different finishing techniques to achieve the desired effect.

    IV. Safety Precautions and Maintenance

    Safety should always be paramount when working with glass and power tools. Wear appropriate safety equipment, including safety glasses, gloves, and dust masks. Ensure proper ventilation when using paints, stains, or sealants. Regular maintenance is key to preserving the coffee table’s appearance and functionality. The glass top should be cleaned regularly with a soft cloth and glass cleaner. The wooden base should be periodically dusted and treated with appropriate wood polish or sealant to maintain its luster and protect it from damage. With careful planning, meticulous craftsmanship, and a commitment to safety, creating a stunning modern coffee table combining glass and wood is a rewarding endeavor.

    Share:

    Simple DIY Wood Serving Trays That Sell Fast

    Simple DIY Wood Serving Trays That Sell Fast

    Simple DIY Wood Serving Trays That Sell Fast

    Hey there, crafty friends! Looking for a DIY project that's both fun and profitable? Look no further than making wood serving trays! They're a timeless and versatile piece that everyone loves, and they're surprisingly easy to create with a little bit of know-how and some basic tools.

    The best part? These trays sell like hotcakes! Whether you're selling them at local markets, online, or to friends and family, you'll be surprised by how quickly they fly off the shelves.

    Ready to get started? Let's dive into some easy and stylish DIY wood serving tray ideas that are sure to be a hit:

    Simple and Sleek: The Classic Tray

    Let's start with the basics. This classic tray is perfect for beginners and is a great foundation for more elaborate designs. Here's what you'll need:

    • A piece of plywood or MDF (medium-density fiberboard)
    • Wood stain or paint (optional)
    • Wood glue
    • Finishing nails or brads
    • Wood filler (optional)
    • Sandpaper (various grits)
    • Measuring tape and pencil
    • Saw (jig saw or circular saw)
    • Clamps
    • Finishing oil or wax (optional)

    Instructions:

    1. Cut your wood: Measure and cut your plywood or MDF to the desired size and shape of your tray. If you're going for a more rustic look, you can use rough-cut lumber instead.
    2. Sand it down: Smooth out any rough edges and imperfections by sanding with progressively finer grits of sandpaper. This will create a smooth surface for staining or painting.
    3. Optional: Stain or Paint: Choose your desired finish and apply it to the wood surface. You can go for a natural wood look, a bold color, or even a distressed finish. Let the stain or paint dry completely.
    4. Optional: Add a Border: For a more polished look, create a decorative border by cutting thin strips of wood and attaching them to the edges of the tray using wood glue and finishing nails.
    5. Seal it up: Once your tray is completely dry, apply a coat of finishing oil or wax to protect the wood and give it a beautiful shine.

    That's it! You've just created a simple and stunning wood serving tray.

    Get Creative: Adding Flair to Your Trays

    Now that you've mastered the basics, it's time to get creative and add some personality to your trays! Here are some ideas to make your trays stand out from the crowd:

    Inlay Designs:

    For a unique touch, try creating an inlay design by cutting shapes from different woods and inlaying them into your tray. You can use contrasting colors, patterns, or even wood veneers to achieve a truly personalized look.

    Etched Patterns:

    For a more subtle but stylish touch, consider etching a pattern onto the wood surface using a woodburning tool or a rotary tool with a specialized bit. This creates intricate designs that can be as simple or elaborate as you like.

    Painted Patterns and Designs:

    Let your creativity flow! Paint your trays with geometric patterns, abstract designs, or even floral motifs. Stencils are a great way to achieve clean lines and detailed designs.

    Handle It:

    Add handles to your tray to make it easier to carry and serve. You can use pre-made handles or create your own from wooden dowels, rope, or even leather straps.

    Selling Your DIY Wood Serving Trays

    Once you've crafted your beautiful trays, it's time to share them with the world! Here are some tips for selling your creations:

    • Online Marketplaces: Platforms like Etsy, Amazon Handmade, and Facebook Marketplace are great places to reach a wider audience.
    • Local Craft Fairs and Markets: Connect with your community and sell your trays in person at local events.
    • Social Media: Showcase your work on Instagram, Pinterest, and Facebook to attract potential customers.
    • Word-of-Mouth: Don't underestimate the power of good old-fashioned word-of-mouth advertising. Let your friends and family know about your creations and spread the word.

    Pricing Your Trays:

    When it comes to pricing your trays, it's important to consider your materials, time spent, and the market value of similar products. Start by calculating the cost of materials and your labor. Don't undervalue your time and effort. Then, research comparable prices for similar trays and adjust your pricing accordingly.

    Don't be afraid to experiment with different pricing strategies to see what works best for you and your target audience.

    Commonly Asked Questions

    What kind of wood is best for serving trays?

    Hardwood like maple, cherry, or walnut is ideal for trays because it's durable, resistant to scratches, and has a beautiful natural grain. But if you're looking for a more affordable option, plywood or MDF can also work well.

    What kind of finish should I use?

    A clear finish like oil or wax will protect the wood while allowing its natural beauty to shine through. If you want a more durable finish, you can use polyurethane or shellac.

    How do I make my trays stand out?

    Get creative with your designs! Experiment with different woods, finishes, and embellishments to create unique and personalized trays.

    How do I market my trays?

    Start by setting up an online shop and promoting your trays through social media. Participate in craft fairs and markets to showcase your work and connect with potential customers.

    Good luck with your wood serving tray creations! Remember, the key to success is finding your own style and putting your heart into your craft. With a little effort and creativity, you can create beautiful and functional trays that will be treasured by their owners.

    Share:

    How to Make a Wood Christmas Card Holder

    How to Make a Wood Christmas Card Holder

    Craft a Charming Christmas Card Holder from Wood

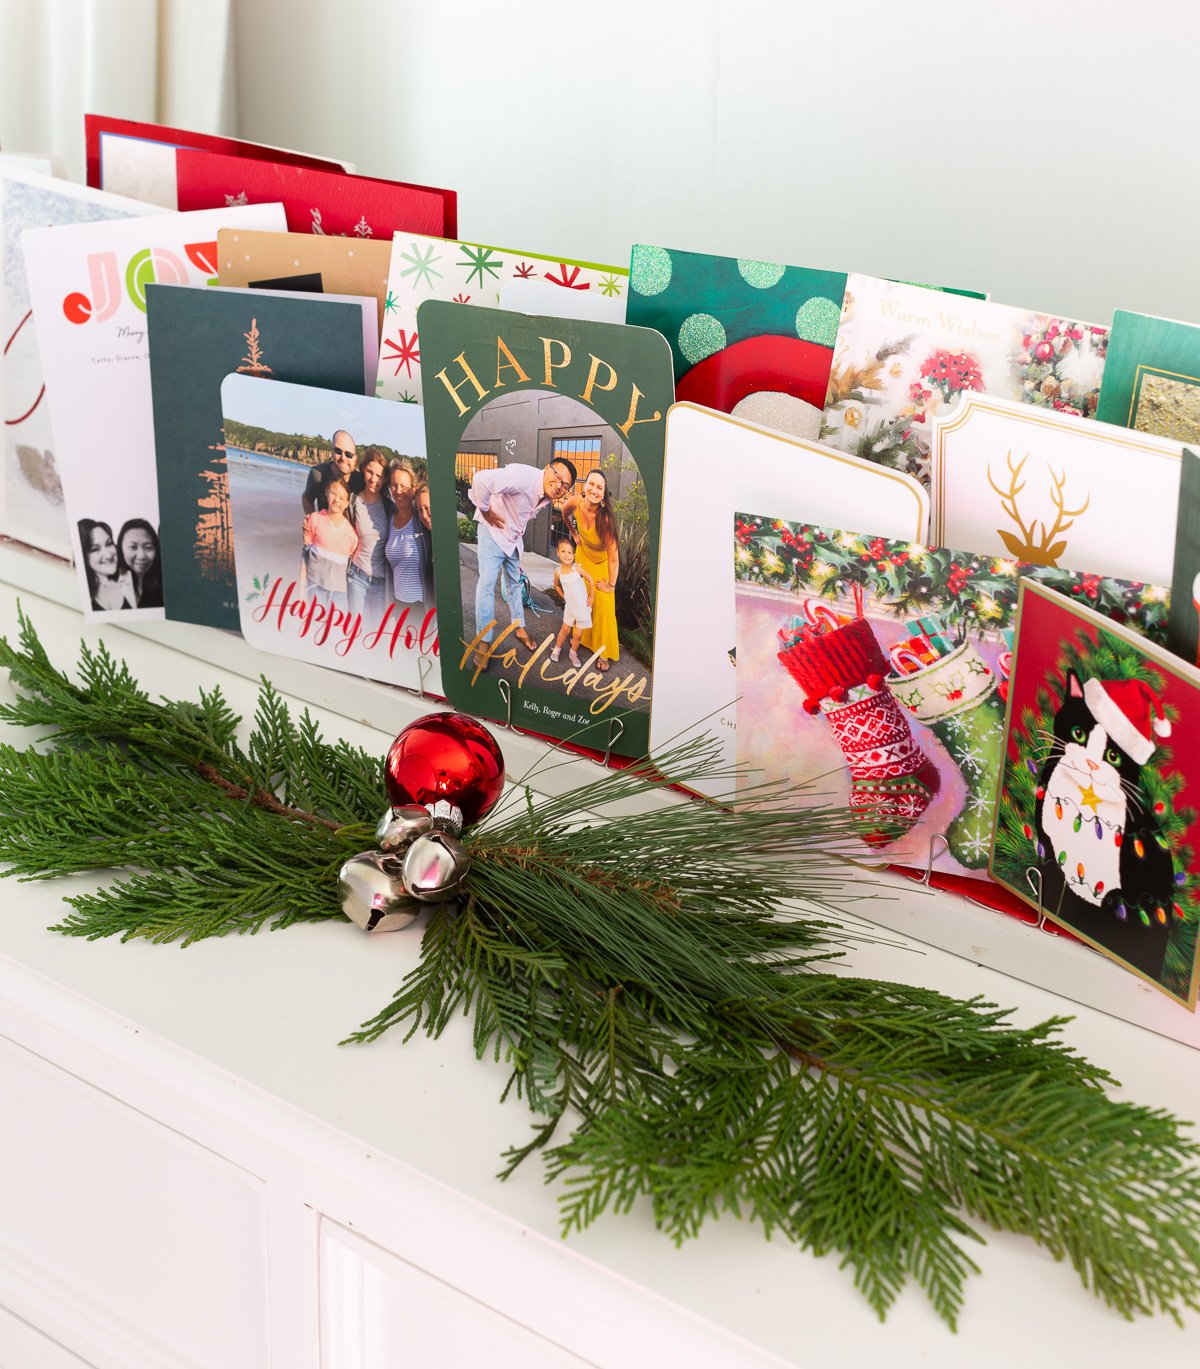
    Add a touch of rustic elegance to your holiday decor with a handcrafted wood Christmas card holder. This project is perfect for beginners and requires minimal tools. You can personalize it with paint, stain, or even decoupage to match your festive style.

    Gather Your Materials

    Before you start crafting, gather the following materials:

    • A piece of wood (approximately 8 inches by 12 inches, thickness around 1/2 inch)
    • Saw (hand saw or circular saw)
    • Sandpaper (various grits, starting from coarse to fine)
    • Pencil
    • Ruler
    • Wood glue
    • Screws (optional)
    • Paint, stain, or decoupage supplies (optional)
    • Protective finish (polyurethane or varnish, optional)

    Step-by-Step Instructions

    Prepare the Wood

    Start by cutting the wood to your desired size. You can use a hand saw or a circular saw for this step. Next, sand the edges and surface of the wood using sandpaper. This will remove any rough edges and create a smooth surface for painting or staining.

    Design the Card Holder

    Use a pencil and ruler to draw the outline of your card holder on the wood. Consider creating a simple rectangular shape with a small lip on one side to hold the cards upright. If you want a more elaborate design, you can add curves or decorative elements.

    Cut Out the Design

    Carefully cut out the design using a saw. Be sure to work slowly and steadily to avoid any mistakes. Once the design is cut out, sand the edges again to ensure they are smooth.

    Assemble the Card Holder (Optional)

    If your design requires multiple pieces of wood, use wood glue or screws to attach them together. Allow the glue to dry completely before proceeding.

    Decorate the Card Holder

    This is where you can personalize your card holder. You can paint it in festive colors, stain it with a rich wood finish, or use decoupage to create a unique pattern. Allow the paint or stain to dry completely before applying a protective finish like polyurethane or varnish (optional).

    Enjoy Your New Card Holder

    Once your card holder is dry, you can start displaying your Christmas cards! You can simply lean it against a wall or place it on a table. Your handmade card holder will surely add a touch of charm to your holiday decor.

    Remember, this is just a basic guide. You can always modify the design and add your own creative touches to make your wood Christmas card holder truly unique.

    Share:

    How to Add Roman Numerals or Custom Numbers to Wooden Wall Clocks

    How to Add Roman Numerals or Custom Numbers to Wooden Wall Clocks

    Add Roman Numerals or Custom Numbers to Wooden Wall Clocks: A Step-by-Step Guide

    Hey there, crafty clock enthusiasts! Are you tired of those generic, boring numbers on your wooden wall clocks? Ever dreamt of adding a touch of elegance with Roman numerals or personalizing them with your favorite numbers? Well, you're in luck! This guide will walk you through the process of transforming your clock faces into works of art, step by step.

    Gather Your Supplies:

    Before we dive into the fun, let's make sure we've got everything we need. Grab these handy tools and materials:

    • Wooden wall clock (preferably with a plain face)
    • Roman numeral stencils or custom number stencils (you can find these online or at craft stores)
    • Acrylic paint in your desired color(s)
    • Paintbrushes (various sizes for different details)
    • Masking tape (for precise application)
    • Pencil (for marking and outlining)
    • Ruler (for accurate measurements)
    • Sandpaper (to smooth any rough edges)
    • Protective gloves (optional, but recommended)
    • Clear sealant (to protect your artwork)

    Prepare Your Clock:

    Now that you've gathered your tools, let's get ready to create! Here's how to prep your clock for its makeover:

    • Clean the surface: Wipe down the clock face with a damp cloth to remove any dust or debris. Allow it to dry completely before proceeding.
    • Remove existing numbers: If your clock has pre-existing numbers, you'll need to remove them. You can gently sand them down or use a paint stripper (if applicable). Be careful not to damage the clock face.
    • Prime the surface (optional): For a smoother finish and better paint adhesion, consider priming the clock face with a primer specifically designed for wood. Let it dry completely before moving on.

    Plan Your Design:

    Time to unleash your creativity! This is where your artistic vision comes into play.

    • Choose your numbers: Decide whether you're going with Roman numerals, custom numbers, or a combination of both. Remember, the size and style of your numbers will affect the overall look of your clock.
    • Consider the clock's size: Ensure that the numbers you choose will fit comfortably on the clock face. Leave enough space between them to avoid clutter.
    • Sketch a layout: If you're unsure about the placement, draw a rough outline of your numbers using a pencil on the clock face. This will help you visualize the final design and make any adjustments before you commit to paint.

    Apply the Stencils:

    Let's get those numbers on the clock! Follow these steps for a precise and neat application:

    • Secure the stencils: Carefully position your stencils on the clock face using masking tape to hold them in place. Ensure the stencil is flat and smooth to avoid paint bleeding.
    • Apply the paint: Using a small paintbrush, carefully apply your desired color to the stencil openings. Work in thin layers, avoiding any paint build-up that could seep under the stencil and create uneven edges.
    • Let it dry: Allow the paint to dry completely before removing the stencil. Once dry, you can peel off the stencil gently. If any paint bleeds, you can use a small paintbrush to clean it up.

    Refine and Finish:

    You're almost there! Take a moment to admire your handiwork and make any final touches:

    • Touch-ups: Once the paint is completely dry, inspect the numbers for any imperfections and touch them up with a fine paintbrush.
    • Seal the finish: To protect your numbers and ensure they last, apply a coat of clear sealant over the clock face. This will also create a smooth, polished look. Let it dry completely before hanging your clock.

    Hang and Enjoy:

    Congratulations! You've successfully transformed your wooden wall clock into a personalized masterpiece. Hang it up in your home and enjoy its unique charm.

    Beyond Roman Numerals and Custom Numbers:

    Want to go beyond the traditional? Unleash your creativity and experiment with other design elements! Here are some fun ideas to consider:

    • Incorporate patterns: Instead of plain numbers, try adding decorative patterns or designs within the numbers. Think floral motifs, geometric shapes, or even simple stripes.
    • Play with color: Don't be afraid to experiment with different colors for your numbers! Create a bold statement with contrasting shades or add a touch of vintage flair with metallic paints.
    • Create a theme: If you have a specific theme in mind for your room or clock, design your numbers to complement it. Nautical, rustic, or modern? The possibilities are endless!

    Commonly Asked Questions:

    Can I use other types of paint besides acrylic?

    While acrylic paint is a popular choice for its quick drying time and ease of application, you can also use other types like oil paints, enamel paints, or even spray paint. However, make sure to test the paint on a small, inconspicuous area of the clock face first to ensure compatibility and avoid any potential issues.

    What if I make a mistake?

    Don't worry! Mistakes happen. If you make an error while applying paint or stencils, you can use a small brush and a bit of paint thinner to clean up the mistake before it dries completely. Remember, it's all about practice and experimentation!

    How do I choose the right size for my numbers?

    The size of your numbers should be proportionate to the size of the clock face. For a small clock, opt for smaller numbers. For a larger clock, you can go for larger numbers to make a bold statement. It's a good idea to try different sizes with your stencils to see what looks best on your clock.

    Now you're ready to take your clock from ordinary to extraordinary. Remember, have fun, embrace your creativity, and don't be afraid to experiment! Happy crafting!

    Share:

    Wooden Project Ideas for Seasonal Decorations and Gifts

    Wooden Project Ideas for Seasonal Decorations and Gifts

    Wooden Project Ideas for Seasonal Decorations and Gifts

    Woodworking is a rewarding hobby that allows you to create beautiful and functional objects. One of the most enjoyable aspects of woodworking is making seasonal decorations and gifts for loved ones. Wood is a versatile material that can be used to create a wide variety of projects, from simple ornaments to elaborate furniture. With a little creativity and some basic woodworking skills, you can make unique and personalized gifts that will be cherished for years to come.

    Fall-Themed Wooden Projects

    Fall is a season of warmth, abundance, and change. It is a time to celebrate the harvest and enjoy the beautiful colors of nature. Here are some wooden project ideas that capture the essence of fall:

    Wooden Pumpkins

    Wooden pumpkins are a classic fall decoration that can be made in various sizes and styles. You can carve them from a single piece of wood or use wood scraps to create a mosaic pumpkin. Paint them in traditional orange or experiment with other fall colors. Add a stem made of wood or a twig to complete the look.

    Wooden Leaf Garland

    A wooden leaf garland is a beautiful way to add a touch of fall to your home. Cut out leaves of various sizes from plywood or a thin board. Paint them in autumn colors and string them together with twine or wire. You can also add beads or other decorations to the garland.

    Wooden Acorn Ornaments

    Acorn ornaments are a charming and easy-to-make fall decoration. Cut out acorn shapes from a thin board or plywood. Paint them brown and add a little green paint to the top for the cap. You can add a loop of twine or ribbon to hang them on the tree or add a small magnet to the back so they can be used as refrigerator ornaments.

    Winter-Themed Wooden Projects

    Winter is a time for cozy evenings by the fireplace and celebrating the holidays. Here are some wooden project ideas that are perfect for the winter season:

    Wooden Snowflake Ornaments

    Wooden snowflake ornaments are a delicate and elegant way to decorate your Christmas tree. Cut out snowflake shapes from thin wood or plywood. You can paint them white or leave them natural. Add a loop of twine or ribbon to hang them on the tree.

    Wooden Reindeer Ornaments

    Wooden reindeer ornaments are a whimsical and festive decoration for the holiday season. Cut out reindeer shapes from plywood or a thin board. Paint them brown and add antlers made from wood or wire. You can also add a red nose and other festive decorations. Add a loop of twine or ribbon to hang them on the tree.

    Wooden Christmas Tree Stand

    A wooden Christmas tree stand is a practical and decorative way to display your holiday tree. You can make a simple stand from scrap wood or create a more elaborate design. Paint the stand to match your holiday decor or leave it natural.

    Spring-Themed Wooden Projects

    Spring is a time of renewal and rebirth. It is a time to celebrate the arrival of warmer weather and the beauty of blooming flowers. Here are some wooden project ideas that capture the spirit of spring:

    Wooden Flower Planters

    Wooden flower planters are a beautiful and functional way to add a touch of spring to your home. You can make them in various sizes and shapes to fit your needs. You can paint them in bright colors or leave them natural. Plant flowers or herbs in your planters to enjoy the beauty of spring.

    Wooden Birdhouses

    Wooden birdhouses are a charming and practical way to attract birds to your yard. You can make them in various styles and sizes. Paint them in bright colors or leave them natural. Add a small hole to the front for the birds to enter and a perch for them to land on.

    Wooden Easter Egg Ornaments

    Wooden Easter egg ornaments are a whimsical and festive way to celebrate Easter. Cut out egg shapes from a thin board or plywood. Paint them in bright colors and decorate them with dots, stripes, or other designs. You can also add a loop of twine or ribbon to hang them on the tree or add a small magnet to the back so they can be used as refrigerator ornaments.

    Summer-Themed Wooden Projects

    Summer is a time for fun, relaxation, and outdoor activities. Here are some wooden project ideas that are perfect for the summer season:

    Wooden Coasters

    Wooden coasters are a practical and decorative way to protect your furniture from condensation rings. Cut out coaster shapes from plywood or a thin board. You can paint them in bright colors, stain them, or leave them natural. You can also add a layer of cork to the bottom to make them more durable and prevent scratching. You can even add a personal touch by adding names or initials to the coasters.

    Wooden Serving Tray

    A wooden serving tray is a versatile and stylish way to serve food and drinks. You can make it in various sizes and shapes to fit your needs. You can paint it, stain it, or leave it natural. Add handles to the sides for easy carrying.

    Wooden Picture Frames

    Wooden picture frames are a classic way to display your favorite photos. You can make them in various sizes and shapes to fit your needs. You can paint them, stain them, or leave them natural. You can also add embellishments like decorative trim or metal accents. These custom-made picture frames make unique and cherished gifts for any occasion.

    No matter what time of year it is, woodworking is a great way to create beautiful and functional objects. With a little creativity and some basic skills, you can make unique and personalized decorations and gifts that will be cherished for years to come. So get out your tools and start creating!

    Share:

    DIY Wooden Toys That Sell Like Hotcakes

    DIY Wooden Toys That Sell Like Hotcakes

    DIY Wooden Toys That Sell Like Hotcakes

    Hey there, crafty friends! Are you looking for a way to turn your woodworking skills into a profitable venture? Look no further than DIY wooden toys! These adorable and timeless creations are always in high demand, especially with parents seeking eco-friendly and safe playthings for their little ones.

    Not only are wooden toys beautiful and durable, but they also offer a plethora of benefits for children. They encourage imaginative play, develop fine motor skills, and stimulate creativity. And the best part? You can whip up these charming toys with just a few basic tools and some wood.

    So, are you ready to unleash your inner woodworker and start crafting toys that will sell like hotcakes? Let's dive into some of the most popular and profitable wooden toy ideas!

    Classic Wooden Toys That Never Go Out Of Style

    These tried-and-true toys have stood the test of time for a reason. They're simple, engaging, and endlessly enjoyable for kids of all ages.

    Wooden Puzzles

    Wooden puzzles are a timeless classic and a great way to introduce kids to problem-solving and spatial reasoning. You can create puzzles of varying difficulties, from simple shapes for toddlers to intricate images for older children. Plus, you can personalize them with different themes like animals, vehicles, or even family portraits!

    Wooden Blocks

    Wooden blocks are the ultimate open-ended toy, inspiring endless creativity and imagination. From building towers to constructing imaginary worlds, the possibilities are endless! You can create sets with different shapes, sizes, and colors to enhance the play experience.

    Wooden Dolls and Animals

    Wooden dolls and animals are charming and durable toys that encourage imaginative play and storytelling. They can be painted, decorated, and even personalized with clothing and accessories. Think about creating different sets, like farm animals, woodland creatures, or characters from beloved children's books.

    Wooden Trains

    Wooden trains never fail to capture a child's imagination. You can craft simple train sets with tracks and carriages, or even create more complex layouts with tunnels, bridges, and stations.

    Trendy Wooden Toys That Are All The Rage

    Stay ahead of the curve with these modern wooden toys that are capturing hearts and minds.

    Wooden Teethers

    With the growing demand for natural and safe baby products, wooden teethers are a hot commodity. You can carve unique shapes and patterns that are easy for little hands to grasp and soothe their gums. Add a touch of natural oils or beeswax for extra comfort and appeal.

    Wooden Stacking Toys

    Stacking toys are a fun and educational way for toddlers to develop their fine motor skills and hand-eye coordination. Get creative with different shapes, colors, and textures to create visually appealing and engaging toys.

    Wooden Activity Cubes

    Activity cubes are multi-faceted toys that offer endless entertainment. They can include various features like spinning gears, sliding beads, shape sorters, and more. You can create unique designs with different themes like farm animals, vehicles, or letters and numbers.

    Wooden Toys with Sensory Elements

    Sensory toys are all the rage right now, and wooden toys can incorporate them beautifully. Think about adding elements like textured surfaces, beads, rattles, or even sound-making components.

    Tips for Selling Your DIY Wooden Toys

    Now that you've got some fantastic toy ideas, let's talk about turning your creations into a thriving business!

    High-Quality Materials

    Invest in high-quality wood, like maple, cherry, or walnut, that is safe for children and durable enough to withstand rough play.

    Safe and Non-Toxic Finishes

    Use non-toxic paints, stains, and finishes that are safe for children to touch and put in their mouths. Look for water-based options and always follow the manufacturer's instructions carefully.

    Creative Packaging and Presentation

    First impressions matter! Present your toys in attractive packaging that reflects your brand and highlights their unique features. Use natural materials like burlap or kraft paper for a rustic and eco-friendly look.

    Online Marketplaces

    Utilize online platforms like Etsy, Amazon Handmade, and Shopify to reach a wider audience. Create engaging product listings with high-quality photos and detailed descriptions.

    Local Craft Fairs and Markets

    Participate in local craft fairs and markets to showcase your handmade toys and interact directly with potential customers. You can get valuable feedback and build a following for your brand.

    Social Media Marketing

    Leverage social media platforms like Instagram and Facebook to share photos of your toys, engage with customers, and promote your brand. Run contests, offer discounts, and share behind-the-scenes glimpses of your creative process.

    Commonly Asked Questions

    What tools do I need to get started?

    You'll need basic woodworking tools like a saw, drill, sandpaper, and a sander. A jigsaw and a router can be helpful for more intricate designs.

    How do I find woodworking plans for wooden toys?

    You can find free plans online, purchase plans from woodworking websites, or even create your own designs. There are endless resources available to help you create your dream wooden toys.

    What are the best woods to use for wooden toys?

    Hardwoods like maple, cherry, and walnut are durable and safe for children. You can also consider using softwoods like pine or cedar, but make sure they are well-finished and safe for little mouths.

    How do I price my wooden toys?

    Consider the cost of materials, time spent crafting, and the market value of similar toys. Research what others are charging and set a competitive price that reflects the quality and craftsmanship of your creations.

    Is it profitable to sell wooden toys?

    Absolutely! Wooden toys are always in high demand, especially with parents seeking high-quality, handcrafted gifts. With careful planning, marketing, and quality craftsmanship, you can create a profitable business selling your DIY wooden toys.

    So, what are you waiting for? Grab your tools, unleash your creativity, and start crafting wooden toys that will bring joy to children and make your heart happy!

    Share:

    Festive Christmas Wood Crafts to Make This Holiday Season

    Festive Christmas Wood Crafts to Make This Holiday Season

    Festive Christmas Wood Crafts to Make This Holiday Season

    As the air grows crisp and the scent of pine fills the air, the holiday season is upon us. What better way to embrace the festive spirit than by crafting beautiful, handcrafted decorations from wood? This timeless material adds warmth and rustic charm to any Christmas decor, making it a perfect choice for your holiday projects. Let your creativity flow as you transform simple wood into stunning Christmas ornaments, festive signs, and charming gift tags.

    Ornaments for Your Tree

    Bring the warmth and beauty of nature into your home with handmade wood ornaments. These unique ornaments will add a special touch to your Christmas tree and become cherished family heirlooms for years to come. You can find pre-cut wooden shapes at craft stores, or unleash your inner artist and cut your own.

    Nature-Inspired Ornaments

    Embrace the beauty of the season with nature-inspired wood ornaments. Cut out simple shapes like snowflakes, stars, or Christmas trees from thin wood slices. Paint them in natural colors like white, brown, or green, and add details with glitter or metallic paint.

    Personalized Ornaments

    Make your ornaments truly special by personalizing them. Paint wooden circles or squares and add your family name, the year, or a special message. You can also carve small details or use stencils to create intricate designs.

    Festive Wooden Signs

    Welcome guests to your home with a festive wooden sign. Choose a rustic piece of wood and paint it with holiday colors and designs. You can create a simple "Merry Christmas" sign or a more elaborate scene with Santa, snowmen, or reindeer.

    Vintage Christmas Signs

    Give your signs a vintage feel by using distressed paint and a weathered wood finish. Add embellishments like burlap ribbon, antique-style lettering, or metal bells for a nostalgic touch.

    Modern Christmas Signs

    For a modern twist, opt for bold colors and geometric shapes. Use stencils to create clean lines and contemporary designs. You can even add a touch of metallic paint for a glamorous look.

    Charming Gift Tags

    Elevate your gift wrapping with handmade wooden gift tags. These small details add a personal touch to your presents and make them truly unique. Cut small shapes from scrap wood and personalize them with names, messages, or holiday illustrations.

    Painted Gift Tags

    Paint the tags with festive colors and decorate them with glitter, sequins, or ribbons. You can also use stencils to create simple patterns.

    Engraved Gift Tags

    For a more rustic and elegant look, engrave the tags with names, dates, or a special message. You can use a wood-burning tool or a laser cutter for precise details.

    As you craft these festive wood decorations, remember to embrace the joy of the season. Each piece will hold a special place in your home, filled with memories of the holidays spent creating and celebrating with loved ones.

    Share:

    How to Build Wooden Benches with a Modern or Rustic Look

    How to Build Wooden Benches with a Modern or Rustic Look

    Building a Wooden Bench: Modern or Rustic, Your Choice!

    So, you're thinking about adding a bench to your outdoor space, huh? Maybe you're craving a cozy reading nook, or you want a stylish place for guests to hang out. Whatever the reason, building a wooden bench is a fantastic project, especially if you're a DIYer at heart. The best part? You can tailor it to your style, whether you prefer a sleek modern aesthetic or a rustic, farmhouse vibe. Let's dive in!

    Choosing Your Style: Modern or Rustic?

    The first step is deciding what kind of bench vibes with your personality and your space. Here's a quick breakdown to help you choose:

    Modern Bench: Sleek Lines & Simplicity

  • Clean, Straight Lines: Think geometric shapes, minimal ornamentation, and a focus on smooth, polished surfaces.
  • Materials: Opt for hardwoods like walnut, maple, or cherry. These woods offer durability and a beautiful natural grain that can be left exposed for a minimalist look.
  • Color: A natural wood finish or a dark stain like ebony or walnut can create a contemporary feel.
  • Rustic Bench: Warmth & Character

  • Natural Imperfections: Embrace knots, cracks, and the unique grain patterns of reclaimed wood. This adds character and a sense of history.
  • Materials: Reclaimed lumber, cedar, or rough-cut pine are perfect choices. They often have a weathered, natural patina that adds to the rustic charm.
  • Color: Natural oil finishes or a weathered gray stain can enhance the rustic look. Consider adding a touch of color with distressed paint or a vintage-inspired finish.
  • Essential Tools & Materials

    Before you get started, make sure you have the following tools and materials on hand. I've broken them down into categories:

    Tools:

  • Measuring Tape & Pencil: Accuracy is key! You'll need to measure your lumber and mark your cuts precisely.
  • Saw: Choose a saw that's suitable for your materials. A circular saw, miter saw, or handsaw will all work well.
  • Drill & Bits: You'll need a drill to pre-drill holes for screws and to create pilot holes for dowels (if using).
  • Screwdriver: A cordless screwdriver or drill driver with a good selection of bits is essential.
  • Clamps: These are crucial for holding your pieces together securely during assembly.
  • Level: A level ensures your bench sits straight and even. A spirit level or laser level will both work.
  • Safety Gear: Safety first! Wear safety glasses, a dust mask, and work gloves to protect yourself.
  • Materials:

  • Lumber: The type and dimensions of lumber will depend on your design, but you'll need planks for the seat, legs, and supports. Calculate your lumber needs based on your bench dimensions.
  • Screws: Use screws specifically designed for woodworking. Choose screws that are long enough to securely fasten your pieces together.
  • Wood Glue: Wood glue adds strength and durability to your joints. Use a high-quality wood glue designed for outdoor applications.
  • Wood Finish: Select a finish that complements your style and protects your wood. Options include stains, oils, varnishes, and paint.
  • Optional: Dowels, brackets, hardware for attaching the bench to a deck or wall.
  • Let's Build! A Basic Bench Design

    Now for the fun part! I'll walk you through a simple bench design that can be easily customized to match your style. This basic design features a rectangular seat supported by four legs. You can adjust the dimensions to create a bench that's just the right size for your space.

    Step 1: Cut Your Lumber

  • Cut your lumber to the following dimensions (adjust as needed):
    • Seat: Two pieces (length of your bench) x width of your bench.
    • Legs: Four pieces (length of your legs) x width of your legs.
    • Supports: Four pieces (length of your supports) x width of your supports (you'll need to adjust the length to connect the legs to the seat).

    Step 2: Assemble the Base

  • Position two legs at each end of the bench seat, ensuring they are parallel and spaced evenly.
  • Use wood glue and screws to attach the legs to the seat. Pre-drill holes to prevent splitting the wood. Use wood glue for a strong bond, especially if you're using reclaimed wood.
  • Install the supports between the legs and the seat. These will add stability and prevent the bench from wobbling.
  • Step 3: Attach the Seat

  • Place the second seat plank on top of the base, ensuring it aligns perfectly with the first seat plank.
  • Attach the top plank to the base using wood glue and screws.
  • Step 4: Finishing Touches

  • Sand down your bench, smoothing out any rough edges and ensuring a smooth, even surface.
  • Apply your chosen wood finish. Allow the finish to dry thoroughly before using your bench. Give the wood plenty of time to absorb the finish for a more durable result.
  • Adding Your Personal Touch: Customization Ideas

    Okay, you've got the basics down. Now let's talk about making your bench truly your own!

    Modern Touches:

  • Sleek Lines: Use a table saw to cut perfectly straight edges and create smooth, rounded corners.
  • Minimalist Design: Avoid excessive ornamentation. Keep the focus on the natural beauty of the wood.
  • Unique Materials: Consider using metal accents, such as a steel frame for the base, or a sleek metal benchtop.
  • Bold Finishes: Embrace dark stains or an oil-based finish that highlights the natural grain.
  • Rustic Charm:

  • Reclaimed Wood: Use wood with visible knots, grain patterns, and signs of weathering to add a touch of history.
  • Distressed Finish: Create a worn, vintage look with sanding techniques, paint stripping, or a weathered gray stain.
  • Rustic Hardware: Use heavy-duty iron brackets, hand-forged nails, or salvaged hardware to add a touch of old-world charm.
  • Unique Details: Incorporate natural elements like branches, stones, or even woven baskets for a cozy, rustic feel.
  • Beyond Basic: Creative Design Ideas

    Looking for something more than a standard bench? Here are a few creative design ideas to get your imagination flowing:

  • Curved Bench: Create a flowing, organic shape by using a router or handsaw to cut curves into the seat and legs.
  • Bench with Storage: Build a bench with drawers or a built-in storage compartment beneath the seat. Perfect for storing cushions or tools.
  • Bench with Backrest: Add a backrest to create a comfortable spot for relaxing.
  • Double Bench: Build a longer bench that can seat several people.
  • Corner Bench: Design a bench specifically for a corner space, making the most of awkward angles.
  • Trestle Bench: Use a trestle design with a single central support for a minimalist aesthetic.
  • Commonly Asked Questions

    What kind of wood is best for a bench?

    For a long-lasting outdoor bench, hardwoods like cedar, oak, redwood, or teak are excellent choices. They are naturally durable and resistant to moisture and rot. For a rustic look, consider reclaimed wood like barnwood or pallet wood. Just be sure to treat it properly with a sealant to prevent decay.

    How do I prevent my wooden bench from rotting?

    The key is to use a wood finish that protects the wood from moisture. Water-based finishes are generally best for outdoor use, but oil-based finishes also offer good protection. Always apply the finish according to the manufacturer's instructions, and reapply it every few years for maximum protection.

    How can I make my bench more comfortable?

    Add cushions or a padded seat top! You can use outdoor fabric cushions, foam padding, or even a layer of sheepskin for a cozy, rustic feel.

    Is it better to use screws or nails?

    For most bench designs, screws are the best choice. They offer greater holding power than nails, especially when working with hardwoods. Make sure to use screws specifically designed for woodworking.

    And there you have it! Building your own wooden bench is a project that combines creativity, practicality, and a touch of rustic charm. So, grab your tools, gather your lumber, and let your imagination run wild. Enjoy the process and the beautiful, handcrafted bench you'll have to show for it!

    Share:

    How to Build Shoe Racks with a Modern Design for Sale

    How to Build Shoe Racks with a Modern Design for Sale

    How to Build Shoe Racks with a Modern Design for Sale

    Alright, so you want to build shoe racks with a modern design to sell. That's awesome! You're stepping into a fantastic niche with huge potential. The key is to create pieces that are both functional and visually appealing, and that's where we come in.

    This guide will walk you through everything you need to know, from choosing the right materials to designing and building your modern shoe racks. Let's get started!

    Step 1: Choosing Your Materials

    The materials you choose will directly impact the look and feel of your shoe racks. Here are some of the most popular choices:

    Wood:

    Wood is a classic choice for shoe racks. It's durable, versatile, and can be stained or painted to match any aesthetic. Here are a few wood options:

    • Oak: Strong and beautiful, oak is a great choice for a more traditional or rustic modern look. It's also very durable, so it's great for high-traffic areas.
    • Walnut: Walnut offers beautiful, rich grain patterns and a naturally dark color that adds a touch of sophistication. It's a bit more expensive than oak but holds its value well.
    • Pine: A lighter, softer wood that is readily available and affordable. Pine is great for a clean, modern look. However, it may be less durable than oak or walnut, so it's best for lighter use.
    • Plywood: A cost-effective and surprisingly strong option. Plywood comes in various grades and finishes, allowing for a lot of design flexibility.

    Metal:

    Metal offers a sleek, modern look, and it's incredibly durable. Here are some metal options:

    • Steel: A sturdy and affordable option. Steel can be powder-coated in a variety of colors to match your designs.
    • Aluminum: Lightweight, corrosion-resistant, and easily recyclable. Aluminum can be polished or brushed for a different aesthetic. It's a great option if you're looking for a lighter and more contemporary look.
    • Iron: A strong, industrial-looking metal that can be used to create a unique and robust shoe rack. Iron can be painted or left in its natural state for a more rustic feel.

    Other Materials:

    You can also explore other materials like acrylic, leather, or even recycled plastic. Just be sure to choose materials that are sturdy enough to handle the weight of shoes.

    Step 2: Designing Your Shoe Rack

    Now that you've chosen your materials, it's time to design your shoe rack. Here are a few things to consider:

    • Function: How many pairs of shoes will the rack need to hold? Will it need to store different types of shoes (sneakers, heels, boots)?
    • Style: What kind of aesthetic are you going for? Modern designs often feature clean lines, minimalist details, and a focus on functionality.
    • Dimensions: What will be the overall size of the shoe rack? How much space do you have to work with?
    • Storage Options: Will the rack have shelves, drawers, or a combination of both? Consider adding features like a tilted shelf for boots or a dedicated section for sneakers.
    • Assembly: Will the shoe rack be assembled by the customer, or will it come fully assembled? If it's assembled by the customer, ensure it's easy and straightforward.

    Getting Inspiration:

    Don't reinvent the wheel! Look at existing modern shoe racks for inspiration. Browse online marketplaces like Etsy and Pinterest for ideas, and visit furniture stores to see what's trending.

    Step 3: Building Your Shoe Rack

    Once you have your design finalized, it's time to build your shoe racks. Here's a breakdown of the process:

    Cutting and Preparing Materials:

    Start by cutting your chosen materials to the required dimensions. Use a saw, a jigsaw, or a laser cutter depending on the materials and the complexity of your design.

    Assembling the Frame:

    Assemble the main frame of the shoe rack using screws, dowels, or glue. Make sure all the joints are secure and stable.

    Adding Shelves and Storage Features:

    Attach shelves, drawers, or other storage features to the frame. Make sure they are properly aligned and secured.

    Finishing Touches:

    Once the shoe rack is assembled, it's time to give it the final touch. This might include:

    • Sanding: Sand the wood to create a smooth finish.
    • Painting or Staining: Apply a stain or paint to the wood or metal to match your design.
    • Finishing: Apply a protective finish, like a sealant or varnish, to protect the shoe rack from scratches and water damage.

    Step 4: Marketing and Selling Your Shoe Racks

    With your shoe racks ready, it's time to get them in front of customers! Here are a few ways to market and sell your products:

    • Online Marketplaces: Etsy, Amazon Handmade, and Shopify are great platforms to reach a wider audience. Take high-quality photos of your shoe racks and write compelling descriptions.
    • Social Media: Use platforms like Instagram and Facebook to showcase your designs and engage with potential customers. Run contests or giveaways to generate excitement.
    • Local Craft Fairs and Markets: Connect with local shoppers at craft fairs and farmers markets. This is a great way to build relationships and get feedback.
    • Your Own Website: If you're serious about selling your shoe racks, create a website to showcase your products and provide information about your brand.

    Commonly Asked Questions

    How much can I sell my shoe rack for?

    Pricing depends on factors like materials, design complexity, and the market for modern shoe racks. Research competitor pricing and consider your costs for materials, labor, and marketing. Start with a price that reflects the value you're providing and adjust it based on customer feedback.

    What kind of business structure should I choose?

    The best structure depends on your individual needs and goals. Sole proprietorships are easy to start but offer limited liability protection. An LLC provides more protection but requires more paperwork. Consult with a lawyer or accountant to determine the best option for you.

    What are some tips for taking good product photos?

    Good photos are crucial for selling online. Use natural light whenever possible, and use a tripod to ensure sharp images. Style your shoe rack in a way that highlights its features. Include shots from different angles and close-ups of details.

    What are some tips for writing good product descriptions?

    Write descriptions that are clear, concise, and engaging. Highlight the key features and benefits of your shoe racks. Use strong verbs and adjectives to create a sense of excitement.

    Building shoe racks with a modern design can be a rewarding experience. It's a fun and creative endeavor that allows you to express your artistic side while creating practical products that people love. With a little effort and creativity, you can build a successful business selling modern shoe racks. Remember, you're not just selling a product, you're selling a solution to an everyday problem, and that's a powerful thing.

    Share:

    The Best Types of Wood for Cutting Boards to Sell

    The Best Types of Wood for Cutting Boards to Sell

    The Best Types of Wood for Cutting Boards to Sell

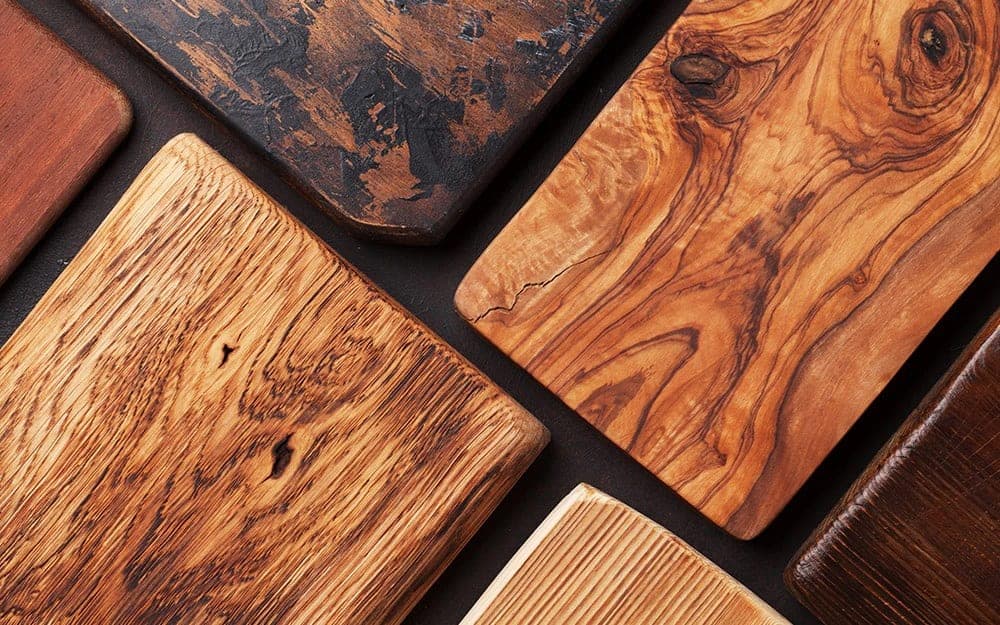
    Cutting boards are an essential kitchen tool, used for everything from chopping vegetables to carving roasts. Choosing the right type of wood for your cutting board is crucial, as it will impact its durability, longevity, and performance. While many wood species are suitable for crafting cutting boards, some stand out as the best choices for both functionality and aesthetic appeal.

    When selecting wood for cutting boards, consider factors such as hardness, grain pattern, resistance to moisture, odor absorption, and cost. Understanding these properties will help you choose the right wood for your needs and target market.

    Hardwoods for Cutting Boards

    Hardwoods are generally denser and more resistant to wear and tear than softwoods. This makes them ideal for cutting boards that will see heavy use. Here are some of the best hardwood options:

    Maple

    Maple is a popular choice for cutting boards due to its hardness, beautiful grain pattern, and resistance to moisture. Its tight grain structure makes it relatively resistant to scratches and dents. Maple is also a good choice for those seeking a light-colored board with a natural finish.

    Cherry

    Cherry wood offers a rich, reddish-brown hue that adds elegance to any kitchen. It is hard and durable, making it suitable for both everyday use and high-end cutting boards. Over time, cherry wood develops a warm, honey-like patina, enhancing its beauty.

    Walnut

    Walnut is a highly sought-after wood for cutting boards, known for its striking grain patterns and rich, dark brown color. It is hard and durable, offering excellent resistance to wear and tear. Walnut boards often feature dramatic figure, making them a stunning centerpiece in any kitchen.

    Hardwood Alternatives

    While traditional hardwoods are excellent for cutting boards, some alternative wood species offer unique characteristics and price points. Here are a few noteworthy options:

    Bamboo

    Bamboo is a rapidly renewable resource with excellent hardness and durability. It is also naturally antimicrobial, making it a safe choice for food preparation. Bamboo boards are often lighter and more affordable than traditional hardwoods, making them a popular choice for budget-conscious consumers.

    Acacia

    Acacia is a dense and durable hardwood with a distinctive golden-brown color and striking grain patterns. Its natural oil content provides a degree of water resistance, making it suitable for cutting boards. Acacia is a relatively affordable option compared to other hardwoods, making it a good choice for both functional and visually appealing boards.

    Softwoods for Cutting Boards

    Softwoods are generally less dense and more prone to scratches and dents than hardwoods. However, some softwood species offer unique advantages and can be used for cutting boards.

    Pine

    Pine is a soft and lightweight wood with a distinctive yellow-brown color. It is affordable and readily available, making it suitable for simple cutting boards. Pine boards are generally not recommended for heavy-duty use, as they can easily scratch and dent. However, they can be a good choice for decorative or serving boards.

    Cedar

    Cedar is known for its pleasant aroma and natural insect-repellent properties. It is a soft wood and should not be used for heavy-duty cutting. However, cedar boards can be used for serving boards or for storing items such as cheeses or breads. Their aroma can enhance the flavor of certain foods.

    Factors to Consider When Choosing Wood for Cutting Boards

    Beyond the basic properties of hardness and appearance, several other factors influence the suitability of wood for cutting boards. Here are some important considerations:

    Moisture Resistance

    Cutting boards are exposed to moisture during use, so choosing a wood with natural resistance to water damage is essential. Woods like maple and walnut are known for their low water absorption. However, even the most water-resistant woods should be treated with oil or wax to enhance their protection.

    Odor Absorption

    Certain woods, like cedar, have a natural ability to absorb odors. This can be desirable for food storage but is undesirable for cutting boards used to prepare different foods. Choose woods with low odor absorption, such as maple or cherry, to prevent cross-contamination of flavors.

    Grain Pattern

    The grain pattern of wood can affect both its appearance and its durability. Tight-grained woods, such as maple, are more resistant to scratches and dents. Wide-grained woods, such as walnut, can be more prone to damage, but their distinctive patterns are highly sought after. Consider the intended use and aesthetic appeal when selecting a wood based on its grain pattern.

    Wood Finishing for Cutting Boards

    Once you've chosen the right wood for your cutting boards, applying a suitable finish is crucial for protection and longevity. Common finishing techniques include:

    Mineral Oil

    Mineral oil is a popular choice for finishing cutting boards because it is food-safe and helps prevent water absorption. It also creates a smooth, water-resistant surface. Apply mineral oil regularly to maintain its protective barrier.

    Beeswax

    Beeswax adds a natural protective layer to cutting boards, enhancing their water resistance and providing a subtle shine. It also helps repel stains. Beeswax is often combined with mineral oil for a more robust finish.

    Food-Grade Finishes

    Several commercially available food-grade finishes are designed specifically for cutting boards. These finishes often combine mineral oil with other protective ingredients like tung oil or polymer resins. Choose a food-grade finish that meets your needs and preferences.

    Conclusion

    Choosing the right wood for your cutting boards is an important step in creating durable, functional, and aesthetically pleasing products. By considering factors such as hardness, grain pattern, moisture resistance, odor absorption, and cost, you can select the ideal wood for your target market and needs. Whether you're crafting maple boards for everyday use or walnut boards for high-end customers, choosing the right wood and applying a suitable finish will ensure your cutting boards meet the highest standards of quality and performance.

    Share:

    Popular Woodworking Items to Sell Online and Locally

    Popular Woodworking Items to Sell Online and Locally

    Popular Woodworking Items to Sell Online and Locally

    Woodworking is a rewarding hobby and a potential source of income. The demand for handcrafted wooden items is consistently high, making it a viable business opportunity. This article explores some of the most popular woodworking items that you can sell online and locally, catering to diverse customer preferences and market needs.

    Home Decor and Furniture

    The home decor and furniture market is vast and brimming with possibilities for woodworking enthusiasts. Consumers increasingly seek unique and personalized pieces to enhance their living spaces, and handcrafted wooden items offer a perfect solution.

    Cutting Boards

    Cutting boards are a staple in any kitchen, offering functionality and aesthetic appeal. They are relatively simple to make, making them a great starting point for beginners. You can experiment with different wood types, sizes, and designs to create a variety of cutting boards that appeal to diverse customers.

  • Wooden Serving Trays: Elegant wooden serving trays can elevate the dining experience. They are versatile, suitable for serving appetizers, desserts, or drinks. You can add decorative elements like handles or inlays to enhance their appeal.
  • Wooden Wall Shelves: Functional and stylish, wooden wall shelves provide a unique storage solution. They come in various sizes and shapes, allowing you to cater to different customer needs. Consider adding a rustic or minimalist finish to enhance their appeal.
  • Wooden Coasters: Protect furniture surfaces with handcrafted wooden coasters. These small but essential items are easy to make and can be personalized with engraved designs or custom logos.
  • Wooden Picture Frames: Create personalized picture frames using different wood types and styles. You can add decorative elements, such as intricate carvings or painted details, to enhance their appeal.
  • Outdoor Furniture

    The demand for high-quality outdoor furniture is consistently strong. Woodworking offers a unique opportunity to create durable and stylish pieces that enhance outdoor living spaces.

  • Wooden Garden Benches: A classic outdoor staple, wooden benches provide a comfortable seating option in gardens, patios, and parks. You can customize their design with different wood types, finishes, and embellishments.
  • Wooden Birdhouses: Birdhouses are popular gifts and garden accents. They are relatively easy to make and can be customized with various designs, colors, and sizes to attract specific bird species.
  • Wooden Planters: Add a touch of rustic charm to your outdoor space with handcrafted wooden planters. They come in various sizes and styles, allowing you to grow flowers, herbs, or small vegetables.
  • Wooden Picnic Tables: Perfect for outdoor gatherings, wooden picnic tables offer durable and spacious seating options. You can customize them with different sizes, shapes, and finishes.
  • Personalized Gifts and Keepsakes

    Handmade wooden gifts and keepsakes offer a personal touch that is highly valued. They serve as lasting mementos that can be cherished for years to come.

    Engraved Wooden Boxes

    Engraved wooden boxes are perfect for storing jewelry, keepsakes, or other small treasures. They can be personalized with names, dates, or special messages, creating a sentimental and unique gift.

  • Wooden Ornaments: Custom-made wooden ornaments add a unique touch to Christmas trees or year-round decorations. They can be personalized with names, initials, or festive designs.
  • Wooden Keychains: Practical and personalized, wooden keychains make a great gift for friends, family, or colleagues. You can add custom engravings, logos, or designs to create a unique piece.
  • Wooden Jewelry Stands: Wooden jewelry stands offer a stylish and functional way to display and organize jewelry. They can be crafted in various designs, from minimalist to intricate, to suit different preferences.
  • Kitchenware and Utensils

    Handcrafted wooden kitchenware and utensils are becoming increasingly popular as consumers seek sustainable and aesthetically pleasing options.

  • Wooden Spoons and Spatulas: Wooden spoons and spatulas offer a natural and durable alternative to plastic or metal utensils. They are gentle on cookware and can be customized with unique designs and finishes.
  • Wooden Salad Bowls: Wooden salad bowls add a touch of elegance to any dining table. They come in various shapes, sizes, and wood types, offering a range of options to suit different needs.
  • Wooden Rolling Pins: Wooden rolling pins are essential for baking and are often cherished as heirloom pieces. They can be customized with different wood types, sizes, and designs.
  • Other Popular Woodworking Items

    Beyond the categories mentioned above, several other woodworking items are consistently in demand. These include:

  • Wooden Toys: Handcrafted wooden toys provide a safe and engaging play experience for children. They can be designed in various shapes, sizes, and colors, promoting creativity and imagination.
  • Wooden Clocks: Wooden clocks add a rustic charm to any home. They can be crafted in various styles, from traditional to modern, and personalized with custom designs or engravings.
  • Wooden Lamps: Wooden lamps offer a warm and inviting ambiance to any space. They can be customized with different wood types, shapes, and finishes, creating a unique statement piece.
  • Wooden Wine Racks: Wine racks are essential for wine enthusiasts. They can be crafted in various styles, from simple to elaborate, to suit different preferences and storage needs.
  • Marketing and Selling Strategies

    Once you've chosen your niche, it's crucial to develop effective marketing and selling strategies to reach your target audience.

    Online Marketplaces

    Online marketplaces such as Etsy, Amazon Handmade, and eBay provide a platform to reach a global audience. These platforms offer tools for creating online storefronts, managing inventory, and promoting your products.

    Social Media Marketing

    Social media platforms like Instagram, Facebook, and Pinterest are excellent for showcasing your woodworking skills and promoting your products. Use high-quality images, engaging captions, and stories to create a compelling brand presence.

    Local Craft Fairs and Markets

    Participating in local craft fairs and markets provides a valuable opportunity to connect with potential customers in person, showcase your products, and generate sales.

    Word-of-Mouth Marketing

    Word-of-mouth marketing is powerful. Encourage satisfied customers to recommend your products to their friends and family. Offer referral discounts or bonuses to incentivize positive referrals.

    Conclusion

    Woodworking offers a fulfilling and potentially profitable business opportunity. By selecting popular items, mastering your craft, and developing effective marketing strategies, you can tap into the growing demand for handcrafted wooden goods, both online and locally.

    Share:

    How to Finish Wooden Benches for a Professional Look

    How to Finish Wooden Benches for a Professional Look

    How to Finish Wooden Benches for a Professional Look

    You've built a beautiful wooden bench, and now you're ready to give it the perfect finish to truly make it shine. But with so many options, it's easy to feel overwhelmed. Don't worry, I'm here to help!

    In this guide, we'll explore the different steps and considerations for finishing your bench like a pro. From choosing the right stain and sealant to applying them properly, we'll cover everything you need to know to create a long-lasting, stunning finish.

    Choosing the Right Finish

    The first step is deciding what kind of finish you want. There are three main types:

    1. Stains

    Stains penetrate the wood, enhancing its natural grain and color without hiding it completely. They come in a variety of shades and finishes, from light washes to deep, rich hues.

    • Oil-based stains are known for their deep penetration, durability, and rich colors. They take longer to dry and require proper ventilation, but offer a classic, high-quality finish.
    • Water-based stains are easier to clean up and dry faster, making them a good choice for beginners. However, they may not penetrate as deeply as oil-based stains and may not be as durable.
    • Gel stains are thicker and more pigmented, offering better coverage and less blotching on porous woods. They are also easier to apply and can be used on vertical surfaces.

    2. Paints

    Paints provide a solid, opaque coating that completely covers the wood, allowing you to create a variety of colors and effects.

    • Latex paint is a popular choice for its quick drying time, ease of cleanup, and low odor. It's also durable and water-resistant.
    • Oil-based paint offers a high-gloss finish and better durability, but it takes longer to dry and requires solvents for cleanup.

    3. Finishes

    Finishes are applied over stains or paints to protect the wood and enhance its appearance. They come in a variety of types, each with its own benefits and drawbacks.

    • Polyurethane is a popular choice for its durability, water resistance, and ease of application. It comes in different sheens, from matte to gloss.
    • Varnish is another durable option that offers a high-gloss finish. It's often used on furniture and other pieces that will receive heavy use.
    • Lacquer is a fast-drying, durable finish that offers a hard, protective layer. It's often used on floors and other high-traffic surfaces.
    • Wax provides a natural, low-gloss finish that helps protect the wood from moisture and scratches. It's often used on furniture and other pieces that will receive moderate use.

    Preparing the Bench for Finishing

    Before applying any finish, it's essential to prepare the wood properly. This involves sanding, cleaning, and addressing any imperfections.

    1. Sanding

    Sanding smooths the surface and removes any rough edges or imperfections. Start with a coarse-grit sandpaper (80-120 grit) to remove any major blemishes or scratches. Then, gradually move to finer grits (150, 220, and 400 grit) for a smooth, consistent finish.

    2. Cleaning

    After sanding, clean the bench thoroughly with a tack cloth to remove dust and debris. This ensures a smooth, dust-free surface for the finish to adhere to.

    3. Filling Imperfections

    If you have any holes or cracks in the wood, fill them with wood filler. Let the filler dry completely, then sand it smooth for a seamless finish.

    Applying the Finish

    Now it's time to apply the finish you've chosen. Follow these steps for best results:

    1. Stain (if using)

    If you're using a stain, apply it evenly to the wood with a brush, cloth, or sponge. Work in thin, even coats, and avoid over-applying. Let the stain dry completely before moving to the next step.

    2. Paint (if using)

    If you're using paint, apply it evenly with a brush or roller. Make sure to cover the wood completely and avoid leaving any streaks or brush marks. Let the paint dry completely before applying any finish.

    3. Finish

    Apply the finish in thin, even coats, following the manufacturer's instructions. Allow each coat to dry completely before applying the next.

    4. Final Touches

    Once the final coat of finish is dry, you can add any finishing touches. This might include applying a wax coat, sanding the edges for a softer feel, or adding hardware.

    Commonly Asked Questions

    1. How long does it take for a wooden bench to dry?

    The drying time for a wooden bench varies depending on the type of finish used. Stains can take anywhere from a few hours to a day to dry, while paints and finishes can take longer. Check the manufacturer's instructions for specific drying times.

    2. How many coats of finish should I apply?

    The number of coats you apply depends on the type of finish and the desired level of protection. Typically, you'll need at least two coats of finish to achieve a good level of durability.

    3. Can I apply a stain over a paint?

    It's generally not recommended to apply a stain over paint. The stain won't penetrate the paint layer effectively, and the results may be uneven.

    4. How can I fix mistakes while finishing?

    If you make a mistake while finishing, you can usually sand the area and reapply the finish. For larger mistakes, you may need to use a paint remover or stripper to remove the finish entirely and start over.

    5. What are some tips for getting a professional look?

    Here are a few tips for achieving a professional look:

    • Prepare the wood properly by sanding, cleaning, and filling any imperfections.
    • Use high-quality stains, paints, and finishes.
    • Apply the finish evenly, working in thin, even coats.
    • Allow each coat to dry completely before applying the next.
    • Take your time and don't rush the process.

    With a little patience and effort, you can finish your wooden bench to a professional standard. Just remember to choose the right finish, prepare the wood properly, and apply the finish evenly. And don't be afraid to experiment to find what works best for you!

    Share:

    人気の投稿

    Powered by Blogger.