Easy and budget-friendly woodworking ideas for creating personalized wood crafts and home accents.

Showing posts with label Outdoor. Show all posts

Simple Floating Shelves Projects for Beginners to Try

Simple Floating Shelves Projects for Beginners to Try

Simple Floating Shelves Projects for Beginners to Try

Hey there, DIY enthusiasts! Are you looking for a fun and easy way to add some personality and functionality to your home? Look no further than floating shelves! These versatile and stylish shelves are a perfect project for beginners, and with a little bit of time and effort, you can create a stunning addition to any room. So grab your tools, put on your favorite playlist, and let's get started!

Choosing the Right Materials

Before you dive into the construction, it's crucial to choose the right materials for your floating shelves. You'll need to decide on the following:

Wood Type

The wood you choose will determine the overall look and feel of your shelves. Some popular options include:

  • Pine: This softwood is affordable, easy to work with, and readily available. It's perfect for beginners.
  • Oak: A strong and durable hardwood that adds a classic and rustic look. It's a bit more expensive than pine.
  • Maple: A beautiful hardwood with a distinctive grain pattern. It's known for its durability and resistance to scratches.
  • Plywood: A versatile and cost-effective option that comes in various thicknesses and finishes. It's great for creating sturdy and stable shelves.

Hardware

You'll need the following hardware for your floating shelves:

  • Shelf Brackets: These come in various styles and materials. Choose brackets that are strong enough to support the weight of your items and complement your chosen wood.
  • Screws: Make sure the screws are long enough to securely attach the brackets to the wall and the shelves to the brackets.
  • Level: A level will ensure your shelves are perfectly straight and horizontal.
  • Measuring Tape: Measure twice, cut once! A measuring tape is essential for precise cutting and placement.

Simple Floating Shelf Projects

Now that you have your materials ready, let's explore some easy and beginner-friendly floating shelf projects:

Basic Floating Shelf

This is the most straightforward project and a great starting point for beginners. You'll only need a single piece of wood and a pair of shelf brackets.

  1. Measure and Cut: Measure the desired length of your shelf and cut the wood to size using a saw.
  2. Mark Bracket Positions: Decide where you want to place your shelf on the wall and mark the bracket positions using a pencil. Remember to consider the weight of the items you'll be placing on the shelf.
  3. Install Brackets: Use a level to make sure the brackets are straight and secure them to the wall using screws.
  4. Attach Shelf: Place the shelf on top of the brackets and screw it in place.

Floating Shelf with a Decorative Edge

For a more visually appealing touch, try adding a decorative edge to your floating shelf. This can be achieved using a router, a jigsaw, or even a hand saw. You can choose from various edge profiles, such as a rounded edge, a chamfered edge, or a beveled edge.

Floating Shelf with Storage

Add some extra functionality to your floating shelf by incorporating storage solutions. You can create a shelf with a built-in drawer, a hidden compartment, or even a secret cubby. Simply create a box-like structure behind the shelf and attach it to the wall.

Floating Shelf with a Geometric Design

If you're looking for a modern and stylish touch, try creating a floating shelf with a geometric design. Use a router to cut intricate patterns or use a jigsaw to create a unique shape. You can create a geometric shelf in the shape of a triangle, a hexagon, or any other shape you desire.

Tips for Success

Here are some tips to ensure your floating shelf projects are a success:

  • Use a Level: Don't underestimate the importance of a level! Ensure your shelves are straight and horizontal for a professional finish.
  • Pre-drill Holes: Pre-drilling holes in the wood before screwing it in will prevent the wood from splitting.
  • Sand Smooth: Always sand your wood smooth after cutting and before staining or painting to eliminate any rough edges.
  • Protect the Wood: Apply a sealant or a finish to protect the wood from moisture, scratches, and stains.
  • Have Fun! Remember, it's all about creating something you love. Don't be afraid to experiment and personalize your project.

Commonly Asked Questions

Here are some frequently asked questions about floating shelves:

What is the weight limit for floating shelves?

The weight limit depends on the type of wood, the size of the shelf, and the strength of the brackets. It's always best to consult the manufacturer's guidelines or choose brackets rated for heavier loads.

What are the best wall anchors for floating shelves?

The best wall anchors depend on the type of wall material you're working with. For drywall, toggle bolts or plastic anchors are good options. For concrete or brick walls, use masonry anchors.

How do I clean floating shelves?

You can clean floating shelves using a soft cloth and a mild cleaning solution. Avoid harsh chemicals or abrasive cleaners that could damage the finish.

With these simple projects and helpful tips, you'll be well on your way to creating stunning floating shelves that elevate your home's style and functionality. Happy crafting!
Share:

How to Build Coffee Tables with Adjustable Height for Versatility

How to Build Coffee Tables with Adjustable Height for Versatility

How to Build Coffee Tables with Adjustable Height for Versatility

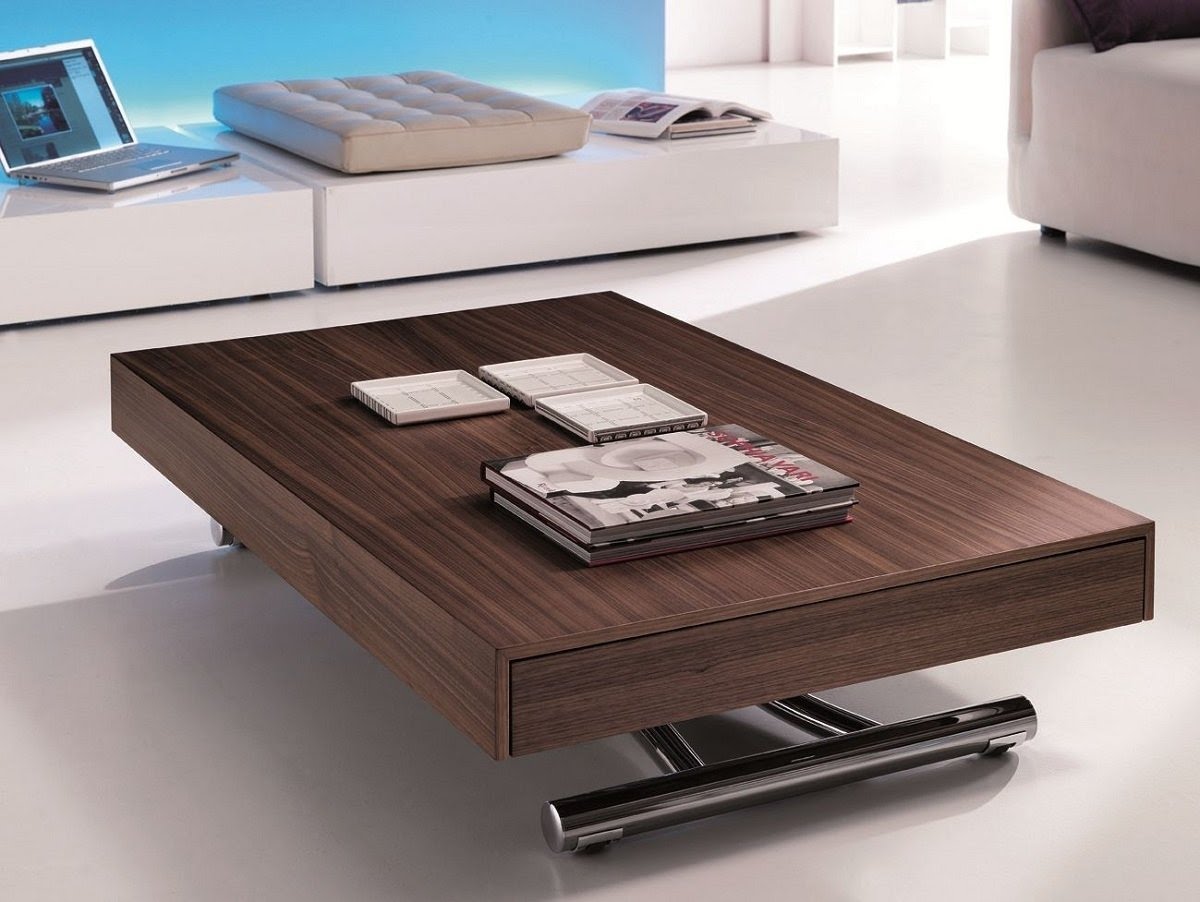
A coffee table is a staple in any living room, but what if you could make it even more versatile? Imagine having a coffee table that can easily transform into a dining table, a desk for working from home, or a platform for a cozy movie night. With adjustable height, you can achieve all this and more.

Choosing the Right Materials

The first step is choosing the right materials for your adjustable coffee table. You can opt for a sturdy wood frame with a tabletop made from your choice of wood, glass, or even metal. For the adjustable mechanism, you can consider using:

  • Gas lift mechanisms: These are common in office chairs and provide smooth, effortless height adjustments.
  • Hand crank mechanisms: These offer a more budget-friendly option and are often seen in industrial furniture.
  • Telescoping legs: These provide simple adjustments but require more manual effort.

Building the Frame

Once you have your materials, you can start building the frame. Begin by cutting the wood pieces for the base to the desired dimensions. Use a drill to create pilot holes before inserting screws to prevent wood from splitting. Attach the tabletop to the frame with strong adhesives and screws. Ensure all joints are tight and secure for stability.

Installing the Adjustable Mechanism

The next step is to install the chosen adjustable mechanism. For gas lift mechanisms, you will need to attach a plate to the underside of the tabletop and another plate to the base frame. Insert the gas lift cylinder between these plates, ensuring it is securely attached. For hand crank mechanisms, attach the crank to the base frame and the lifting mechanism to the underside of the tabletop. For telescoping legs, attach the legs to the base frame, making sure they can extend and retract smoothly.

Adding Finishing Touches

After the frame and adjustable mechanism are complete, it's time to add the finishing touches. You can sand down any rough edges and apply stain or paint to your desired color and finish. For a more polished look, consider adding a protective coating like polyurethane or varnish.

Safety Tips

Remember to always prioritize safety while building your adjustable coffee table. Wear safety glasses, gloves, and appropriate clothing. Use tools properly and be cautious when working with power tools. Take breaks to avoid fatigue, and always double-check your measurements and connections before proceeding to the next step.

Enjoying Your Versatile Coffee Table

Once your adjustable coffee table is complete, you'll be able to enjoy its versatility. From coffee time to dinner parties, from working at home to movie nights, your new creation will seamlessly adapt to your needs. With a little effort and the right materials, you can build a coffee table that truly enhances your living space.

Share:

Wooden Key Holders with Storage for Mail, Letters, and More

Wooden Key Holders with Storage for Mail, Letters, and More

Wooden Key Holders with Storage for Mail, Letters, and More

Tired of keys cluttering your entryway, mail piling up on the counter, and important documents disappearing into the abyss of your desk? A stylish and functional wooden key holder with storage is the perfect solution to tame the chaos and bring order to your home. Combining a sleek, natural aesthetic with practical design, these versatile pieces offer a dedicated space for your essentials, keeping your entryway organized and welcoming.

Unleash the Power of Organization

Imagine walking into your home and immediately feeling a sense of calm. No more scrambling for keys, no more misplaced bills, and no more piles of paperwork taking over your countertop. With a wooden key holder with storage, you can:

  • Keep keys readily accessible: No more frantic searches before heading out the door. Simply grab your keys from their designated spot and be on your way.
  • Tidy up mail and letters: A dedicated storage compartment keeps incoming mail organized, preventing it from becoming a chaotic heap. No more lost bills or forgotten appointments.
  • Store important documents: Keep essential documents like bills, insurance papers, or school forms safe and readily available in a designated area.
  • Elevate your entryway decor: Wooden key holders with storage come in a variety of styles, adding a touch of natural elegance to your entryway and complementing any home décor.

Choose the Perfect Key Holder for Your Needs

Wooden key holders with storage come in various shapes, sizes, and features to suit different needs and preferences. Here are some popular options:

Wall-Mounted Key Holders

Space-saving and easy to install, wall-mounted key holders offer convenient storage solutions. They often feature hooks for keys, a shelf for mail, and compartments for smaller items.

Freestanding Key Holders

For added versatility, freestanding key holders can be placed anywhere in your entryway. They usually have a wider base for stability and offer more storage options, including drawers, cubbies, and shelves.

Key Holders with Mailboxes

For those who receive a lot of mail, key holders with integrated mailboxes provide a dedicated space for incoming letters and packages. These options typically have a larger compartment for mail and a separate area for keys.

Embrace the Warmth of Wood

Wooden key holders with storage offer a timeless and natural charm that complements any décor style. From rustic farmhouse to modern minimalist, there's a wooden key holder to enhance your home's character. The warm tones and unique grain patterns of wood create a welcoming and inviting atmosphere in your entryway.

Investing in a wooden key holder with storage is more than just organizing your essentials; it's about creating a sense of calm and order in your home. Start your day feeling relaxed and ready to tackle whatever comes your way, knowing that your keys, mail, and important documents are all in their designated place.

Share:

人気の投稿

Powered by Blogger.