Easy and budget-friendly woodworking ideas for creating personalized wood crafts and home accents.

Showing posts with label Rustic. Show all posts

Profitable Wood Toolbox Organizer Projects to Sell

Profitable Wood Toolbox Organizer Projects to Sell

Profitable Wood Toolbox Organizer Projects to Sell

Hey there, woodworking enthusiasts! Are you looking for some profitable wood projects to sell? Look no further than toolbox organizers! These practical and customizable projects are always in demand, especially among tradespeople and DIYers. Plus, they're relatively simple to make, even for beginners. Let's dive into some woodworking projects you can start building and selling today!

Toolbox Organizer Ideas: Where Function Meets Form

The beauty of toolbox organizers is that they can be as simple or as elaborate as you like. Here are some popular project ideas to get your creative juices flowing:

Classic Tool Trays

These are the bread and butter of toolbox organization. They provide a simple, flat surface for tools to be laid out neatly. You can make them in different sizes to accommodate various toolboxes.

Dividing Tool Trays

Take the classic tool tray a step further by adding dividers. These partitions create dedicated spaces for specific tools, keeping everything in its place and preventing them from clanging together.

Tool Roll-Ups

These are perfect for storing smaller tools and accessories. They're compact, roll up neatly, and can be easily transported. You can use different fabrics or leathers for a more custom look.

Specialty Tool Organizers

Think outside the box! You can create organizers for specific tool types, such as:

  • Screwdriver organizers: With slots for different screwdriver bits.
  • Hammer holders: With a built-in stand for easy access.
  • Drill bit organizers: With compartments to hold various bit sizes.
  • Level holders: With a secure way to store and carry levels.
  • Measuring tape holders: With clips or loops to keep the tape secure.

Multi-Purpose Toolboxes

Combine your woodworking skills with your imagination! Create toolboxes with built-in organizers, such as:

  • Workbenches with storage: Add drawers, shelves, and tool compartments to the workbench itself.
  • Mobile tool carts: Construct sturdy carts with rolling wheels, complete with drawers, shelves, and tool holders.
  • Tool cabinets: Make a cabinet with lockable doors and custom organizers inside.

Tips for Building Profitable Wood Toolbox Organizers

Now that you're brimming with ideas, let's get practical. Here are some tips to ensure your projects are high-quality, desirable, and profitable:

Choose the Right Wood

For durability and longevity, choose hardwoods like oak, maple, or cherry. You can also use plywood for less expensive projects.

Focus on Functionality

Remember, these organizers are primarily functional. Make sure your designs are practical, easy to use, and cater to the needs of your target audience.

Prioritize Quality Craftsmanship

Workmanship is everything! Pay attention to details like smooth finishes, sturdy construction, and precise cuts.

Add Personalized Touches

Don't underestimate the power of personalization! Offer customers customization options like:

  • Custom dimensions: To fit specific toolboxes.
  • Laser engraving: Add the customer's name, initials, or logo.
  • Stain and finish options: Provide a range of wood finishes to suit different preferences.
  • Hardware choices: Allow customers to select different handles, hinges, or fasteners.

Price Your Projects Competitively

Research similar products online and in your local area. Factor in your materials, labor, and desired profit margin when setting your prices.

Market Your Products Effectively

Spread the word! Promote your work online through social media, your own website, or online marketplaces. Consider selling locally at craft fairs or woodworking events.

Marketing Your Wood Toolbox Organizers

You've built the perfect toolbox organizers, now it's time to get them in the hands of your customers! Here are some marketing tips to help you succeed:

Show Off Your Skills

Take high-quality photos and videos of your projects. Showcase the craftsmanship, functionality, and unique features. Share them online and in your marketing materials.

Highlight the Benefits

Emphasize how your organizers will make life easier for tradespeople and DIYers. Mention how they'll improve organization, productivity, and tool protection.

Target Your Audience

Identify who your ideal customer is. Are you targeting contractors, electricians, plumbers, or hobbyists? Customize your marketing messages to resonate with their specific needs.

Engage Online

Build an online presence! Use social media platforms, create a website or blog, and consider selling on online marketplaces like Etsy or Amazon Handmade. Engage with your audience, respond to comments, and build relationships.

Offer Incentives

Attract customers with special offers, discounts, or bundled deals. Consider free shipping or a discount for multiple purchases.

Get Feedback

Ask customers for their feedback on your products and your service. Use this information to improve your offerings and refine your marketing strategies.

Frequently Asked Questions

Here are some questions you might have about selling wood toolbox organizers:

How do I get started selling my wood toolbox organizers?

Start by creating a small batch of organizers to test the market. You can sell them locally at craft fairs or online marketplaces. Gather feedback and refine your designs and marketing strategies.

What are the best places to sell wood toolbox organizers?

Online marketplaces like Etsy, Amazon Handmade, and Facebook Marketplace are great options. You can also sell through your own website or social media platforms. Consider selling locally at craft fairs, woodworking events, or directly to tradespeople in your area.

How much can I expect to make selling wood toolbox organizers?

The potential profit depends on your materials, labor, pricing, and sales volume. Research competitors, consider your costs, and set prices that are competitive yet profitable.

What are some tips for photographing my wood toolbox organizers?

Use good lighting, a clean background, and showcase the functionality of your organizers. Highlight the craftsmanship and unique features of your products.

How can I build a customer base for my woodworking business?

Engage online, build relationships, offer excellent customer service, and consistently create high-quality products. Participate in online woodworking communities, network with other businesses, and promote your work through social media and online marketplaces.

Remember, building a successful woodworking business takes time, effort, and a passion for your craft. But with dedication and the right strategies, you can turn your woodworking hobby into a thriving business. So get out there, build some amazing toolbox organizers, and watch your business grow!

Share:

How to Craft Wooden Key Racks That Double as Wall Art

How to Craft Wooden Key Racks That Double as Wall Art

Craft Wooden Key Racks That Double as Wall Art

Transform your entryway from mundane to magnificent with a handcrafted wooden key rack that seamlessly blends function and aesthetics. This project is a perfect fusion of practicality and artistic expression, allowing you to create a unique and personalized piece that reflects your style. Let's embark on this exciting journey of crafting a beautiful and functional key rack that will be the envy of your guests.

Gathering Your Materials and Tools

Before you dive into this project, it's essential to gather the necessary materials and tools. This will ensure a smooth and enjoyable crafting experience. Here's what you'll need:

Materials

  • Wooden board (choose a wood type that complements your décor)
  • Wooden dowels or hooks (consider the size and number of keys you need to hang)
  • Wood glue
  • Wood stain or paint (to enhance the wood's natural beauty or create a vibrant look)
  • Sandpaper (different grits for smoothing and finishing)
  • Finishing oil or sealant (for protection and durability)
  • Screws or nails

Tools

  • Saw (to cut the wooden board and dowels to your desired length)
  • Drill (for pre-drilling holes for the dowels or hooks)
  • Measuring tape and pencil
  • Level (for ensuring the key rack is hung straight)
  • Hammer or screwdriver
  • Safety glasses (to protect your eyes)

Designing Your Key Rack Masterpiece

Now, let's unleash your creativity and design a key rack that reflects your unique style. Here are some ideas to ignite your inspiration:

Shape and Size

  • Rectangular: This classic shape offers a timeless and versatile design.
  • Round: A circular key rack adds a touch of whimsy and sophistication to your entryway.
  • Geometric: Explore the possibilities of triangles, squares, or even hexagonal key racks for a modern and edgy aesthetic.
  • Customized: Don't be afraid to experiment with unique shapes or even incorporate initials or meaningful symbols into your design.

Dowels or Hooks

  • Dowels: Create a rustic and charming look with dowels, and choose different diameters to add visual interest.
  • Hooks: Select decorative hooks to enhance the overall aesthetic of your key rack.

Finishing Touches

  • Wood Stain: Enhance the natural beauty of the wood by choosing a stain that complements your décor.
  • Paint: Add a splash of color and personality to your key rack with paint in your favorite hues.

Crafting Your Key Rack: Step by Step

Now, let's get our hands dirty and create your personalized key rack. Follow these steps carefully for a successful project:

  1. Cut the Wooden Board: Using a saw, cut the wooden board to your desired dimensions, ensuring the shape matches your design.
  2. Sand the Board: Smooth the edges and surface of the board using sandpaper, starting with coarser grits and progressing to finer grits for a polished finish.
  3. Mark Dowel or Hook Positions: Measure and mark the locations on the board where you want to install the dowels or hooks. Consider the size and spacing for optimal functionality.
  4. Pre-Drill Holes (If Needed): If using dowels, pre-drill holes slightly smaller than the dowel diameter to ensure smooth insertion.
  5. Attach Dowels or Hooks: Secure the dowels or hooks to the board using wood glue and screws or nails, ensuring they are firmly attached.
  6. Stain or Paint: Apply the stain or paint to the entire key rack, following the manufacturer's instructions for application and drying time.
  7. Apply Finishing Oil or Sealant (Optional): To protect your key rack from wear and tear, apply a finishing oil or sealant as per the manufacturer's instructions.
  8. Hang Your Key Rack: Carefully hang your completed key rack on the wall using a level to ensure it is straight.

Adding Personal Touches to Your Key Rack

With your key rack complete, it's time to add those unique touches that make it truly yours.

  • Embellishments: Consider adding decorative elements like metal accents, small ceramic tiles, or even engraved wooden plaques for a personalized look.
  • Custom Hooks: Choose hooks that reflect your interests, like animal silhouettes or whimsical shapes, for a playful touch.
  • Lighting: Enhance the visual appeal of your key rack with strategically placed accent lighting. This can highlight the wood grain or create a warm and inviting ambiance.
  • Wall Decor: Integrate the key rack into your entryway decor by incorporating complementary wall art, mirrors, or decorative plants for a cohesive and stylish aesthetic.

Conclusion

Congratulations! You have now created a functional and visually stunning wooden key rack that adds a touch of artistry to your entryway. This project showcases your creativity and DIY skills, leaving you with a piece that you'll proudly display for years to come. So, get ready to welcome guests with a charming and practical key rack that reflects your unique style.

Share:

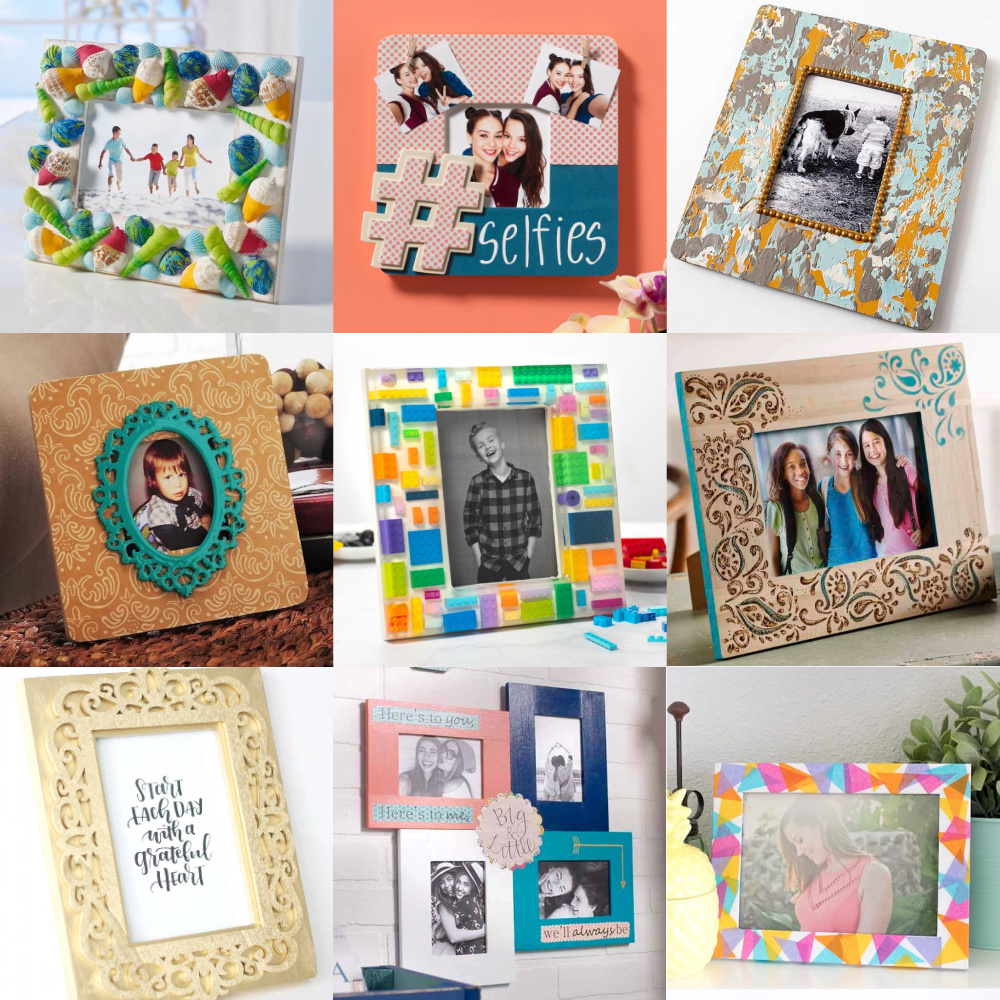
High-End Picture Frame Projects for Premium Sales

High-End Picture Frame Projects for Premium Sales

High-End Picture Frame Projects for Premium Sales

In the world of art and decor, picture frames are more than just functional accessories; they are integral components that elevate the visual impact of cherished photographs, paintings, and prints. For discerning customers seeking to enhance their homes and showcase their prized possessions, high-end picture frame projects present a lucrative opportunity for businesses to tap into the premium market. This article delves into the realm of high-end picture frame projects, providing insights into design trends, materials, customization options, and marketing strategies that cater to affluent clientele.

Understanding the High-End Picture Frame Market

High-end picture frames are not simply about framing a picture; they are about creating a statement, an heirloom piece that reflects the taste and sophistication of the owner. This segment of the market prioritizes quality, craftsmanship, and exclusivity, demanding materials and techniques that go beyond the ordinary.

Key Characteristics of High-End Picture Frames

  • Exceptional Materials: High-end frames often feature premium woods like mahogany, walnut, or exotic hardwoods, as well as materials like sculpted metals, polished stones, and even rare gemstones.
  • Exquisite Craftsmanship: The attention to detail is paramount. Hand-carved designs, intricate inlay work, and meticulous finishing techniques are hallmarks of high-end frames.
  • Custom Design: The ability to personalize frames to specific dimensions, styles, and finishes is crucial to meeting the individual needs of discerning customers.
  • Unique and Exclusive Designs: High-end customers often seek frames that are one-of-a-kind, showcasing unique designs, rare materials, or collaborations with renowned artists.
  • Elevated Presentation: The overall experience is enhanced by premium packaging, presentation, and installation services, reinforcing the value of the purchase.

Design Trends in High-End Picture Frames

The world of high-end picture frame design is constantly evolving, influenced by contemporary art movements, architectural trends, and the changing preferences of affluent clientele. Here are some prevailing trends:

Modern Minimalism

Simple lines, clean geometries, and muted colors define this style. Metals like polished stainless steel, brushed aluminum, or black nickel create a sleek and sophisticated look. Frames with minimal ornamentation or with subtle geometric accents are popular.

Industrial Chic

This style embraces raw materials and exposed textures. Reclaimed wood, rusted metals, and industrial-inspired finishes create a unique and edgy aesthetic. Frames with visible joinery or distressed finishes complement this trend.

Luxe Glamour

Opulence is key in this style. Gold leaf, silver leaf, and intricate carvings on frames made of walnut or mahogany create a sense of grandeur. Frames with embellishments like crystals, gemstones, or ornate moldings add to the luxurious feel.

Contemporary Art Influence

The influence of contemporary art movements is evident in the bold colors, abstract forms, and unconventional materials used in high-end picture frames. Geometric shapes, asymmetrical designs, and innovative framing techniques are employed to complement modern art pieces.

Materials and Techniques for High-End Picture Frames

Choosing the right materials and employing skilled techniques are fundamental to creating high-end picture frames that stand the test of time. Here are some options for businesses:

Woods

  • Walnut: Known for its rich brown color and distinctive grain patterns, walnut is a popular choice for high-end frames.
  • Mahogany: With its deep red hues and beautiful grain, mahogany exudes elegance and sophistication. It is often used for ornate frames with intricate carvings.
  • Cherry: Cherry wood has a warm, reddish-brown color that ages gracefully. Its fine grain and subtle sheen make it suitable for both contemporary and traditional styles.
  • Exotic Hardwoods: Woods like ebony, rosewood, or burlwood offer unique grain patterns and vibrant colors, adding a touch of exclusivity to frames. They are often used for statement pieces and one-of-a-kind designs.

Metals

  • Aluminum: Light and durable, aluminum can be polished to a high shine or treated with a brushed finish for a contemporary look. It is commonly used for modern, minimalist frames.
  • Brass: A classic choice for high-end frames, brass can be polished, lacquered, or given an aged finish for a vintage feel. It often complements traditional or antique styles.
  • Silver: Exuding elegance and sophistication, silver frames can be handcrafted or plated with silver leaf. They are ideal for showcasing fine art pieces and vintage photographs.
  • Steel: Available in various finishes, steel can be used to create sleek and modern frames. It can be combined with other materials for a unique look.

Other Materials

  • Leather: Leather accents on frames add a touch of luxury and sophistication. They can be used for borders, corners, or even entire frames. Leather frames are particularly well-suited for vintage photographs and antique artwork.
  • Stone: Natural stones like marble, granite, or onyx are used in high-end frames to create a sense of opulence and prestige. They can be polished to a high gloss or left with a natural finish. Stone frames are often used for contemporary or minimalist art pieces.
  • Glass: Glass can be used for both the front and back of frames, providing a clear and unobstructed view of the artwork. Acid-etched glass, frosted glass, or decorative glass can add visual interest. Glass frames are especially suitable for minimalist designs or for showcasing photographic prints.

Customizing Picture Frames

High-end customers often have specific preferences for the design and finish of their frames. Offering a wide range of customization options is essential to cater to their individual needs and elevate the customer experience. Here are some key aspects of customization:

  • Size and Shape: Customers should be able to choose the exact dimensions and shape of their frames to perfectly accommodate their artwork.
  • Material Selection: Offer a curated selection of high-quality woods, metals, or other materials that meet the standards of discerning clientele.
  • Finishes: Provide a variety of finishes, including stains, paints, patinas, and metal coatings, to complement the style of the artwork and the decor of the space.
  • Embellishments: Offer options for embellishments like hand-carved details, intricate moldings, inlay work, or gemstone accents.
  • Glass Options: Provide different glass types, including UV-protective glass, museum-quality glass, and anti-reflective glass, to protect the artwork and enhance its visibility.
  • Mounts and Mats: Offer a variety of mounts and mats in different colors, textures, and thicknesses to complement the artwork and create visual balance.
  • Hardware: Provide a selection of high-quality hardware, including hinges, latches, and hanging systems, that match the style of the frame and ensure secure and elegant installation.

Marketing High-End Picture Frame Projects

Marketing high-end picture frame projects requires a tailored approach that targets affluent individuals, art collectors, and design professionals. Here are some effective strategies:

Target Audience

  • Art Collectors: Attend art fairs, gallery openings, and events frequented by art collectors. Partner with art galleries and auction houses to showcase your frames.
  • Design Professionals: Network with interior designers, architects, and art consultants. Offer discounts or incentives to promote collaborations.
  • Affluent Individuals: Utilize online platforms like social media and luxury lifestyle magazines to reach affluent consumers interested in high-end home decor.

Marketing Strategies

  • Luxury Branding: Create a brand identity that reflects exclusivity, craftsmanship, and sophistication. Use high-quality photography, elegant typography, and a consistent visual style.
  • Content Marketing: Develop compelling content that showcases your expertise in framing, highlights design trends, and provides insights into the world of art and decor. Share on your website, blog, and social media platforms.
  • Partnerships: Collaborate with art galleries, design firms, and luxury retailers to expand your reach and tap into existing customer bases.
  • Personalized Experiences: Offer private consultations, design services, and installation support to provide a bespoke experience for high-end clients.
  • Events and Workshops: Host exclusive events, workshops, or demonstrations featuring art experts, designers, or framing specialists to educate and inspire customers.

Conclusion

High-end picture frame projects offer a unique opportunity to cater to the discerning tastes and preferences of affluent clientele. By focusing on exceptional materials, exquisite craftsmanship, custom design, and marketing strategies that resonate with this target audience, businesses can build a successful niche in the premium market. By elevating the experience and creating heirloom-quality frames that enhance the beauty and value of cherished artwork, businesses can establish themselves as trusted providers of high-end framing solutions.

Share:

人気の投稿

Powered by Blogger.