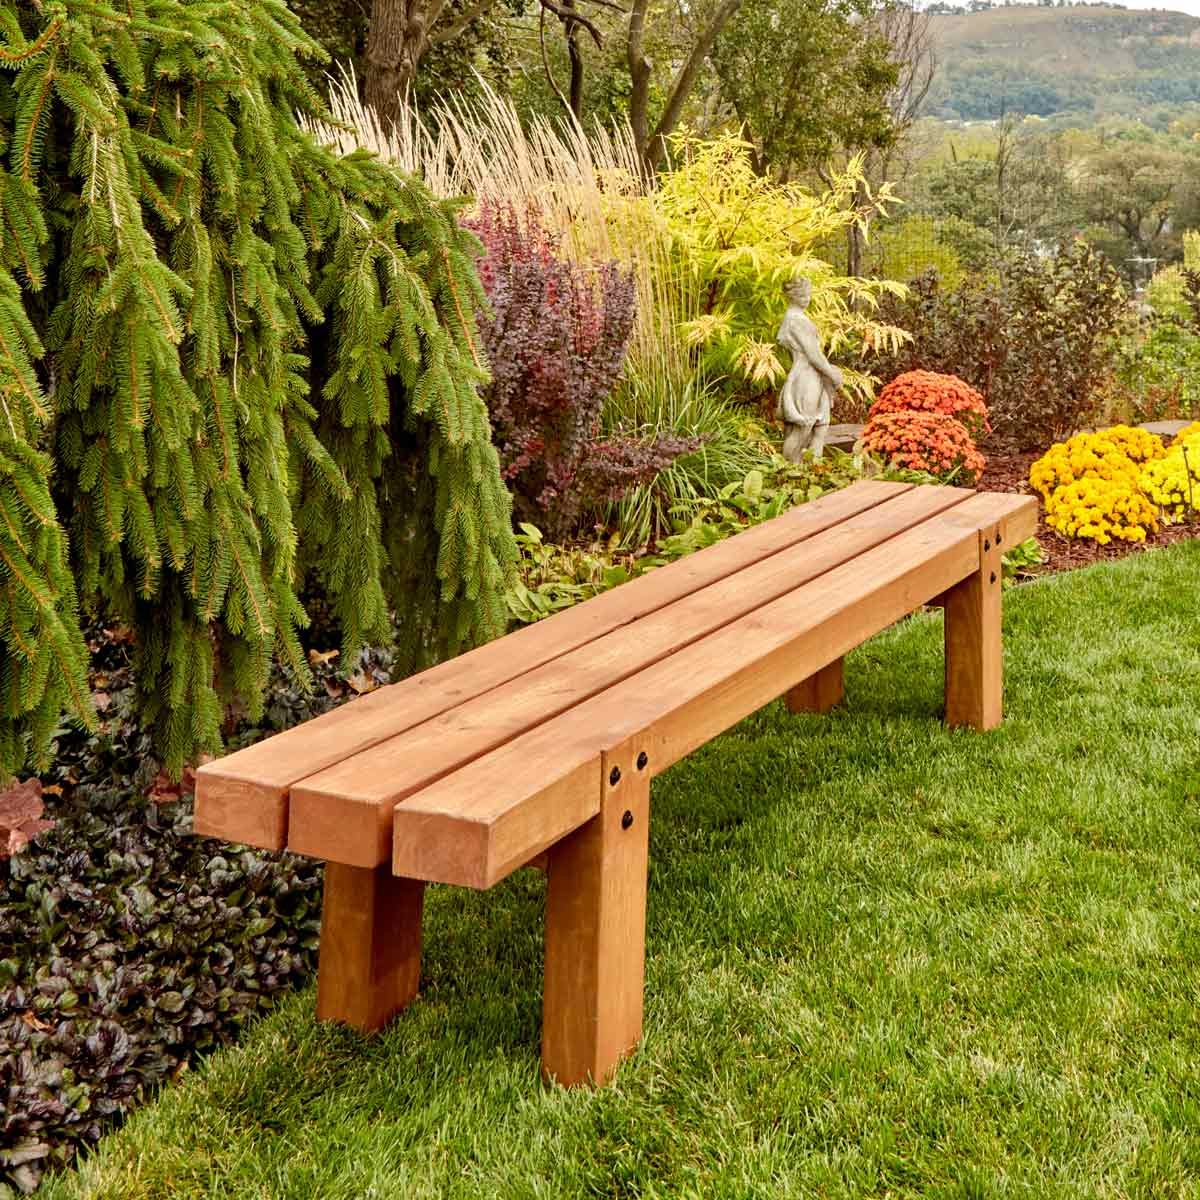
Easy and budget-friendly woodworking ideas for creating personalized wood crafts and home accents.

Showing posts with label Look. Show all posts

How to Build Wooden Projects That Are Both Beautiful and Functional

How to Build Wooden Projects That Are Both Beautiful and Functional

Crafting Beauty and Utility: Building Stunning and Functional Wooden Projects

The allure of woodworking lies in its ability to transform raw materials into objects of both beauty and practicality. Whether you're a seasoned craftsman or a curious beginner, the journey of creating a functional wooden piece is deeply rewarding. This article guides you through the process, emphasizing design considerations and practical techniques to ensure your projects are not only visually appealing but also serve their intended purpose effectively.

Designing for Both Form and Function

The foundation of any successful woodworking project rests on thoughtful design. Don't rush into construction before meticulously planning every detail. Consider the project's intended use: Will it be a sturdy coffee table, a delicate jewelry box, or a robust garden bench? This dictates material selection, joinery techniques, and overall aesthetic. Sketch your design from multiple angles, experimenting with different dimensions and styles. Digital design tools can also be invaluable, allowing for precise measurements and 3D visualizations before you ever touch a piece of wood.

Prioritizing Functionality

Functionality should never be an afterthought. A beautiful piece that is impractical is ultimately a failure. Ask yourself: How will this item be used? Where will it be placed? What stresses will it endure? For example, a coffee table needs a strong, stable base capable of supporting weight, while a jewelry box requires intricate details and secure compartments. Thoroughly addressing these questions early ensures a final product that truly serves its purpose.

Embracing Aesthetics

While functionality is crucial, don't underestimate the power of aesthetics. The beauty of wood lies in its natural grain and variations in color. Highlight these qualities by selecting appropriate finishes and joinery methods. Consider the overall style: Do you prefer clean, modern lines or rustic, handcrafted charm? Choose a finish that complements the wood and the project's intended setting. A simple oil finish can enhance the wood's natural beauty, while a more elaborate stain or paint can achieve a specific aesthetic.

Choosing the Right Materials and Tools

The success of your project heavily relies on selecting the appropriate materials and tools. Different wood species possess unique properties: some are harder and more durable, others softer and easier to carve. Consider the wood's grain, density, and resistance to moisture. For example, oak is ideal for furniture due to its strength and durability, while pine is a popular choice for less demanding projects due to its affordability and ease of working. Gather all necessary tools before commencing the project. Invest in quality tools, as they significantly improve accuracy, precision, and overall safety.

Essential Tools for Success

Beginners should start with a basic tool kit that includes:

  • Measuring tape and square
  • Hand saw or circular saw
  • Chisels and mallets
  • Sandpaper (various grits)
  • Clamps
  • Safety glasses and dust mask

As your skills progress, you can gradually expand your tool collection.

Mastering Essential Woodworking Techniques

Proficiency in fundamental woodworking techniques significantly impacts the final product's quality. Accurate measuring and cutting are paramount. Practice your cuts on scrap wood before working on your actual project. Learn various joinery methods, such as mortise and tenon, dowel joints, or biscuit joints, each offering unique strength and aesthetic appeal. Pay close attention to detail during assembly, ensuring all components align precisely and securely. A well-executed joinery is as crucial to functionality as it is to the project's visual appeal.

The Importance of Finishing Touches

Finishing is the final, yet crucial, step. Proper finishing protects the wood from moisture and wear, enhancing its durability and beauty. Sanding is essential to achieve a smooth surface. Start with coarser grits and progressively move to finer grits for a polished finish. Apply your chosen finish according to the manufacturer's instructions, ensuring even coverage and avoiding drips or runs. Allow sufficient drying time between coats.

By carefully considering design, selecting appropriate materials and tools, and mastering fundamental woodworking techniques, you can confidently create wooden projects that are both beautiful and functional, pieces that you'll cherish for years to come.

Share:

How to Craft Wooden Key Racks That Double as Wall Art

How to Craft Wooden Key Racks That Double as Wall Art

Craft Wooden Key Racks That Double as Wall Art

Transform your entryway from mundane to magnificent with a handcrafted wooden key rack that seamlessly blends function and aesthetics. This project is a perfect fusion of practicality and artistic expression, allowing you to create a unique and personalized piece that reflects your style. Let's embark on this exciting journey of crafting a beautiful and functional key rack that will be the envy of your guests.

Gathering Your Materials and Tools

Before you dive into this project, it's essential to gather the necessary materials and tools. This will ensure a smooth and enjoyable crafting experience. Here's what you'll need:

Materials

  • Wooden board (choose a wood type that complements your décor)
  • Wooden dowels or hooks (consider the size and number of keys you need to hang)
  • Wood glue
  • Wood stain or paint (to enhance the wood's natural beauty or create a vibrant look)
  • Sandpaper (different grits for smoothing and finishing)
  • Finishing oil or sealant (for protection and durability)
  • Screws or nails

Tools

  • Saw (to cut the wooden board and dowels to your desired length)
  • Drill (for pre-drilling holes for the dowels or hooks)
  • Measuring tape and pencil
  • Level (for ensuring the key rack is hung straight)
  • Hammer or screwdriver
  • Safety glasses (to protect your eyes)

Designing Your Key Rack Masterpiece

Now, let's unleash your creativity and design a key rack that reflects your unique style. Here are some ideas to ignite your inspiration:

Shape and Size

  • Rectangular: This classic shape offers a timeless and versatile design.
  • Round: A circular key rack adds a touch of whimsy and sophistication to your entryway.
  • Geometric: Explore the possibilities of triangles, squares, or even hexagonal key racks for a modern and edgy aesthetic.
  • Customized: Don't be afraid to experiment with unique shapes or even incorporate initials or meaningful symbols into your design.

Dowels or Hooks

  • Dowels: Create a rustic and charming look with dowels, and choose different diameters to add visual interest.
  • Hooks: Select decorative hooks to enhance the overall aesthetic of your key rack.

Finishing Touches

  • Wood Stain: Enhance the natural beauty of the wood by choosing a stain that complements your décor.
  • Paint: Add a splash of color and personality to your key rack with paint in your favorite hues.

Crafting Your Key Rack: Step by Step

Now, let's get our hands dirty and create your personalized key rack. Follow these steps carefully for a successful project:

  1. Cut the Wooden Board: Using a saw, cut the wooden board to your desired dimensions, ensuring the shape matches your design.
  2. Sand the Board: Smooth the edges and surface of the board using sandpaper, starting with coarser grits and progressing to finer grits for a polished finish.
  3. Mark Dowel or Hook Positions: Measure and mark the locations on the board where you want to install the dowels or hooks. Consider the size and spacing for optimal functionality.
  4. Pre-Drill Holes (If Needed): If using dowels, pre-drill holes slightly smaller than the dowel diameter to ensure smooth insertion.
  5. Attach Dowels or Hooks: Secure the dowels or hooks to the board using wood glue and screws or nails, ensuring they are firmly attached.
  6. Stain or Paint: Apply the stain or paint to the entire key rack, following the manufacturer's instructions for application and drying time.
  7. Apply Finishing Oil or Sealant (Optional): To protect your key rack from wear and tear, apply a finishing oil or sealant as per the manufacturer's instructions.
  8. Hang Your Key Rack: Carefully hang your completed key rack on the wall using a level to ensure it is straight.

Adding Personal Touches to Your Key Rack

With your key rack complete, it's time to add those unique touches that make it truly yours.

  • Embellishments: Consider adding decorative elements like metal accents, small ceramic tiles, or even engraved wooden plaques for a personalized look.
  • Custom Hooks: Choose hooks that reflect your interests, like animal silhouettes or whimsical shapes, for a playful touch.
  • Lighting: Enhance the visual appeal of your key rack with strategically placed accent lighting. This can highlight the wood grain or create a warm and inviting ambiance.
  • Wall Decor: Integrate the key rack into your entryway decor by incorporating complementary wall art, mirrors, or decorative plants for a cohesive and stylish aesthetic.

Conclusion

Congratulations! You have now created a functional and visually stunning wooden key rack that adds a touch of artistry to your entryway. This project showcases your creativity and DIY skills, leaving you with a piece that you'll proudly display for years to come. So, get ready to welcome guests with a charming and practical key rack that reflects your unique style.

Share:

Custom Wine Racks You Can Make and Sell This Weekend

Custom Wine Racks You Can Make and Sell This Weekend

Craft a Profitable Weekend: Build & Sell Custom Wine Racks

Imagine this: a Saturday morning, coffee in hand, surrounded by fragrant wood, the hum of your tools a familiar soundtrack. You’re creating something beautiful, something functional, something that speaks to a love of wine and a desire for personalized style. This isn't a fantasy – it’s a real possibility. With a weekend and a few basic tools, you can build and sell custom wine racks, tapping into a lucrative market with a demand for unique, handmade pieces.

Why Wine Racks?

Wine racks are more than just storage. They’re a statement piece, an art form, an expression of personal taste. They’re a conversation starter, a focal point in the home, and a testament to the love of the beverage itself. This is why the demand for custom wine racks is on the rise, especially for those who want something beyond the mass-produced, cookie-cutter designs.

Crafting Your Business: Setting Up for Success

Before diving into the sawdust, it’s crucial to get your business ducks in a row. This doesn’t have to be complicated, but it's essential for building a solid foundation:

1. Define Your Niche

What style of wine racks will you specialize in? Rustic reclaimed wood? Sleek modern metal? Sleek, minimalist designs? Understanding your target audience and their aesthetic preferences is key to creating a brand identity and attracting the right customers.

2. Source Your Materials

Quality materials are the backbone of a good wine rack. Explore local lumber yards, salvage shops, and online suppliers to find wood, metal, or other materials that align with your niche. Don’t be afraid to experiment and find unique options that set you apart.

3. Gather Your Tools

A basic set of tools is essential. Consider these:

  • Saw (circular or jigsaw)
  • Drill
  • Sandpaper
  • Measuring tape
  • Level
  • Clamps
  • Screwdriver or drill driver
  • Safety gear (goggles, gloves, dust mask)

4. Craft Your Marketing Strategy

Getting the word out about your wine racks is crucial. Leverage the power of social media (Instagram, Facebook) to showcase your work, engage with potential customers, and build a following. Local craft fairs, farmer's markets, and online platforms like Etsy are excellent avenues for selling and connecting with buyers.

Building Your First Wine Rack: A Step-by-Step Guide

Let’s dive into the creative process. Here’s a simple, beginner-friendly wine rack design you can adapt and personalize:

1. Design and Measurement

Start by sketching your wine rack design. Consider the size, number of bottles you want to hold, and the overall aesthetic. Use your measuring tape to determine the exact dimensions of your rack. You’ll need the height, width, and depth.

2. Cutting the Wood

Using your saw, cut the wood pieces according to your measurements. For a basic rack, you'll need two vertical side pieces and horizontal shelves or supports. Remember to factor in the thickness of the wood when calculating the dimensions.

3. Assembly

Secure the vertical side pieces together with screws, creating the frame of your rack. Attach the shelves or supports using screws or glue, ensuring they are evenly spaced to comfortably accommodate wine bottles.

4. Finishing Touches

Sand the wood to remove any rough edges and achieve a smooth finish. Apply a stain or paint to enhance the wood's natural beauty or create a personalized look. Consider adding decorative elements like metal accents, carved designs, or engraved details to personalize your wine rack.

5. Packaging and Presentation

Wrap your completed wine rack in protective material like bubble wrap or foam to prevent damage during transport. Consider a simple, elegant presentation by placing it on a decorative cloth or in a wooden crate. This will enhance its visual appeal and increase its desirability to potential buyers.

Beyond the Basics: Expanding Your Skills

As you gain confidence, you can venture into more complex designs. Experiment with different materials, styles, and techniques. You can try:

  • Metal wine racks: Incorporate iron, steel, or aluminum for modern, industrial looks.
  • Wall-mounted wine racks: Create space-saving options that seamlessly blend into any room.
  • Modular wine racks: Offer customizable designs that allow customers to add sections and adapt to their changing needs.

The possibilities are endless. Embrace your creativity, experiment with different materials, and enjoy the journey of crafting beautiful and functional wine racks that are sure to delight your customers.

Share:

How to Build Wooden Toys with a Classic or Vintage Appeal

How to Build Wooden Toys with a Classic or Vintage Appeal

Building Wooden Toys with Classic or Vintage Appeal

There’s something undeniably charming about wooden toys. Maybe it’s the simple, natural beauty of the wood, or the way they invite imaginative play. Whatever the reason, wooden toys hold a special place in our hearts, and building them yourself can be a rewarding experience. Today, we’re going to dive into the world of creating wooden toys with a classic or vintage appeal, giving your creations that timeless charm. Get ready to unleash your inner woodworker and create playthings that will stand the test of time!

Choosing the Right Wood

The first step in your wooden toy journey is selecting the perfect wood. You want something that’s both durable and safe for kids. Here are some popular choices:

  • Maple: A strong, hard wood that’s easy to work with and takes stain well. It’s a fantastic choice for classic toy designs like rocking horses and building blocks.
  • Cherry: Known for its rich, reddish-brown color and beautiful grain pattern. Cherry wood is ideal for toys that need a touch of elegance.
  • Pine: An affordable, softwood that’s easy to cut and carve. Pine is perfect for simple toys like wooden cars and puzzles.
  • Walnut: A luxurious hardwood with a deep brown color and stunning grain pattern. Use walnut for toys you want to be extra special.

When choosing wood, consider the type of toy you’re making and the level of detail you’re aiming for. For intricate carvings, a harder wood like maple or walnut might be a better choice. For simpler toys, a softer wood like pine is more forgiving. Make sure you’re using wood that’s been treated with non-toxic finishes, especially for items that kids will put in their mouths.

Tools of the Trade

Now, let’s talk tools. You don’t need a full-blown woodworking shop to make great wooden toys. Here are some essentials to get you started:

  • Hand saw: For cutting wood to size.
  • Jig saw: For cutting curved shapes.
  • Sandpaper: In various grits to smooth out surfaces and create a polished look.
  • Screwdriver: For assembling parts.
  • Clamps: For holding pieces together while gluing or drilling.
  • Drill: For creating holes for axles or other attachments.
  • Measuring tape: For ensuring accurate cuts.
  • Pencil: For marking cutting lines.

For extra detail, you can add things like chisels, a router, and a drill press. But don’t worry, you can achieve a lot with basic tools. As you get more comfortable, you can gradually add to your arsenal.

Classic Toy Designs to Inspire Your Creativity

Okay, you’ve got your wood and tools, now what? Let’s explore some classic toy designs that are perfect for showcasing the vintage charm of wood. Remember, these are just starting points. Feel free to add your own personal touches and create unique pieces that reflect your style.

Wooden Toys for Toddlers

  • Stacking blocks: A timeless classic that encourages fine motor skills and problem-solving. You can create simple square blocks or get creative with shapes like cylinders, pyramids, or even animals.
  • Pull toys: A fun way for toddlers to explore their world. Design a simple wooden car with wheels that turn, or a whimsical animal they can pull along.
  • Wooden puzzles: Introduce your little one to the joy of problem-solving. Make a simple shape puzzle with a few large pieces or create a more complex picture puzzle.

Wooden Toys for Older Kids

  • Wooden cars and trucks: Durable and imaginative, wooden vehicles are perfect for imaginative play. You can make a simple car or a more complex truck with a working bed.
  • Building blocks: Encourage creative construction with colorful wooden blocks. You can create simple shapes or get more elaborate with towers, bridges, and houses.
  • Wooden dolls and furniture: Bring your child’s imaginary world to life with handmade wooden dolls and furniture. You can create dollhouses, beds, chairs, and more.

Giving Your Wooden Toys a Vintage Touch

Now, let’s add that extra vintage charm to your creations. Here are some tips for giving your wooden toys that timeless look:

  • Natural finishes: For a classic, rustic feel, use a natural oil finish like tung oil or linseed oil. These finishes enhance the natural beauty of the wood and offer a protective layer.
  • Distressed paint: Give your toys a well-loved look by using a distressed paint technique. Apply a layer of paint, then sand it back in areas to reveal the wood underneath.
  • Vintage-inspired colors: Choose colors that evoke a sense of nostalgia, like soft pastels, muted blues, or warm browns.
  • Hand-painted details: Add personality to your toys with hand-painted details. Think simple floral patterns, whimsical animal faces, or even lettering.
  • Metal accents: For a touch of vintage elegance, incorporate metal accents like hinges, screws, or wheels.

Experiment with different techniques and see what works best for your style. Remember, there’s no right or wrong way to achieve a vintage look. Have fun with it and let your creativity guide you.

Safety First

Safety is paramount when making toys for children. Always use non-toxic paints and finishes. Avoid using sharp edges or small pieces that could be a choking hazard. Make sure all surfaces are smooth and free of splinters. And, of course, always supervise children when they’re playing with wooden toys.

Adding a Personal Touch

One of the best things about making wooden toys is that you can truly personalize them. Think about the child you’re making the toy for and their interests. Do they love animals? Cars? Fairytales? Incorporate these themes into your design. Add extra details, unique colors, or even hand-painted characters. Every little touch makes your creations special and memorable.

Sharing Your Creations

Once you’ve created your vintage-inspired wooden toys, don’t be shy about sharing them with the world! You can sell them at craft fairs, online marketplaces, or even donate them to local charities. You can also create a blog or social media page to showcase your creations and connect with other woodworking enthusiasts. Spread the love of classic wooden toys and inspire others to create their own.

Commonly Asked Questions

How long does it take to make a wooden toy?

The time it takes to make a wooden toy depends on the complexity of the design and your experience level. A simple toy like a wooden car can take a few hours, while a more intricate project like a rocking horse could take several days.

What are some good resources for learning more about woodworking?

There are many great resources available for learning woodworking. You can find online tutorials, books, and woodworking courses both in person and online. Local libraries and community colleges often offer woodworking classes as well.

Is it expensive to get started with woodworking?

You can get started with woodworking with a relatively small investment. Basic tools like a saw, sandpaper, and a drill are readily available at affordable prices. As you progress, you can gradually add more tools to your collection.

Do I need to be a professional woodworker to make wooden toys?

Absolutely not! Woodworking is a skill that can be learned by anyone. Even if you’re a beginner, you can create beautiful and functional wooden toys with practice and patience. Start with simple designs and gradually work your way up to more challenging projects.

Building wooden toys with a classic or vintage appeal is a rewarding hobby that allows you to create unique and cherished playthings. With the right wood, tools, and a little creativity, you can bring timeless charm to your creations and create gifts that will be treasured for generations to come. So, what are you waiting for? Get your hands dirty, unleash your inner woodworker, and start crafting some vintage-inspired wooden toys today!

Share:

Simple Woodworking Projects You Can Make and Sell

Simple Woodworking Projects You Can Make and Sell

Simple Woodworking Projects You Can Make and Sell

In the realm of woodworking, the allure of crafting beautiful and functional objects is undeniable. Yet, for many aspiring woodworkers, the prospect of undertaking complex projects can seem daunting. Fear not, for the world of woodworking offers a plethora of simple projects that are both achievable and marketable. These projects can serve as stepping stones for beginners, allowing them to hone their skills while exploring the rewarding experience of creating handcrafted items that can be sold for profit.

This article will delve into a range of simple woodworking projects that are perfect for those just starting their journey into the craft. From charming coasters to elegant serving trays, each project provides an opportunity to develop woodworking skills, experiment with different techniques, and create products that are both aesthetically pleasing and in high demand.

Essential Tools and Materials

Before embarking on any woodworking project, it's crucial to gather the necessary tools and materials. While the specific requirements may vary depending on the chosen project, there are some essential tools that form the foundation of any woodworking endeavor. These include:

  • Hand saw: For making basic cuts and shaping wood.
  • Measuring tape: For ensuring accuracy in measurements.
  • Wood glue: For securely bonding wood pieces together.
  • Clamps: For holding wood pieces firmly in place while gluing.
  • Sandpaper: For smoothing wood surfaces and creating a polished finish.
  • Wood stain or paint: For enhancing the appearance of the wood and adding color.
  • Finishing oil or varnish: For protecting the wood from scratches and moisture.

The type of wood used will depend on the specific project and desired aesthetic. Common options include pine, oak, walnut, and cherry. Remember to select wood that is free of knots, cracks, or other imperfections for optimal results.

Simple Woodworking Projects for Beginners

Now, let's explore a selection of simple woodworking projects that are ideal for those new to the craft. These projects are designed to be achievable with basic tools and techniques, providing a satisfying experience for beginners.

Coasters

Coasters are a timeless and practical addition to any home. They protect surfaces from heat and spills, while adding a touch of personal style. These projects are a perfect introduction to woodworking as they involve simple cuts and sanding.

  • Materials: Wooden squares, wood glue, sandpaper, wood stain or paint, protective sealant.
  • Steps:
  • Cut the wooden squares to your desired size.
  • Sand the edges and surfaces for a smooth finish.
  • Apply wood stain or paint, if desired.
  • Apply a protective sealant for durability.

Coasters can be made in various shapes, sizes, and designs, offering creative freedom. Experiment with different wood species, stains, or embellishments to create unique and appealing coasters.

Serving Trays

Serving trays are another versatile project that combines functionality and aesthetics. They can be used for serving food, drinks, or organizing household items. These projects involve basic cuts, sanding, and joining techniques.

  • Materials: Wooden boards, wood glue, clamps, sandpaper, wood stain or paint, finishing oil or varnish, handles (optional).
  • Steps:
  • Cut the wooden boards to the desired dimensions for the tray.
  • Join the boards together using wood glue and clamps.
  • Sand the surfaces and edges for a smooth finish.
  • Apply wood stain or paint, if desired.
  • Apply a finishing oil or varnish for protection.
  • Attach handles, if desired.

Serving trays can be customized with intricate carvings, decorative inlays, or engraved designs. Explore different shapes, sizes, and styles to cater to various tastes.

Picture Frames

Picture frames are a classic woodworking project that allows for personal expression. They provide a stylish way to display cherished photographs or artwork. These projects involve precise cuts and joinery techniques.

  • Materials: Wooden strips, miter saw or hand saw, wood glue, clamps, sandpaper, wood stain or paint, finishing oil or varnish, glass or acrylic sheet (optional).
  • Steps:
  • Cut the wooden strips to the desired dimensions using a miter saw or hand saw.
  • Join the strips together at the corners using wood glue and clamps, ensuring precise miter cuts.
  • Sand the surfaces and edges for a smooth finish.
  • Apply wood stain or paint, if desired.
  • Apply a finishing oil or varnish for protection.
  • Attach glass or acrylic sheet, if desired.

Picture frames can be made in various styles, ranging from minimalist to ornate. Experiment with different wood species, stains, or decorative embellishments to create frames that complement the artwork they enclose.

Cutting Boards

Cutting boards are essential kitchen tools that provide a durable and hygienic surface for food preparation. These projects involve simple cuts, sanding, and finishing techniques.

  • Materials: Wooden planks, wood glue, clamps, sandpaper, food-safe oil or wax.
  • Steps:
  • Cut the wooden planks to the desired dimensions for the cutting board.
  • Join the planks together using wood glue and clamps.
  • Sand the surfaces and edges for a smooth finish.
  • Apply a food-safe oil or wax for protection and moisture resistance.

Cutting boards can be customized with decorative handles, engraved designs, or contrasting wood species for a unique look.

Wooden Signs

Wooden signs are a charming and versatile way to display messages, add personality to a space, or promote a business. These projects involve basic cuts, sanding, and lettering techniques.

  • Materials: Wooden board, wood glue, clamps, sandpaper, wood stain or paint, wood burning tool or stencils, finishing oil or varnish.
  • Steps:
  • Cut the wooden board to the desired dimensions.
  • Sand the surfaces and edges for a smooth finish.
  • Apply wood stain or paint, if desired.
  • Use a wood burning tool or stencils to create the desired lettering or designs.
  • Apply a finishing oil or varnish for protection.

Wooden signs can be made in various shapes, sizes, and styles. Experiment with different fonts, colors, and embellishments to create eye-catching and personalized signs.

Marketing and Selling Your Creations

Once you've honed your woodworking skills and created a selection of beautiful and functional items, it's time to consider how to market and sell your creations. There are various platforms and strategies to explore:

  • Online Marketplaces: Sites like Etsy, Amazon Handmade, and eBay provide a readily accessible platform to showcase and sell handcrafted goods to a global audience.
  • Local Craft Fairs and Markets: Participating in local craft fairs and markets allows you to connect directly with potential customers, showcase your work, and build relationships.
  • Social Media: Utilize platforms like Instagram, Facebook, and Pinterest to create a visual portfolio of your work, connect with potential customers, and promote upcoming events.
  • Word-of-Mouth: Don't underestimate the power of word-of-mouth marketing. Share your creations with friends, family, and colleagues, and encourage them to spread the word.

When pricing your woodworking projects, consider the cost of materials, time spent, and desired profit margin. Research similar items on online marketplaces or at local craft fairs to gauge market prices.

Conclusion

Simple woodworking projects offer a fantastic starting point for beginners looking to explore the craft and create marketable goods. From coasters and serving trays to picture frames and cutting boards, these projects are achievable with basic tools and techniques, providing a rewarding experience for both the creator and the buyer.

By combining your woodworking skills with effective marketing strategies, you can turn your passion into a fulfilling side hustle or even a full-fledged business. So, embrace the joy of woodworking and unleash your creativity to craft beautiful and functional objects that will be cherished for years to come.

Share:

Fast and Easy Birdhouse Projects for Extra Cash

Fast and Easy Birdhouse Projects for Extra Cash

Fast and Easy Birdhouse Projects for Extra Cash

Hey there, fellow crafters! Looking for a fun, rewarding way to make some extra cash? Forget complicated crafts that take forever – let's talk about birdhouses! They're surprisingly simple to make, relatively inexpensive to produce, and there's always a demand, especially during spring and summer. Think of all the happy chirping birds and happy jingling coins in your pocket! Let’s dive into some fast and easy birdhouse projects that can easily boost your income.

Finding Your Niche: What Kind of Birdhouse Builder Are You?

Before we jump into the specifics, let's figure out your style. Are you a minimalist? A rustic craftsman? Do you prefer sleek modern designs or charmingly quirky ones? Defining your niche helps you target your market and stand out from the crowd.

The Minimalist Maestro

If you’re a minimalist, focus on clean lines and simple designs. Think unadorned wood, maybe a single coat of a natural-toned stain. These birdhouses appeal to those who appreciate simplicity and elegance. They’re quick to make, and you can increase your profit margin by keeping materials costs low.

The Rustic Artisan

Rustic birdhouses are always a hit! Think reclaimed wood, slightly weathered finishes, and maybe even some added natural elements like twigs or small branches. This style evokes a sense of warmth and nature, appealing to a broad customer base. You could even incorporate different wood types for a more textured look.

The Quirky Creator

Let your creativity run wild! Paint them bright colors, add fun details like little doors or whimsical roof designs. Don't be afraid to experiment with different shapes and sizes. These birdhouses are perfect for attracting customers who appreciate unique and fun designs.

The Modern Minimalist

Combine the best of both worlds! Use clean, modern lines but with interesting wood choices or a pop of color. Think geometric shapes crafted from high-quality wood, maybe with a sleek metal roof. This sophisticated style appeals to a more discerning customer base willing to pay a premium.

Choosing Your Materials: Keeping it Budget-Friendly

The beauty of birdhouse building is that it doesn't require expensive materials. You can often find great deals on scrap wood at lumber yards, home improvement stores, or even for free from friends and neighbors doing renovations.

Wood Selection: A Guide for Beginners

Cedar and pine are excellent choices for their durability and resistance to rot. They're also relatively inexpensive. Avoid using treated lumber, as the chemicals can be harmful to birds. If you are working with reclaimed wood, make sure it’s clean and free of any hazardous materials.

Hardware and Finishing Touches

You'll need basic tools like a saw (hand saw or circular saw), a drill, screws, and sandpaper. For finishing, consider non-toxic paints, stains, or varnishes designed for outdoor use. A simple coat of weather-resistant sealant will protect your birdhouses from the elements and add to their longevity.

Simple Birdhouse Designs: Easy to Make, Easy to Sell

Let's talk about some easy-to-make designs that are guaranteed to sell.

The Classic A-Frame

This is the quintessential birdhouse design. It's simple to construct, requiring just a few basic cuts and some assembly. The angled roof helps shed water effectively. You can easily customize it with different sizes and paint schemes.

The Simple Box Style

This design is even easier than the A-frame. It's essentially a box with a small entrance hole. Perfect for beginners, it's a great way to build up your skills and speed. You can add a small perch or decorate the exterior with paint or natural elements.

The Hanging Birdhouse

These are popular because they're easy to hang from tree branches or porch ceilings. You can add a simple hook or even incorporate a rope or chain into the design itself. They are particularly appealing for smaller birds.

Boosting Your Birdhouse Business: Selling Your Creations

Now that you've crafted your beautiful birdhouses, it’s time to sell them!

Online Marketplaces

Etsy, Facebook Marketplace, and eBay are great platforms to reach a wider audience. High-quality photos are essential! Show off your craftsmanship and highlight the unique features of your birdhouses. Remember to clearly state the dimensions and materials used. Good descriptions and positive reviews are key to building your reputation.

Local Craft Fairs and Markets

Participating in local craft fairs and farmers' markets gives you a chance to interact directly with customers, answer questions, and showcase your creations in person. This personal touch can make a big difference in sales.

Direct Sales to Local Businesses

Approach local garden centers, pet stores, or even home décor shops and inquire about selling your birdhouses on consignment. This is a great way to reach a targeted customer base and avoid the hassle of managing online sales.

Tips for Success: Quality, Consistency, and Marketing

Focus on Quality: Use good materials and take your time to create well-made birdhouses. People are willing to pay more for quality craftsmanship.

Maintain Consistency: Once you find a design that sells well, stick with it for a while. This helps you streamline your production process and build a recognizable brand.

Marketing is Key: Use social media to showcase your birdhouses, share customer testimonials, and run occasional promotions. Consider creating a simple website or online store to showcase your creations.

Pricing Strategically: Research your competitors' pricing and factor in your material costs, labor, and desired profit margin. Don't undervalue your work!

Frequently Asked Questions

Q: What tools do I need to make birdhouses?

A: You’ll primarily need a saw, a drill, screws, sandpaper, and measuring tape. A clamp can also be helpful.

Q: What kind of wood should I use?

A: Cedar and pine are excellent choices because of their durability and resistance to rot. Avoid treated lumber.

Q: How much can I realistically make selling birdhouses?

A: It depends on your production rate, your pricing, and your sales channels. With consistent effort, you can earn a decent supplemental income.

Q: How do I protect my birdhouses from the weather?

A: Apply a non-toxic, weather-resistant sealant or varnish to protect them from rain, snow, and sun.

Q: Where can I sell my birdhouses?

A: Online marketplaces (Etsy, Facebook Marketplace, eBay), local craft fairs, farmers' markets, and direct sales to local businesses are all good options.

There you have it! Start crafting, start selling, and start enjoying that extra cash! Remember to have fun with it – your passion will show in your work and attract customers. Good luck!

Share:

人気の投稿

Powered by Blogger.