Easy and budget-friendly woodworking ideas for creating personalized wood crafts and home accents.

Showing posts with label Project. Show all posts

How to Craft a Wooden Plant Stand with a Scandinavian or Mid-Century Modern Look

How to Craft a Wooden Plant Stand with a Scandinavian or Mid-Century Modern Look

Craft a Wooden Plant Stand with Scandinavian or Mid-Century Modern Flair

Elevate your greenery with a stylish wooden plant stand that embodies the minimalist aesthetic of Scandinavian or Mid-Century Modern design. Whether you're a seasoned woodworker or a DIY novice, this guide will walk you through crafting a unique and functional piece that complements your home's decor.

Choosing Your Materials

The heart of your plant stand lies in the choice of wood. Opt for materials known for their durability and natural beauty, echoing the core values of Scandinavian and Mid-Century design. Here are some excellent choices:

Scandinavian Style

Embrace the light and airy feel of Scandinavian design with:

  • Pine: Its soft, pale hue and affordability make pine a classic choice for Scandinavian projects.
  • Birch: Birch's natural grain patterns and light color add warmth and sophistication.

Mid-Century Modern Style

Embrace the bolder aesthetic of Mid-Century Modern with:

  • Walnut: Walnut's rich, dark tones and distinctive grain patterns deliver a timeless appeal.
  • Teak: Teak boasts a unique, golden hue and durability that ages gracefully.

Designing Your Plant Stand

Before diving into construction, sketch your plant stand's design. Consider:

Shape and Size

Choose from classic shapes like a round, square, or rectangular base. Determine the height and width that best accommodate your plants and your space.

Legs

Scandinavian designs often favor simple, tapered legs or hairpin legs. Mid-Century Modern styles often feature splayed legs for a more dramatic look.

Shelves

Decide on the number of shelves and their configuration. A single shelf provides a simple platform, while multiple shelves allow you to display a collection of plants.

Building Your Plant Stand

Now for the hands-on part!

Cutting and Assembling

Cut your wood pieces to your desired dimensions using a saw. Join the base and legs securely with wood glue and screws.

Adding Shelves

Attach shelves to the base, ensuring stability and alignment. You can use brackets, cleats, or dowels to create a secure and aesthetically pleasing finish.

Finishing Touches

Enhance your plant stand's beauty and durability with a finishing touch.

Sanding and Staining

Sand your wood smooth to create a uniform surface. Apply a stain in a color that complements your chosen wood and desired style.

Sealing

Seal your stand with a clear polyurethane or wax to protect it from scratches, moisture, and daily wear and tear.

Displaying Your Greenery

Your plant stand is ready to showcase your favorite houseplants! Arrange them thoughtfully, taking into account light requirements and creating a visually pleasing display.

With your own handcrafted plant stand, you'll have a stylish and functional piece that enhances your home's ambiance and celebrates the beauty of your plants.

Share:

Profitable Wood Toolbox Organizer Projects to Sell

Profitable Wood Toolbox Organizer Projects to Sell

Profitable Wood Toolbox Organizer Projects to Sell

Hey there, woodworking enthusiasts! Are you looking for some profitable wood projects to sell? Look no further than toolbox organizers! These practical and customizable projects are always in demand, especially among tradespeople and DIYers. Plus, they're relatively simple to make, even for beginners. Let's dive into some woodworking projects you can start building and selling today!

Toolbox Organizer Ideas: Where Function Meets Form

The beauty of toolbox organizers is that they can be as simple or as elaborate as you like. Here are some popular project ideas to get your creative juices flowing:

Classic Tool Trays

These are the bread and butter of toolbox organization. They provide a simple, flat surface for tools to be laid out neatly. You can make them in different sizes to accommodate various toolboxes.

Dividing Tool Trays

Take the classic tool tray a step further by adding dividers. These partitions create dedicated spaces for specific tools, keeping everything in its place and preventing them from clanging together.

Tool Roll-Ups

These are perfect for storing smaller tools and accessories. They're compact, roll up neatly, and can be easily transported. You can use different fabrics or leathers for a more custom look.

Specialty Tool Organizers

Think outside the box! You can create organizers for specific tool types, such as:

  • Screwdriver organizers: With slots for different screwdriver bits.
  • Hammer holders: With a built-in stand for easy access.
  • Drill bit organizers: With compartments to hold various bit sizes.
  • Level holders: With a secure way to store and carry levels.
  • Measuring tape holders: With clips or loops to keep the tape secure.

Multi-Purpose Toolboxes

Combine your woodworking skills with your imagination! Create toolboxes with built-in organizers, such as:

  • Workbenches with storage: Add drawers, shelves, and tool compartments to the workbench itself.
  • Mobile tool carts: Construct sturdy carts with rolling wheels, complete with drawers, shelves, and tool holders.
  • Tool cabinets: Make a cabinet with lockable doors and custom organizers inside.

Tips for Building Profitable Wood Toolbox Organizers

Now that you're brimming with ideas, let's get practical. Here are some tips to ensure your projects are high-quality, desirable, and profitable:

Choose the Right Wood

For durability and longevity, choose hardwoods like oak, maple, or cherry. You can also use plywood for less expensive projects.

Focus on Functionality

Remember, these organizers are primarily functional. Make sure your designs are practical, easy to use, and cater to the needs of your target audience.

Prioritize Quality Craftsmanship

Workmanship is everything! Pay attention to details like smooth finishes, sturdy construction, and precise cuts.

Add Personalized Touches

Don't underestimate the power of personalization! Offer customers customization options like:

  • Custom dimensions: To fit specific toolboxes.
  • Laser engraving: Add the customer's name, initials, or logo.
  • Stain and finish options: Provide a range of wood finishes to suit different preferences.
  • Hardware choices: Allow customers to select different handles, hinges, or fasteners.

Price Your Projects Competitively

Research similar products online and in your local area. Factor in your materials, labor, and desired profit margin when setting your prices.

Market Your Products Effectively

Spread the word! Promote your work online through social media, your own website, or online marketplaces. Consider selling locally at craft fairs or woodworking events.

Marketing Your Wood Toolbox Organizers

You've built the perfect toolbox organizers, now it's time to get them in the hands of your customers! Here are some marketing tips to help you succeed:

Show Off Your Skills

Take high-quality photos and videos of your projects. Showcase the craftsmanship, functionality, and unique features. Share them online and in your marketing materials.

Highlight the Benefits

Emphasize how your organizers will make life easier for tradespeople and DIYers. Mention how they'll improve organization, productivity, and tool protection.

Target Your Audience

Identify who your ideal customer is. Are you targeting contractors, electricians, plumbers, or hobbyists? Customize your marketing messages to resonate with their specific needs.

Engage Online

Build an online presence! Use social media platforms, create a website or blog, and consider selling on online marketplaces like Etsy or Amazon Handmade. Engage with your audience, respond to comments, and build relationships.

Offer Incentives

Attract customers with special offers, discounts, or bundled deals. Consider free shipping or a discount for multiple purchases.

Get Feedback

Ask customers for their feedback on your products and your service. Use this information to improve your offerings and refine your marketing strategies.

Frequently Asked Questions

Here are some questions you might have about selling wood toolbox organizers:

How do I get started selling my wood toolbox organizers?

Start by creating a small batch of organizers to test the market. You can sell them locally at craft fairs or online marketplaces. Gather feedback and refine your designs and marketing strategies.

What are the best places to sell wood toolbox organizers?

Online marketplaces like Etsy, Amazon Handmade, and Facebook Marketplace are great options. You can also sell through your own website or social media platforms. Consider selling locally at craft fairs, woodworking events, or directly to tradespeople in your area.

How much can I expect to make selling wood toolbox organizers?

The potential profit depends on your materials, labor, pricing, and sales volume. Research competitors, consider your costs, and set prices that are competitive yet profitable.

What are some tips for photographing my wood toolbox organizers?

Use good lighting, a clean background, and showcase the functionality of your organizers. Highlight the craftsmanship and unique features of your products.

How can I build a customer base for my woodworking business?

Engage online, build relationships, offer excellent customer service, and consistently create high-quality products. Participate in online woodworking communities, network with other businesses, and promote your work through social media and online marketplaces.

Remember, building a successful woodworking business takes time, effort, and a passion for your craft. But with dedication and the right strategies, you can turn your woodworking hobby into a thriving business. So get out there, build some amazing toolbox organizers, and watch your business grow!

Share:

How to Build Wooden Shoe Racks for Under-the-Bed Storage

How to Build Wooden Shoe Racks for Under-the-Bed Storage

Build Your Own Under-the-Bed Shoe Storage: A DIY Guide

Tired of shoe clutter taking over your entryway or bedroom? You're not alone! Many people struggle with shoe storage, especially if you're a sneakerhead or just have a lot of footwear. But what if I told you there's a simple and stylish solution right under your bed? That's right, building your own under-the-bed shoe racks is a fantastic way to maximize your space and keep those kicks organized. And the best part? It's a DIY project even beginners can tackle!

Ready to get started? Let's dive into the world of under-the-bed shoe rack building. We'll cover everything from choosing the right materials to assembling your new storage solution with step-by-step instructions. So, grab your tools and let's build!

Materials You'll Need

Before we get our hands dirty, let's gather all the necessary materials. You'll need:

  • Wood: Pine or plywood are great budget-friendly options, while hardwoods like oak or maple add durability and a classic touch. You'll need boards for the rack's frame and shelves. Think about how many shelves you need based on your shoe collection.
  • Wood Glue: This helps ensure sturdy and long-lasting connections.
  • Wood Screws: Choose screws that are long enough to penetrate through the boards and into the frame.
  • Screwdriver or Drill: Make sure you have a driver bit that matches your screw size.
  • Sandpaper: Sand the wood to create a smooth surface and prevent splinters.
  • Wood Stain or Paint (Optional): Personalize your shoe rack with a stain or paint that complements your decor.
  • Measuring Tape: Crucial for getting your measurements right.
  • Pencil: For marking cuts and assembly lines.
  • Safety Glasses: Protect your eyes from sawdust and flying debris.
  • Saw: Choose a saw that's comfortable to use and appropriate for the thickness of your wood. A circular saw or jigsaw is perfect for precise cuts.
  • Clamps: Help hold pieces together while gluing and screwing.

Tip: If you don't have all the necessary tools, consider renting them from a local hardware store. It's a great way to save money on expensive tools you might only use once.

Planning Your Shoe Rack Design

Now that you've gathered your materials, let's plan the perfect shoe rack for your needs. Think about:

  • Dimensions: Measure the space under your bed carefully to determine the width and depth of your shoe rack. Remember to leave some clearance for easy access and sliding the rack in and out.
  • Height: Consider the height of your shoes. You'll need enough vertical space for your tallest heels or boots.
  • Number of Shelves: How many shelves do you need to store your entire collection comfortably? More shelves mean more storage space, but it can also make the rack heavier and harder to move. Strike a balance based on your needs.
  • Style: Do you want a simple, minimalist design, or something more elaborate? You can add decorative touches like trim, molding, or decorative hardware. Let your creativity run wild!
  • Mobility: Do you want to be able to easily slide the rack in and out from under the bed? If so, consider adding casters to the bottom of the rack.

Step-by-Step Construction

Get ready to put your design into action! Here's a detailed guide for building your under-the-bed shoe rack:

1. Cut the Wood

  • Cut your wood boards to the desired dimensions according to your plan.
  • Use a measuring tape and pencil to mark your cuts precisely.
  • Double-check your measurements before making any cuts!

2. Build the Frame

  • Create the frame of your shoe rack by joining together the longer side pieces.
  • Align the boards with the edges flush and use wood glue and screws to secure them together.
  • Repeat this process for the shorter side pieces, creating a rectangular frame.
  • Use clamps to hold the boards in place while the glue dries.

3. Add the Shelves

  • Cut the shelf boards to the width of your frame.
  • Attach the shelves to the inside of the frame, using wood glue and screws to ensure stability.
  • Space the shelves according to your desired shoe storage needs.

4. Sand and Finish

  • Once the glue has dried completely, sand the entire surface of the shoe rack with sandpaper. This creates a smooth finish and removes any rough edges.
  • Apply wood stain or paint, if desired, to add color and protect the wood. Follow the manufacturer's instructions for application and drying time.

5. Optional: Add Casters

  • For added mobility, attach casters to the bottom of the shoe rack.
  • This will make it easier to slide the rack in and out from under the bed.

Tips for Success

Here are some helpful tips to make your under-the-bed shoe rack building experience smoother:

  • Plan ahead: Sketch out your shoe rack design before you start cutting wood. This will help you visualize the final product and prevent mistakes.
  • Measure twice, cut once: Accuracy is crucial in woodworking. Double-check your measurements before making any cuts to ensure the pieces fit together perfectly.
  • Use clamps: Clamps are essential for holding pieces together while gluing and screwing. They prevent the wood from shifting and ensure a strong bond.
  • Sand thoroughly: Thorough sanding is important for a smooth and splinter-free finish. Sand the entire surface of your shoe rack, paying special attention to the edges and corners.
  • Don't rush the drying time: Allow the glue to dry completely before moving on to the next step. This ensures a strong and lasting bond.
  • Have fun! Building a shoe rack can be a rewarding project. Enjoy the process, and don't be afraid to get creative.

Commonly Asked Questions

Here are some frequently asked questions about under-the-bed shoe racks:

How much does it cost to build a shoe rack?

The cost of building a shoe rack varies depending on the materials you choose. Pine and plywood are budget-friendly options, while hardwoods like oak or maple will be more expensive. You can expect to spend anywhere from $20 to $100 for materials, depending on your design and choice of wood.

What is the best type of wood to use for a shoe rack?

Pine and plywood are excellent choices for shoe racks because they are affordable, lightweight, and easy to work with. Hardwoods like oak or maple are more durable and resistant to scratches, but they are also more expensive. Ultimately, the best wood for your shoe rack depends on your budget and desired aesthetic.

Can I stain or paint a shoe rack?

Absolutely! Staining or painting a shoe rack is a great way to personalize it and match your décor. Choose a stain or paint color that complements your bedroom or entryway. You can also add decorative touches like stencils, trim, or molding.

How do I make a shoe rack more durable?

Use high-quality wood and hardware. Choose screws that are long enough to penetrate through the boards and into the frame. Apply wood glue liberally to create a strong bond between the pieces. And don't forget to sand thoroughly to prevent splinters and ensure a smooth finish.

Now that you have all the information you need, grab your tools, get creative, and start building your own under-the-bed shoe rack! It's a fun and rewarding project that will help you get organized and make the most of your space.

Share:

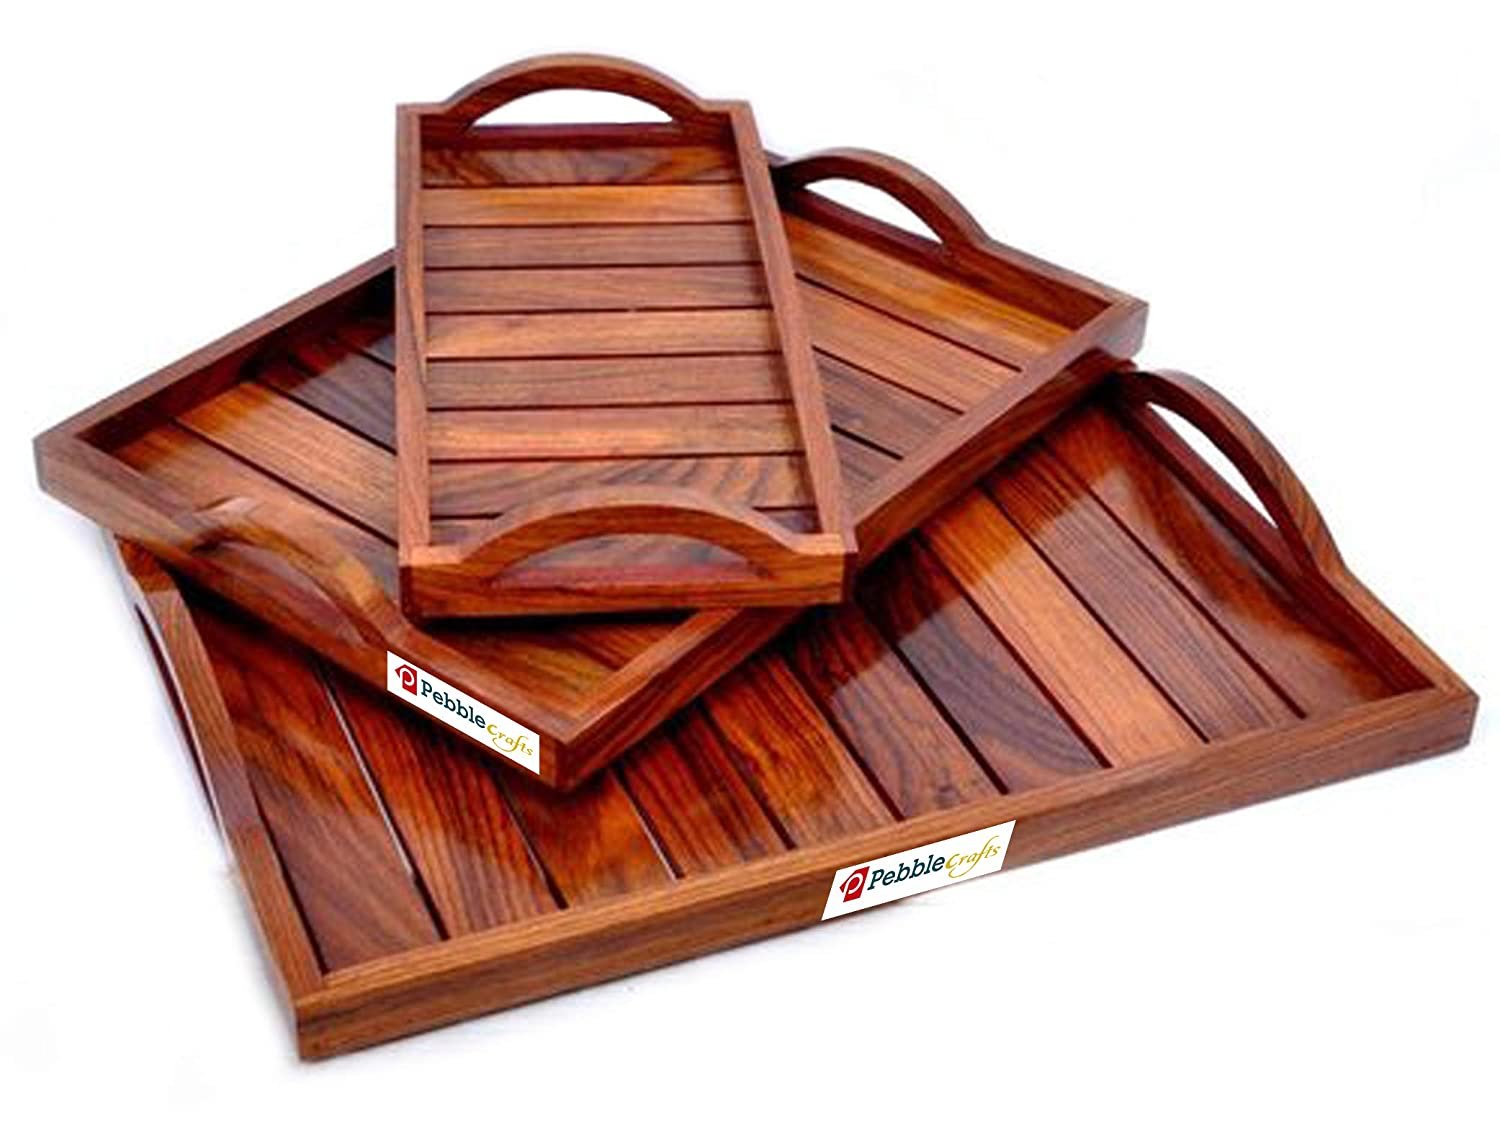
Wooden Serving Trays That Are Both Functional and Stylish

Wooden Serving Trays That Are Both Functional and Stylish

Wooden Serving Trays: Blending Functionality and Elegance

In the realm of culinary artistry, serving trays transcend mere utility. They emerge as canvases upon which to showcase culinary masterpieces, elevating dining experiences to new heights. Wooden serving trays, in particular, possess an inherent charm that seamlessly blends functionality with aesthetic appeal. Their warm, natural textures and timeless designs impart an air of sophistication to any setting. Whether adorning a formal dinner table or adding a touch of rustic charm to a casual gathering, these versatile pieces serve as the foundation for unforgettable moments.

A Symphony of Functionality and Style

Wooden serving trays embody the essence of practicality intertwined with elegance. Their robust construction ensures durability, capable of withstanding the weight of even the most elaborate culinary creations. The generous surface area provides ample space for a multitude of dishes, allowing for a cohesive and visually pleasing presentation. Whether serving appetizers, desserts, or a complete meal, wooden serving trays offer a stable and secure platform for transporting and showcasing culinary delights.

A Culinary Canvas

The smooth, even surface of a wooden serving tray serves as a blank canvas for culinary expression. It provides a neutral backdrop that allows the vibrant colors and intricate details of dishes to take center stage. The natural warmth of the wood enhances the visual appeal of food, creating a harmonious symphony of textures and hues.

Versatility in Design

Wooden serving trays are available in a multitude of shapes, sizes, and finishes, offering boundless possibilities for customization. From rectangular trays that exude classic elegance to oval trays that bring a touch of whimsy, there is a design to complement every taste and style. The choice of wood species, such as acacia, mango, or teak, influences the grain pattern and color, adding a unique character to each piece.

The Allure of Natural Beauty

The intrinsic appeal of wood lies in its natural beauty. Each piece of wood possesses a unique grain pattern and texture, making each serving tray a one-of-a-kind masterpiece. The warm hues and tactile quality of wood evoke a sense of comfort and sophistication, adding a touch of rustic charm to any setting. Whether polished to a high gloss or left with a natural finish, wooden serving trays bring a touch of organic elegance to the dining experience.

A Touch of Rustic Charm

For a more relaxed and informal setting, wooden serving trays with a rustic finish are ideal. These trays often retain the natural imperfections of the wood, showcasing knots and grain patterns that add character and warmth. Their unpolished aesthetic complements casual gatherings, adding a touch of earthy charm to the ambiance.

Sophisticated Elegance

When a touch of sophistication is desired, wooden serving trays with polished finishes are the perfect choice. These trays often feature smooth, sleek surfaces that reflect light, enhancing their elegant appearance. Their polished aesthetic complements formal dinners and upscale gatherings, creating a refined and sophisticated ambiance.

Functionality Beyond Serving

Wooden serving trays transcend their culinary purpose, embracing a multitude of applications throughout the home. Their versatility extends beyond the dining table, finding a place in various living spaces.

Home Décor Essentials

Wooden serving trays can transform into decorative accents, adding warmth and charm to any room. They can be styled with candles, flowers, or decorative objects, creating a visually captivating centerpiece for a coffee table or console. Their natural beauty complements a range of interior design styles, from farmhouse chic to modern minimalist.

Practical Solutions for Everyday Life

Wooden serving trays offer practical solutions for everyday tasks. They can be used to organize essentials in a bathroom or bedroom, providing a stylish and functional platform for toiletries, jewelry, or personal accessories. In a living room, they can serve as a convenient way to gather remote controls, magazines, or books, keeping clutter at bay.

Maintaining the Beauty of Wooden Serving Trays

To preserve the beauty and functionality of wooden serving trays, proper care and maintenance are essential.

Cleaning and Care

Wooden serving trays are generally easy to clean. For everyday cleaning, simply wipe them down with a damp cloth and mild soap. Avoid using harsh chemicals or abrasive cleaners, as they can damage the wood's finish. For more stubborn stains, a gentle wood cleaner can be used. After cleaning, dry the tray thoroughly to prevent warping.

Protecting the Finish

To prevent scratches and stains, apply a food-safe wood sealant or oil to the surface of the tray. Regular application of oil or sealant will help to maintain the tray's moisture balance and protect it from the elements. When not in use, store wooden trays in a cool, dry place, away from direct sunlight.

Conclusion

Wooden serving trays seamlessly merge functionality with style, adding a touch of warmth and elegance to any setting. Their natural beauty, durability, and versatility make them indispensable pieces for both culinary enthusiasts and home décor aficionados. Whether serving a gourmet meal or creating a cozy ambiance, wooden serving trays offer a timeless and enduring element of sophistication, elevating everyday moments to extraordinary experiences.

Share:

Easy and Affordable Wood Signs to Make and Sell

Easy and Affordable Wood Signs to Make and Sell

Easy and Affordable Wood Signs to Make and Sell

Hey there, crafty friends! Are you looking for a fun and profitable side hustle? Look no further than making and selling wood signs! They're trendy, customizable, and surprisingly easy to create. Plus, you can get started with minimal investment, making it a super affordable venture.

Getting Started with Wood Signs

Before you dive into the world of wood signs, let's talk about the basics. You'll need a few essential tools and supplies, but don't worry, you can find them easily at your local craft store or online. Here's what you'll need:

  • Wood: Pine is a popular choice for beginners because it's affordable and easy to work with. You can find pre-cut boards or cut your own. Experiment with different sizes and shapes to find your style.
  • Stain: Stain adds a beautiful color and finish to your wood signs. Choose from a range of colors and finishes, from light and natural to rich and dark.
  • Paint: Use acrylic paint for lettering and design details. It dries quickly and comes in a rainbow of colors.
  • Paintbrushes: You'll need brushes for both painting the background and applying lettering. Choose a variety of sizes for different tasks.
  • Stencil: Stencils are great for creating crisp lettering and designs. You can buy pre-made stencils or create your own using vinyl or contact paper.
  • Sandpaper: Sanding smooths out the wood surface and prepares it for painting. Use different grits to achieve the desired finish.
  • Polyurethane: Polyurethane protects your finished sign from scratches and water damage. You can apply it with a brush or a spray can.

Easy Wood Sign Ideas

Now that you've got your supplies, it's time to choose a project! Here are a few easy and popular wood sign ideas that are sure to sell well:

Welcome Signs

Welcome signs are a classic and always in demand. They can be personalized for different occasions, such as a housewarming, wedding, or birthday. Add a personal touch with names, dates, or special messages.

Farmhouse Style Signs

Farmhouse style is super trendy right now, so these signs are always a hit. Think rustic designs with inspirational quotes, farmhouse sayings, and cute animals.

Kitchen and Bathroom Signs

These signs are perfect for adding a touch of personality to any home. Create signs with funny quotes, recipes, or inspirational messages for the kitchen. For the bathroom, think quotes about relaxation, hygiene, or funny sayings.

Seasonal Signs

Capitalize on holidays and seasons by creating themed signs. Think Halloween, Thanksgiving, Christmas, and springtime.

Personalized Signs

Offer personalized signs with names, dates, and special messages. These make great gifts for birthdays, anniversaries, and other occasions.

Tips for Selling Your Wood Signs

Now that you've created some beautiful wood signs, it's time to sell them! Here are a few tips to help you get started:

  • Set up an online shop: Create a website or use online platforms like Etsy or Shopify to sell your signs.
  • Sell at local craft fairs and markets: Get your signs in front of potential customers by selling at local events.
  • Promote your business on social media: Use platforms like Instagram, Facebook, and Pinterest to showcase your work and attract customers.
  • Offer custom orders: Allow customers to personalize their signs with their own names, dates, and messages. This adds value and allows you to create unique pieces.
  • Provide excellent customer service: Respond to inquiries quickly, ship orders promptly, and offer refunds or exchanges if needed.

Pricing Your Wood Signs

Pricing your signs can be tricky, but here are some factors to consider:

  • Cost of materials: Factor in the cost of wood, stain, paint, brushes, and other supplies.
  • Time spent: Account for the time it takes to create the sign, from planning to finishing.
  • Competition: Research the prices of similar signs from other makers to get an idea of what people are willing to pay.
  • Value and uniqueness: If your signs are unique and well-made, you can charge more.

Start with a price that you feel is fair and adjust it based on customer feedback. Don't be afraid to charge what your work is worth!

Commonly Asked Questions

Q: How do I make the lettering look good on my wood signs?

A: Use a stencil for crisp lettering. If you're freehanding, practice on a scrap piece of wood before you start on the sign. Apply paint in thin coats to avoid bleeding.

Q: What kind of wood is best for making signs?

A: Pine is a good choice for beginners. It's affordable and easy to work with. You can also experiment with other woods, like cedar or oak, for a more rustic look.

Q: How do I seal my wood signs?

A: Apply a polyurethane sealant to protect your sign from scratches and water damage. You can apply it with a brush or a spray can.

Q: Where can I sell my wood signs?

A: You can sell your signs online through platforms like Etsy or Shopify, or at local craft fairs and markets. You can also consider selling through consignment shops or contacting businesses that might be interested in carrying your products.

There you have it, friends! Making and selling wood signs is a fun and rewarding way to express your creativity and earn some extra cash. So grab your supplies and get started! I hope you find success in your creative ventures.

Share:

人気の投稿

Powered by Blogger.