Easy and budget-friendly woodworking ideas for creating personalized wood crafts and home accents.

Showing posts with label Small. Show all posts

How to Build Bird Feeders with a Hanging or Stationary Design

How to Build Bird Feeders with a Hanging or Stationary Design

Building Bird Feeders: Hanging and Stationary Designs

Attracting feathered friends to your backyard is a delightful way to connect with nature and enjoy their vibrant colors and cheerful songs. Building a bird feeder is a rewarding project that allows you to create a welcoming haven for these winged visitors. This guide will walk you through the steps of constructing both hanging and stationary bird feeders, empowering you to customize your design and provide a steady supply of sustenance for your avian neighbors.

Materials You'll Need

Before you begin, gather the necessary materials. This list covers common items, but feel free to experiment with different materials to suit your style and budget:

  • Wood (cedar, pine, or treated lumber)
  • Screws and nails
  • Wire mesh (for seed trays)
  • Plastic or metal containers (for food storage)
  • Birdseed
  • Paint or stain (optional)
  • Hanging wire or rope
  • Measuring tape
  • Saw
  • Drill
  • Screwdriver
  • Safety glasses

Building a Hanging Bird Feeder

Step 1: Plan Your Design

Consider the shape and size of your feeder. You can opt for a classic rectangular design or get creative with shapes like a birdhouse or a simple platform. Decide on the type of birdseed you want to offer and choose a feeder that complements it.

Step 2: Cut and Assemble the Feeder

Using your chosen wood, cut pieces according to your design. Securely attach the pieces using screws or nails, ensuring a sturdy construction. For a platform feeder, create a base and sides that will support the birdseed. For a container feeder, build a frame to hold the container, ensuring it's well-ventilated.

Step 3: Create the Seed Tray

For platform feeders, use wire mesh to create a tray that sits above the base. For container feeders, ensure the container has a hole or opening for the birds to access the food. The tray or container should be large enough to hold an adequate amount of birdseed.

Step 4: Attach the Hanging Mechanism

Drill a hole in the top of your feeder for the hanging wire or rope. Attach the wire or rope securely, making sure it can support the weight of the feeder and birdseed. Consider adding a swivel to prevent the feeder from twisting in the wind.

Step 5: Finishing Touches

Sand any rough edges to prevent injuries to birds. Apply a coat of paint or stain to protect the wood and enhance the appearance of your feeder. Let the paint or stain dry completely before filling the feeder with birdseed.

Building a Stationary Bird Feeder

Step 1: Choose a Location

Select a spot near a window or in a sheltered area of your yard. Avoid areas with excessive sun or rain exposure, as this can affect the quality of the birdseed. Ideally, the feeder should be positioned at eye level or slightly lower.

Step 2: Construct the Base

Create a stable base for your feeder. A simple rectangular platform or a sturdy post can be used. For a platform feeder, ensure the base is large enough to accommodate the feeder and prevent it from tipping over.

Step 3: Assemble the Feeder

Follow the same instructions for building a hanging feeder, adapting the design to fit the stationary base. Secure the feeder to the base using screws or nails.

Step 4: Add a Roof (Optional)

To further protect the birdseed from rain and snow, you can build a simple roof over the feeder. Use plywood or metal sheets to create a slanted roof that slopes down to the back of the feeder. Attach the roof to the base using brackets or screws.

Step 5: Install the Feeder

Secure the feeder to the base using screws or nails. If you've chosen a post-style base, make sure it's firmly embedded in the ground for stability.

Tips for Building and Using Your Bird Feeder

  • Choose the right birdseed: Different birds prefer different types of seeds. Offer a variety to attract a diverse range of feathered friends.
  • Keep the feeder clean: Regularly clean the feeder to prevent disease and attract pests. Rinse it with soapy water and let it dry completely before refilling.
  • Monitor birdseed levels: Ensure there is always enough birdseed available. Refilling it frequently will keep your feathered visitors happy and well-fed.
  • Position the feeder strategically: Place the feeder near a window or in a safe location where birds can easily access it.
  • Enjoy your feathered visitors: Relax and appreciate the beauty and wonder of birds as they visit your feeder.

Building a bird feeder is a rewarding and enriching experience. It's a simple yet impactful way to contribute to the well-being of birds and bring a touch of nature into your backyard. With a little creativity and effort, you can build a beautiful feeder that attracts a variety of feathered friends. So gather your materials, get creative, and enjoy the joy of watching birds as they feast on your creation.

Share:

How to Build Elegant Wooden Candle Holders for Your Coffee Table

How to Build Elegant Wooden Candle Holders for Your Coffee Table

Elevate Your Coffee Table with Elegant Wooden Candle Holders

A well-appointed coffee table is the centerpiece of any living room, inviting conversation and creating a warm ambiance. Adding a touch of rustic charm and sophistication with custom-made wooden candle holders is a timeless way to enhance its appeal. This guide will provide a comprehensive step-by-step approach to building elegant wooden candle holders that will not only illuminate your space but also showcase your craftsmanship.

Materials You’ll Need

Before embarking on your project, ensure you have all the necessary materials at hand. This will ensure a smooth and efficient construction process. Here's a comprehensive list:

  • Wood: Choose a durable and aesthetically pleasing wood like walnut, cherry, oak, or maple. The thickness should be at least 1 inch for stability.
  • Candle Holders: Select candle holders that complement the chosen wood. Consider glass, metal, or ceramic options.
  • Wood Glue: A high-quality wood glue is essential for strong and lasting bonds.
  • Wood Finish: Opt for a finish that enhances the natural beauty of the wood. Consider a clear coat, stain, or paint.
  • Sandpaper: A variety of grits, from coarse to fine, will be required for smoothing the wood.
  • Measuring Tape: Accurate measurements are crucial for a well-proportioned design.
  • Pencil: For marking cutting lines on the wood.
  • Saw: A hand saw, jigsaw, or table saw can be used to cut the wood.
  • Drill: For drilling pilot holes before attaching the candle holders.
  • Screws: Choose screws that match the wood and candle holder materials.
  • Clamps: To hold the pieces together while the glue dries.
  • Safety Glasses and Dust Mask: For eye and respiratory protection during the construction process.

Designing Your Candle Holders

The design of your candle holders is a matter of personal preference and can be tailored to your existing coffee table decor. Here are some ideas to inspire your creative process:

Shapes and Styles

  • Circular: Classic and elegant, circular candle holders add a touch of sophistication to any coffee table.
  • Square or Rectangular: These shapes offer a more modern and minimalist aesthetic.
  • Geometric: For a bolder look, consider incorporating geometric shapes like triangles, hexagons, or octagons.
  • Freeform: Let your creativity flow and design unique shapes inspired by nature or abstract art.

Size and Height

Consider the size of your coffee table and the overall design of your living room when determining the dimensions of your candle holders. A proportionate size will create a harmonious visual balance.

Decorative Touches

Enhance the aesthetic appeal of your candle holders by adding decorative touches:

  • Carving: Add intricate carvings, patterns, or motifs to create a unique and personalized touch.
  • Inlays: Incorporate contrasting wood species or decorative elements to add visual interest.
  • Painted Details: Apply a layer of paint or stain to highlight specific areas or create a decorative effect.

Building the Candle Holders

Now that you have a design in mind, it's time to bring your vision to life. Follow these steps for a meticulous construction process:

Cutting the Wood

  • Measure and Mark: Accurately measure and mark the wood based on your chosen design.
  • Cut with Precision: Utilize your chosen saw to cut the wood according to the marked lines.
  • Sand the Edges: Smooth the edges of the cut pieces with sandpaper to prevent splinters and create a polished look.

Assembling the Candle Holders

  • Apply Glue: Apply a generous layer of wood glue to the surfaces that will be joined.
  • Clamp Together: Securely clamp the pieces together, ensuring they are aligned according to your design.
  • Allow Glue to Dry: Allow the glue to dry completely, typically overnight.

Attaching the Candle Holders

  • Drill Pilot Holes: Drill pilot holes in the base of your wooden structure for attaching the candle holders.
  • Secure with Screws: Attach the candle holders to the base using appropriate screws.

Finishing Touches

The final step in creating elegant wooden candle holders involves enhancing their aesthetic appeal and protecting them from wear and tear.

Sanding and Finishing

  • Sand Smooth: Sand the entire surface of the candle holders using progressively finer grits of sandpaper to achieve a smooth and polished finish.
  • Apply Finish: Choose a suitable finish for your wood, such as a clear coat, stain, or paint. Follow the manufacturer's instructions for application.
  • Allow to Dry: Allow the finish to dry completely before handling the candle holders.

Tips for Success

To ensure a successful project and achieve the best results, consider these helpful tips:

  • Use Quality Materials: Invest in high-quality wood and finishing products to ensure durability and a beautiful aesthetic.
  • Take Your Time: Rushing the process can lead to mistakes. Allow yourself ample time for each step.
  • Practice Safety: Wear safety glasses and a dust mask when cutting and sanding wood.
  • Get Creative: Don't be afraid to experiment with different designs and decorative techniques.
  • Enjoy the Process: Crafting your own candle holders is a rewarding experience, so relax and have fun!

Conclusion

Creating custom-made wooden candle holders is a rewarding project that allows you to express your creativity and elevate the ambiance of your living room. By following these steps, you can build elegant candle holders that will be a focal point of your coffee table, adding a touch of warmth, sophistication, and personal style to your home. Remember, the key is to let your imagination guide you and enjoy the process of creating something beautiful and unique.

Share:

Profitable Modern Coffee Table Ideas for Beginners to Build and Sell

Profitable Modern Coffee Table Ideas for Beginners to Build and Sell

Profitable Modern Coffee Table Ideas for Beginners to Build and Sell

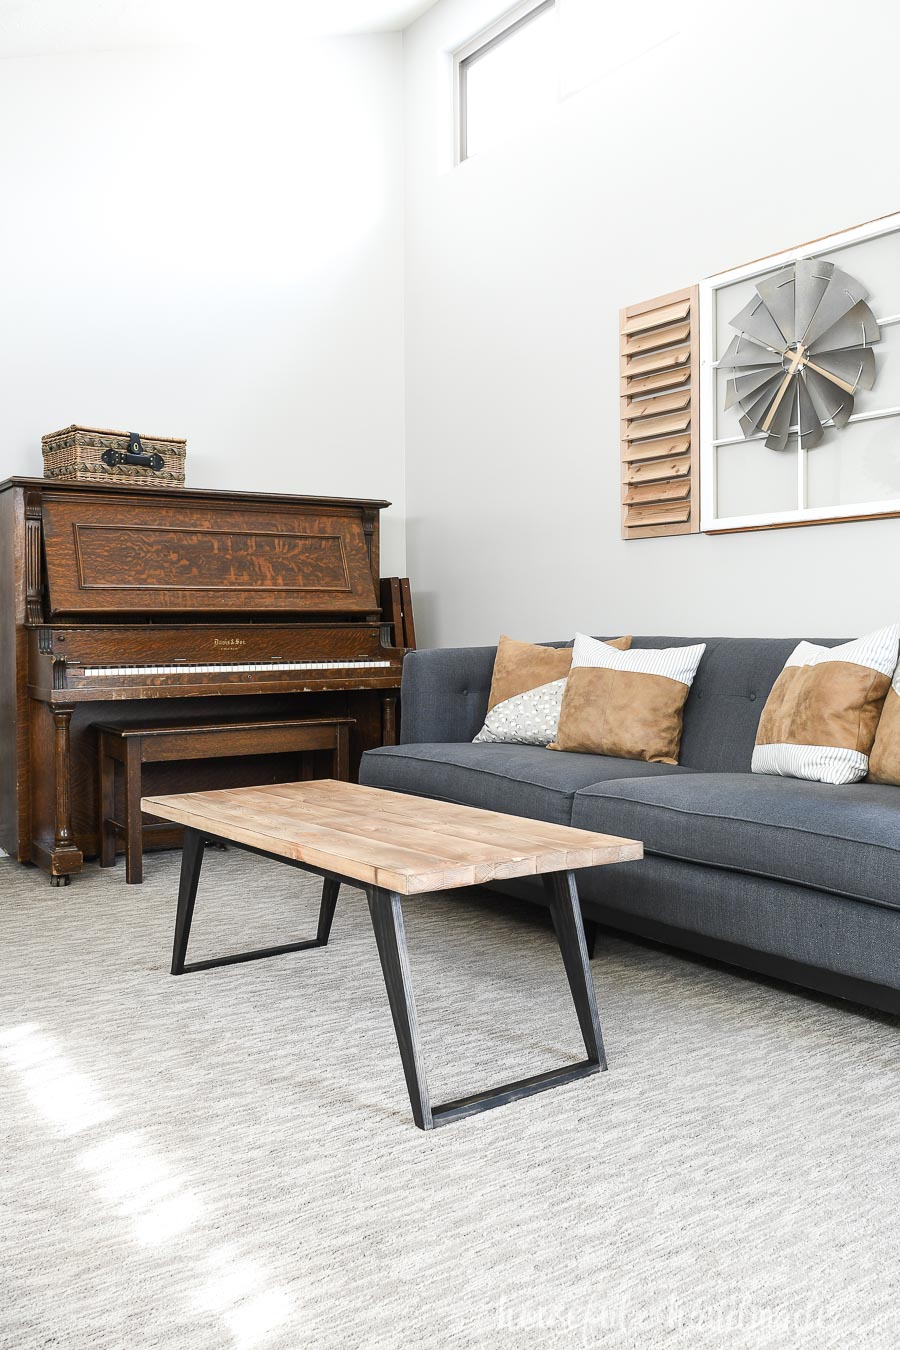
Starting a woodworking business can be an exciting venture, and building modern coffee tables is a fantastic place to begin. These pieces are highly sought after, offering a blend of style and functionality that appeals to a wide audience. The beauty lies in their versatility; you can create tables that fit various aesthetics, from minimalist to industrial, ensuring you tap into diverse market preferences. This article explores profitable modern coffee table ideas that beginners can tackle, providing you with the inspiration and knowledge to launch your woodworking journey.

Simple Yet Stylish: The Mid-Century Modern Coffee Table

This timeless design is a classic for a reason. It features clean lines, sleek proportions, and often incorporates materials like wood and metal. To make it your own, experiment with different wood finishes, like walnut or oak, or consider adding a touch of brass for a vintage vibe. You can find countless online tutorials for constructing a mid-century modern coffee table, making it a great starting point for beginners.

Tips for Crafting a Winning Mid-Century Modern Coffee Table:

  • Embrace the iconic tapered legs, a signature element of this style.
  • Consider using a combination of wood and metal, playing with different textures and finishes.
  • Focus on creating clean lines and simple shapes, allowing the natural beauty of the wood to shine through.

Industrial Chic: The Concrete Coffee Table

Concrete coffee tables offer a raw and edgy aesthetic that's incredibly popular. You can achieve this look by pouring concrete into a mold to create a unique tabletop. Then, pair it with steel or wood legs for a contrasting yet harmonious effect. This approach is a fantastic opportunity to create one-of-a-kind pieces.

Key Points for Building a Concrete Coffee Table:

  • Invest in a high-quality concrete mix and mold to ensure durability and a smooth finish.
  • Allow ample time for the concrete to cure properly before handling or finishing.
  • Choose contrasting materials for the legs, such as steel or reclaimed wood, to enhance the industrial feel.

Rustic Charm: The Live Edge Coffee Table

Live edge coffee tables celebrate the natural beauty of wood by showcasing its unique grain patterns and edges. To build one, you'll need a slab of wood with the bark intact. The key is to preserve the organic shape and character of the wood, creating a piece that's truly unique.

Tips for Creating a Stunning Live Edge Table:

  • Choose a species of wood with a captivating grain pattern, such as walnut, maple, or oak.
  • Preserve the natural edges of the wood, adding to its character and rustic appeal.
  • Consider using epoxy resin to fill any gaps or imperfections, creating a striking visual element.

Modern Minimalism: The Floating Coffee Table

For a sleek and modern aesthetic, consider a floating coffee table. These designs create the illusion that the tabletop is suspended in mid-air, giving your living space a futuristic feel. The key is to use clever construction techniques to achieve this visual effect.

Key Considerations for Building a Floating Coffee Table:

  • Utilize sturdy materials, such as metal or thick wood, to ensure stability and support the tabletop.
  • Conceal the supporting structures to maintain the illusion of a floating tabletop.
  • Experiment with different shapes and sizes, from rectangular to circular or even geometric designs.

Marketing Your Coffee Table Creations

Once you've mastered the art of building modern coffee tables, it's time to bring your creations to market. To make your business successful, you'll need to establish an effective marketing strategy. This involves showcasing your work online and offline, using social media to connect with potential customers, and considering selling through local markets and online platforms.

Essential Marketing Strategies:

  • Create a compelling online presence: Set up a website or online store to showcase your coffee tables.
  • Embrace social media: Use platforms like Instagram, Facebook, and Pinterest to share your work and engage with potential buyers.
  • Network and participate in local events: Attend craft fairs and markets to showcase your work and build connections with customers.

Starting a woodworking business, particularly with modern coffee tables, offers a rewarding and profitable path. With dedication, creativity, and the right guidance, you can transform your passion for woodworking into a successful venture.

Share:

人気の投稿

Powered by Blogger.