Easy and budget-friendly woodworking ideas for creating personalized wood crafts and home accents.

Showing posts with label Racks. Show all posts

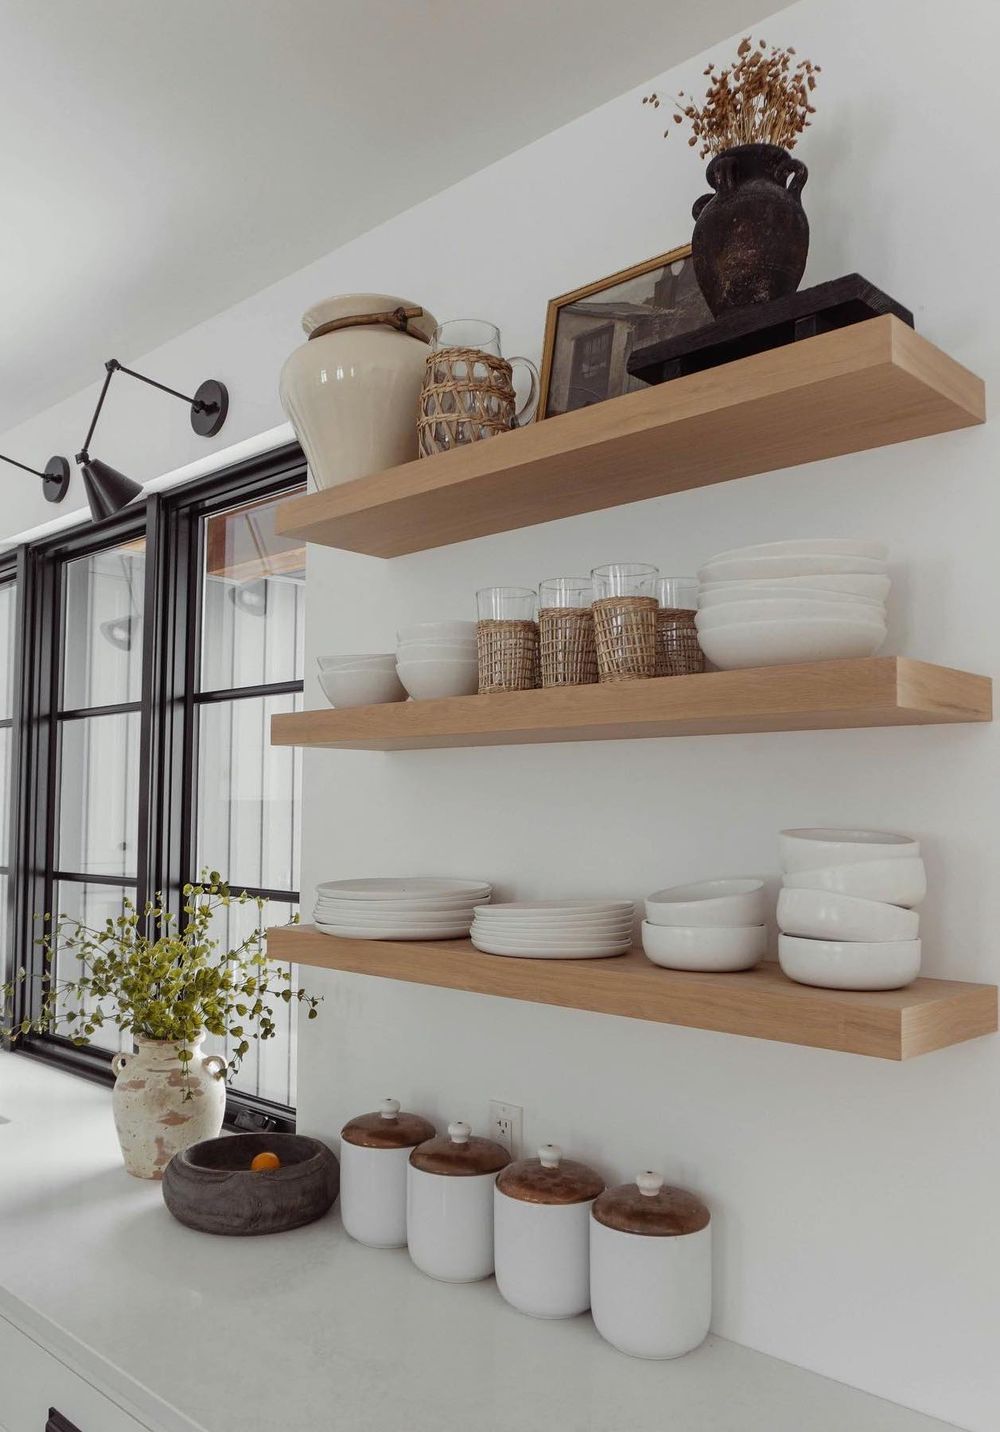
DIY Floating Shelf Ideas for a Minimalist or Modern Interior

DIY Floating Shelf Ideas for a Minimalist or Modern Interior

Elevate Your Minimalist or Modern Home with DIY Floating Shelves

Hey there, design enthusiasts! Tired of bulky bookshelves cluttering your minimalist or modern space? Floating shelves are the perfect solution to seamlessly integrate storage and style. Not only are they visually appealing, but they also offer the flexibility to create a bespoke look that complements your unique aesthetic.

The best part? You don't need to shell out big bucks for fancy pre-made shelves. With a little DIY know-how and a few simple materials, you can craft stunning floating shelves that add a touch of elegance and functionality to your home.

Floating Shelf Styles for Every Space

Before diving into the construction process, let's talk about the different styles of floating shelves you can create. Here are a few ideas to spark your creativity:

Geometric Elegance

Embrace sharp angles and clean lines with geometric floating shelves. Think triangular shapes, rectangular shelves with beveled edges, or even hexagonal designs. These shelves add a touch of modern sophistication and can be customized to fit any corner or wall space.

Industrial Chic

For a rugged and contemporary look, incorporate industrial elements like exposed pipes, metal brackets, or reclaimed wood. These shelves are perfect for showcasing vintage finds, books, or minimalist decor.

Minimalist Marvels

Keep it simple with minimalist floating shelves. Choose sleek, straightforward designs in neutral tones like white, black, or natural wood. These shelves offer a clean and uncluttered look, allowing your belongings to take center stage.

Essential Materials for Your DIY Project

Now, let's gather the essentials for your floating shelf adventure. Here's a list of materials you'll likely need:

  • Wood: Choose a wood type that complements your style. Popular options include plywood, MDF, reclaimed wood, or even bamboo for a sustainable touch.
  • Brackets: You can use L-brackets, shelf brackets, or even create custom brackets using metal piping or wood.
  • Screws and Anchors: Choose screws that are long enough to securely hold your shelves in place. Use anchors if your walls are drywall or plaster.
  • Wood Filler: For a smooth finish, use wood filler to cover any screw holes or imperfections in the wood.
  • Sandpaper: Smooth out any rough edges and prepare the surface for painting or staining.
  • Paint or Stain: This is entirely up to your personal preference and the style you're aiming for. Choose a color or stain that harmonizes with your existing decor.
  • Measuring Tape, Level, and Pencil: These tools are essential for precise marking and placement of your shelves.
  • Safety Glasses and Gloves: Always prioritize safety when working with tools.

Crafting Your Floating Shelves: A Step-by-Step Guide

Ready to bring your floating shelf vision to life? Follow these simple steps:

  1. Plan and Measure: Determine the size, shape, and number of shelves you'll create. Use a measuring tape to mark the exact location on your wall where you want to install your shelves. Make sure the placement is level for a polished look.
  2. Cut the Wood: Using a saw, carefully cut your wood to the desired dimensions. If you're working with plywood or MDF, be sure to cut with the grain for a clean, consistent cut.
  3. Install the Brackets: Mark the wall where you want to install your brackets. Use a drill to make pilot holes, then secure the brackets to the wall with the appropriate screws. Make sure the brackets are level and at the correct height for your shelves.
  4. Attach the Shelves: Place your shelves on the brackets and secure them with screws. Use wood filler to cover any screw holes for a seamless appearance. If you're using L-brackets, you can typically attach the shelves from underneath.
  5. Sand, Prime, and Finish: Sand your shelves to smooth out any rough edges. If you're painting, apply a primer before applying your chosen paint color. If you're staining, apply a wood stain for a natural and warm finish.
  6. Decorate and Enjoy! Finally, arrange your belongings and enjoy your beautiful new floating shelves. Get creative and let your personality shine through in your display.

Tips for Success

Here are a few extra tips to ensure your DIY floating shelves are a triumph:

  • Practice Makes Perfect: If you're new to DIY projects, it's always a good idea to practice cutting and assembling your shelves on scrap wood before working with your final materials.
  • Double-Check Your Measurements: Accuracy is key for a professional-looking finish. Take your time and double-check your measurements to ensure your shelves are properly aligned.
  • Use Quality Materials: Invest in durable and high-quality materials for shelves that will last. A sturdy wood base and strong brackets are essential for long-term stability.
  • Prioritize Safety: Always wear safety glasses and gloves when working with tools. Use a work surface that is stable and free of clutter.
  • Don't Be Afraid to Get Creative: Floating shelves offer endless possibilities for design and customization. Have fun with it and let your imagination run wild!

Commonly Asked Questions

We've addressed some of the most common questions about DIY floating shelves. Let's dive into these FAQs:

What if my walls are drywall?

Drywall is a common wall material, and you'll need to use anchors to ensure your floating shelves are securely mounted. There are many types of anchors available, so choose ones that are appropriate for the weight of your shelves and the thickness of your drywall. Follow the instructions on the anchor packaging for proper installation.

How do I choose the right brackets?

The type of brackets you choose will depend on the weight of your shelves and the style you're going for. L-brackets are a common choice for lightweight shelves, while shelf brackets or custom-made brackets are better suited for heavier loads. Consider the thickness of your shelves and the material they're made from when choosing brackets.

What if my shelves aren't perfectly level?

A level is your best friend for this project. Use a level to ensure your brackets are installed at the same height and that your shelves are perfectly horizontal. If your shelves are slightly off, you can adjust them by adding shims or spacers underneath.

Can I use floating shelves for anything?

Absolutely! Floating shelves are incredibly versatile and can be used for a wide range of purposes. Here are a few ideas:

  • Bookshelf: Showcase your favorite books or create a cozy reading nook.
  • Display Shelf: Arrange decorative items, art pieces, or family photos.
  • Kitchen Storage: Organize spices, cookbooks, or decorative plates.
  • Bathroom Organizer: Store towels, toiletries, or decorative baskets.
  • Bedroom Accent: Add a touch of style with nightstands, plant shelves, or jewelry organizers.

So, get ready to embrace the minimalist or modern aesthetic in your home with these DIY floating shelf ideas! Remember, the key is to choose materials that reflect your style and to have fun with the process. With a little creativity and effort, you can create a stunning and functional storage solution that elevates your space.

Share:

How to Sell Floating Shelves on Etsy and Other Platforms

How to Sell Floating Shelves on Etsy and Other Platforms

Unlocking the Power of Floating Shelves: A Guide to Selling on Etsy and Beyond

In the ever-evolving world of online retail, floating shelves have become a beloved staple for home décor enthusiasts. Their sleek, minimalist design and space-saving functionality make them a hot commodity, drawing in buyers seeking to enhance their living spaces. If you're a skilled craftsperson or a passionate DIYer with a knack for creating stylish and functional furniture, selling floating shelves online presents a lucrative opportunity. Let's delve into the strategies for establishing a successful online presence and attracting a steady stream of customers for your floating shelf creations.

Crafting Captivating Listings

The first step in any successful online venture is crafting enticing listings that pique buyer interest and effectively showcase your products. Your listings should be a compelling blend of captivating visuals, detailed descriptions, and strategic keywords.

Professional Photography is Key

High-quality photographs are the cornerstone of successful online sales. Invest in a decent camera or even your smartphone's camera, and ensure your shelves are photographed in a well-lit environment. Capture the shelves from various angles, highlighting their design, materials, and installation process. Don't hesitate to use props to showcase how the shelves would look in a real home setting.

Captivating Descriptions that Sell

Your product descriptions should be more than just a list of features. Tell a story about your shelves, emphasizing their benefits and why they're a valuable addition to any home. Highlight the materials used, the craftsmanship involved, and the unique selling points that set your shelves apart. Remember to include essential information like dimensions, weight capacity, and installation instructions.

Keywords for Discoverability

Strategically incorporating relevant keywords into your listings is vital for driving traffic to your products. Use tools like Etsy's Keyword Tool to identify popular search terms related to floating shelves. Include keywords in your product titles, descriptions, and tags to increase your visibility in search results.

Building a Strong Brand Presence

Beyond individual listings, creating a cohesive brand identity can establish you as a trusted seller and attract a loyal customer base.

Develop a Unique Brand Style

Think about the aesthetic you want to project. Are your shelves rustic, modern, minimalist, or eclectic? Develop a consistent visual theme across your listings, social media, and website (if applicable). Consider using consistent fonts, color palettes, and imagery to create a recognizable brand persona.

Engage with Your Audience

Building a community around your brand is crucial for fostering trust and loyalty. Engage with your customers on social media platforms, respond promptly to questions and feedback, and run contests or giveaways to create excitement around your brand.

Expanding Your Reach Beyond Etsy

While Etsy is a valuable platform for reaching niche audiences, diversifying your sales channels can expand your reach and tap into new customer segments.

Exploring Other Marketplaces

Platforms like Amazon Handmade, Facebook Marketplace, and Shopify offer alternative avenues for selling your products. Research each platform to determine which best aligns with your target market and business goals.

Direct Sales through Your Website

Consider creating your own website to establish a more personalized brand presence. This gives you greater control over your brand messaging, design, and customer experience. Additionally, you can avoid platform fees associated with marketplaces.

Social Media Marketing

Platforms like Instagram and Pinterest are perfect for showcasing visually appealing products like floating shelves. Create captivating content, leverage relevant hashtags, and run targeted ads to reach your ideal audience.

Standing Out from the Crowd

In a competitive online market, differentiating your offerings and delivering exceptional customer service are key to success.

Offer Customization Options

Allow customers to personalize their shelves by choosing from a variety of materials, finishes, sizes, and designs. This adds value and caters to individual preferences.

Provide Excellent Customer Support

Respond to inquiries promptly, address customer concerns professionally, and offer post-sale support. Going the extra mile for your customers builds trust and fosters repeat business.

Showcase Positive Reviews

Positive reviews from satisfied customers are powerful social proof. Encourage your buyers to leave feedback and prominently display their glowing testimonials on your listings and website.

Selling floating shelves online can be a rewarding experience, allowing you to share your creativity with the world and earn a sustainable income. By following these strategies, you can establish a strong brand presence, attract a loyal customer base, and achieve lasting success in the competitive world of online retail. Remember, success is a journey, not a destination. Continuously learn, adapt, and evolve to stay ahead of the curve and ensure the longevity of your floating shelf business.

Share:

How to Build and Sell Jewelry Boxes with Unique Design Features

How to Build and Sell Jewelry Boxes with Unique Design Features

Building and Selling Jewelry Boxes with Unique Design Features

Jewelry boxes are not just for storing treasures; they can be beautiful works of art in their own right. With a little creativity and effort, you can build and sell jewelry boxes with unique design features that will capture the hearts (and wallets) of jewelry lovers everywhere. From incorporating sustainable materials to crafting intricate carvings, there are endless possibilities to explore.

Finding Your Niche

Before you start crafting, take a moment to think about your target audience. Who are you designing these boxes for? What kind of jewelry do they wear? What are their aesthetics? For example, if you're targeting young women who love bohemian styles, you might incorporate natural elements like wood and leather into your designs. For a more minimalist audience, clean lines and simple materials like metal and glass could be more appealing.

Identifying Market Trends

Staying up-to-date with current trends is essential. Explore online marketplaces like Etsy and Pinterest to see what types of jewelry boxes are popular. Look for emerging themes and styles to incorporate into your own designs. This will help you stand out from the crowd and attract a wider audience.

Crafting Your Unique Designs

Now comes the fun part: designing your jewelry boxes! Let your creativity flow and explore different options.

Incorporating Sustainable Materials

Sustainability is becoming increasingly important in all aspects of life, including the jewelry industry. Consider using recycled materials like reclaimed wood, upcycled fabrics, or even repurposed metal. Not only will this be environmentally friendly, but it can also add a unique and rustic touch to your designs.

Playing with Textures and Finishes

Add depth and dimension to your jewelry boxes by incorporating different textures and finishes. Use sandpaper to create a distressed look on wood, or try adding fabric lining for a soft and luxurious feel. Consider adding a layer of varnish or paint to protect your materials and enhance their appearance.

Embracing Intricate Carvings

If you're skilled with tools, you can add a touch of artistry to your designs with intricate carvings. Use a small carving knife or a specialized tool to create patterns, initials, or even miniature sculptures on the surface of the box. This can create a truly unique and personalized piece.

Experimenting with Colour and Pattern

Don't be afraid to experiment with different colours and patterns. You can paint the box itself, line the interior with patterned fabric, or even add decorative elements like ribbons or beads. Play with textures and colours to create visually appealing and unique pieces.

Marketing and Selling Your Creations

Now that you've created your stunning jewelry boxes, it's time to share them with the world! You can choose from a variety of online and offline marketing strategies:

Leveraging Social Media

Instagram, Pinterest, and Facebook are fantastic platforms for showcasing your unique jewelry boxes. Share high-quality photos and videos of your work, engage with potential customers, and participate in relevant hashtags to expand your reach.

Creating a Website or Etsy Shop

A website or Etsy shop provides a professional platform to sell your creations. Carefully curate your product listings with detailed descriptions, high-resolution images, and clear pricing. You can also use these platforms to highlight your unique design features and craftsmanship.

Participating in Craft Fairs and Markets

Attending local craft fairs and markets offers a direct connection with potential customers. This is a great opportunity to showcase your jewelry boxes in person and answer any questions buyers may have. Don't forget to bring business cards and promotional materials.

Pricing Your Jewelry Boxes

Pricing your jewelry boxes is a balancing act. You want to ensure you're covering your costs, while also remaining competitive in the market. Consider the following factors:

  • Material costs
  • Time spent crafting
  • Uniqueness of your design
  • Competitor pricing
  • Start with a price that reflects the value of your work and the materials used. You can always adjust your prices later based on customer feedback and market demand.

    Continuous Improvement

    The world of jewelry box design is constantly evolving. Embrace feedback from customers, keep an eye on current trends, and always strive to improve your craftsmanship. As you grow as a designer, your unique jewelry boxes will become even more sought-after and appreciated.

    Share:

    How to Build Bird Feeders with a Hanging or Stationary Design

    How to Build Bird Feeders with a Hanging or Stationary Design

    Building Bird Feeders: Hanging and Stationary Designs

    Attracting feathered friends to your backyard is a delightful way to connect with nature and enjoy their vibrant colors and cheerful songs. Building a bird feeder is a rewarding project that allows you to create a welcoming haven for these winged visitors. This guide will walk you through the steps of constructing both hanging and stationary bird feeders, empowering you to customize your design and provide a steady supply of sustenance for your avian neighbors.

    Materials You'll Need

    Before you begin, gather the necessary materials. This list covers common items, but feel free to experiment with different materials to suit your style and budget:

    • Wood (cedar, pine, or treated lumber)
    • Screws and nails
    • Wire mesh (for seed trays)
    • Plastic or metal containers (for food storage)
    • Birdseed
    • Paint or stain (optional)
    • Hanging wire or rope
    • Measuring tape
    • Saw
    • Drill
    • Screwdriver
    • Safety glasses

    Building a Hanging Bird Feeder

    Step 1: Plan Your Design

    Consider the shape and size of your feeder. You can opt for a classic rectangular design or get creative with shapes like a birdhouse or a simple platform. Decide on the type of birdseed you want to offer and choose a feeder that complements it.

    Step 2: Cut and Assemble the Feeder

    Using your chosen wood, cut pieces according to your design. Securely attach the pieces using screws or nails, ensuring a sturdy construction. For a platform feeder, create a base and sides that will support the birdseed. For a container feeder, build a frame to hold the container, ensuring it's well-ventilated.

    Step 3: Create the Seed Tray

    For platform feeders, use wire mesh to create a tray that sits above the base. For container feeders, ensure the container has a hole or opening for the birds to access the food. The tray or container should be large enough to hold an adequate amount of birdseed.

    Step 4: Attach the Hanging Mechanism

    Drill a hole in the top of your feeder for the hanging wire or rope. Attach the wire or rope securely, making sure it can support the weight of the feeder and birdseed. Consider adding a swivel to prevent the feeder from twisting in the wind.

    Step 5: Finishing Touches

    Sand any rough edges to prevent injuries to birds. Apply a coat of paint or stain to protect the wood and enhance the appearance of your feeder. Let the paint or stain dry completely before filling the feeder with birdseed.

    Building a Stationary Bird Feeder

    Step 1: Choose a Location

    Select a spot near a window or in a sheltered area of your yard. Avoid areas with excessive sun or rain exposure, as this can affect the quality of the birdseed. Ideally, the feeder should be positioned at eye level or slightly lower.

    Step 2: Construct the Base

    Create a stable base for your feeder. A simple rectangular platform or a sturdy post can be used. For a platform feeder, ensure the base is large enough to accommodate the feeder and prevent it from tipping over.

    Step 3: Assemble the Feeder

    Follow the same instructions for building a hanging feeder, adapting the design to fit the stationary base. Secure the feeder to the base using screws or nails.

    Step 4: Add a Roof (Optional)

    To further protect the birdseed from rain and snow, you can build a simple roof over the feeder. Use plywood or metal sheets to create a slanted roof that slopes down to the back of the feeder. Attach the roof to the base using brackets or screws.

    Step 5: Install the Feeder

    Secure the feeder to the base using screws or nails. If you've chosen a post-style base, make sure it's firmly embedded in the ground for stability.

    Tips for Building and Using Your Bird Feeder

    • Choose the right birdseed: Different birds prefer different types of seeds. Offer a variety to attract a diverse range of feathered friends.
    • Keep the feeder clean: Regularly clean the feeder to prevent disease and attract pests. Rinse it with soapy water and let it dry completely before refilling.
    • Monitor birdseed levels: Ensure there is always enough birdseed available. Refilling it frequently will keep your feathered visitors happy and well-fed.
    • Position the feeder strategically: Place the feeder near a window or in a safe location where birds can easily access it.
    • Enjoy your feathered visitors: Relax and appreciate the beauty and wonder of birds as they visit your feeder.

    Building a bird feeder is a rewarding and enriching experience. It's a simple yet impactful way to contribute to the well-being of birds and bring a touch of nature into your backyard. With a little creativity and effort, you can build a beautiful feeder that attracts a variety of feathered friends. So gather your materials, get creative, and enjoy the joy of watching birds as they feast on your creation.

    Share:

    Simple and Elegant Wooden Wall Clocks to Build and Sell

    Simple and Elegant Wooden Wall Clocks to Build and Sell

    Simple and Elegant Wooden Wall Clocks to Build and Sell

    In a world increasingly dominated by digital displays, the timeless appeal of analog clocks remains strong. And when it comes to crafting a statement piece for your home, nothing quite compares to the warmth and elegance of a handcrafted wooden wall clock. This guide explores some simple and elegant designs you can build and sell, combining practicality with artistic flair.

    Choosing the Right Wood

    The wood you choose for your clocks will significantly impact their aesthetic and durability. Consider these factors:

    Grain Pattern:

    • Straight grain: Offers a clean, minimalist look, ideal for modern designs.
    • Figured grain: Features knots, swirls, and other unique patterns, adding visual interest and rustic charm.
    • Burls: Show extraordinary grain patterns with vibrant colors, perfect for statement pieces.

    Color and Finish:

    • Light woods: (Pine, maple, birch) offer a bright and airy feel.
    • Dark woods: (Walnut, cherry, mahogany) create a sense of sophistication and richness.
    • Stains and finishes: Enhance the wood's natural beauty and protect it from wear and tear.

    Hardness and Durability:

    • Hardwoods: (Oak, maple, cherry) are strong and resistant to scratches and dents, ideal for everyday use.
    • Softwoods: (Pine, cedar) are easier to work with but may require more care.

    Simple and Elegant Clock Designs

    Here are some easy-to-build wooden clock designs that offer a blend of simplicity and elegance:

    1. The Classic Round Clock:

    • Materials: Plywood or hardwood for the base, clock movement, hands, and a circular piece of wood for the face.
    • Construction: Cut the base into a circular shape. Attach the clock movement to the back, and then fix the circular face to the front. Apply a stain or finish of your choice.
    • Customization: Add decorative elements like woodburning, inlay, or laser engraving.

    2. The Minimalist Square Clock:

    • Materials: Hardwood for the square base, clock movement, hands, and a smaller square piece of wood for the face.
    • Construction: Cut the base into a square shape. Mount the clock movement to the back and attach the smaller square face to the front. Use a minimalist design for the hands.
    • Customization: Add a unique finish, such as a natural oil or a clear epoxy resin.

    3. The Geometric Clock:

    • Materials: Plywood or hardwood for the base, clock movement, hands, and geometric shapes to create the face.
    • Construction: Cut the base into a desired shape (rectangle, hexagon, etc.). Create geometric shapes from wood and arrange them to form the clock face. Attach the clock movement to the back.
    • Customization: Use different wood species for each geometric shape or experiment with contrasting colors and finishes.

    4. The Branch Clock:

    • Materials: Branch of wood, clock movement, hands, and a small circular piece of wood for the face.
    • Construction: Sand and clean the branch. Attach the circular face to the branch. Mount the clock movement on the back.
    • Customization: Use different wood species for the branch and face or leave the bark intact for a rustic look.

    Essential Tools and Techniques

    To build these clocks, you'll need basic woodworking tools and techniques:

    Tools:

    • Saw (hand saw, circular saw, or jigsaw)
    • Drill with bits for wood
    • Sandpaper (various grits)
    • Clamps
    • Measuring tape and ruler
    • Wood glue
    • Stains and finishes (optional)

    Techniques:

    • Cutting: Use a saw to cut the wood into desired shapes.
    • Drilling: Drill holes for the clock movement and hands.
    • Sanding: Smooth the surfaces of the wood to prepare them for finishing.
    • Gluing: Use wood glue to attach the clock movement and hands to the base.
    • Finishing: Apply stains, paints, or other finishes to enhance the wood's appearance and provide protection.

    Marketing and Selling Your Wooden Clocks

    Once you've mastered the craft, it's time to showcase your work and find customers. Here are some marketing strategies:

    Online Platforms:

    • Etsy: A popular platform for handmade goods.
    • Amazon Handmade: Reach a larger audience through Amazon's extensive network.
    • Your own website: Create a dedicated website to showcase your work and sell directly.
    • Social Media: Use platforms like Instagram and Facebook to share your clocks and connect with potential buyers.

    Local Markets and Events:

    • Craft fairs and festivals: Engage with customers in person and showcase your unique designs.
    • Farmers markets: Offer a natural and sustainable product that complements local produce.
    • Local shops and galleries: Collaborate with businesses that share your aesthetic.

    Building Your Brand:

    • Develop a consistent style: Choose a design aesthetic that reflects your personality and resonates with your target market.
    • High-quality photography: Invest in professional product photography to capture the beauty and craftsmanship of your clocks.
    • Engage with customers: Respond promptly to inquiries, offer personalized recommendations, and cultivate a positive brand image.

    Creating and selling simple and elegant wooden wall clocks is a rewarding endeavor that combines creativity, skill, and entrepreneurial spirit. By following this guide and putting your passion into practice, you can craft unique, timeless pieces that bring beauty and functionality to homes around the world.

    Share:

    Jewelry Box Designs That Will Beautify Any Bedroom and Sell Well

    Jewelry Box Designs That Will Beautify Any Bedroom and Sell Well

    Jewelry Box Designs That Will Beautify Any Bedroom and Sell Well

    Hey there, fellow jewelry lovers! We all know the struggle of finding the perfect place to store our precious baubles. A jewelry box isn't just about keeping things organized, it's an opportunity to add a touch of elegance and personality to your bedroom. But with so many designs out there, how do you choose one that's both beautiful and practical?

    Well, fear not! I'm here to spill the tea on the hottest jewelry box trends that'll make your heart skip a beat and your bedroom sparkle.

    The Timeless Appeal of Classic Designs

    Sometimes, the best designs are the ones that stand the test of time. Think vintage vibes and elegant simplicity.

    The Elegant Wooden Box

    This classic beauty is a timeless choice. Imagine a sleek, wooden box with a soft velvet lining. You can choose from rich, dark wood tones for a sophisticated look, or go for a lighter wood for a more airy and modern feel. This design screams "luxury" and will never go out of style.

    The Antique Jewelry Trunk

    Let's channel our inner explorer! Antique jewelry trunks are a fantastic way to add a touch of history and charm to your bedroom. Look for intricate carvings, brass accents, and a worn, vintage finish. Just imagine opening this beauty and revealing your prized possessions.

    Modern Jewelry Boxes: A Fusion of Form and Function

    If you're all about clean lines, minimalist aesthetics, and functionality, then modern jewelry boxes are calling your name.

    The Acrylic Beauty

    Say hello to transparency! Acrylic jewelry boxes are a modern take on the classic design. They offer a clear view of your collection, allowing you to showcase your favorite pieces. The sleek, minimalist design adds a contemporary touch to any bedroom.

    The Stackable System

    Who says you need to settle for just one box? Stackable jewelry boxes are perfect for organized souls who want to categorize their collection. Each tier can be dedicated to different types of jewelry, making it super easy to find what you're looking for.

    Unique Jewelry Box Ideas that Will Stand Out

    For those who want their jewelry box to be as unique as their style, there are endless possibilities! Let's dive into some wild and wonderful designs.

    The Travel-Inspired Jewelry Case

    Perfect for the jet-setting jewelry enthusiast! This design features a compact, travel-friendly case that's perfect for keeping your favorite pieces organized and safe on the go. Look for cases with compartments for earrings, rings, necklaces, and even a small mirror.

    The Jewelry Tree

    Bring a touch of nature into your bedroom! A jewelry tree is a unique and eye-catching way to display your necklaces and bracelets. This design is a beautiful blend of functionality and style. Choose a tree crafted from wood or metal to complement your bedroom décor.

    Factors to Consider When Choosing Your Jewelry Box

    Now that we've explored the endless possibilities, let's chat about the factors to consider when picking the perfect jewelry box.

    Size Matters

    It's all about finding the right fit. Think about the amount of jewelry you have and how much storage space you need. A small box might be perfect for a minimalist collection, while a larger box with multiple compartments is ideal for a jewelry enthusiast.

    Materials: Look for Quality

    Invest in a jewelry box that's made from quality materials that will last. Wood, metal, or acrylic are all great choices. Look for a lining that protects your jewelry from scratches and tarnishing, like soft velvet or satin.

    Style and Design: Reflect Your Personality

    This is where you get to let your personality shine! Choose a design that complements your bedroom décor and reflects your individual style. Do you love vintage vibes, modern minimalism, or something in between? There's a jewelry box out there for everyone.

    Tips for Designing a Jewelry Box That Will Sell

    Ready to unleash your inner entrepreneur and design a jewelry box that's destined to be a bestseller? Here's a little insider knowledge:

    • Target Your Audience: Who are you designing for? Millennials who love sleek, modern designs? Vintage enthusiasts? Knowing your target audience will help you create a product they'll adore.
    • Function and Functionality: A successful jewelry box is more than just a pretty face. It needs to be practical and easy to use. Make sure your design includes compartments for different types of jewelry and easy-to-access storage.
    • Durable Materials: Invest in quality materials that will withstand everyday use and keep your jewelry safe and secure. Think sturdy wood, durable metal, or scratch-resistant acrylic.
    • Add a Personal Touch: What sets your design apart? Consider adding unique touches, like intricate carvings, personalized engravings, or a pop of color.
    • Think Beyond the Box: Explore alternative designs like jewelry trees, travel-inspired cases, or stackable systems. Be creative and offer something unique that will capture customers' imaginations.

    Frequently Asked Questions

    What is the best material for a jewelry box?

    The best material depends on your personal preference and budget. Wood, metal, and acrylic are all popular choices. Wood offers a classic look and durability, metal adds a touch of elegance, and acrylic provides a modern and transparent design. Consider the type of jewelry you'll be storing and your desired aesthetic when making your choice.

    How do I choose the right size jewelry box?

    The size of your jewelry box should match the size of your jewelry collection. If you have a large collection, you'll need a larger box with multiple compartments. If you have a smaller collection, a smaller box might be more suitable. Think about how much space you have available and how many pieces of jewelry you need to store.

    What features should a jewelry box have?

    A great jewelry box should include features that make it easy to organize and protect your jewelry. Look for compartments for different types of jewelry, a soft lining to prevent scratches, and a secure lock to keep your valuables safe. Some boxes might also include a mirror or a travel-friendly design.

    Remember, choosing the right jewelry box is a personal journey. Take your time, explore your options, and choose a design that speaks to your heart and complements your unique style. And most importantly, enjoy the process of organizing your precious pieces!

    Share:

    How to Finish Wooden Shoe Racks for a Professional Look

    How to Finish Wooden Shoe Racks for a Professional Look

    Finishing Wooden Shoe Racks for a Professional Look

    You’ve just built your own shoe rack, and you’re proud of your handiwork. But it’s missing that final touch to really make it stand out. Don’t worry, finishing your wooden shoe rack is a breeze! With a little patience and the right tools, you can easily achieve that polished, professional look you’re going for. Let’s dive into the world of finishing and learn how to turn your DIY project into a stunning piece of furniture.

    Getting Started: Prepping Your Shoe Rack

    Before you even think about grabbing the stain or paint, you need to prepare your shoe rack for a flawless finish. It’s like prepping your canvas before you start painting – the better the foundation, the better the final result.

    Sanding: Smoothing Things Out

    The first step is sanding, and believe me, it’s worth the effort. You want to get rid of any rough spots, imperfections, or unevenness left from your woodworking. Start with a coarser grit sandpaper (around 80 or 100 grit) to remove any major flaws. Then, gradually move to finer grits (like 120, 150, and 220) for a smooth, even surface.

    Remember, sanding with the grain is key. This means running your sandpaper along the direction of the wood’s natural pattern. Going against the grain can create scratches that will show through your finish. You can use a sanding block or a random orbit sander to help you achieve a uniform finish.

    Cleaning: Removing Dust and Debris

    After sanding, it’s time to clean up. You want to remove all the dust and debris that’s accumulated during the sanding process. A tack cloth or a slightly damp cloth will do the trick. Just be sure to let the wood dry completely before moving on to the next step.

    Choosing Your Finish: The Big Decision

    Now comes the fun part: choosing your finish. This is where you get to personalize your shoe rack and bring your vision to life. Here are a few popular options:

    Stain: Enhancing the Wood’s Natural Beauty

    Stains are great for highlighting the natural grain and color of your wood. There are countless stain colors to choose from, ranging from natural wood tones to deep, rich hues. They come in oil-based or water-based formulas. Oil-based stains tend to penetrate deeper and create a richer color, but they take longer to dry and can be messy. Water-based stains dry faster and are easier to clean up, but they may not penetrate as deeply. You can also create custom colors by mixing different stains together.

    Paint: Adding Color and Character

    If you’re looking for a bolder statement or want to cover up any imperfections, paint is the way to go. You can find paints in just about any color imaginable, and they come in a variety of finishes, from matte to gloss. For a more durable finish, consider using a paint specifically designed for furniture. Be sure to apply the paint in thin, even coats to avoid drips and runs.

    Polyurethane: Adding Protection and Shine

    After staining or painting your shoe rack, you’ll want to seal it with a protective finish like polyurethane. It creates a durable barrier that protects your wood from scratches, spills, and UV damage. Polyurethane comes in different finishes – gloss, semi-gloss, satin, and matte – so you can choose the level of shine you prefer. Polyurethane can be oil-based or water-based. Water-based dries faster and cleans up easier, but oil-based is generally considered more durable.

    Applying the Finish: Patience is Key

    Now comes the fun part – actually applying the finish! Remember, it’s all about technique and patience. Here are some tips to get you started:

    Applying Stain

    Use a natural-bristle brush, a cloth, or a foam brush to apply stain. Work in the direction of the wood grain for a uniform look. Apply a thin, even coat and let it dry completely before applying a second coat if necessary.

    Applying Paint

    Use a high-quality paint brush or a foam roller for a smooth finish. Start with a thin coat and let it dry completely before applying a second coat. If you’re using a brush, avoid overlapping strokes as this can lead to brush marks.

    Applying Polyurethane

    Apply polyurethane with a natural-bristle brush, a foam brush, or a cloth. Work in thin, even coats, going with the grain. Let each coat dry completely before applying the next. Remember, the key to a professional finish is to apply thin coats and allow them to dry completely before applying the next.

    Additional Tips for a Professional Look

    Here are a few more tips to help you achieve that professional finish:

  • Always wear gloves to protect your hands from stains, paint, and polyurethane.
  • Work in a well-ventilated area, especially when using oil-based products.
  • Clean up spills immediately to avoid staining.
  • Use a tack cloth or a slightly damp cloth to remove dust and debris before applying each coat.
  • Don’t rush the process. Allow each coat to dry completely before applying the next.
  • Don’t be afraid to experiment with different finishes to find what you like best.
  • Remember, the key to a professional finish is patience, practice, and attention to detail.

    Commonly Asked Questions

    Can I finish my shoe rack with just one coat?

    It depends on the finish you choose. Some finishes, like stain, may only require one coat, while others, like polyurethane, may need two or more coats for a durable finish.

    Can I use a spray gun to apply the finish?

    Yes, you can. A spray gun can give you a smoother, more even finish than a brush or a roller, but it requires more practice and setup.

    What if I mess up? Can I fix it?

    Don’t worry, mistakes happen! If you have any drips, runs, or imperfections, you can sand them down and reapply the finish. It's also a good idea to test the finish on a scrap piece of wood first to get the hang of it.

    Finishing your wooden shoe rack is a rewarding way to personalize your home decor. With the right preparation, tools, and techniques, you can achieve a stunning, professional finish that will make you proud for years to come. So go ahead, embrace the process, and let your creativity shine!

    Share:

    Simple Woodworking Projects You Can Make and Sell

    Simple Woodworking Projects You Can Make and Sell

    Simple Woodworking Projects You Can Make and Sell

    In the realm of woodworking, the allure of crafting beautiful and functional objects is undeniable. Yet, for many aspiring woodworkers, the prospect of undertaking complex projects can seem daunting. Fear not, for the world of woodworking offers a plethora of simple projects that are both achievable and marketable. These projects can serve as stepping stones for beginners, allowing them to hone their skills while exploring the rewarding experience of creating handcrafted items that can be sold for profit.

    This article will delve into a range of simple woodworking projects that are perfect for those just starting their journey into the craft. From charming coasters to elegant serving trays, each project provides an opportunity to develop woodworking skills, experiment with different techniques, and create products that are both aesthetically pleasing and in high demand.

    Essential Tools and Materials

    Before embarking on any woodworking project, it's crucial to gather the necessary tools and materials. While the specific requirements may vary depending on the chosen project, there are some essential tools that form the foundation of any woodworking endeavor. These include:

    • Hand saw: For making basic cuts and shaping wood.
    • Measuring tape: For ensuring accuracy in measurements.
    • Wood glue: For securely bonding wood pieces together.
    • Clamps: For holding wood pieces firmly in place while gluing.
    • Sandpaper: For smoothing wood surfaces and creating a polished finish.
    • Wood stain or paint: For enhancing the appearance of the wood and adding color.
    • Finishing oil or varnish: For protecting the wood from scratches and moisture.

    The type of wood used will depend on the specific project and desired aesthetic. Common options include pine, oak, walnut, and cherry. Remember to select wood that is free of knots, cracks, or other imperfections for optimal results.

    Simple Woodworking Projects for Beginners

    Now, let's explore a selection of simple woodworking projects that are ideal for those new to the craft. These projects are designed to be achievable with basic tools and techniques, providing a satisfying experience for beginners.

    Coasters

    Coasters are a timeless and practical addition to any home. They protect surfaces from heat and spills, while adding a touch of personal style. These projects are a perfect introduction to woodworking as they involve simple cuts and sanding.

    • Materials: Wooden squares, wood glue, sandpaper, wood stain or paint, protective sealant.
    • Steps:
    • Cut the wooden squares to your desired size.
    • Sand the edges and surfaces for a smooth finish.
    • Apply wood stain or paint, if desired.
    • Apply a protective sealant for durability.

    Coasters can be made in various shapes, sizes, and designs, offering creative freedom. Experiment with different wood species, stains, or embellishments to create unique and appealing coasters.

    Serving Trays

    Serving trays are another versatile project that combines functionality and aesthetics. They can be used for serving food, drinks, or organizing household items. These projects involve basic cuts, sanding, and joining techniques.

    • Materials: Wooden boards, wood glue, clamps, sandpaper, wood stain or paint, finishing oil or varnish, handles (optional).
    • Steps:
    • Cut the wooden boards to the desired dimensions for the tray.
    • Join the boards together using wood glue and clamps.
    • Sand the surfaces and edges for a smooth finish.
    • Apply wood stain or paint, if desired.
    • Apply a finishing oil or varnish for protection.
    • Attach handles, if desired.

    Serving trays can be customized with intricate carvings, decorative inlays, or engraved designs. Explore different shapes, sizes, and styles to cater to various tastes.

    Picture Frames

    Picture frames are a classic woodworking project that allows for personal expression. They provide a stylish way to display cherished photographs or artwork. These projects involve precise cuts and joinery techniques.

    • Materials: Wooden strips, miter saw or hand saw, wood glue, clamps, sandpaper, wood stain or paint, finishing oil or varnish, glass or acrylic sheet (optional).
    • Steps:
    • Cut the wooden strips to the desired dimensions using a miter saw or hand saw.
    • Join the strips together at the corners using wood glue and clamps, ensuring precise miter cuts.
    • Sand the surfaces and edges for a smooth finish.
    • Apply wood stain or paint, if desired.
    • Apply a finishing oil or varnish for protection.
    • Attach glass or acrylic sheet, if desired.

    Picture frames can be made in various styles, ranging from minimalist to ornate. Experiment with different wood species, stains, or decorative embellishments to create frames that complement the artwork they enclose.

    Cutting Boards

    Cutting boards are essential kitchen tools that provide a durable and hygienic surface for food preparation. These projects involve simple cuts, sanding, and finishing techniques.

    • Materials: Wooden planks, wood glue, clamps, sandpaper, food-safe oil or wax.
    • Steps:
    • Cut the wooden planks to the desired dimensions for the cutting board.
    • Join the planks together using wood glue and clamps.
    • Sand the surfaces and edges for a smooth finish.
    • Apply a food-safe oil or wax for protection and moisture resistance.

    Cutting boards can be customized with decorative handles, engraved designs, or contrasting wood species for a unique look.

    Wooden Signs

    Wooden signs are a charming and versatile way to display messages, add personality to a space, or promote a business. These projects involve basic cuts, sanding, and lettering techniques.

    • Materials: Wooden board, wood glue, clamps, sandpaper, wood stain or paint, wood burning tool or stencils, finishing oil or varnish.
    • Steps:
    • Cut the wooden board to the desired dimensions.
    • Sand the surfaces and edges for a smooth finish.
    • Apply wood stain or paint, if desired.
    • Use a wood burning tool or stencils to create the desired lettering or designs.
    • Apply a finishing oil or varnish for protection.

    Wooden signs can be made in various shapes, sizes, and styles. Experiment with different fonts, colors, and embellishments to create eye-catching and personalized signs.

    Marketing and Selling Your Creations

    Once you've honed your woodworking skills and created a selection of beautiful and functional items, it's time to consider how to market and sell your creations. There are various platforms and strategies to explore:

    • Online Marketplaces: Sites like Etsy, Amazon Handmade, and eBay provide a readily accessible platform to showcase and sell handcrafted goods to a global audience.
    • Local Craft Fairs and Markets: Participating in local craft fairs and markets allows you to connect directly with potential customers, showcase your work, and build relationships.
    • Social Media: Utilize platforms like Instagram, Facebook, and Pinterest to create a visual portfolio of your work, connect with potential customers, and promote upcoming events.
    • Word-of-Mouth: Don't underestimate the power of word-of-mouth marketing. Share your creations with friends, family, and colleagues, and encourage them to spread the word.

    When pricing your woodworking projects, consider the cost of materials, time spent, and desired profit margin. Research similar items on online marketplaces or at local craft fairs to gauge market prices.

    Conclusion

    Simple woodworking projects offer a fantastic starting point for beginners looking to explore the craft and create marketable goods. From coasters and serving trays to picture frames and cutting boards, these projects are achievable with basic tools and techniques, providing a rewarding experience for both the creator and the buyer.

    By combining your woodworking skills with effective marketing strategies, you can turn your passion into a fulfilling side hustle or even a full-fledged business. So, embrace the joy of woodworking and unleash your creativity to craft beautiful and functional objects that will be cherished for years to come.

    Share:

    How to Make Stylish Birdhouses for Extra Income

    How to Make Stylish Birdhouses for Extra Income

    Turn Your Crafting Skills into Cash: Building Stylish Birdhouses for Extra Income

    Hey there, crafty friends! Ever dreamt of turning your love for DIY into a side hustle? Well, you're in luck! Birdhouses are not just homes for feathered friends; they're also a fantastic way to tap into a lucrative market. Imagine crafting beautiful, unique birdhouses and seeing them bring joy to nature lovers and homeowners alike. Ready to turn your passion into profit? Let's dive into the world of birdhouse building and discover how to make it your money-making masterpiece.

    Why Birdhouses Are a Winning Choice

    Let's be honest, who doesn't love the sound of birds singing in the morning? Birdhouses are more than just charming decorations; they're a gateway to attracting these delightful creatures to your own backyard. This makes them an incredibly popular purchase, especially for people who appreciate nature and the calming presence of birdsong. Plus, they're relatively easy to make, meaning you can get started without needing a ton of specialized equipment or skills.

    Finding Your Birdhouse Niche: It's All About Style

    The key to success is to find your niche – the specific style of birdhouses that sets you apart. Forget plain, boring wooden boxes! Think beyond the ordinary. Here are some ideas to spark your creative fire:

    The Classic Charm of Rustic Designs

    Embrace the beauty of natural materials like reclaimed wood, weathered bark, and twigs. Add touches of rustic charm with hand-painted signs, antique hardware, and even a tiny bird bath. These birdhouses are perfect for those who love a touch of nostalgia and a connection to the natural world.

    Modern and Minimalist Birdhouses: A Touch of Elegance

    For a contemporary feel, go for clean lines, sleek shapes, and bold geometric patterns. Think metal accents, painted geometric designs, and minimalist color palettes. These birdhouses are perfect for homes with a modern aesthetic.

    Whimsical Designs: Fun for the Whole Family

    Get creative! Turn your birdhouses into mini masterpieces with whimsical elements. Imagine fairy houses, miniature cottages, or even adorable animal characters. These charming designs are sure to capture the attention of families with children, adding a playful touch to their gardens.

    Essential Tools and Materials: Building Your Birdhouse Arsenal

    Before you dive into your first birdhouse build, gather the right tools and materials to make your crafting journey smooth. Here's what you'll need:

    • Woodworking Tools: A circular saw, jigsaw, drill, screwdriver, and hammer are essential for cutting, shaping, and assembling your birdhouse.
    • Measuring and Marking Tools: A tape measure, ruler, and pencil will help you achieve precise cuts and create accurate designs.
    • Wood: Choose wood that's durable and weather-resistant. Cedar, redwood, and pine are excellent options.
    • Paint and Finishes: Choose paints that are safe for birds and weatherproof. Consider using eco-friendly options.
    • Hardware: Screws, hinges, hooks, and decorative elements will help you secure your birdhouse and add unique touches.
    • Safety Gear: Don't forget about safety! Always wear safety glasses, a dust mask, and gloves while working.

    Crafting Your Masterpieces: Birdhouse Building Basics

    Now, let's break down the birdhouse building process into easy steps. Don't worry, you'll be a birdhouse pro in no time!

    1. Sketch Your Design: Before you start cutting, sketch your birdhouse design on paper. This will help you visualize the finished product and plan your cuts.
    2. Cut and Shape the Wood: Using your woodworking tools, carefully cut the wood according to your design. Make sure to create precise cuts for a clean and professional finish.
    3. Assemble the Base and Walls: Join the base pieces together, followed by the walls. Use wood glue and screws to secure the joints. Make sure to use sturdy construction methods that will withstand the elements.
    4. Add the Roof: Attach the roof to the walls, ensuring a secure fit. Use a small overhang to prevent rainwater from entering the birdhouse.
    5. Create the Entrance Hole: Carefully drill the entrance hole at the correct size and position. Research the specific bird species you're targeting to ensure you provide an appropriate entrance size.
    6. Add Decorative Touches: Now it's time to unleash your creativity! Paint your birdhouse, add decorative accents, or even craft a miniature bird feeder to attract your feathered guests.
    7. Finish and Seal: Apply a clear sealant to protect your birdhouse from weather damage and maintain its beauty.

    Marketing Your Birdhouses: Finding Your Flock of Customers

    Now that you've built some stunning birdhouses, it's time to get them in front of potential buyers. Here are some strategies for finding your flock of customers:

    • Local Craft Fairs and Markets: Craft fairs are an excellent way to connect with customers face-to-face and showcase your unique designs. You can also offer personalized birdhouses and custom orders.
    • Online Marketplaces: Platforms like Etsy and eBay offer a global audience for your birdhouses. Create high-quality photos and write captivating product descriptions to attract buyers.
    • Social Media Marketing: Use Instagram, Facebook, and Pinterest to showcase your birdhouses. Create engaging content, run contests, and use relevant hashtags to reach your target audience.
    • Local Garden Centers and Florists: Partner with local businesses that sell gardening supplies and plants. They can often display your birdhouses in their stores and recommend them to their customers.
    • Your Own Website: Create a simple website or online store to showcase your birdhouse collection and provide more information about your products.

    Setting Prices: Balancing Value and Profit

    Pricing your birdhouses is a balancing act. You want to charge a fair price that reflects the time, effort, and materials you put into each piece, but also make them attractive to buyers. Consider the following factors when setting your prices:

    • Materials Cost: Factor in the cost of wood, paint, hardware, and any other materials you use.
    • Time and Effort: Account for the time you spend designing, building, and finishing each birdhouse.
    • Market Research: Look at the prices of similar birdhouses on online marketplaces and in local stores. This will give you a sense of the current market value.
    • Value Proposition: Highlight your unique selling points, such as high-quality materials, intricate designs, or personalized touches.

    Tips for Success: Flying High with Your Birdhouse Business

    Here are some additional tips to help you soar with your birdhouse business:

    • Stay Up-to-Date: Keep an eye on trends in the birdhouse market and be open to incorporating new styles and designs.
    • Focus on Quality: Use high-quality materials and craftsmanship to create birdhouses that are durable and aesthetically pleasing.
    • Provide Excellent Customer Service: Respond promptly to inquiries, package your birdhouses carefully, and be attentive to any feedback.
    • Network and Collaborate: Connect with other crafters and businesses in your community. You can share resources, ideas, and even collaborate on projects.
    • Embrace Sustainability: Use eco-friendly materials and practices whenever possible to reduce your environmental impact and appeal to environmentally conscious customers.

    Frequently Asked Questions

    Here are some common questions about building and selling birdhouses:

    • What kind of wood is best for birdhouses? Cedar, redwood, and pine are excellent choices due to their durability and weather resistance. These woods naturally resist rot and insect damage, ensuring your birdhouses last for years.
    • What are some popular birdhouse designs? Popular birdhouse designs range from classic rustic styles to modern minimalist designs and whimsical fairy houses. Consider the preferences of your target market when choosing designs.
    • How much can I sell my birdhouses for? Prices vary widely depending on the size, complexity, materials, and unique features of the birdhouse. You can typically find birdhouses priced from $20 to $100 or more.
    • Where can I find customers for my birdhouses? Craft fairs, online marketplaces, garden centers, and social media are all excellent platforms for selling birdhouses. Connecting with local businesses and promoting your products online can expand your reach.

    So there you have it! Building and selling birdhouses can be a rewarding and profitable endeavor. Get creative, find your niche, and let your crafting skills take flight. Happy birdhouse building!

    Share:

    The Best Materials for Building Floating Shelves in Your Home

    The Best Materials for Building Floating Shelves in Your Home

    The Best Materials for Building Floating Shelves in Your Home

    Floating shelves are a fantastic way to add storage and style to any room in your home. They create a clean, modern look and can be customized to fit your exact needs. But with so many materials to choose from, it can be overwhelming to decide which one is right for you. This guide will explore the most popular materials for floating shelves and help you choose the best option for your specific project.

    Wood: The Classic Choice for Floating Shelves

    Wood remains the most popular choice for floating shelves due to its versatility, natural beauty, and affordability. Whether you prefer the rustic charm of reclaimed wood, the timeless elegance of oak, or the modern simplicity of maple, there's a wood type to suit every aesthetic.

    Pros of Wood

    • Natural Beauty: Wood offers a warm, organic aesthetic that adds character and depth to any space.
    • Durability: Properly treated and finished wood can withstand daily use and last for years.
    • Versatility: Wood can be stained, painted, or left natural, offering endless customization possibilities.
    • Affordability: Compared to other materials, wood is generally more budget-friendly.

    Cons of Wood

    • Susceptibility to Moisture: Wood can warp or rot if exposed to excessive moisture, making it less suitable for bathrooms or outdoor areas.
    • Maintenance: Wood requires regular cleaning and may need refinishing over time.

    Metal: For a Contemporary and Industrial Touch

    Metal floating shelves bring a modern and industrial vibe to any room. Steel, iron, and aluminum are popular choices, each offering distinct visual appeal and durability. Metal shelves can be painted or left raw for a sleek, minimalist look.

    Pros of Metal

    • Durability: Metal is strong and resistant to scratches and dents.
    • Sleek Design: Metal shelves offer a clean, minimalist aesthetic that complements contemporary décor.
    • Lightweight: Metal shelves are generally lighter than wood, making them easier to install.
    • Moisture Resistance: Metal is less susceptible to moisture damage, making it suitable for bathrooms and kitchens.

    Cons of Metal

    • Cold to the Touch: Metal can feel cold, especially in cooler environments.
    • Potential for Rust: Some metals are susceptible to rust if not properly treated.

    Glass: For a Modern and Elegant Look

    Glass shelves create a sophisticated and airy feel, adding a touch of elegance to any room. They are particularly well-suited for displaying decorative items, making them perfect for showcasing your prized possessions.

    Pros of Glass

    • Minimalist Aesthetics: Glass shelves disappear visually, creating a sleek and open look.
    • Light Reflection: Glass reflects light, making a room appear brighter and more spacious.
    • Easy to Clean: Glass shelves are simple to wipe clean, maintaining their pristine look.

    Cons of Glass

    • Fragility: Glass can be prone to breakage, making it less suitable for heavy items.
    • Fingerprints: Glass can easily show fingerprints, requiring regular cleaning.
    • Cost: Glass shelves can be more expensive than wood or metal shelves.

    Choosing the Right Material for Your Floating Shelves

    The best material for your floating shelves depends on your needs, style preferences, and budget. Consider these factors when making your decision:

    • Style: Wood offers a classic look, metal provides a contemporary feel, and glass creates a sleek and modern aesthetic.
    • Function: Wood is a versatile material, metal is strong and durable, and glass is ideal for displaying decorative items.
    • Location: Consider moisture levels when selecting materials. Wood is less suitable for humid environments, while metal and glass are more resistant to moisture.
    • Budget: Wood is generally the most affordable option, followed by metal and then glass.

    By carefully considering these factors, you can choose the perfect material for your floating shelves and create a stunning and functional addition to your home.

    Share:

    Budget-Friendly Wood Wall Clock Projects That Sell Well

    Budget-Friendly Wood Wall Clock Projects That Sell Well

    Budget-Friendly Wood Wall Clock Projects That Sell Well

    Are you looking for a creative and profitable side hustle? Look no further than crafting budget-friendly wood wall clocks! These charming timepieces are in high demand, and with a bit of ingenuity and some readily available materials, you can create stunning pieces that will fly off your shelves. Let's explore some inspiring ideas and tips to help you get started.

    The Beauty of Wood Wall Clocks

    Wood wall clocks exude a warm and inviting ambiance, seamlessly blending into any decor style. They add a touch of rustic charm to modern homes, complement the farmhouse aesthetic, and even bring a vintage vibe to contemporary spaces. Their versatility makes them a popular choice for a wide range of customers.

    Why They Sell Well

    Here's why wood wall clocks are a hot commodity:

    • Uniqueness: Each clock is a handcrafted piece, making it one-of-a-kind and highly desirable.
    • Personalization: You can customize them with various wood types, stains, designs, and clock mechanisms, allowing customers to express their personal style.
    • Giftability: Wood wall clocks make wonderful housewarming gifts, birthday presents, or thoughtful additions to any occasion.
    • Versatility: They can be incorporated into diverse settings, from living rooms and bedrooms to kitchens and offices.

    Budget-Friendly Materials and Tools

    Creating wood wall clocks doesn't have to break the bank. You can start with affordable materials and tools readily available at your local hardware store or online retailers.

    Wood Selection

    Choose wood scraps, reclaimed wood, or inexpensive wood boards from your local lumberyard. Consider using plywood for a more budget-friendly option.

    Clock Mechanisms

    Look for affordable quartz clock mechanisms online or at craft stores. These are readily available and provide accurate timekeeping.

    Essential Tools

    You'll need a few basic tools to get started:

    • Jigsaw or scroll saw
    • Drill and drill bits
    • Sandpaper
    • Stain or paint
    • Measuring tape and pencil

    Creative Design Ideas for Wood Wall Clocks

    Let your imagination run wild! The possibilities for wood wall clock designs are endless. Here are a few inspirational ideas to spark your creativity:

    Geometric Shapes

    Create a modern look by cutting out geometric shapes from wood, such as squares, triangles, or hexagons. Combine different shapes and sizes for an eclectic and unique piece.

    Rustic Charm

    Embrace the beauty of natural wood by leaving its natural texture and knots exposed. Consider using reclaimed wood with a distressed finish for a truly rustic aesthetic.

    Floral Motifs

    Add a touch of elegance by carving or burning floral designs into the wood. Use stencils for intricate patterns, or create freehand sketches for a more organic look.

    Personalized Touches

    Offer customization options to your customers. Let them choose their preferred wood type, stain color, and design elements to make their clock truly unique.

    Marketing Your Wood Wall Clocks

    Once you've crafted your stunning wood wall clocks, it's time to market them! Here are some effective strategies to reach potential buyers:

    Online Marketplaces

    Utilize platforms like Etsy, Amazon Handmade, and Facebook Marketplace to showcase your handcrafted creations. These platforms offer a wide audience and convenient ways to manage orders and payments.

    Social Media Marketing

    Leverage Instagram, Pinterest, and Facebook to share high-quality photos and videos of your wood wall clocks. Engage with your followers, run contests, and use relevant hashtags to increase visibility.

    Local Craft Shows and Markets

    Participate in local craft shows and markets to connect with potential customers face-to-face. Offer personalized service and allow shoppers to touch and feel your beautiful wood wall clocks.

    Conclusion

    Crafting and selling budget-friendly wood wall clocks is a rewarding and profitable side hustle. With a little creativity, dedication, and smart marketing strategies, you can turn your passion into a successful venture. So, grab your tools, unleash your imagination, and start building your dream business!

    Share:

    人気の投稿

    Powered by Blogger.