Easy and budget-friendly woodworking ideas for creating personalized wood crafts and home accents.

Showing posts with label Storage. Show all posts

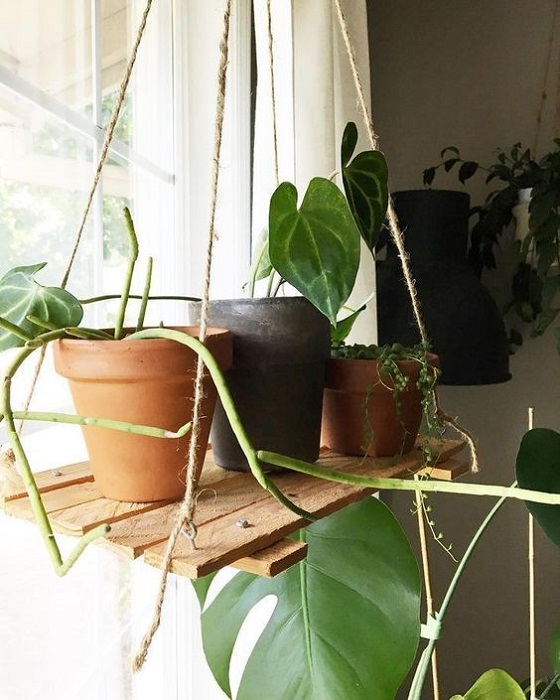
How to Make Floating Shelves That Are Perfect for Displaying Plants

How to Make Floating Shelves That Are Perfect for Displaying Plants

How to Make Floating Shelves That Are Perfect for Displaying Plants

Floating shelves are a fantastic way to add a touch of greenery to any space, creating a vibrant and refreshing atmosphere. Whether you have a small apartment or a spacious living room, these shelves offer a unique and stylish solution for showcasing your favorite plants. In this article, we'll walk you through the process of building your own floating shelves, making them perfect for displaying your beloved botanical companions.

Choosing the Right Materials

The first step in building your floating shelves is selecting the right materials. Here's what you'll need:

  • Wood planks: Select a wood type that's both sturdy and aesthetically pleasing. Some popular choices include pine, maple, or oak.
  • Brackets: These are essential for supporting the shelves. Look for brackets specifically designed for floating shelves, often made of metal or wood. They should be strong enough to hold the weight of your plants.
  • Screws: Choose screws that are long enough to securely fasten the brackets to the wall and the shelves to the brackets.
  • Sandpaper: You'll need sandpaper to smooth out the wood and create a polished finish.
  • Wood stain or paint: (Optional) Use these to add color and protect the wood from moisture and damage.
  • Measuring tape, level, and pencil: These are crucial for ensuring your shelves are perfectly aligned and level.
  • Drill: A drill with the appropriate drill bits is necessary for creating pilot holes and fastening screws.

Cutting and Preparing the Wood

With your materials gathered, it's time to cut the wood planks to your desired size. Carefully measure the length and width of the shelves you want to create. You can use a circular saw or a handsaw for this step. Once the wood is cut, use sandpaper to smooth out any rough edges and create a smooth surface for your plants.

Finishing Touches

To enhance the look and protect your shelves, you can apply a wood stain or paint. Select a color that complements your decor and brings out the beauty of your wood. Allow the stain or paint to dry completely before proceeding to the next step.

Installing the Brackets

Now comes the critical step of attaching the brackets to the wall. Choose a location that's stable and can support the weight of your shelves and plants. Using a level, mark the placement of the brackets on the wall. Then, use your drill to create pilot holes for the screws. This prevents the wood from splitting when you drive in the screws. Securely fasten the brackets to the wall with the appropriate screws.

Attaching the Shelves

With the brackets installed, you're ready to attach the shelves. Gently lift the shelves onto the brackets. Before fully securing the shelves, double-check that they are level and perfectly aligned. Once satisfied, use the remaining screws to attach the shelves to the brackets.

Adding the Finishing Touches

Your floating shelves are now ready to be adorned with your plant collection! Choose plants that complement the size and style of your shelves, and enjoy the beauty they bring to your space. You can experiment with different plant arrangements to create a unique and eye-catching display. Here are some extra tips:

  • Use a variety of plant sizes and shapes. Mix and match different types of plants to create visual interest.
  • Incorporate hanging plants. Create a cascading effect by hanging plants from the shelves.
  • Add decorative elements. Enhance the display with small decorative items like pebbles, ornaments, or small sculptures.
  • Consider lighting. Add LED lights to highlight the shelves and showcase your plants.

Creating floating shelves is a fun and rewarding project that allows you to display your plants in a stylish and modern way. With a little effort and a bit of creativity, you can transform your home into a lush green oasis, making it a more beautiful and inviting space for you and your plants.

Share:

Eco-Friendly Wooden Blanket Ladders to Sell

Eco-Friendly Wooden Blanket Ladders to Sell

Cozy Up With Style: Build Your Own Wooden Blanket Ladder

Are you tired of your blankets cluttering up your living space? Do you dream of a chic and organized way to store your throw blankets, quilts, and other cozy necessities? Well, say hello to the wooden blanket ladder – the perfect solution for a functional and stylish storage solution that adds a touch of natural elegance to your home.

Forget about those bulky, boring shelves or unsightly storage bins! A wooden blanket ladder offers a charming and practical way to display your favorite blankets while keeping them readily accessible. It's not just about functionality, it's about adding a touch of warmth and personality to your living room, bedroom, or even your porch.

Ready to dive in and explore the world of wooden blanket ladders? Let's uncover the benefits, the different styles, and everything you need to know to choose the perfect ladder for your space!

Why Choose a Wooden Blanket Ladder?

More than just a storage solution, a wooden blanket ladder brings a unique blend of style, functionality, and sustainability to your home.

A Touch of Natural Charm

The warmth and beauty of natural wood bring a touch of rustic elegance to any space. It's a simple yet effective way to add a bit of character and personality to your living room, bedroom, or even your entryway. Think of it as a subtle, yet striking way to elevate the overall aesthetic of your home.

Versatile Styling

Wooden blanket ladders are incredibly versatile! Whether you're going for a farmhouse chic look, a modern minimalist vibe, or a cozy bohemian aesthetic, there's a ladder style that will perfectly complement your decor. You can even personalize it by adding your own touch with paint, stain, or decorative accents.

Functionality Meets Style

Beyond the visual appeal, wooden blanket ladders are incredibly practical. They keep your blankets neatly organized, easily accessible, and off the floor. It's a great way to reduce clutter and create a sense of order in your space. Plus, they're a great way to add some visual interest to your walls.

Eco-Friendly Choice

Choosing a wooden blanket ladder is a way to embrace sustainable living. Wood is a renewable resource, and choosing responsibly sourced wood ensures that you're making an eco-conscious decision. Plus, a well-made wooden ladder will last for years to come, minimizing your environmental impact.

Different Styles to Choose From

Ready to find the perfect ladder for your home? Here are some of the most popular styles:

Classic Ladder Style

The traditional ladder design is a timeless choice that works beautifully in a variety of settings. It typically features a simple, rectangular frame with rungs spaced evenly apart. This style is a great choice for minimalist or traditional decor.

Rustic Ladder Style

For a more rustic and natural look, opt for a ladder with a distressed finish or reclaimed wood. These ladders often feature uneven rungs or a more weathered aesthetic, adding a touch of vintage charm to your space.

Modern Ladder Style

For a more contemporary look, choose a ladder with sleek lines and a minimalist design. Look for ladders made from hardwoods like walnut or oak, often finished with a clear coat or a light stain.

Decorative Ladder Style

Want to add a personal touch? Consider a decorative ladder with unique accents, such as a woven rope or a metal top rail. These ladders often feature intricate details or carvings, adding a touch of artistic flair to your space.

Crafting Your Own Wooden Blanket Ladder

Feeling crafty? You can build your own wooden blanket ladder! It's a fun and rewarding project that allows you to create a truly personalized piece for your home. Plus, you can customize it with your favorite wood species, stain, or paint to perfectly match your decor.

Here are some tips for crafting your own blanket ladder:

  • Choose a wood species that is durable and aesthetically pleasing. Oak, maple, and walnut are excellent options for their strength and beauty.
  • Purchase pre-cut lumber or have your lumberyard cut the pieces to your specifications.
  • Use wood glue and screws for a secure and durable construction.
  • Sand the wood to a smooth finish and apply a stain or paint for a personalized look.
  • Finding the Right Spot For Your Ladder

    Once you've chosen your wooden blanket ladder, it's time to find the perfect spot for it. Here are some ideas:

  • Living Room: A blanket ladder can create a cozy and inviting focal point in your living room. Place it beside a sofa or armchair, or against a blank wall to add visual interest.
  • Bedroom: Use a blanket ladder to keep your bedding organized and within easy reach. Place it at the foot of the bed, or in a corner for a touch of rustic charm.
  • Entryway: A blanket ladder is a stylish way to store hats, scarves, and other accessories in your entryway. It adds a touch of personality to your home's first impression.
  • Bathroom: Store towels or robes on a blanket ladder for a spa-like experience in your bathroom.
  • Kitchen: Use a blanket ladder to store tea towels, pot holders, or even kitchen linens for a charming touch in your kitchen.
  • Caring for Your Wooden Blanket Ladder

    To keep your wooden blanket ladder looking its best, follow these simple care tips:

  • Dust Regularly: Use a soft cloth or duster to remove dust and debris from the ladder's surface.
  • Clean with a Mild Soap: For deeper cleaning, mix a mild soap with warm water and gently wipe down the ladder. Rinse with a damp cloth and dry thoroughly.
  • Avoid Harsh Chemicals: Avoid using harsh chemicals or abrasive cleaners on your wooden ladder. These can damage the finish and dull the wood's natural beauty.
  • Protect From Moisture: Keep your wooden ladder away from excessive moisture, as this can cause warping or damage.
  • Commonly Asked Questions

    Can I use a blanket ladder for anything other than blankets?

    Absolutely! Blanket ladders are versatile and can be used for a variety of storage purposes. Think of it as a stylish and functional way to organize almost anything!

    How much weight can a wooden blanket ladder hold?

    The weight capacity of a wooden blanket ladder depends on the materials and construction. Look for ladders made with sturdy wood and strong joints to ensure they can safely hold the weight of your belongings.

    Where can I buy a wooden blanket ladder?

    You can find wooden blanket ladders at a variety of home decor stores, furniture retailers, and online marketplaces. Many Etsy sellers offer handcrafted ladders, while larger retailers like Target and Walmart also carry affordable options.

    Can I customize a wooden blanket ladder?

    Yes! Many wooden blanket ladders can be easily customized with paint, stain, or other decorative elements. You can also add your own touch by incorporating unique hardware or by incorporating your own design elements.

    Ready to bring a touch of rustic charm and functional storage to your home? Embrace the beauty and versatility of a wooden blanket ladder! It's a practical and stylish way to keep your blankets organized while adding a touch of natural elegance to your space. Happy decorating!

    Share:

    Dado Joints Explained: A Beginner’s Guide to Woodworking

    Dado Joints Explained: A Beginner’s Guide to Woodworking

    Dado Joints Explained: A Beginner's Guide to Woodworking

    Dado joints, those neat, rectangular slots cut into wood, are the backbone of sturdy furniture and woodworking projects. They provide strength, stability, and a clean, professional look. But fear not, novice woodworkers, for mastering dado joints is easier than you might think! This guide will break down the basics, giving you the knowledge and confidence to tackle this versatile woodworking technique.

    Understanding Dado Joints

    Imagine a groove, a rectangular channel, carved into a piece of wood. That's a dado joint. Think of them as a mortise and tenon's more modern, robust cousin. You create a dado on one piece of wood to receive the "tongue" or "tenon" of another piece. This interlocking system forms a strong, secure joint, often used for shelving, drawer boxes, or frame construction.

    The Benefits of Using Dado Joints

    Why bother with dado joints when simple butt joints seem so much easier? Here's why:

    • Strength and Stability: Dado joints distribute weight evenly across the entire surface of the joint, preventing movement and creating a remarkably strong bond.
    • Clean Aesthetics: Unlike traditional butt joints, dado joints create a flush, seamless look, enhancing the visual appeal of your projects.
    • Versatile: Dado joints can be used for a wide variety of applications, from simple shelf construction to intricate furniture designs.

    Tools for Cutting Dado Joints

    While you can manually cut dado joints with a chisel, a saw, and a lot of patience, these modern tools make the process much easier and precise:

    Table Saw

    The most popular tool for cutting dado joints. You can utilize dado stacks, sets of saw blades that create the desired width, for smooth, consistent cuts. This method offers great control and allows for different dado widths.

    Router

    Using a router with a dado bit is another effective way to cut dado joints. You can create varying depths and widths by adjusting the router's depth and the bit size. It's a great option for tight spaces and intricate designs.

    Dado Set

    A dado set is a specialized set of saw blades designed for cutting dado joints. It typically includes a dado head (the main blade), a chipper (to remove waste), and spacers (to adjust the width of the dado). This method is great for consistent width and clean cuts, although it might be more expensive than individual blades.

    Types of Dado Joints

    The world of dado joints is more diverse than you might think. Explore different types to find the best fit for your project:

    Through Dado Joints

    These are your classic dado joints, running completely through the thickness of the wood. Perfect for creating shelves, drawers, or strong frame joints.

    Stop Dado Joints

    Stop dado joints are only cut a certain distance into the wood, creating a groove that stops before reaching the end of the piece. Ideal for creating shelves or drawer dividers that fit snugly within a frame.

    Blind Dado Joints

    The hidden gems of the dado family, these joints are cut from one side of the wood, creating a groove that ends before reaching the other side. This offers strength and stability without being visibly prominent, perfect for creating clean, minimalist designs.

    Cutting Dado Joints: A Step-by-Step Guide

    Ready to dive in? Let's break down the cutting process using a table saw, a widely used method for dado joints:

    1. Choose your materials and cut your dado width: Determine the exact width needed for your dado joint. Select a dado stack or individual blades based on the required width.
    2. Set your fence: Carefully adjust the fence on your table saw to create the proper dado width. Ensure it is perfectly aligned for consistent results.
    3. Cut your dado: Make your first pass through the wood with the dado stack, slowly and carefully. This initial cut will create a channel for your dado.
    4. Adjust your depth and cut: Make a second pass, increasing the depth of the cut slightly to create a deeper dado. Repeat this process until you achieve the desired depth.
    5. Clean up: Use a chisel or router to clean up the edges of your dado joint and ensure a smooth, even surface. Clean up any sawdust or debris from the area.

    Tips for Success with Dado Joints

    These helpful pointers can elevate your dado joint game:

    • Measure twice, cut once: Accuracy is paramount when working with dado joints. Take your time to double-check measurements before making any cuts.
    • Use a push stick: For safety and control, especially when dealing with large pieces, use a push stick to feed the wood through the table saw.
    • Don't rush: Patience is key. Take your time, make slow and steady cuts, and avoid forcing the wood through the saw.
    • Practice makes perfect: Start with small projects and gradually increase the complexity as you gain confidence. Experiment with different dado types and techniques to discover your preferred approach.

    There you have it! Now you're equipped with the knowledge to tackle dado joints like a seasoned woodworker. With a little practice and patience, you'll be creating sturdy, beautiful, and professional-looking projects in no time. Happy woodworking!

    Share:

    DIY Wood Serving Trays with a Modern Twist

    DIY Wood Serving Trays with a Modern Twist

    DIY Wood Serving Trays with a Modern Twist: Elevate Your Entertaining Game

    Hey there, crafting enthusiasts! Ready to add a touch of personalized style to your home decor? We're about to embark on a DIY journey that's both fun and rewarding - crafting gorgeous, modern wood serving trays that will impress your guests and elevate your entertaining game.

    Forget those generic store-bought trays. With a little creativity and these easy-to-follow instructions, you can build something truly unique and tailored to your taste. Plus, the satisfaction of crafting something beautiful with your own hands? Priceless!

    Choosing the Right Wood

    The first step is choosing the perfect wood. You want something durable, easy to work with, and visually appealing. Here are a few popular choices:

    • Pine: Affordable, lightweight, and easy to cut. It's a great option for beginners.
    • Maple: Durable, with a beautiful grain pattern. It's a bit more expensive but offers a classic look.
    • Walnut: Rich, dark wood with a stunning grain. It's luxurious and perfect for a statement piece.
    • Cherry: Warm, reddish-brown wood with a smooth finish. It ages beautifully and develops a rich patina over time.
    • Oak: Sturdy and durable, with a pronounced grain. It's a great choice for a rustic or traditional style.

    Consider the size and shape you want for your tray. For a smaller, more delicate option, thin wood like pine or maple works well. If you're going for a larger, sturdier tray, oak or walnut are excellent choices.

    Tools and Materials

    Before you get started, gather your tools and materials. You'll need:

    • Wood in your desired size and thickness
    • Circular saw or jigsaw (for cutting the wood)
    • Sandpaper (various grits, from coarse to fine)
    • Wood glue
    • Wood stain (optional) and a brush
    • Polyurethane or varnish (for finishing)
    • Measuring tape
    • Pencil
    • Safety glasses
    • Work gloves

    Building Your Modern Wood Tray: Step-by-Step

    Now, let's get crafty! Follow these steps to create your own unique serving tray:

    1. Cutting the Wood

    Start by measuring and marking the wood for your desired tray dimensions. You'll need two pieces for the base and two pieces for the sides. Use a circular saw or jigsaw to cut the wood to size, ensuring clean and accurate cuts.

    2. Sanding and Refinishing

    Once the wood is cut, use sandpaper to smooth out any rough edges. Start with coarse sandpaper and work your way up to finer grits for a smoother finish. This step is crucial for a polished look and a comfortable feel.

    3. Applying the Stain (Optional)

    If you want to add color and enhance the wood's natural beauty, now's the time to apply stain. Choose a stain that complements the wood you've chosen. Apply it evenly with a brush, following the wood grain for a natural effect.

    4. Assembling the Tray

    Now, it's time to bring your tray together! Apply wood glue to the edges of the base pieces and attach the side pieces, ensuring they are aligned and flush with the base. Use clamps to hold the pieces together until the glue dries completely.

    5. Finishing Touches

    Once the glue is dry, apply a protective finish like polyurethane or varnish to seal the wood and enhance its durability. Apply two or three coats, allowing each coat to dry completely before applying the next.

    Adding a Modern Twist

    Now comes the fun part! Let's give your tray a modern edge. Here are a few ideas:

    • Geometric Shapes: Cut out a simple geometric shape from the base of the tray. You can use a jigsaw or a laser cutter for more precise cuts.
    • Metal Accents: Attach metal handles or corner pieces to the tray for a sleek and modern look.
    • Unique Hardware: Use decorative hinges or latches as handles, adding a touch of personality.
    • Inlay Designs: Create intricate designs by inlaying contrasting wood pieces into the base.

    Ideas for Decorating Your Tray

    Now that you've got your beautiful modern tray, let's talk about how to style it! Here are some inspiring ideas:

    • Serve Drinks: Display your favorite cocktails or mocktails on your tray for a stylish and easy-to-carry drink station.
    • Organize Accessories: Keep your remote controls, magazines, and other essentials tidy and within reach with your decorative tray.
    • Decorative Display: Showcase small plants, candles, or other decorative items on your tray for a touch of elegance.
    • Host a Cheese Board: Impress your guests with a gourmet cheese board artfully arranged on your modern tray.
    • Gift Wrap Station: Set up a dedicated gift-wrapping station with your tray, featuring your favorite wrapping paper and ribbons.

    Frequently Asked Questions

    Let's address some common questions you might have about your DIY wood tray project:

    1. What kind of wood glue should I use?

    Use a wood glue specifically designed for woodworking projects. Titebond II is a popular choice for its strong bond and water resistance.

    2. Can I use pre-stained wood?

    Yes, you can use pre-stained wood to save time. However, be mindful that the stain might not adhere as well to the existing finish.

    3. How do I seal the tray without making it too glossy?

    Choose a matte or semi-gloss polyurethane or varnish for a more natural finish. You can also apply a layer of sanding sealer before applying the final coat for a smoother, less glossy look.

    4. What are some alternative ways to add a modern twist?

    Get creative! You can try painting the edges of the tray with a contrasting color, adding a metallic paint finish, or even adding some minimalist stencils. The possibilities are endless!

    There you have it! Now you're equipped to create stunning, modern wood serving trays that'll elevate your home decor and impress your guests. So get those crafting hands ready, have fun, and let your creativity shine through. Remember, the best part about DIY is that you can personalize it to your heart's content. Happy crafting!

    Share:

    Budget-Friendly Wood Wall Clock Projects That Sell Well

    Budget-Friendly Wood Wall Clock Projects That Sell Well

    Budget-Friendly Wood Wall Clock Projects That Sell Well

    Are you looking for a creative and profitable side hustle? Look no further than crafting budget-friendly wood wall clocks! These charming timepieces are in high demand, and with a bit of ingenuity and some readily available materials, you can create stunning pieces that will fly off your shelves. Let's explore some inspiring ideas and tips to help you get started.

    The Beauty of Wood Wall Clocks

    Wood wall clocks exude a warm and inviting ambiance, seamlessly blending into any decor style. They add a touch of rustic charm to modern homes, complement the farmhouse aesthetic, and even bring a vintage vibe to contemporary spaces. Their versatility makes them a popular choice for a wide range of customers.

    Why They Sell Well

    Here's why wood wall clocks are a hot commodity:

    • Uniqueness: Each clock is a handcrafted piece, making it one-of-a-kind and highly desirable.
    • Personalization: You can customize them with various wood types, stains, designs, and clock mechanisms, allowing customers to express their personal style.
    • Giftability: Wood wall clocks make wonderful housewarming gifts, birthday presents, or thoughtful additions to any occasion.
    • Versatility: They can be incorporated into diverse settings, from living rooms and bedrooms to kitchens and offices.

    Budget-Friendly Materials and Tools

    Creating wood wall clocks doesn't have to break the bank. You can start with affordable materials and tools readily available at your local hardware store or online retailers.

    Wood Selection

    Choose wood scraps, reclaimed wood, or inexpensive wood boards from your local lumberyard. Consider using plywood for a more budget-friendly option.

    Clock Mechanisms

    Look for affordable quartz clock mechanisms online or at craft stores. These are readily available and provide accurate timekeeping.

    Essential Tools

    You'll need a few basic tools to get started:

    • Jigsaw or scroll saw
    • Drill and drill bits
    • Sandpaper
    • Stain or paint
    • Measuring tape and pencil

    Creative Design Ideas for Wood Wall Clocks

    Let your imagination run wild! The possibilities for wood wall clock designs are endless. Here are a few inspirational ideas to spark your creativity:

    Geometric Shapes

    Create a modern look by cutting out geometric shapes from wood, such as squares, triangles, or hexagons. Combine different shapes and sizes for an eclectic and unique piece.

    Rustic Charm

    Embrace the beauty of natural wood by leaving its natural texture and knots exposed. Consider using reclaimed wood with a distressed finish for a truly rustic aesthetic.

    Floral Motifs

    Add a touch of elegance by carving or burning floral designs into the wood. Use stencils for intricate patterns, or create freehand sketches for a more organic look.

    Personalized Touches

    Offer customization options to your customers. Let them choose their preferred wood type, stain color, and design elements to make their clock truly unique.

    Marketing Your Wood Wall Clocks

    Once you've crafted your stunning wood wall clocks, it's time to market them! Here are some effective strategies to reach potential buyers:

    Online Marketplaces

    Utilize platforms like Etsy, Amazon Handmade, and Facebook Marketplace to showcase your handcrafted creations. These platforms offer a wide audience and convenient ways to manage orders and payments.

    Social Media Marketing

    Leverage Instagram, Pinterest, and Facebook to share high-quality photos and videos of your wood wall clocks. Engage with your followers, run contests, and use relevant hashtags to increase visibility.

    Local Craft Shows and Markets

    Participate in local craft shows and markets to connect with potential customers face-to-face. Offer personalized service and allow shoppers to touch and feel your beautiful wood wall clocks.

    Conclusion

    Crafting and selling budget-friendly wood wall clocks is a rewarding and profitable side hustle. With a little creativity, dedication, and smart marketing strategies, you can turn your passion into a successful venture. So, grab your tools, unleash your imagination, and start building your dream business!

    Share:

    人気の投稿

    Powered by Blogger.