Easy and budget-friendly woodworking ideas for creating personalized wood crafts and home accents.

Showing posts with label Shoe. Show all posts

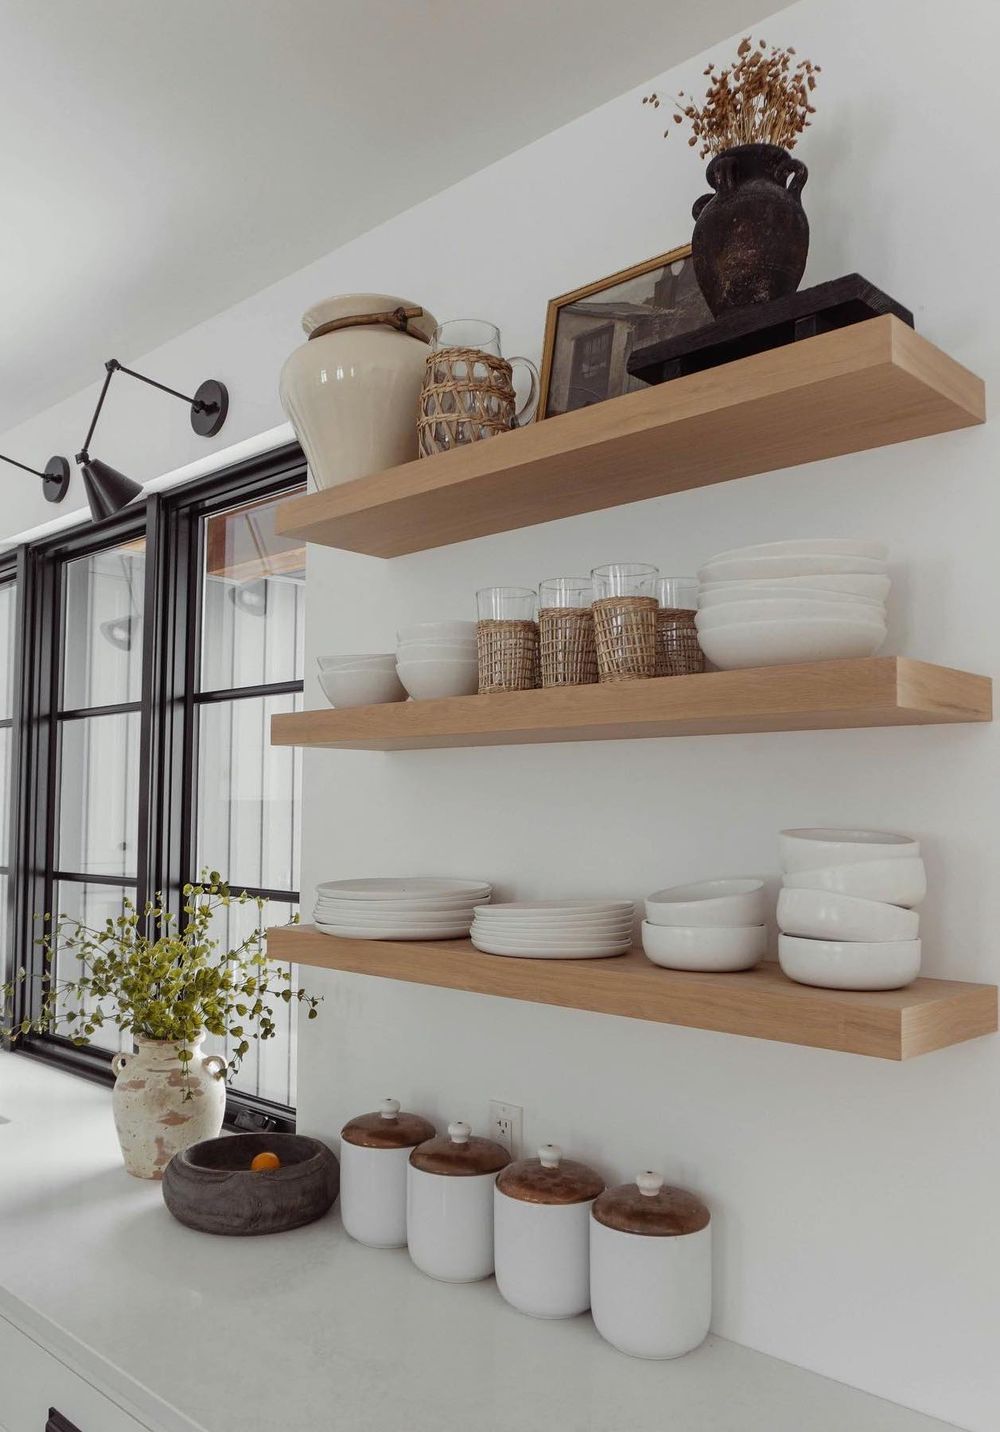
DIY Floating Shelf Ideas for a Minimalist or Modern Interior

DIY Floating Shelf Ideas for a Minimalist or Modern Interior

Elevate Your Minimalist or Modern Home with DIY Floating Shelves

Hey there, design enthusiasts! Tired of bulky bookshelves cluttering your minimalist or modern space? Floating shelves are the perfect solution to seamlessly integrate storage and style. Not only are they visually appealing, but they also offer the flexibility to create a bespoke look that complements your unique aesthetic.

The best part? You don't need to shell out big bucks for fancy pre-made shelves. With a little DIY know-how and a few simple materials, you can craft stunning floating shelves that add a touch of elegance and functionality to your home.

Floating Shelf Styles for Every Space

Before diving into the construction process, let's talk about the different styles of floating shelves you can create. Here are a few ideas to spark your creativity:

Geometric Elegance

Embrace sharp angles and clean lines with geometric floating shelves. Think triangular shapes, rectangular shelves with beveled edges, or even hexagonal designs. These shelves add a touch of modern sophistication and can be customized to fit any corner or wall space.

Industrial Chic

For a rugged and contemporary look, incorporate industrial elements like exposed pipes, metal brackets, or reclaimed wood. These shelves are perfect for showcasing vintage finds, books, or minimalist decor.

Minimalist Marvels

Keep it simple with minimalist floating shelves. Choose sleek, straightforward designs in neutral tones like white, black, or natural wood. These shelves offer a clean and uncluttered look, allowing your belongings to take center stage.

Essential Materials for Your DIY Project

Now, let's gather the essentials for your floating shelf adventure. Here's a list of materials you'll likely need:

  • Wood: Choose a wood type that complements your style. Popular options include plywood, MDF, reclaimed wood, or even bamboo for a sustainable touch.
  • Brackets: You can use L-brackets, shelf brackets, or even create custom brackets using metal piping or wood.
  • Screws and Anchors: Choose screws that are long enough to securely hold your shelves in place. Use anchors if your walls are drywall or plaster.
  • Wood Filler: For a smooth finish, use wood filler to cover any screw holes or imperfections in the wood.
  • Sandpaper: Smooth out any rough edges and prepare the surface for painting or staining.
  • Paint or Stain: This is entirely up to your personal preference and the style you're aiming for. Choose a color or stain that harmonizes with your existing decor.
  • Measuring Tape, Level, and Pencil: These tools are essential for precise marking and placement of your shelves.
  • Safety Glasses and Gloves: Always prioritize safety when working with tools.

Crafting Your Floating Shelves: A Step-by-Step Guide

Ready to bring your floating shelf vision to life? Follow these simple steps:

  1. Plan and Measure: Determine the size, shape, and number of shelves you'll create. Use a measuring tape to mark the exact location on your wall where you want to install your shelves. Make sure the placement is level for a polished look.
  2. Cut the Wood: Using a saw, carefully cut your wood to the desired dimensions. If you're working with plywood or MDF, be sure to cut with the grain for a clean, consistent cut.
  3. Install the Brackets: Mark the wall where you want to install your brackets. Use a drill to make pilot holes, then secure the brackets to the wall with the appropriate screws. Make sure the brackets are level and at the correct height for your shelves.
  4. Attach the Shelves: Place your shelves on the brackets and secure them with screws. Use wood filler to cover any screw holes for a seamless appearance. If you're using L-brackets, you can typically attach the shelves from underneath.
  5. Sand, Prime, and Finish: Sand your shelves to smooth out any rough edges. If you're painting, apply a primer before applying your chosen paint color. If you're staining, apply a wood stain for a natural and warm finish.
  6. Decorate and Enjoy! Finally, arrange your belongings and enjoy your beautiful new floating shelves. Get creative and let your personality shine through in your display.

Tips for Success

Here are a few extra tips to ensure your DIY floating shelves are a triumph:

  • Practice Makes Perfect: If you're new to DIY projects, it's always a good idea to practice cutting and assembling your shelves on scrap wood before working with your final materials.
  • Double-Check Your Measurements: Accuracy is key for a professional-looking finish. Take your time and double-check your measurements to ensure your shelves are properly aligned.
  • Use Quality Materials: Invest in durable and high-quality materials for shelves that will last. A sturdy wood base and strong brackets are essential for long-term stability.
  • Prioritize Safety: Always wear safety glasses and gloves when working with tools. Use a work surface that is stable and free of clutter.
  • Don't Be Afraid to Get Creative: Floating shelves offer endless possibilities for design and customization. Have fun with it and let your imagination run wild!

Commonly Asked Questions

We've addressed some of the most common questions about DIY floating shelves. Let's dive into these FAQs:

What if my walls are drywall?

Drywall is a common wall material, and you'll need to use anchors to ensure your floating shelves are securely mounted. There are many types of anchors available, so choose ones that are appropriate for the weight of your shelves and the thickness of your drywall. Follow the instructions on the anchor packaging for proper installation.

How do I choose the right brackets?

The type of brackets you choose will depend on the weight of your shelves and the style you're going for. L-brackets are a common choice for lightweight shelves, while shelf brackets or custom-made brackets are better suited for heavier loads. Consider the thickness of your shelves and the material they're made from when choosing brackets.

What if my shelves aren't perfectly level?

A level is your best friend for this project. Use a level to ensure your brackets are installed at the same height and that your shelves are perfectly horizontal. If your shelves are slightly off, you can adjust them by adding shims or spacers underneath.

Can I use floating shelves for anything?

Absolutely! Floating shelves are incredibly versatile and can be used for a wide range of purposes. Here are a few ideas:

  • Bookshelf: Showcase your favorite books or create a cozy reading nook.
  • Display Shelf: Arrange decorative items, art pieces, or family photos.
  • Kitchen Storage: Organize spices, cookbooks, or decorative plates.
  • Bathroom Organizer: Store towels, toiletries, or decorative baskets.
  • Bedroom Accent: Add a touch of style with nightstands, plant shelves, or jewelry organizers.

So, get ready to embrace the minimalist or modern aesthetic in your home with these DIY floating shelf ideas! Remember, the key is to choose materials that reflect your style and to have fun with the process. With a little creativity and effort, you can create a stunning and functional storage solution that elevates your space.
Share:

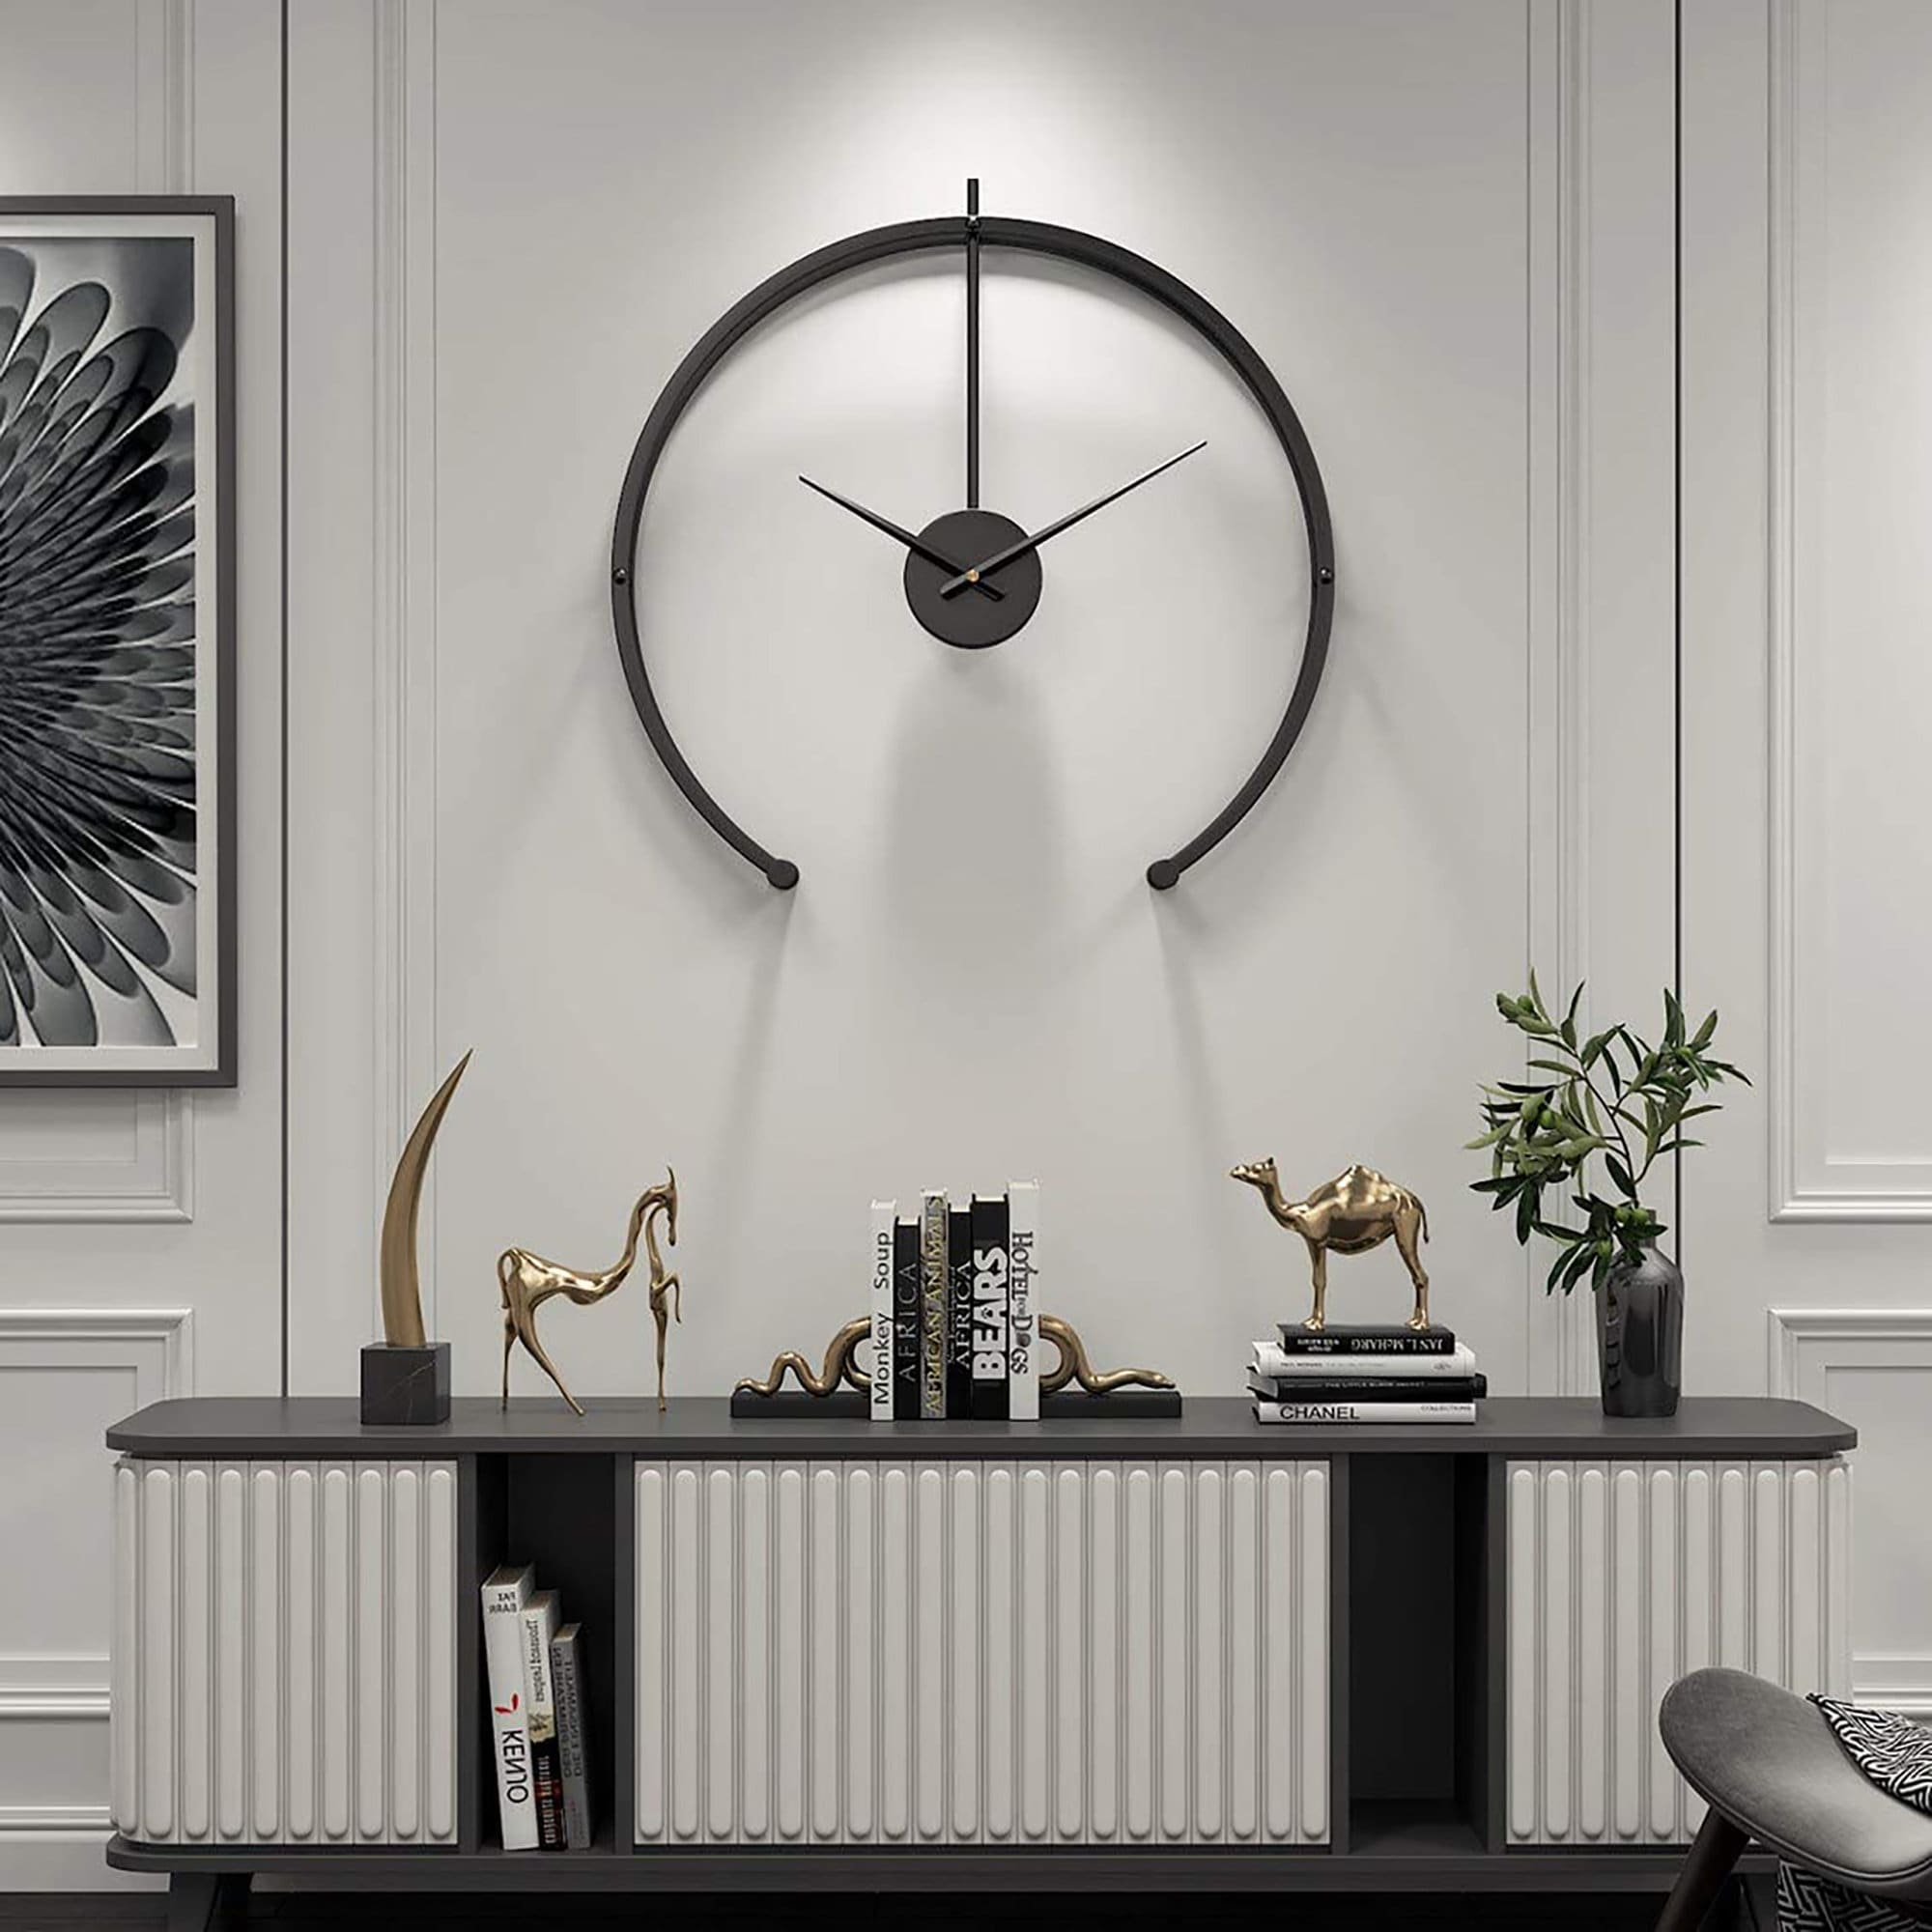
Simple and Elegant Wooden Wall Clocks to Build and Sell

Simple and Elegant Wooden Wall Clocks to Build and Sell

Simple and Elegant Wooden Wall Clocks to Build and Sell

In a world increasingly dominated by digital displays, the timeless appeal of analog clocks remains strong. And when it comes to crafting a statement piece for your home, nothing quite compares to the warmth and elegance of a handcrafted wooden wall clock. This guide explores some simple and elegant designs you can build and sell, combining practicality with artistic flair.

Choosing the Right Wood

The wood you choose for your clocks will significantly impact their aesthetic and durability. Consider these factors:

Grain Pattern:

  • Straight grain: Offers a clean, minimalist look, ideal for modern designs.
  • Figured grain: Features knots, swirls, and other unique patterns, adding visual interest and rustic charm.
  • Burls: Show extraordinary grain patterns with vibrant colors, perfect for statement pieces.

Color and Finish:

  • Light woods: (Pine, maple, birch) offer a bright and airy feel.
  • Dark woods: (Walnut, cherry, mahogany) create a sense of sophistication and richness.
  • Stains and finishes: Enhance the wood's natural beauty and protect it from wear and tear.

Hardness and Durability:

  • Hardwoods: (Oak, maple, cherry) are strong and resistant to scratches and dents, ideal for everyday use.
  • Softwoods: (Pine, cedar) are easier to work with but may require more care.

Simple and Elegant Clock Designs

Here are some easy-to-build wooden clock designs that offer a blend of simplicity and elegance:

1. The Classic Round Clock:

  • Materials: Plywood or hardwood for the base, clock movement, hands, and a circular piece of wood for the face.
  • Construction: Cut the base into a circular shape. Attach the clock movement to the back, and then fix the circular face to the front. Apply a stain or finish of your choice.
  • Customization: Add decorative elements like woodburning, inlay, or laser engraving.

2. The Minimalist Square Clock:

  • Materials: Hardwood for the square base, clock movement, hands, and a smaller square piece of wood for the face.
  • Construction: Cut the base into a square shape. Mount the clock movement to the back and attach the smaller square face to the front. Use a minimalist design for the hands.
  • Customization: Add a unique finish, such as a natural oil or a clear epoxy resin.

3. The Geometric Clock:

  • Materials: Plywood or hardwood for the base, clock movement, hands, and geometric shapes to create the face.
  • Construction: Cut the base into a desired shape (rectangle, hexagon, etc.). Create geometric shapes from wood and arrange them to form the clock face. Attach the clock movement to the back.
  • Customization: Use different wood species for each geometric shape or experiment with contrasting colors and finishes.

4. The Branch Clock:

  • Materials: Branch of wood, clock movement, hands, and a small circular piece of wood for the face.
  • Construction: Sand and clean the branch. Attach the circular face to the branch. Mount the clock movement on the back.
  • Customization: Use different wood species for the branch and face or leave the bark intact for a rustic look.

Essential Tools and Techniques

To build these clocks, you'll need basic woodworking tools and techniques:

Tools:

  • Saw (hand saw, circular saw, or jigsaw)
  • Drill with bits for wood
  • Sandpaper (various grits)
  • Clamps
  • Measuring tape and ruler
  • Wood glue
  • Stains and finishes (optional)

Techniques:

  • Cutting: Use a saw to cut the wood into desired shapes.
  • Drilling: Drill holes for the clock movement and hands.
  • Sanding: Smooth the surfaces of the wood to prepare them for finishing.
  • Gluing: Use wood glue to attach the clock movement and hands to the base.
  • Finishing: Apply stains, paints, or other finishes to enhance the wood's appearance and provide protection.

Marketing and Selling Your Wooden Clocks

Once you've mastered the craft, it's time to showcase your work and find customers. Here are some marketing strategies:

Online Platforms:

  • Etsy: A popular platform for handmade goods.
  • Amazon Handmade: Reach a larger audience through Amazon's extensive network.
  • Your own website: Create a dedicated website to showcase your work and sell directly.
  • Social Media: Use platforms like Instagram and Facebook to share your clocks and connect with potential buyers.

Local Markets and Events:

  • Craft fairs and festivals: Engage with customers in person and showcase your unique designs.
  • Farmers markets: Offer a natural and sustainable product that complements local produce.
  • Local shops and galleries: Collaborate with businesses that share your aesthetic.

Building Your Brand:

  • Develop a consistent style: Choose a design aesthetic that reflects your personality and resonates with your target market.
  • High-quality photography: Invest in professional product photography to capture the beauty and craftsmanship of your clocks.
  • Engage with customers: Respond promptly to inquiries, offer personalized recommendations, and cultivate a positive brand image.

Creating and selling simple and elegant wooden wall clocks is a rewarding endeavor that combines creativity, skill, and entrepreneurial spirit. By following this guide and putting your passion into practice, you can craft unique, timeless pieces that bring beauty and functionality to homes around the world.

Share:

Fun and Easy Wood Project Ideas to Try at Home

Fun and Easy Wood Project Ideas to Try at Home

Fun and Easy Wood Projects to Try at Home

Hey there, DIY enthusiasts! Are you itching to get your hands on some wood and create something amazing? Maybe you're looking for a fun weekend project or just a creative outlet to unwind. Whatever your reason, you've come to the right place. I'm going to share some fun and easy wood project ideas that are perfect for beginners and seasoned woodworkers alike.

Don't worry, these projects don't require you to be a master carpenter. We're talking about projects that you can tackle even if you've never touched a saw before. And the best part? They're all super satisfying to complete, and you'll end up with something awesome to show off or use in your home.

Simple Projects for Beginners

Let's start with some basic projects that are perfect for getting your feet wet in the world of woodworking. These projects are quick, easy, and don't require a ton of tools or materials.

Wooden Coasters

Who doesn't love a good set of coasters? They're a great way to protect your furniture and add a touch of personality to your home. You can make them out of scraps of wood, or even use pre-cut squares from your local craft store. Just sand the edges, stain or paint them, and you're good to go.

Wooden Jewelry Stand

If you're a jewelry lover, a wooden jewelry stand is a must-have. You can find simple designs online that you can easily follow. All you need is some wood, a few screws, and maybe some decorative elements like beads or knobs. It's a great way to organize your jewelry and add a touch of rustic charm to your bedroom or vanity.

Wooden Key Holder

Tired of keys scattered everywhere? A wooden key holder is the perfect solution. You can use a piece of wood with a unique shape or even a simple plank. Add some hooks, a cute sign, and maybe even some hooks for mail. You can personalize it by adding your initials or a funny quote.

Step Up Your Game with Intermediate Projects

Feeling confident after those beginner projects? Let's move on to something a little more challenging. These projects might require a bit more planning and precision, but they're still manageable for DIY beginners.

Wooden Serving Tray

A wooden serving tray is a versatile piece of furniture that can be used for everything from serving appetizers to holding drinks. You can find plans online that will guide you through the process. You'll need to cut and assemble the pieces, then sand and finish them to your liking. Add some handles for a professional touch.

Wooden Picture Frame

There's something so special about displaying your favorite photos in a frame you made yourself. You can find frame plans for all shapes and sizes, from classic rectangles to fun geometric designs. Just cut the pieces, assemble them, and add a glass pane and backing. You can even customize it by carving a special message or design into the wood.

Wooden Plant Stand

Give your plants a stylish home with a custom wooden plant stand. You can make a simple one with a single shelf, or get creative and build a tiered stand with multiple levels. Use wood that complements your existing decor and finish it with stain or paint to match your style. And if you're feeling really ambitious, try adding a decorative base or some intricate carvings.

More Advanced Woodworking Projects

Ready to dive into the world of woodworking? These projects will push your skills to the next level, but they're still doable for beginners with a little patience and guidance.

Wooden Coffee Table

A coffee table is a staple in most living rooms, and you can build one yourself that's both beautiful and functional. You can find tons of coffee table plans online, with different styles and designs to choose from. Don't be afraid to get creative and add your own personal touch.

Wooden Storage Bench

Storage benches are a great way to add extra seating and storage space to your home. They're perfect for entryways, bedrooms, or even the foot of your bed. You can use simple construction methods to build a sturdy bench with a hinged top for storage. Add a cushion for extra comfort.

Wooden Wall Shelf

Wall shelves are a versatile way to add storage and display space to any room. You can build simple shelves with brackets, or create more intricate designs with floating shelves. Choose wood that complements your decor and use stain or paint to achieve the desired look. Get creative with the shapes and sizes, and don't be afraid to add some decorative details.

Tips for Woodworking Beginners

Now that you're ready to get started, here are a few tips to make your woodworking journey smoother and more enjoyable:

  • Start small. Don't try to tackle a huge project right away. Choose something manageable and build up your skills gradually.
  • Use the right tools. Make sure you have the necessary tools for the project you're working on. Don't be afraid to ask for help if you're not sure what you need.
  • Follow the instructions carefully. Read the plans thoroughly and understand each step before you start. Don't rush the process and take your time to ensure accuracy.
  • Practice safety first. Always wear safety glasses and use proper tools to protect yourself from injury.
  • Don't be afraid to experiment. Woodworking is all about creativity and finding what works best for you. Don't be afraid to try new techniques and experiment with different materials.
  • Have fun! The most important thing is to enjoy the process. Relax, be patient, and have fun creating something beautiful with your hands.

Commonly Asked Questions

What kind of wood should I use for my first project?

For beginners, softwoods like pine or fir are good choices because they're relatively easy to work with. Hardwoods like oak or maple are more durable but can be more challenging to cut and shape.

What tools do I need for woodworking?

For basic projects, you'll need a saw, a hammer, a screwdriver, sandpaper, and a measuring tape. As you progress, you might want to invest in more specialized tools like a drill press, a router, or a table saw.

Where can I find woodworking plans?

There are countless free and paid woodworking plans available online. You can find them on websites like Pinterest, Instructables, and Ana White. Many woodworking magazines also offer plans and project ideas.

How do I finish my wood projects?

You can finish your wood projects with stain, paint, or varnish. Stain will enhance the natural grain of the wood, while paint will provide a solid color. Varnish will protect the wood and give it a shiny finish.

So, there you have it - a whole world of woodworking fun waiting for you. Don't be intimidated by the tools or the process. Just choose a project that interests you, gather your materials, and dive in! Remember, even the most experienced woodworkers started somewhere. And who knows, maybe you'll discover a hidden talent that you never knew you had. Happy woodworking!

Share:

How to Finish Wooden Shoe Racks for a Professional Look

How to Finish Wooden Shoe Racks for a Professional Look

Finishing Wooden Shoe Racks for a Professional Look

You’ve just built your own shoe rack, and you’re proud of your handiwork. But it’s missing that final touch to really make it stand out. Don’t worry, finishing your wooden shoe rack is a breeze! With a little patience and the right tools, you can easily achieve that polished, professional look you’re going for. Let’s dive into the world of finishing and learn how to turn your DIY project into a stunning piece of furniture.

Getting Started: Prepping Your Shoe Rack

Before you even think about grabbing the stain or paint, you need to prepare your shoe rack for a flawless finish. It’s like prepping your canvas before you start painting – the better the foundation, the better the final result.

Sanding: Smoothing Things Out

The first step is sanding, and believe me, it’s worth the effort. You want to get rid of any rough spots, imperfections, or unevenness left from your woodworking. Start with a coarser grit sandpaper (around 80 or 100 grit) to remove any major flaws. Then, gradually move to finer grits (like 120, 150, and 220) for a smooth, even surface.

Remember, sanding with the grain is key. This means running your sandpaper along the direction of the wood’s natural pattern. Going against the grain can create scratches that will show through your finish. You can use a sanding block or a random orbit sander to help you achieve a uniform finish.

Cleaning: Removing Dust and Debris

After sanding, it’s time to clean up. You want to remove all the dust and debris that’s accumulated during the sanding process. A tack cloth or a slightly damp cloth will do the trick. Just be sure to let the wood dry completely before moving on to the next step.

Choosing Your Finish: The Big Decision

Now comes the fun part: choosing your finish. This is where you get to personalize your shoe rack and bring your vision to life. Here are a few popular options:

Stain: Enhancing the Wood’s Natural Beauty

Stains are great for highlighting the natural grain and color of your wood. There are countless stain colors to choose from, ranging from natural wood tones to deep, rich hues. They come in oil-based or water-based formulas. Oil-based stains tend to penetrate deeper and create a richer color, but they take longer to dry and can be messy. Water-based stains dry faster and are easier to clean up, but they may not penetrate as deeply. You can also create custom colors by mixing different stains together.

Paint: Adding Color and Character

If you’re looking for a bolder statement or want to cover up any imperfections, paint is the way to go. You can find paints in just about any color imaginable, and they come in a variety of finishes, from matte to gloss. For a more durable finish, consider using a paint specifically designed for furniture. Be sure to apply the paint in thin, even coats to avoid drips and runs.

Polyurethane: Adding Protection and Shine

After staining or painting your shoe rack, you’ll want to seal it with a protective finish like polyurethane. It creates a durable barrier that protects your wood from scratches, spills, and UV damage. Polyurethane comes in different finishes – gloss, semi-gloss, satin, and matte – so you can choose the level of shine you prefer. Polyurethane can be oil-based or water-based. Water-based dries faster and cleans up easier, but oil-based is generally considered more durable.

Applying the Finish: Patience is Key

Now comes the fun part – actually applying the finish! Remember, it’s all about technique and patience. Here are some tips to get you started:

Applying Stain

Use a natural-bristle brush, a cloth, or a foam brush to apply stain. Work in the direction of the wood grain for a uniform look. Apply a thin, even coat and let it dry completely before applying a second coat if necessary.

Applying Paint

Use a high-quality paint brush or a foam roller for a smooth finish. Start with a thin coat and let it dry completely before applying a second coat. If you’re using a brush, avoid overlapping strokes as this can lead to brush marks.

Applying Polyurethane

Apply polyurethane with a natural-bristle brush, a foam brush, or a cloth. Work in thin, even coats, going with the grain. Let each coat dry completely before applying the next. Remember, the key to a professional finish is to apply thin coats and allow them to dry completely before applying the next.

Additional Tips for a Professional Look

Here are a few more tips to help you achieve that professional finish:

  • Always wear gloves to protect your hands from stains, paint, and polyurethane.
  • Work in a well-ventilated area, especially when using oil-based products.
  • Clean up spills immediately to avoid staining.
  • Use a tack cloth or a slightly damp cloth to remove dust and debris before applying each coat.
  • Don’t rush the process. Allow each coat to dry completely before applying the next.
  • Don’t be afraid to experiment with different finishes to find what you like best.
  • Remember, the key to a professional finish is patience, practice, and attention to detail.

    Commonly Asked Questions

    Can I finish my shoe rack with just one coat?

    It depends on the finish you choose. Some finishes, like stain, may only require one coat, while others, like polyurethane, may need two or more coats for a durable finish.

    Can I use a spray gun to apply the finish?

    Yes, you can. A spray gun can give you a smoother, more even finish than a brush or a roller, but it requires more practice and setup.

    What if I mess up? Can I fix it?

    Don’t worry, mistakes happen! If you have any drips, runs, or imperfections, you can sand them down and reapply the finish. It's also a good idea to test the finish on a scrap piece of wood first to get the hang of it.

    Finishing your wooden shoe rack is a rewarding way to personalize your home decor. With the right preparation, tools, and techniques, you can achieve a stunning, professional finish that will make you proud for years to come. So go ahead, embrace the process, and let your creativity shine!

    Share:

    Simple Woodworking Projects You Can Make and Sell

    Simple Woodworking Projects You Can Make and Sell

    Simple Woodworking Projects You Can Make and Sell

    In the realm of woodworking, the allure of crafting beautiful and functional objects is undeniable. Yet, for many aspiring woodworkers, the prospect of undertaking complex projects can seem daunting. Fear not, for the world of woodworking offers a plethora of simple projects that are both achievable and marketable. These projects can serve as stepping stones for beginners, allowing them to hone their skills while exploring the rewarding experience of creating handcrafted items that can be sold for profit.

    This article will delve into a range of simple woodworking projects that are perfect for those just starting their journey into the craft. From charming coasters to elegant serving trays, each project provides an opportunity to develop woodworking skills, experiment with different techniques, and create products that are both aesthetically pleasing and in high demand.

    Essential Tools and Materials

    Before embarking on any woodworking project, it's crucial to gather the necessary tools and materials. While the specific requirements may vary depending on the chosen project, there are some essential tools that form the foundation of any woodworking endeavor. These include:

    • Hand saw: For making basic cuts and shaping wood.
    • Measuring tape: For ensuring accuracy in measurements.
    • Wood glue: For securely bonding wood pieces together.
    • Clamps: For holding wood pieces firmly in place while gluing.
    • Sandpaper: For smoothing wood surfaces and creating a polished finish.
    • Wood stain or paint: For enhancing the appearance of the wood and adding color.
    • Finishing oil or varnish: For protecting the wood from scratches and moisture.

    The type of wood used will depend on the specific project and desired aesthetic. Common options include pine, oak, walnut, and cherry. Remember to select wood that is free of knots, cracks, or other imperfections for optimal results.

    Simple Woodworking Projects for Beginners

    Now, let's explore a selection of simple woodworking projects that are ideal for those new to the craft. These projects are designed to be achievable with basic tools and techniques, providing a satisfying experience for beginners.

    Coasters

    Coasters are a timeless and practical addition to any home. They protect surfaces from heat and spills, while adding a touch of personal style. These projects are a perfect introduction to woodworking as they involve simple cuts and sanding.

    • Materials: Wooden squares, wood glue, sandpaper, wood stain or paint, protective sealant.
    • Steps:
    • Cut the wooden squares to your desired size.
    • Sand the edges and surfaces for a smooth finish.
    • Apply wood stain or paint, if desired.
    • Apply a protective sealant for durability.

    Coasters can be made in various shapes, sizes, and designs, offering creative freedom. Experiment with different wood species, stains, or embellishments to create unique and appealing coasters.

    Serving Trays

    Serving trays are another versatile project that combines functionality and aesthetics. They can be used for serving food, drinks, or organizing household items. These projects involve basic cuts, sanding, and joining techniques.

    • Materials: Wooden boards, wood glue, clamps, sandpaper, wood stain or paint, finishing oil or varnish, handles (optional).
    • Steps:
    • Cut the wooden boards to the desired dimensions for the tray.
    • Join the boards together using wood glue and clamps.
    • Sand the surfaces and edges for a smooth finish.
    • Apply wood stain or paint, if desired.
    • Apply a finishing oil or varnish for protection.
    • Attach handles, if desired.

    Serving trays can be customized with intricate carvings, decorative inlays, or engraved designs. Explore different shapes, sizes, and styles to cater to various tastes.

    Picture Frames

    Picture frames are a classic woodworking project that allows for personal expression. They provide a stylish way to display cherished photographs or artwork. These projects involve precise cuts and joinery techniques.

    • Materials: Wooden strips, miter saw or hand saw, wood glue, clamps, sandpaper, wood stain or paint, finishing oil or varnish, glass or acrylic sheet (optional).
    • Steps:
    • Cut the wooden strips to the desired dimensions using a miter saw or hand saw.
    • Join the strips together at the corners using wood glue and clamps, ensuring precise miter cuts.
    • Sand the surfaces and edges for a smooth finish.
    • Apply wood stain or paint, if desired.
    • Apply a finishing oil or varnish for protection.
    • Attach glass or acrylic sheet, if desired.

    Picture frames can be made in various styles, ranging from minimalist to ornate. Experiment with different wood species, stains, or decorative embellishments to create frames that complement the artwork they enclose.

    Cutting Boards

    Cutting boards are essential kitchen tools that provide a durable and hygienic surface for food preparation. These projects involve simple cuts, sanding, and finishing techniques.

    • Materials: Wooden planks, wood glue, clamps, sandpaper, food-safe oil or wax.
    • Steps:
    • Cut the wooden planks to the desired dimensions for the cutting board.
    • Join the planks together using wood glue and clamps.
    • Sand the surfaces and edges for a smooth finish.
    • Apply a food-safe oil or wax for protection and moisture resistance.

    Cutting boards can be customized with decorative handles, engraved designs, or contrasting wood species for a unique look.

    Wooden Signs

    Wooden signs are a charming and versatile way to display messages, add personality to a space, or promote a business. These projects involve basic cuts, sanding, and lettering techniques.

    • Materials: Wooden board, wood glue, clamps, sandpaper, wood stain or paint, wood burning tool or stencils, finishing oil or varnish.
    • Steps:
    • Cut the wooden board to the desired dimensions.
    • Sand the surfaces and edges for a smooth finish.
    • Apply wood stain or paint, if desired.
    • Use a wood burning tool or stencils to create the desired lettering or designs.
    • Apply a finishing oil or varnish for protection.

    Wooden signs can be made in various shapes, sizes, and styles. Experiment with different fonts, colors, and embellishments to create eye-catching and personalized signs.

    Marketing and Selling Your Creations

    Once you've honed your woodworking skills and created a selection of beautiful and functional items, it's time to consider how to market and sell your creations. There are various platforms and strategies to explore:

    • Online Marketplaces: Sites like Etsy, Amazon Handmade, and eBay provide a readily accessible platform to showcase and sell handcrafted goods to a global audience.
    • Local Craft Fairs and Markets: Participating in local craft fairs and markets allows you to connect directly with potential customers, showcase your work, and build relationships.
    • Social Media: Utilize platforms like Instagram, Facebook, and Pinterest to create a visual portfolio of your work, connect with potential customers, and promote upcoming events.
    • Word-of-Mouth: Don't underestimate the power of word-of-mouth marketing. Share your creations with friends, family, and colleagues, and encourage them to spread the word.

    When pricing your woodworking projects, consider the cost of materials, time spent, and desired profit margin. Research similar items on online marketplaces or at local craft fairs to gauge market prices.

    Conclusion

    Simple woodworking projects offer a fantastic starting point for beginners looking to explore the craft and create marketable goods. From coasters and serving trays to picture frames and cutting boards, these projects are achievable with basic tools and techniques, providing a rewarding experience for both the creator and the buyer.

    By combining your woodworking skills with effective marketing strategies, you can turn your passion into a fulfilling side hustle or even a full-fledged business. So, embrace the joy of woodworking and unleash your creativity to craft beautiful and functional objects that will be cherished for years to come.

    Share:

    Budget-Friendly Wood Wall Clock Projects That Sell Well

    Budget-Friendly Wood Wall Clock Projects That Sell Well

    Budget-Friendly Wood Wall Clock Projects That Sell Well

    Are you looking for a creative and profitable side hustle? Look no further than crafting budget-friendly wood wall clocks! These charming timepieces are in high demand, and with a bit of ingenuity and some readily available materials, you can create stunning pieces that will fly off your shelves. Let's explore some inspiring ideas and tips to help you get started.

    The Beauty of Wood Wall Clocks

    Wood wall clocks exude a warm and inviting ambiance, seamlessly blending into any decor style. They add a touch of rustic charm to modern homes, complement the farmhouse aesthetic, and even bring a vintage vibe to contemporary spaces. Their versatility makes them a popular choice for a wide range of customers.

    Why They Sell Well

    Here's why wood wall clocks are a hot commodity:

    • Uniqueness: Each clock is a handcrafted piece, making it one-of-a-kind and highly desirable.
    • Personalization: You can customize them with various wood types, stains, designs, and clock mechanisms, allowing customers to express their personal style.
    • Giftability: Wood wall clocks make wonderful housewarming gifts, birthday presents, or thoughtful additions to any occasion.
    • Versatility: They can be incorporated into diverse settings, from living rooms and bedrooms to kitchens and offices.

    Budget-Friendly Materials and Tools

    Creating wood wall clocks doesn't have to break the bank. You can start with affordable materials and tools readily available at your local hardware store or online retailers.

    Wood Selection

    Choose wood scraps, reclaimed wood, or inexpensive wood boards from your local lumberyard. Consider using plywood for a more budget-friendly option.

    Clock Mechanisms

    Look for affordable quartz clock mechanisms online or at craft stores. These are readily available and provide accurate timekeeping.

    Essential Tools

    You'll need a few basic tools to get started:

    • Jigsaw or scroll saw
    • Drill and drill bits
    • Sandpaper
    • Stain or paint
    • Measuring tape and pencil

    Creative Design Ideas for Wood Wall Clocks

    Let your imagination run wild! The possibilities for wood wall clock designs are endless. Here are a few inspirational ideas to spark your creativity:

    Geometric Shapes

    Create a modern look by cutting out geometric shapes from wood, such as squares, triangles, or hexagons. Combine different shapes and sizes for an eclectic and unique piece.

    Rustic Charm

    Embrace the beauty of natural wood by leaving its natural texture and knots exposed. Consider using reclaimed wood with a distressed finish for a truly rustic aesthetic.

    Floral Motifs

    Add a touch of elegance by carving or burning floral designs into the wood. Use stencils for intricate patterns, or create freehand sketches for a more organic look.

    Personalized Touches

    Offer customization options to your customers. Let them choose their preferred wood type, stain color, and design elements to make their clock truly unique.

    Marketing Your Wood Wall Clocks

    Once you've crafted your stunning wood wall clocks, it's time to market them! Here are some effective strategies to reach potential buyers:

    Online Marketplaces

    Utilize platforms like Etsy, Amazon Handmade, and Facebook Marketplace to showcase your handcrafted creations. These platforms offer a wide audience and convenient ways to manage orders and payments.

    Social Media Marketing

    Leverage Instagram, Pinterest, and Facebook to share high-quality photos and videos of your wood wall clocks. Engage with your followers, run contests, and use relevant hashtags to increase visibility.

    Local Craft Shows and Markets

    Participate in local craft shows and markets to connect with potential customers face-to-face. Offer personalized service and allow shoppers to touch and feel your beautiful wood wall clocks.

    Conclusion

    Crafting and selling budget-friendly wood wall clocks is a rewarding and profitable side hustle. With a little creativity, dedication, and smart marketing strategies, you can turn your passion into a successful venture. So, grab your tools, unleash your imagination, and start building your dream business!

    Share:

    人気の投稿

    Powered by Blogger.