Easy and budget-friendly woodworking ideas for creating personalized wood crafts and home accents.

Showing posts with label Woodworking. Show all posts

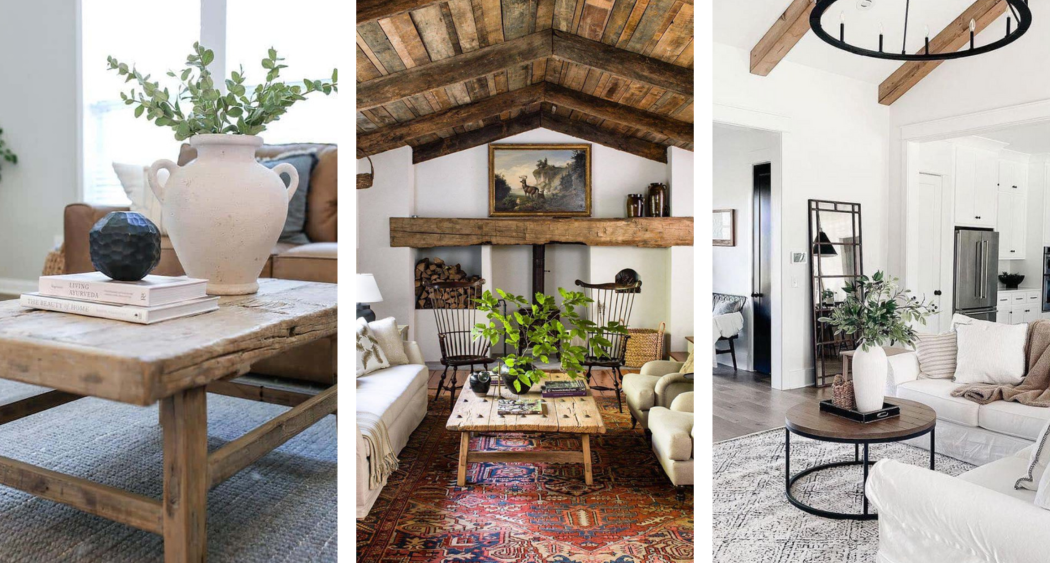
How to Build Coffee Tables with a Farmhouse or Coastal Look

How to Build Coffee Tables with a Farmhouse or Coastal Look

How to Build Coffee Tables with a Farmhouse or Coastal Look: A Step-by-Step Guide

Hey there, DIY enthusiasts! Are you looking to add a touch of charm and personality to your living room? Building your own coffee table is a fantastic way to do just that, and with a farmhouse or coastal style, you can create a piece that perfectly complements your home's aesthetic. In this guide, we'll walk you through the process of creating a coffee table that's both functional and visually appealing, and you'll be surprised at how simple it can be!

Choosing Your Style: Farmhouse vs. Coastal

First, let's decide on the style that best suits your taste:

Farmhouse Charm

A farmhouse coffee table exudes warmth and rustic elegance. Think distressed wood, chunky legs, and maybe even a touch of reclaimed materials. You can embrace the natural beauty of wood by leaving it unpainted or staining it in warm tones like brown, gray, or white.

Coastal Breeze

If you're drawn to the relaxed vibe of the coast, a coastal coffee table should be your go-to. Light colors, driftwood accents, and nautical details like rope or seashells create a calming atmosphere. You can use white paint, light blue tones, or even incorporate rope elements into your design.

Materials and Tools You'll Need

Now, let's gather the materials and tools you'll need for your coffee table project:

  • Wood: This is the foundation of your table! Choose lumber like pine, oak, or cedar based on your style preference and budget.
  • Screws: Go for wood screws in various sizes for securely attaching the table top, legs, and any additional supports.
  • Wood Glue: This will strengthen the joints and ensure your table is sturdy.
  • Sandpaper: You'll need a variety of grits to smooth out the wood and create a polished finish.
  • Stain or Paint: Choose your finish based on your desired style.
  • Polyurethane: This protects your table from scratches, stains, and water damage.
  • Measuring Tape and Pencil: Essential for accurate measurements and marking cuts.
  • Saw: A circular saw or a jigsaw will come in handy for cutting your wood to size.
  • Drill: Use a drill with a bit that matches your screw size for easy fastening.
  • Safety Glasses and Gloves: Protect your eyes and hands while working with tools and wood.

Building Your Coffee Table: Step-by-Step Instructions

Ready to get started? Let's build your coffee table! Here's a step-by-step guide to help you along the way:

Step 1: Designing and Planning

Before diving in, grab a piece of paper and a pencil. Sketch out your coffee table design, including the dimensions of the tabletop, legs, and any additional supports or shelves. Think about the overall size and shape you want, and consider the height that's comfortable for your living room.

Step 2: Cutting the Wood

Now, it's time to cut your wood to size. Using your saw, carefully cut the wood according to your plan. Remember to measure twice and cut once!

Step 3: Assembling the Tabletop

For a simple tabletop, you can use a single piece of wood. But if you're going for a larger or more intricate design, you can join multiple pieces together. Apply wood glue to the edges before fastening them with screws. Make sure to use a level to ensure the tabletop is even.

Step 4: Attaching the Legs

Once your tabletop is ready, it's time for the legs! Decide where you want to place them. For a farmhouse look, you might choose a more rustic, uneven placement. Coastal designs often call for a more symmetrical arrangement.

Apply wood glue to the legs and attach them to the underside of the tabletop, using screws to reinforce the connection. Make sure to check that the legs are level and the table is stable.

Step 5: Adding Details and Finishing Touches

Time for the fun part! This is where you can really add personality to your table. Here are a few ideas:

  • Farmhouse: For a distressed farmhouse look, sand the edges of the wood to reveal the grain. You can even use a hammer to create small dents or chips in the wood for a more weathered appearance. Stain the table in a warm brown or gray tone.
  • Coastal: Whitewash the wood for a breezy, beachy feel. If you want to incorporate rope, attach it to the underside of the tabletop to create a unique border. Consider adding seashell accents or other nautical elements for a touch of whimsy.

Step 6: Finishing and Sealing

Sand your table down to smooth out any rough edges, then apply your chosen stain or paint. Make sure to follow the manufacturer's instructions for drying times. Once the paint or stain is dry, apply a coat of polyurethane to protect your coffee table from spills and scratches.

Commonly Asked Questions

Q: What is the best wood to use for a farmhouse or coastal coffee table?

A: Pine is a great option for both styles due to its affordability and natural beauty. Oak offers durability and a rich grain, making it perfect for a farmhouse look. Cedar provides a natural aroma and resistance to moisture, which can be useful for coastal designs.

Q: Can I use reclaimed wood for my coffee table?

A: Absolutely! Reclaimed wood can add a touch of history and character to your farmhouse coffee table. Be sure to inspect the wood thoroughly before using it to ensure it is sound and safe.

Q: How can I make my coffee table look more unique?

A: There are endless possibilities for adding unique touches! Consider adding a decorative top, such as a piece of glass, tile, or metal. You can also incorporate metal accents, like iron legs or handles, for a more industrial feel. Don't be afraid to experiment and have fun with your design!

Q: What if I don't have any woodworking experience?

A: That's okay! There are plenty of resources available to help you learn the basics of woodworking. Start with simpler projects, and don't be afraid to ask for help if you need it. Remember, practice makes perfect, and you'll be building beautiful furniture in no time!

Building a coffee table from scratch is a rewarding experience that allows you to create a piece of furniture that's uniquely yours. So, gather your tools, get creative, and enjoy the process of bringing your vision to life!

Share:

Quick and Easy Wine Racks to Build and Sell for Profit

Quick and Easy Wine Racks to Build and Sell for Profit

Quick and Easy Wine Racks to Build and Sell for Profit

Hey there, fellow DIYers! Are you looking for a fun and profitable woodworking project? Look no further than building and selling wine racks. Wine racks are always in demand, especially with the growing popularity of home bars and wine cellars. Plus, they're relatively easy to build, even for beginners. You can make some good cash with a little time and effort. Let's dive into some quick and easy wine rack designs that are sure to sell!

Simple and Sleek: The Wall-Mounted Wine Rack

This classic design is a winner because it's easy to build, space-saving, and can be customized to fit any style.

Materials You'll Need:

  • Wood boards (pine, oak, or cedar are great choices)
  • Wood glue
  • Wood screws
  • Sandpaper
  • Wood stain or paint (optional)
  • Measuring tape
  • Saw (hand saw, circular saw, or jigsaw)
  • Drill
  • Level

Steps:

  1. Cut the wood to size. You'll need to cut the boards to the desired length for your wine rack. Consider the number of bottles you want to store and the size of your wall space.
  2. Assemble the shelves. Cut and assemble the shelves using wood glue and screws. Make sure the shelves are securely attached and level.
  3. Add support pieces. Cut and attach support pieces to the back of the shelves to create a sturdy base. Use a level to make sure everything is straight.
  4. Sand and finish. Smooth out any rough edges with sandpaper. Apply stain or paint to enhance the look and provide a protective finish. Let dry completely. You can use a clear coat to seal the wood and protect it from spills.
  5. Mount the rack. Choose a location on the wall and use a level to mark the position of the rack. Drill pilot holes for the screws and then attach the rack to the wall securely.

You can add more creative touches by using different wood types or adding decorative elements like metal brackets or a wine bottle holder.

Rustic Charm: The Wine Barrel Rack

Looking for something unique and eye-catching? A wine barrel rack adds a rustic charm to any setting.

Materials You'll Need:

  • Half wine barrel
  • Wood screws
  • Sandpaper
  • Wood stain or paint (optional)
  • Drill

Steps:

  1. Clean and prep the barrel. Remove any excess debris, and give the barrel a good scrub with soap and water. You can also use a wire brush to remove any stubborn dirt.
  2. Sand the barrel. Sand the barrel using sandpaper to smooth out any rough spots. This will make the barrel look more polished and help the finish adhere properly.
  3. Stain or paint (optional). You can stain or paint the barrel to create a custom look that fits your style. A natural wood finish can highlight the rustic look, while a painted barrel can add a pop of color.
  4. Drill holes for bottles. Mark the spots for your bottle holes and drill them with a drill bit that is slightly larger than the diameter of your wine bottles.

Remember to check the diameter of your wine bottles to ensure they fit snugly in the holes. You can also add a decorative piece to the top of the barrel for a more polished look.

Contemporary Style: The Stacked Wine Rack

This modern design is both stylish and functional. It's great for larger wine collections and adds a touch of sophistication to your home bar.

Materials You'll Need:

  • Wood boards (plywood, MDF, or hardwood)
  • Wood glue
  • Wood screws
  • Sandpaper
  • Wood stain or paint (optional)
  • Measuring tape
  • Saw (hand saw, circular saw, or jigsaw)
  • Drill
  • Level

Steps:

  1. Cut the wood to size. Cut the boards to create individual shelf units, making sure they're wide enough to accommodate your bottles and the desired stacking height.
  2. Create the bottle slots. Using a jigsaw or a drill with a special bit, create slots for your wine bottles in each shelf unit. Make sure the slots are wide enough for the bottles but not too loose.
  3. Assemble the units. Use wood glue and screws to connect the shelf units together. Securely attach them to form a stable and attractive stack. Be sure to check for levelness as you go.
  4. Sand and finish. Once the rack is assembled, sand any rough edges and apply a stain or paint (optional) to create a beautiful final look.

You can experiment with different wood types and finishes to create unique variations. A stacked wine rack can also be customized by adding a built-in bottle opener or a small storage space for glasses.

Tips for Success

Here are some tips to make your wine rack building and selling experience a profitable one:

  • Research your market. What kind of wine racks are in demand in your area? Visit local furniture stores and online marketplaces to get an idea of popular styles and price points.
  • Find quality materials at affordable prices. Shop around for wood and hardware at local lumber yards, online retailers, or even salvage yards for unique and cost-effective materials.
  • Focus on quality and craftsmanship. A well-built wine rack is a worthwhile investment. Use sturdy materials and take pride in your workmanship to create a product that people will appreciate.
  • Price competitively. Consider your costs, your time, and the market value when setting your prices. Offer competitive pricing, but don't undervalue your work.
  • Promote your products. Create a website, social media presence, or online marketplace listings to showcase your wine racks. Share photos of your work and highlight the unique features and craftsmanship.
  • Offer excellent customer service. Build positive relationships with your customers by responding promptly to inquiries, being helpful, and going the extra mile to ensure their satisfaction.

Frequently Asked Questions

Q: What kind of wood should I use for a wine rack?

You can use various woods, but pine, oak, and cedar are popular choices. Pine is relatively affordable and easy to work with. Oak is known for its durability and attractive grain patterns. Cedar is naturally insect-resistant and has a pleasant aroma.

Q: How do I finish my wine rack?

You can stain, paint, or use a clear coat to finish your wine rack. A clear coat will protect the wood and enhance its natural beauty. Stains add color and depth, while paints provide a vibrant finish. Choose a finish that complements the style and wood type.

Q: Where can I sell my wine racks?

You can sell your wine racks online on platforms like Etsy, Facebook Marketplace, Craigslist, or Amazon Handmade. You can also sell them locally at craft fairs, farmers markets, or consignment shops. You can even try selling them to local wineries or restaurants.

Q: How do I make my wine racks stand out from the competition?

Offer unique designs, use high-quality materials, focus on craftsmanship, and provide excellent customer service. You can also offer customization options, such as different wood types, finishes, or sizes. Get creative and showcase your personality in your work!

Building and selling wine racks is a great way to unleash your creativity, turn a profit, and add a touch of elegance to people's homes. So, get out there, grab your tools, and start crafting those beautiful wine racks! Good luck!

Share:

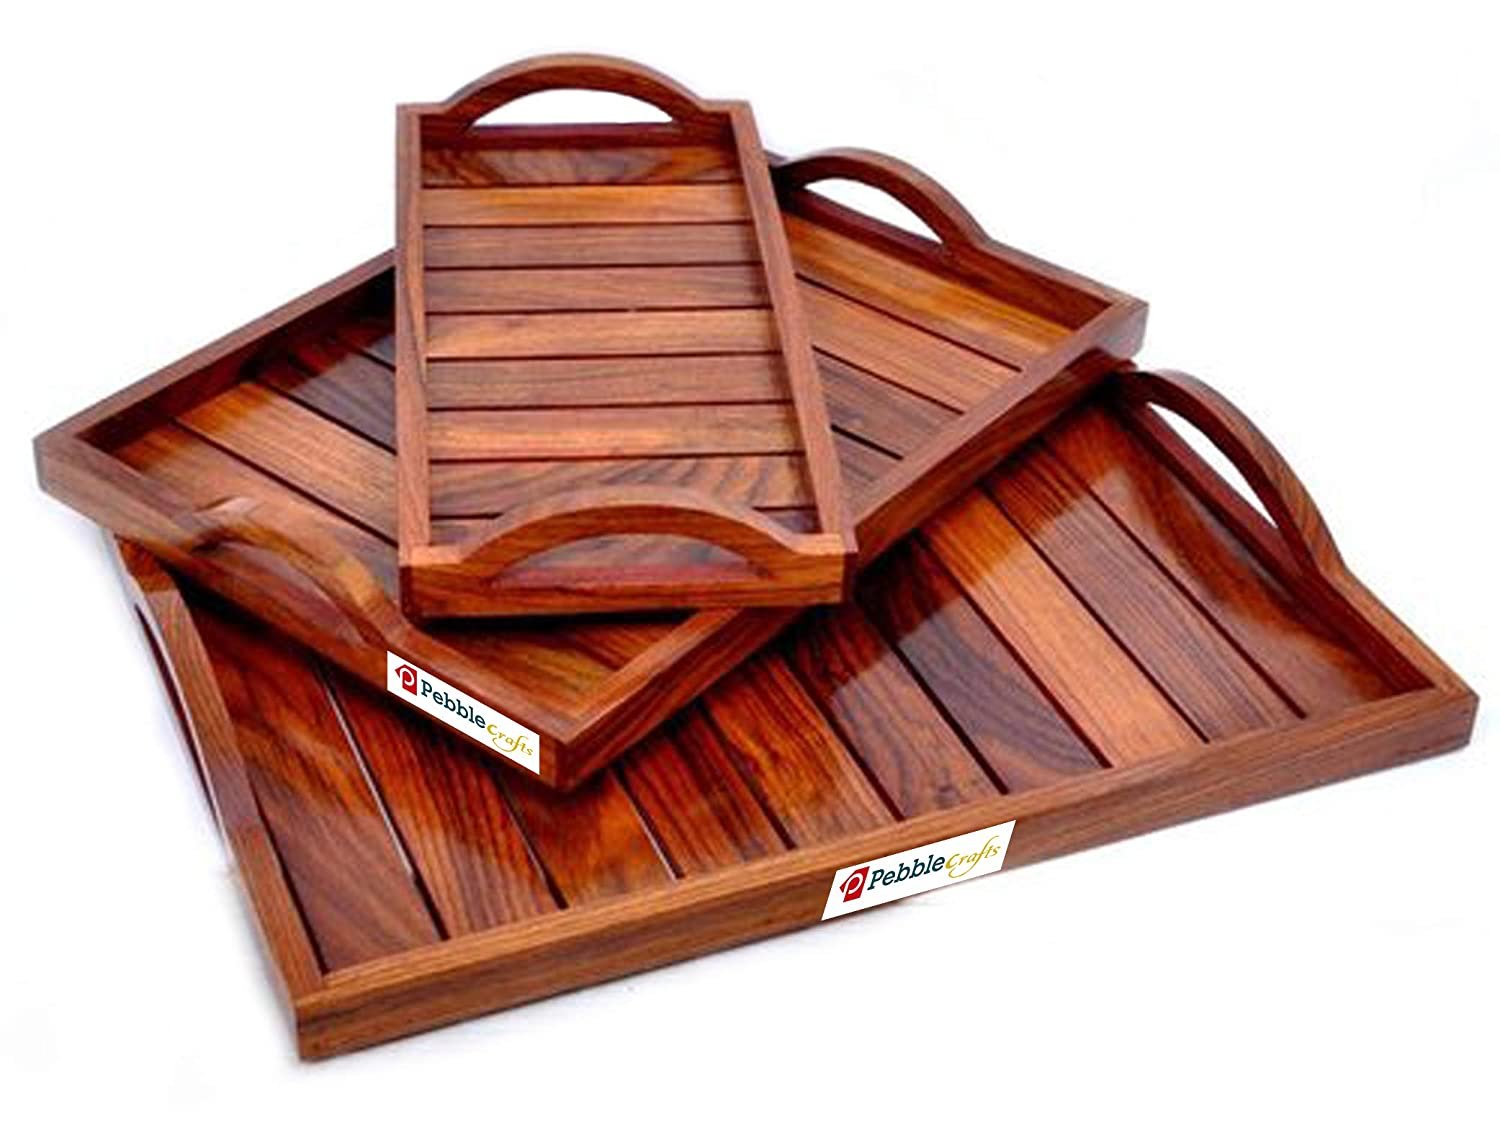
Wooden Serving Trays That Are Both Functional and Stylish

Wooden Serving Trays That Are Both Functional and Stylish

Wooden Serving Trays: Blending Functionality and Elegance

In the realm of culinary artistry, serving trays transcend mere utility. They emerge as canvases upon which to showcase culinary masterpieces, elevating dining experiences to new heights. Wooden serving trays, in particular, possess an inherent charm that seamlessly blends functionality with aesthetic appeal. Their warm, natural textures and timeless designs impart an air of sophistication to any setting. Whether adorning a formal dinner table or adding a touch of rustic charm to a casual gathering, these versatile pieces serve as the foundation for unforgettable moments.

A Symphony of Functionality and Style

Wooden serving trays embody the essence of practicality intertwined with elegance. Their robust construction ensures durability, capable of withstanding the weight of even the most elaborate culinary creations. The generous surface area provides ample space for a multitude of dishes, allowing for a cohesive and visually pleasing presentation. Whether serving appetizers, desserts, or a complete meal, wooden serving trays offer a stable and secure platform for transporting and showcasing culinary delights.

A Culinary Canvas

The smooth, even surface of a wooden serving tray serves as a blank canvas for culinary expression. It provides a neutral backdrop that allows the vibrant colors and intricate details of dishes to take center stage. The natural warmth of the wood enhances the visual appeal of food, creating a harmonious symphony of textures and hues.

Versatility in Design

Wooden serving trays are available in a multitude of shapes, sizes, and finishes, offering boundless possibilities for customization. From rectangular trays that exude classic elegance to oval trays that bring a touch of whimsy, there is a design to complement every taste and style. The choice of wood species, such as acacia, mango, or teak, influences the grain pattern and color, adding a unique character to each piece.

The Allure of Natural Beauty

The intrinsic appeal of wood lies in its natural beauty. Each piece of wood possesses a unique grain pattern and texture, making each serving tray a one-of-a-kind masterpiece. The warm hues and tactile quality of wood evoke a sense of comfort and sophistication, adding a touch of rustic charm to any setting. Whether polished to a high gloss or left with a natural finish, wooden serving trays bring a touch of organic elegance to the dining experience.

A Touch of Rustic Charm

For a more relaxed and informal setting, wooden serving trays with a rustic finish are ideal. These trays often retain the natural imperfections of the wood, showcasing knots and grain patterns that add character and warmth. Their unpolished aesthetic complements casual gatherings, adding a touch of earthy charm to the ambiance.

Sophisticated Elegance

When a touch of sophistication is desired, wooden serving trays with polished finishes are the perfect choice. These trays often feature smooth, sleek surfaces that reflect light, enhancing their elegant appearance. Their polished aesthetic complements formal dinners and upscale gatherings, creating a refined and sophisticated ambiance.

Functionality Beyond Serving

Wooden serving trays transcend their culinary purpose, embracing a multitude of applications throughout the home. Their versatility extends beyond the dining table, finding a place in various living spaces.

Home Décor Essentials

Wooden serving trays can transform into decorative accents, adding warmth and charm to any room. They can be styled with candles, flowers, or decorative objects, creating a visually captivating centerpiece for a coffee table or console. Their natural beauty complements a range of interior design styles, from farmhouse chic to modern minimalist.

Practical Solutions for Everyday Life

Wooden serving trays offer practical solutions for everyday tasks. They can be used to organize essentials in a bathroom or bedroom, providing a stylish and functional platform for toiletries, jewelry, or personal accessories. In a living room, they can serve as a convenient way to gather remote controls, magazines, or books, keeping clutter at bay.

Maintaining the Beauty of Wooden Serving Trays

To preserve the beauty and functionality of wooden serving trays, proper care and maintenance are essential.

Cleaning and Care

Wooden serving trays are generally easy to clean. For everyday cleaning, simply wipe them down with a damp cloth and mild soap. Avoid using harsh chemicals or abrasive cleaners, as they can damage the wood's finish. For more stubborn stains, a gentle wood cleaner can be used. After cleaning, dry the tray thoroughly to prevent warping.

Protecting the Finish

To prevent scratches and stains, apply a food-safe wood sealant or oil to the surface of the tray. Regular application of oil or sealant will help to maintain the tray's moisture balance and protect it from the elements. When not in use, store wooden trays in a cool, dry place, away from direct sunlight.

Conclusion

Wooden serving trays seamlessly merge functionality with style, adding a touch of warmth and elegance to any setting. Their natural beauty, durability, and versatility make them indispensable pieces for both culinary enthusiasts and home décor aficionados. Whether serving a gourmet meal or creating a cozy ambiance, wooden serving trays offer a timeless and enduring element of sophistication, elevating everyday moments to extraordinary experiences.

Share:

How to Create Multi-Tier Wooden Shoe Racks for Extra Profit

How to Create Multi-Tier Wooden Shoe Racks for Extra Profit

Craft Your Way to Extra Profit: Building Multi-Tier Wooden Shoe Racks

Hey there, fellow DIY enthusiasts and aspiring entrepreneurs! Are you looking for a profitable side hustle that combines creativity with practical skills? Well, you've come to the right place! Today, we're diving into the world of crafting multi-tier wooden shoe racks, a product that's in high demand and perfect for adding a touch of rustic charm to any home.

Let's be real: everyone needs a place to store their shoes, and a well-made wooden shoe rack is both stylish and functional. Imagine this: you're whipping up these beauties in your workshop, and bam! – you've got a product ready to sell at local craft fairs, online marketplaces, or even directly to eager customers. Ready to roll up your sleeves and get started? Let's break down the process, step by step.

Getting Started: Tools and Materials

First things first, let's gather our tools and materials. Don't worry, you don't need a full-blown carpentry shop. Here's what you'll need to get you rolling:

Tools

  • Circular saw or table saw
  • Measuring tape
  • Pencil
  • Drill with various drill bits
  • Sandpaper (various grits)
  • Safety glasses and dust mask
  • Wood glue
  • Clamps
  • Screwdriver or drill driver
  • Finishing nails or brads
  • Wood stain or paint (optional)
  • Polyurethane or varnish (optional)

Materials

  • Wooden boards (pine, oak, or maple work well)
  • Screws or wood dowels
  • Optional: Decorative hardware (knobs, handles)

Designing Your Dream Shoe Rack

The fun part begins with design! Think about the size, shape, and style of shoe rack you want to create. Do you want a classic rectangular design, or something more unique? Consider the following:

  • Size: How many pairs of shoes will it hold?
  • Tiers: How many tiers do you want? A two-tier rack is great for smaller spaces, while a three or four-tier design can handle more footwear.
  • Shape: A simple rectangular design is easy to build, but you can also get creative with curves or angled shelves.
  • Style: Do you want a rustic, modern, or minimalist look? The wood choice, stain, and hardware will all play a part in determining the overall style.

Sketching and Planning

Once you've got a general idea, sketch out your design and note down the measurements. You can use graph paper or even just a plain piece of paper. This will help you visualize the final product and figure out how much material you'll need.

Building the Shoe Rack: Step by Step

Time to get our hands dirty! This is where the real magic happens. Follow these steps, and you'll be well on your way to a sturdy, beautiful shoe rack.

1. Cutting the Boards

  • Measure and cut the boards according to your design. Be sure to use a saw guide for precise cuts.
  • Remember to consider the thickness of the wood when calculating your measurements.
  • Use a ruler or measuring tape to ensure all pieces are cut to the same length.

2. Assembling the Base

  • Lay out the boards for your base. You can create a solid base by attaching two long boards together.
  • Secure them with wood glue and screws or dowels.
  • Use clamps to hold the pieces together while the glue dries.

3. Creating the Shelves

  • Cut the boards for your shelves.
  • If you are making a multi-tier shoe rack, ensure that each shelf is the same length and width.
  • Sand the edges of the shelves to ensure they are smooth.

4. Attaching the Shelves

  • Attach the shelves to the base using screws, dowels, or brackets.
  • Make sure the shelves are securely fastened and level.
  • Spacing between shelves should be enough to accommodate different shoe sizes.

5. Adding Supports

  • For a more sturdy and attractive shoe rack, consider adding support legs or braces.
  • These can be made from wood blocks, metal rods, or decorative trim.
  • Secure them to the base and shelves using screws or glue.

Finishing Touches: Time for the Aesthetics

Alright, we're getting close to the finish line! Let's make your shoe rack a real eye-catcher.

1. Sanding

  • Sand the entire surface of the shoe rack with fine-grit sandpaper.
  • This will create a smooth finish and remove any rough edges.
  • Pay attention to the corners and edges, as they're more prone to splinters.

2. Staining or Painting (Optional)

  • This step is optional but highly recommended!
  • Choose a stain or paint color that complements your style and décor.
  • Apply the stain or paint evenly with a brush or cloth.
  • Let it dry completely before proceeding to the next step.

3. Sealing (Optional)

  • To protect your shoe rack from spills and scratches, apply a coat of polyurethane or varnish.
  • Let the sealant dry completely before handling the rack.

4. Decorative Hardware (Optional)

  • Want to add a touch of personality? Consider adding decorative knobs or handles to the shelves.
  • These can add a pop of color and make the rack even more unique.

Marketing Your Shoe Racks: Sell, Sell, Sell!

You've done the hard work, now it's time to reap the rewards! There are plenty of ways to market and sell your handmade shoe racks:

  • Craft Fairs and Markets: These events are a great way to connect with potential customers face-to-face and showcase your unique creations.
  • Online Marketplaces: Platforms like Etsy, Amazon Handmade, and Shopify offer a global audience and the ability to reach customers from the comfort of your own home.
  • Social Media Marketing: Instagram, Facebook, and Pinterest are excellent platforms for sharing photos of your shoe racks, building a following, and promoting your business.
  • Local Businesses: Reach out to local furniture stores, home décor shops, or even real estate agents who might be interested in selling your products.

Commonly Asked Questions

Q: What type of wood is best for shoe racks?

A: Pine, oak, and maple are all popular choices for shoe racks. They are durable, relatively affordable, and easy to work with.

Q: How much can I sell a shoe rack for?

A: The price will depend on the size, complexity, and materials used. Research what similar shoe racks are selling for on online marketplaces and at craft fairs.

Q: How do I prevent the wood from warping?

A: Use kiln-dried wood to reduce the chance of warping. Also, ensure all joints are well glued and clamped during assembly.

Q: Can I add a stain or paint to my shoe rack?

A: Absolutely! Staining or painting can add a custom look and protect the wood.

Ready to Get Started?

That's it! You've got all the knowledge you need to start crafting multi-tier wooden shoe racks. Remember, practice makes perfect. Start with a simple design, and don't be afraid to experiment with different styles and techniques. With a little patience and creativity, you'll be turning out beautiful and functional shoe racks in no time!

Good luck, and happy crafting!

Share:

How to Make Wooden Coffee Tables with Geometric or Abstract Designs

How to Make Wooden Coffee Tables with Geometric or Abstract Designs

Elevate Your Living Room with Geometric and Abstract Wooden Coffee Tables

Looking to add a unique and stylish touch to your living room? A handcrafted wooden coffee table with a geometric or abstract design can be the perfect statement piece. Not only will it make your space feel more personal, but it will also serve as a conversation starter! Let's dive into the world of wood and design, and discover how you can bring your own artistic vision to life.

Choosing Your Style: Geometric vs. Abstract

The first step in your coffee table journey is deciding on the overall style: geometric or abstract?

Geometric Design

Think sharp lines, clean angles, and repeating patterns. Think about incorporating classic shapes like squares, triangles, circles, and even hexagons. Geometric designs lend themselves beautifully to both modern and minimalist spaces, adding a touch of structure and visual interest.

Here are some inspiring geometric design ideas:

  • Checkerboard Pattern: Alternating squares of different wood species creates a visually appealing and classic geometric look.
  • Inlaid Geometric Shapes: Cut out intricate geometric shapes from a contrasting wood and inlay them into the tabletop for a dimensional and eye-catching effect.
  • Angular Legs: Instead of traditional rounded legs, choose angular, geometric shapes for a modern aesthetic.

Abstract Design

Abstract designs are all about freedom and expression. Think flowing curves, swirling patterns, and unexpected shapes. Abstract designs are a great way to inject a bit of personality and whimsy into your living room.

Here are some abstract design ideas to ignite your creativity:

  • Freeform Inlay: Use different wood species or colors to create free-flowing patterns and organic shapes. Let your creativity guide you!
  • Distressed Wood: Reclaimed wood with its natural knots and textures can be used to create an abstract and rustic look.
  • Carved Designs: Carve abstract patterns directly into the wood for a unique and textured surface.

Choosing Your Wood: A Material Masterclass

Now that you have your design direction, let's talk wood! The type of wood you choose will influence the look, feel, and even the longevity of your coffee table.

Popular Wood Choices:

  • Walnut: Renowned for its rich brown color and beautiful grain patterns, walnut is a strong and durable choice that ages gracefully.
  • Cherry: This warm-toned wood boasts a lovely reddish-brown hue and smooth texture. It's known for its beautiful patina that develops over time.
  • Maple: Maple's light, creamy color and fine grain make it a versatile choice for both contemporary and traditional styles. It also finishes beautifully.
  • Oak: Strong and durable, oak is a classic choice for furniture. It comes in various colors, from golden to reddish-brown.
  • Reclaimed Wood: Adding an eco-friendly and rustic touch to your coffee table, reclaimed wood comes with its own unique history and character, often showcasing knots and other natural imperfections.

Crafting Your Coffee Table: Essential Tools and Techniques

Ready to get your hands dirty? Here's a breakdown of the tools and techniques you'll need to bring your coffee table to life.

Tools and Materials

  • Saw (Table Saw, Circular Saw, Jig Saw): For cutting the wood to size and creating your design elements.
  • Router: For shaping edges, creating decorative details, and inlaying wood pieces.
  • Sandpaper: Essential for smoothing rough surfaces and achieving a polished finish.
  • Wood Glue: For securely bonding wood pieces together.
  • Wood Finish (Oil, Stain, Varnish): To protect and enhance the natural beauty of your wood.
  • Clamps: For holding wood pieces securely while gluing or assembling.
  • Measuring Tape, Pencil, and Ruler: For precise measurements and marking.

Basic Techniques

  • Cutting: Mastering the art of using your saw with precision is essential for achieving the right shapes and sizes. Practice making accurate cuts before starting on your table.
  • Joining: Learn different joining techniques like dovetail joints, mortise and tenon joints, or even simple butt joints. These techniques will create strong and durable connections.
  • Finishing: Sanding, staining, and applying a protective finish will bring out the beauty of your wood and protect it from wear and tear.
  • Inlaying: This technique involves cutting out shapes and fitting them into the tabletop to create intricate designs.

Inspirational Design Ideas: Unleash Your Creativity

Need a little inspiration to spark your creative juices? Here are some ideas to get you started:

Geometric Designs

  • Modern Minimalist: A sleek tabletop with clean lines and geometric legs. Use a dark wood like walnut or oak for a sophisticated look.
  • Mid-Century Modern: Think a mix of geometric shapes with a touch of organic curves. Experiment with contrasting wood species for a visually dynamic effect.
  • Industrial Chic: Use rough-cut reclaimed wood with metal accents for an edgy and modern aesthetic. Incorporate metal piping for the legs or use a metal frame for a raw and industrial look.

Abstract Designs

  • Flowing Lines: Use a router to create swirling and flowing patterns on the tabletop for a dynamic and organic look. Use light-colored wood like maple or birch to accentuate the lines.
  • Nature Inspired: Draw inspiration from natural forms like leaves, branches, or even the flow of water to create abstract patterns. Incorporate natural elements like stones or driftwood into the design.
  • Modern Abstract: Experiment with bold colors and contrasting textures for a modern and eclectic look. Use reclaimed wood or painted surfaces to create a unique and abstract feel.

Frequently Asked Questions

What are the best woods for creating a coffee table?

Walnut, cherry, maple, oak, and reclaimed wood are all excellent choices for building a coffee table, each with its own unique characteristics and advantages.

What are some tips for creating a geometric design?

Focus on precise measurements, utilize a router for clean lines and angles, and consider using contrasting wood species for a dynamic effect.

How can I add an abstract design to my coffee table?

Experiment with freeform inlaying, carving abstract patterns, or using reclaimed wood with its natural imperfections to create a unique and organic look.

What type of finish should I use for my coffee table?

Oil, stain, and varnish are all popular choices for finishing wood. Consider the desired look and level of protection when making your selection.

Can I learn woodworking skills without any prior experience?

Absolutely! There are many resources available online and at local woodworking shops to help you get started. Start with simple projects and gradually build up your skills and confidence.

Remember, building a coffee table is a rewarding journey of creativity and craftsmanship. So gather your tools, choose your wood, and let your imagination run wild! You're about to create a unique and stylish centerpiece for your living room that will be enjoyed for years to come.

Share:

How to Craft Modular Wooden Shoe Racks for Versatile Use

How to Craft Modular Wooden Shoe Racks for Versatile Use

Craft Modular Wooden Shoe Racks for Versatile Use

Shoe clutter can be a real eyesore, taking up valuable space and leaving your entryway feeling chaotic. But what if you could tame your footwear frenzy with a sleek, stylish shoe rack that adapts to your needs? This article delves into the world of modular wooden shoe racks, showing you how to build these versatile creations, allowing you to organize your shoes while adding a touch of rustic charm to your home.

Why Choose Modular Wooden Shoe Racks?

Modular wooden shoe racks offer a unique advantage: they're flexible! Unlike fixed shelves, these racks can be rearranged and expanded to accommodate your growing shoe collection or changing storage needs. This versatility makes them ideal for both small spaces and larger entryways, allowing you to tailor the design to your specific requirements.

Planning Your Modular Shoe Rack

Before diving into the woodworking, take some time to plan your rack. Consider the following:

1. Space and Size:

Measure your available space to determine the overall dimensions of your shoe rack. Will it fit against a wall, stand in a corner, or be a free-standing unit? Think about the height and width you need, and how many levels will be optimal for your shoe collection.

2. Style and Design:

Choose a style that complements your home decor. Do you prefer a rustic, farmhouse look with exposed wood, or a more modern, sleek design with clean lines? Sketch out your ideas to visualize the finished product.

3. Materials:

Select wood that aligns with your style and budget. Pine is affordable and readily available, while hardwoods like oak or maple offer durability and a richer aesthetic. Consider the thickness and width of the boards for a sturdy and functional rack.

Crafting Your Modular Shoe Rack

Now, let's get our hands dirty and assemble your modular shoe rack. You'll need the following tools and materials:

  • Wood of your choice (for shelves and sides)
  • Screws and nails
  • Wood glue
  • Saw (circular or table saw)
  • Drill
  • Sandpaper
  • Clamps
  • Measuring tape
  • Level
  • Safety goggles
  • Finish of your choice (stain, paint, varnish)

Here's the step-by-step process:

1. Cut the Wood:

Use your saw to cut the wood for the shelves, sides, and any additional supports. Ensure all cuts are precise and square.

2. Assemble the Shelves:

Start by attaching the sides to the shelves using wood glue and screws. For extra stability, drill pilot holes before screwing. Use clamps to hold the pieces in place while the glue dries.

3. Create Modular Units:

Build individual units of shelves, each with two sides. These units will be modular, allowing you to add more sections or rearrange them as needed.

4. Connect the Units:

To connect the units, use dowels, wooden pegs, or metal brackets. This allows you to easily separate and reassemble the rack as your storage needs evolve.

5. Sand and Finish:

Once your rack is assembled, smooth out any rough edges with sandpaper. Apply your chosen finish to protect the wood and enhance its appearance. Stain offers a natural, rustic look, while paint allows for more colorful and creative designs.

Tips for Versatile Use

Maximize the versatility of your modular wooden shoe rack with these smart tips:

  • Adjustable Height: Incorporate shelves with adjustable heights using pegs or slots, allowing you to accommodate different shoe sizes and styles.
  • Open Shelving: Opt for open shelves for easy access and air circulation to help prevent shoe odor.
  • Multi-Purpose Functionality: Design shelves with varying widths to hold not only shoes but also other items like bags, hats, or scarves.
  • Additional Storage: Add a small drawer or compartment at the base of the rack for storing shoe cleaning supplies or other accessories.

Enjoy Your Customized Shoe Haven!

With a little effort and creativity, you can craft a beautiful and functional modular wooden shoe rack that fits your style and storage needs perfectly. Enjoy the satisfaction of creating something unique for your home while finally conquering the shoe clutter chaos!

Share:

人気の投稿

Powered by Blogger.