Easy and budget-friendly woodworking ideas for creating personalized wood crafts and home accents.

Showing posts with label Beginners. Show all posts

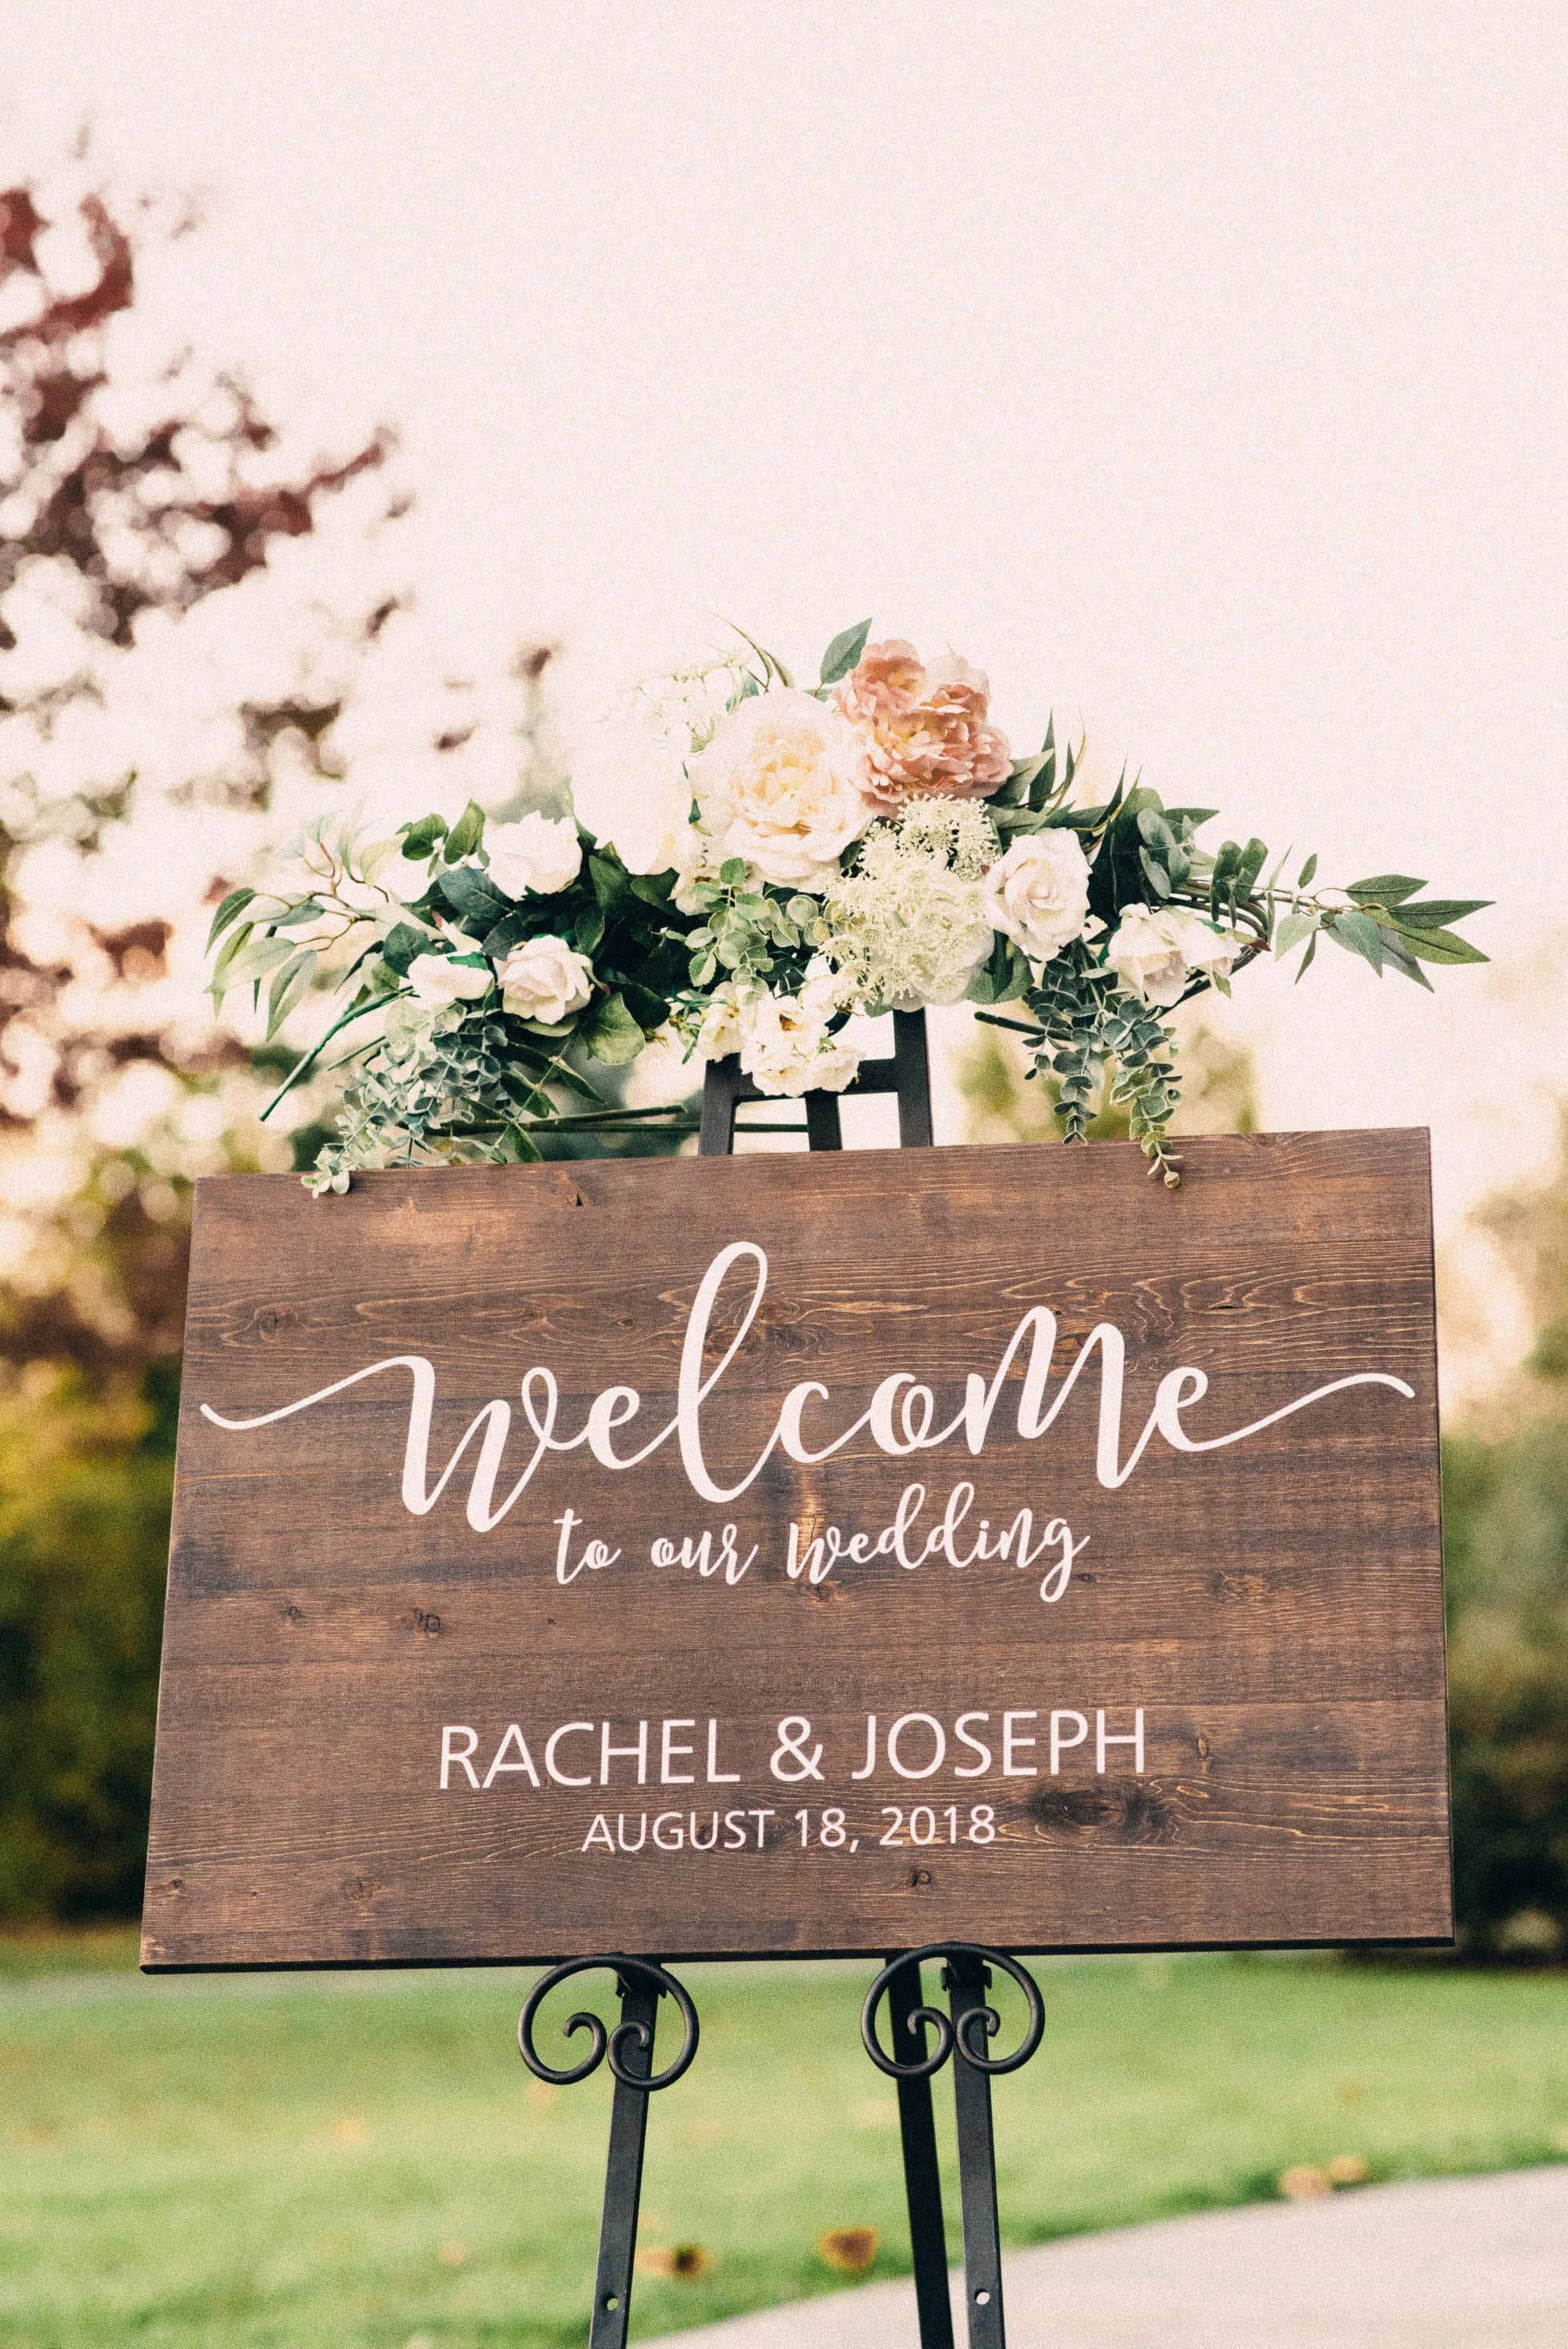
How to Make Wood Signs for Weddings and Events

How to Make Wood Signs for Weddings and Events

Crafting Charming Wood Signs for Weddings and Events

Hey there, crafty friends! Are you looking to add a touch of rustic charm to your wedding or event? Look no further than homemade wood signs! They're not just beautiful, they're also a fantastic way to personalize your celebration and make it truly unique.

Don't be intimidated if you're not a seasoned woodworker – making wood signs is surprisingly easy and incredibly rewarding! Let's dive into the fun and learn how to bring your sign-making dreams to life.

Choosing Your Wood

The first step is to choose the perfect wood for your sign. You have a ton of options, so let's break them down:

Popular Wood Choices

  • Pine: Affordable, light, and easy to work with, making it a great choice for beginners. It's often available in various thicknesses and sizes.
  • Birch: Offers a beautiful, light-colored grain with a smooth finish. It's strong and durable, making it perfect for signs that will be handled frequently.
  • Oak: A classic choice for its durability and rich color. It has a stunning grain pattern, adding a rustic and elegant look to your signs.
  • Reclaimed Wood: Gives your signs a unique and environmentally conscious touch. Look for salvaged wood from old barns, pallets, or furniture for an authentic, vintage vibe.

The choice of wood will depend on the style of your event, your budget, and the desired finish. Consider what would best complement your overall theme and decor.

Gathering Your Supplies

Once you've picked your wood, it's time to gather your supplies. You'll need:

  • Wood: The foundation of your sign!
  • Saw: Use a jigsaw, circular saw, or handsaw to cut your wood to size.
  • Sandpaper: Essential for smoothing out your wood and removing imperfections.
  • Stain or Paint: To add color and enhance the natural beauty of your wood.
  • Paintbrushes: Apply the stain or paint evenly.
  • Stencils or Templates: For creating lettering and designs.
  • Pencil: For outlining your lettering and designs.
  • Measuring Tape: To ensure accurate measurements and cuts.
  • Safety Gear: Always protect yourself with safety glasses, a dust mask, and work gloves.

You can also add some extra flair with things like:

  • Embellishments: Ribbons, lace, flowers, or other decorative elements.
  • Hardware: Screws, hooks, or other hardware for mounting or hanging.
  • Sealer: To protect your finished sign from water damage and UV rays.

Prepping Your Wood

Now it's time to prep your wood for creating your masterpiece. Follow these steps:

  1. Measure and Cut: Determine the size and shape of your sign. Measure twice and cut once to avoid any mistakes.
  2. Sand: Sand the wood thoroughly to create a smooth surface. Use coarse sandpaper to remove rough edges, then switch to finer grits for a polished finish.
  3. Clean: Wipe away any sawdust or debris from the wood surface with a damp cloth.

With your wood prepped and ready, it's time to unleash your creativity!

Designing Your Sign

This is where the fun truly begins! Here are some ideas to get your creative juices flowing:

Wedding Sign Ideas

  • Welcome Sign: A classic choice for greeting guests.
  • Table Numbers: Elegant and practical for organizing your reception tables.
  • Directional Signs: Guide your guests to the ceremony, reception, or photo booth.
  • Guest Book Sign: Encourage guests to leave messages for the happy couple.
  • Love Story Sign: Share a special message or quote about your love journey.

Event Sign Ideas

  • Party Sign: Set the tone for your event with a playful and festive sign.
  • Menu Board: Showcase your delicious food and drinks.
  • Photo Booth Sign: Encourage guests to capture memories.
  • Quote Sign: Add inspiration or a funny quote to your event.
  • Hashtag Sign: Promote your event with a unique hashtag.

Don't be afraid to get creative and add your own personal touch to the design. Let your imagination run wild and create something truly unique that reflects your style and the theme of your event.

Adding Lettering and Designs

Now it's time to turn your design into reality. Here are some tips for creating your sign's lettering and design:

  1. Stencils or Templates: Use pre-made stencils or templates for lettering and designs. They provide a consistent and accurate look.
  2. Freehand Drawing: If you're feeling confident, try freehand drawing with a pencil.
  3. Vinyl Lettering: For a clean and professional look, use vinyl lettering that can be applied directly to your sign.
  4. Paintbrushes: Use a brush with the right size and shape for your design.
  5. Paint Markers: For a quick and easy application, use paint markers to create your lettering and designs.

Choose a method that suits your skill level and the desired aesthetic for your sign. Be sure to practice on a scrap piece of wood before working on your final project to get the hang of it.

Finishing Touches

You're almost there! Now it's time to add those finishing touches that will make your sign truly shine:

  1. Stain or Paint: Apply your chosen stain or paint to the wood. Make sure to work in a well-ventilated area and use the correct application techniques for your chosen medium.
  2. Let Dry: Allow the stain or paint to dry completely before moving on. Refer to the manufacturer's instructions for drying times.
  3. Sealer: Apply a sealer to protect your sign from the elements and extend its lifespan.
  4. Embellishments: Add ribbons, lace, flowers, or other embellishments to enhance the look of your sign.
  5. Hardware: Attach any necessary hardware for mounting or hanging your sign.

Take a step back and admire your creation! You've just made a beautiful, personalized sign that will add a special touch to your event.

Tips for Success

Here are some extra tips to make your sign-making journey even smoother:

  • Plan Ahead: Think about the design, size, and materials before you start.
  • Practice: Practice your lettering and design on a scrap piece of wood before working on the final sign.
  • Patience: Let the stain or paint dry completely between coats.
  • Have Fun: Remember, the process should be enjoyable! Don't be afraid to experiment and have fun with it.

Commonly Asked Questions

Got questions about making wood signs? Here are some answers to common inquiries:

Q: What kind of wood should I use for my wedding or event sign?

A: It really depends on the style of your event and your budget. Pine is a popular choice for beginners due to its affordability and ease of use. Birch offers a beautiful, light-colored grain, while oak is a classic choice for its durability and rich color. Reclaimed wood gives your signs a unique and environmentally conscious touch.

Q: How do I create lettering on a wood sign?

A: You have several options: use stencils or templates, draw freehand with a pencil, or use vinyl lettering. Choose the method that suits your skill level and desired aesthetic.

Q: How do I seal my wood sign?

A: A sealer protects your sign from the elements and extends its lifespan. You can use polyurethane, varnish, or a wax-based sealant. Apply the sealer according to the manufacturer's instructions.

Q: How do I make my sign stand out?

A: Add embellishments like ribbons, lace, flowers, or other decorative elements. You can also use different paint techniques, like distressing or layering colors.

There you have it, friends! Making wood signs for your wedding or event is a fun and rewarding project. So get those creative juices flowing and let your DIY spirit shine!

Share:

How to Make Wooden Coffee Tables with Geometric or Abstract Designs

How to Make Wooden Coffee Tables with Geometric or Abstract Designs

Elevate Your Living Room with Geometric and Abstract Wooden Coffee Tables

Looking to add a unique and stylish touch to your living room? A handcrafted wooden coffee table with a geometric or abstract design can be the perfect statement piece. Not only will it make your space feel more personal, but it will also serve as a conversation starter! Let's dive into the world of wood and design, and discover how you can bring your own artistic vision to life.

Choosing Your Style: Geometric vs. Abstract

The first step in your coffee table journey is deciding on the overall style: geometric or abstract?

Geometric Design

Think sharp lines, clean angles, and repeating patterns. Think about incorporating classic shapes like squares, triangles, circles, and even hexagons. Geometric designs lend themselves beautifully to both modern and minimalist spaces, adding a touch of structure and visual interest.

Here are some inspiring geometric design ideas:

  • Checkerboard Pattern: Alternating squares of different wood species creates a visually appealing and classic geometric look.
  • Inlaid Geometric Shapes: Cut out intricate geometric shapes from a contrasting wood and inlay them into the tabletop for a dimensional and eye-catching effect.
  • Angular Legs: Instead of traditional rounded legs, choose angular, geometric shapes for a modern aesthetic.

Abstract Design

Abstract designs are all about freedom and expression. Think flowing curves, swirling patterns, and unexpected shapes. Abstract designs are a great way to inject a bit of personality and whimsy into your living room.

Here are some abstract design ideas to ignite your creativity:

  • Freeform Inlay: Use different wood species or colors to create free-flowing patterns and organic shapes. Let your creativity guide you!
  • Distressed Wood: Reclaimed wood with its natural knots and textures can be used to create an abstract and rustic look.
  • Carved Designs: Carve abstract patterns directly into the wood for a unique and textured surface.

Choosing Your Wood: A Material Masterclass

Now that you have your design direction, let's talk wood! The type of wood you choose will influence the look, feel, and even the longevity of your coffee table.

Popular Wood Choices:

  • Walnut: Renowned for its rich brown color and beautiful grain patterns, walnut is a strong and durable choice that ages gracefully.
  • Cherry: This warm-toned wood boasts a lovely reddish-brown hue and smooth texture. It's known for its beautiful patina that develops over time.
  • Maple: Maple's light, creamy color and fine grain make it a versatile choice for both contemporary and traditional styles. It also finishes beautifully.
  • Oak: Strong and durable, oak is a classic choice for furniture. It comes in various colors, from golden to reddish-brown.
  • Reclaimed Wood: Adding an eco-friendly and rustic touch to your coffee table, reclaimed wood comes with its own unique history and character, often showcasing knots and other natural imperfections.

Crafting Your Coffee Table: Essential Tools and Techniques

Ready to get your hands dirty? Here's a breakdown of the tools and techniques you'll need to bring your coffee table to life.

Tools and Materials

  • Saw (Table Saw, Circular Saw, Jig Saw): For cutting the wood to size and creating your design elements.
  • Router: For shaping edges, creating decorative details, and inlaying wood pieces.
  • Sandpaper: Essential for smoothing rough surfaces and achieving a polished finish.
  • Wood Glue: For securely bonding wood pieces together.
  • Wood Finish (Oil, Stain, Varnish): To protect and enhance the natural beauty of your wood.
  • Clamps: For holding wood pieces securely while gluing or assembling.
  • Measuring Tape, Pencil, and Ruler: For precise measurements and marking.

Basic Techniques

  • Cutting: Mastering the art of using your saw with precision is essential for achieving the right shapes and sizes. Practice making accurate cuts before starting on your table.
  • Joining: Learn different joining techniques like dovetail joints, mortise and tenon joints, or even simple butt joints. These techniques will create strong and durable connections.
  • Finishing: Sanding, staining, and applying a protective finish will bring out the beauty of your wood and protect it from wear and tear.
  • Inlaying: This technique involves cutting out shapes and fitting them into the tabletop to create intricate designs.

Inspirational Design Ideas: Unleash Your Creativity

Need a little inspiration to spark your creative juices? Here are some ideas to get you started:

Geometric Designs

  • Modern Minimalist: A sleek tabletop with clean lines and geometric legs. Use a dark wood like walnut or oak for a sophisticated look.
  • Mid-Century Modern: Think a mix of geometric shapes with a touch of organic curves. Experiment with contrasting wood species for a visually dynamic effect.
  • Industrial Chic: Use rough-cut reclaimed wood with metal accents for an edgy and modern aesthetic. Incorporate metal piping for the legs or use a metal frame for a raw and industrial look.

Abstract Designs

  • Flowing Lines: Use a router to create swirling and flowing patterns on the tabletop for a dynamic and organic look. Use light-colored wood like maple or birch to accentuate the lines.
  • Nature Inspired: Draw inspiration from natural forms like leaves, branches, or even the flow of water to create abstract patterns. Incorporate natural elements like stones or driftwood into the design.
  • Modern Abstract: Experiment with bold colors and contrasting textures for a modern and eclectic look. Use reclaimed wood or painted surfaces to create a unique and abstract feel.

Frequently Asked Questions

What are the best woods for creating a coffee table?

Walnut, cherry, maple, oak, and reclaimed wood are all excellent choices for building a coffee table, each with its own unique characteristics and advantages.

What are some tips for creating a geometric design?

Focus on precise measurements, utilize a router for clean lines and angles, and consider using contrasting wood species for a dynamic effect.

How can I add an abstract design to my coffee table?

Experiment with freeform inlaying, carving abstract patterns, or using reclaimed wood with its natural imperfections to create a unique and organic look.

What type of finish should I use for my coffee table?

Oil, stain, and varnish are all popular choices for finishing wood. Consider the desired look and level of protection when making your selection.

Can I learn woodworking skills without any prior experience?

Absolutely! There are many resources available online and at local woodworking shops to help you get started. Start with simple projects and gradually build up your skills and confidence.

Remember, building a coffee table is a rewarding journey of creativity and craftsmanship. So gather your tools, choose your wood, and let your imagination run wild! You're about to create a unique and stylish centerpiece for your living room that will be enjoyed for years to come.

Share:

Budget-Friendly Wood Project Ideas for Crafting Your Dream Home

Budget-Friendly Wood Project Ideas for Crafting Your Dream Home

Budget-Friendly Wood Project Ideas for Crafting Your Dream Home

Transforming your home into a sanctuary of comfort and style doesn't require a hefty budget. Embrace the warmth and versatility of wood to craft personalized touches that elevate your space, all while staying within a reasonable price range. From functional furniture to decorative accents, these budget-friendly wood project ideas will ignite your creativity and help you build the home of your dreams.

Revamp Your Furniture

Breathe new life into existing furniture with a simple wood makeover. Embrace the art of upcycling by transforming old chairs, tables, or even cabinets into statement pieces. A fresh coat of paint, wood stain, or a combination of both can instantly change the character of your furniture. Consider adding decorative hardware like knobs, handles, or even custom-made legs to enhance the visual appeal. You can also incorporate unique textures by using wood veneer, decoupage techniques, or even adding fabric upholstery for a personalized touch.

Enhance Functionality

Beyond aesthetics, consider adding practical features to your furniture. Build a simple wooden shelf to add extra storage space, or create a custom spice rack to organize your kitchen essentials. Craft a wooden headboard for your bed to create a focal point and add a touch of warmth. The possibilities are endless when it comes to enhancing both the beauty and functionality of your existing furniture.

Wall Art and Decorative Accents

Don't underestimate the power of wood in enhancing your walls. Create eye-catching wall art by repurposing wood scraps, pallet wood, or even old wooden doors. Experiment with different wood finishes, textures, and shapes to achieve unique and personalized designs. Consider adding intricate details like carvings, inlays, or stenciling to elevate the visual impact. You can also create decorative accents like wooden picture frames, wall shelves, or even custom-made coat racks to add warmth and character to your space.

Showcase Your Creativity

Let your imagination run wild when crafting wood art. Create a geometric wall sculpture using reclaimed wood, or construct a wooden clock using salvaged gears and wheels. The possibilities are endless, allowing you to express your artistic vision while adding personality to your home.

DIY Storage Solutions

Save money and enhance your home's organization with budget-friendly DIY storage solutions. Construct simple wooden shelves to maximize vertical space in your kitchen, bathroom, or bedroom. Build a rustic wooden crate to house plants or store blankets and pillows. These DIY projects are easy to personalize and add a touch of rustic charm to your home. They also provide a cost-effective alternative to expensive, ready-made storage options.

Make It Personal

Personalize your storage solutions with unique details. Add rustic handles to your wooden crates, or paint them in vibrant colors that reflect your personal style. Craft wooden labels for your shelves to create a more organized and visually appealing system. The ability to customize these storage solutions adds a personal touch that complements your home's character.

Tips for Success

To ensure a successful wood project, consider these helpful tips:

  • Plan Ahead: Design your project with careful consideration for dimensions, materials, and desired aesthetic.
  • Choose Quality Wood: Select wood that suits your project requirements and budget. Consider factors like durability, moisture resistance, and ease of workability.
  • Safety First: Wear appropriate safety gear, such as goggles, gloves, and a dust mask, while working with wood.
  • Utilize Your Resources: Explore local lumberyards, hardware stores, and online retailers for competitive pricing and diverse wood selections.
  • Don't Be Afraid to Experiment: Embrace the creative process and experiment with different techniques, finishes, and designs to achieve your desired look.

With a bit of creativity, patience, and the right tools, you can craft budget-friendly wood projects that transform your home into a sanctuary of style and comfort. The satisfaction of bringing your ideas to life is a rewarding experience that will enhance the beauty and functionality of your living space.

Share:

How to Craft Modular Wooden Shoe Racks for Versatile Use

How to Craft Modular Wooden Shoe Racks for Versatile Use

Craft Modular Wooden Shoe Racks for Versatile Use

Shoe clutter can be a real eyesore, taking up valuable space and leaving your entryway feeling chaotic. But what if you could tame your footwear frenzy with a sleek, stylish shoe rack that adapts to your needs? This article delves into the world of modular wooden shoe racks, showing you how to build these versatile creations, allowing you to organize your shoes while adding a touch of rustic charm to your home.

Why Choose Modular Wooden Shoe Racks?

Modular wooden shoe racks offer a unique advantage: they're flexible! Unlike fixed shelves, these racks can be rearranged and expanded to accommodate your growing shoe collection or changing storage needs. This versatility makes them ideal for both small spaces and larger entryways, allowing you to tailor the design to your specific requirements.

Planning Your Modular Shoe Rack

Before diving into the woodworking, take some time to plan your rack. Consider the following:

1. Space and Size:

Measure your available space to determine the overall dimensions of your shoe rack. Will it fit against a wall, stand in a corner, or be a free-standing unit? Think about the height and width you need, and how many levels will be optimal for your shoe collection.

2. Style and Design:

Choose a style that complements your home decor. Do you prefer a rustic, farmhouse look with exposed wood, or a more modern, sleek design with clean lines? Sketch out your ideas to visualize the finished product.

3. Materials:

Select wood that aligns with your style and budget. Pine is affordable and readily available, while hardwoods like oak or maple offer durability and a richer aesthetic. Consider the thickness and width of the boards for a sturdy and functional rack.

Crafting Your Modular Shoe Rack

Now, let's get our hands dirty and assemble your modular shoe rack. You'll need the following tools and materials:

  • Wood of your choice (for shelves and sides)
  • Screws and nails
  • Wood glue
  • Saw (circular or table saw)
  • Drill
  • Sandpaper
  • Clamps
  • Measuring tape
  • Level
  • Safety goggles
  • Finish of your choice (stain, paint, varnish)

Here's the step-by-step process:

1. Cut the Wood:

Use your saw to cut the wood for the shelves, sides, and any additional supports. Ensure all cuts are precise and square.

2. Assemble the Shelves:

Start by attaching the sides to the shelves using wood glue and screws. For extra stability, drill pilot holes before screwing. Use clamps to hold the pieces in place while the glue dries.

3. Create Modular Units:

Build individual units of shelves, each with two sides. These units will be modular, allowing you to add more sections or rearrange them as needed.

4. Connect the Units:

To connect the units, use dowels, wooden pegs, or metal brackets. This allows you to easily separate and reassemble the rack as your storage needs evolve.

5. Sand and Finish:

Once your rack is assembled, smooth out any rough edges with sandpaper. Apply your chosen finish to protect the wood and enhance its appearance. Stain offers a natural, rustic look, while paint allows for more colorful and creative designs.

Tips for Versatile Use

Maximize the versatility of your modular wooden shoe rack with these smart tips:

  • Adjustable Height: Incorporate shelves with adjustable heights using pegs or slots, allowing you to accommodate different shoe sizes and styles.
  • Open Shelving: Opt for open shelves for easy access and air circulation to help prevent shoe odor.
  • Multi-Purpose Functionality: Design shelves with varying widths to hold not only shoes but also other items like bags, hats, or scarves.
  • Additional Storage: Add a small drawer or compartment at the base of the rack for storing shoe cleaning supplies or other accessories.

Enjoy Your Customized Shoe Haven!

With a little effort and creativity, you can craft a beautiful and functional modular wooden shoe rack that fits your style and storage needs perfectly. Enjoy the satisfaction of creating something unique for your home while finally conquering the shoe clutter chaos!

Share:

How to Craft Wooden Toys with a Personal Touch for Special Gifts

How to Craft Wooden Toys with a Personal Touch for Special Gifts

Crafting Wooden Toys with a Personal Touch: Unique Gifts for Cherished Occasions

In an era of mass-produced goods, there's something deeply meaningful about gifting a handcrafted item, especially a wooden toy. Wooden toys exude warmth, longevity, and a sense of craftsmanship that resonates with the recipient. By adding a personal touch, these toys transform into treasured keepsakes, capturing the spirit of the occasion and the love invested in their creation. This article provides a comprehensive guide to crafting personalized wooden toys, exploring various techniques, design ideas, and considerations for making these gifts truly special.

Choosing the Right Wood for Your Project

The first step in crafting wooden toys is selecting the right wood. The type of wood you choose will influence the toy's appearance, durability, and even the overall aesthetic. Consider the following factors:

Wood Properties

  • Hardwoods: Oak, maple, cherry, and walnut are known for their strength, durability, and beautiful grain patterns. They are ideal for toys that will withstand rough play.
  • Softwoods: Pine, cedar, and fir are softer, lighter, and easier to work with. They are well-suited for toys with intricate designs or those requiring delicate carving.

Wood Safety

Safety is paramount when working with wood for toys. Ensure the wood is free of knots, cracks, or other imperfections that could pose a choking hazard. Opt for woods that are non-toxic and comply with safety standards.

Wood Appearance

The appearance of the wood can significantly impact the toy's aesthetic. Consider the grain pattern, color, and texture. Some woods, like cherry and walnut, darken with age, adding a vintage charm to the toy.

Tools and Techniques for Crafting Wooden Toys

Crafting wooden toys requires a range of tools and techniques, depending on the complexity of the design. Here's a basic toolkit for beginners:

  • Hand saw: For cutting wood to size.
  • Sandpaper: For smoothing surfaces and removing rough edges.
  • Wood glue: For securing wood pieces together.
  • Screwdriver: For assembling parts.
  • Hammer: For driving nails or assembling wooden structures.
  • Measuring tape and pencil: For marking and transferring measurements.

For more intricate designs, you might need:

  • Power saw: For precise cuts and detailed shapes.
  • Woodcarving tools: For creating detailed features and ornaments.
  • Drill: For creating holes for dowels, screws, or other fasteners.
  • Router: For shaping edges and creating grooves.

Basic Techniques

Here are some basic woodworking techniques essential for crafting toys:

  • Cutting: Using a saw to cut wood to the desired shape and size.
  • Sanding: Smoothing wood surfaces with sandpaper to achieve a smooth and polished finish.
  • Gluing: Bonding wood pieces together using wood glue.
  • Screwing: Using screws to fasten wood pieces securely.

Designing Personal Touches: Making Your Wooden Toys Unique

The beauty of crafting wooden toys lies in the opportunity to personalize them with thoughtful details. Here are some ways to infuse your creations with a unique touch:

Engraving or Carving

Engraving or carving names, dates, or special messages onto the toy adds a deeply personal touch. This technique can be done by hand or using a laser engraving machine for greater precision. Consider adding decorative elements like hearts, stars, or initials to enhance the design.

Painting and Staining

Adding color and finishing touches to wooden toys can bring them to life. Explore different paint techniques, from simple solid colors to intricate patterns and artistic designs. You can also use stains to enhance the natural wood grain or create a rustic aesthetic.

Personalized Accessories

Enhance the functionality and playability of your toys with personalized accessories. For example, create custom wooden wheels for a toy car, a personalized name tag for a wooden doll, or custom buttons for a wooden puzzle.

Unique Shapes and Designs

Don't be afraid to explore unique shapes and designs. Incorporate elements inspired by the recipient's interests, hobbies, or favorite characters. Consider crafting a toy train for a young enthusiast or a wooden flower for a nature-loving child.

Safety and Finishing Touches

After crafting your wooden toy, it's crucial to ensure its safety and durability. Follow these guidelines:

Sanding and Smoothing

Thoroughly sand all edges and surfaces to remove any rough spots that could be harmful. Aim for a smooth, polished finish that feels comfortable to touch.

Finishing Touches

Apply a protective finish, such as a sealant or varnish, to protect the wood from scratches, moisture, and wear and tear. Choose non-toxic and child-safe finishes that comply with safety standards.

Quality Control

Inspect the toy carefully for loose parts, sharp edges, or potential choking hazards. Ensure all parts are securely attached and the overall construction is stable.

Sharing Your Creations and Inspiring Others

Crafting personalized wooden toys is not just about creating gifts; it's about sharing your skills, passion, and love with others. Encourage the recipient to play with and enjoy the toy. Share your experience and inspire others to create their own personalized wooden toys.

In conclusion, crafting wooden toys with a personal touch is an enriching experience that allows you to create truly special and meaningful gifts. By selecting the right wood, mastering basic woodworking techniques, and adding personalized details, you can transform these toys into lasting memories. Embrace the joy of creating, and let your wooden toys be a testament to the love and care you invest in them.

Share:

人気の投稿

Powered by Blogger.