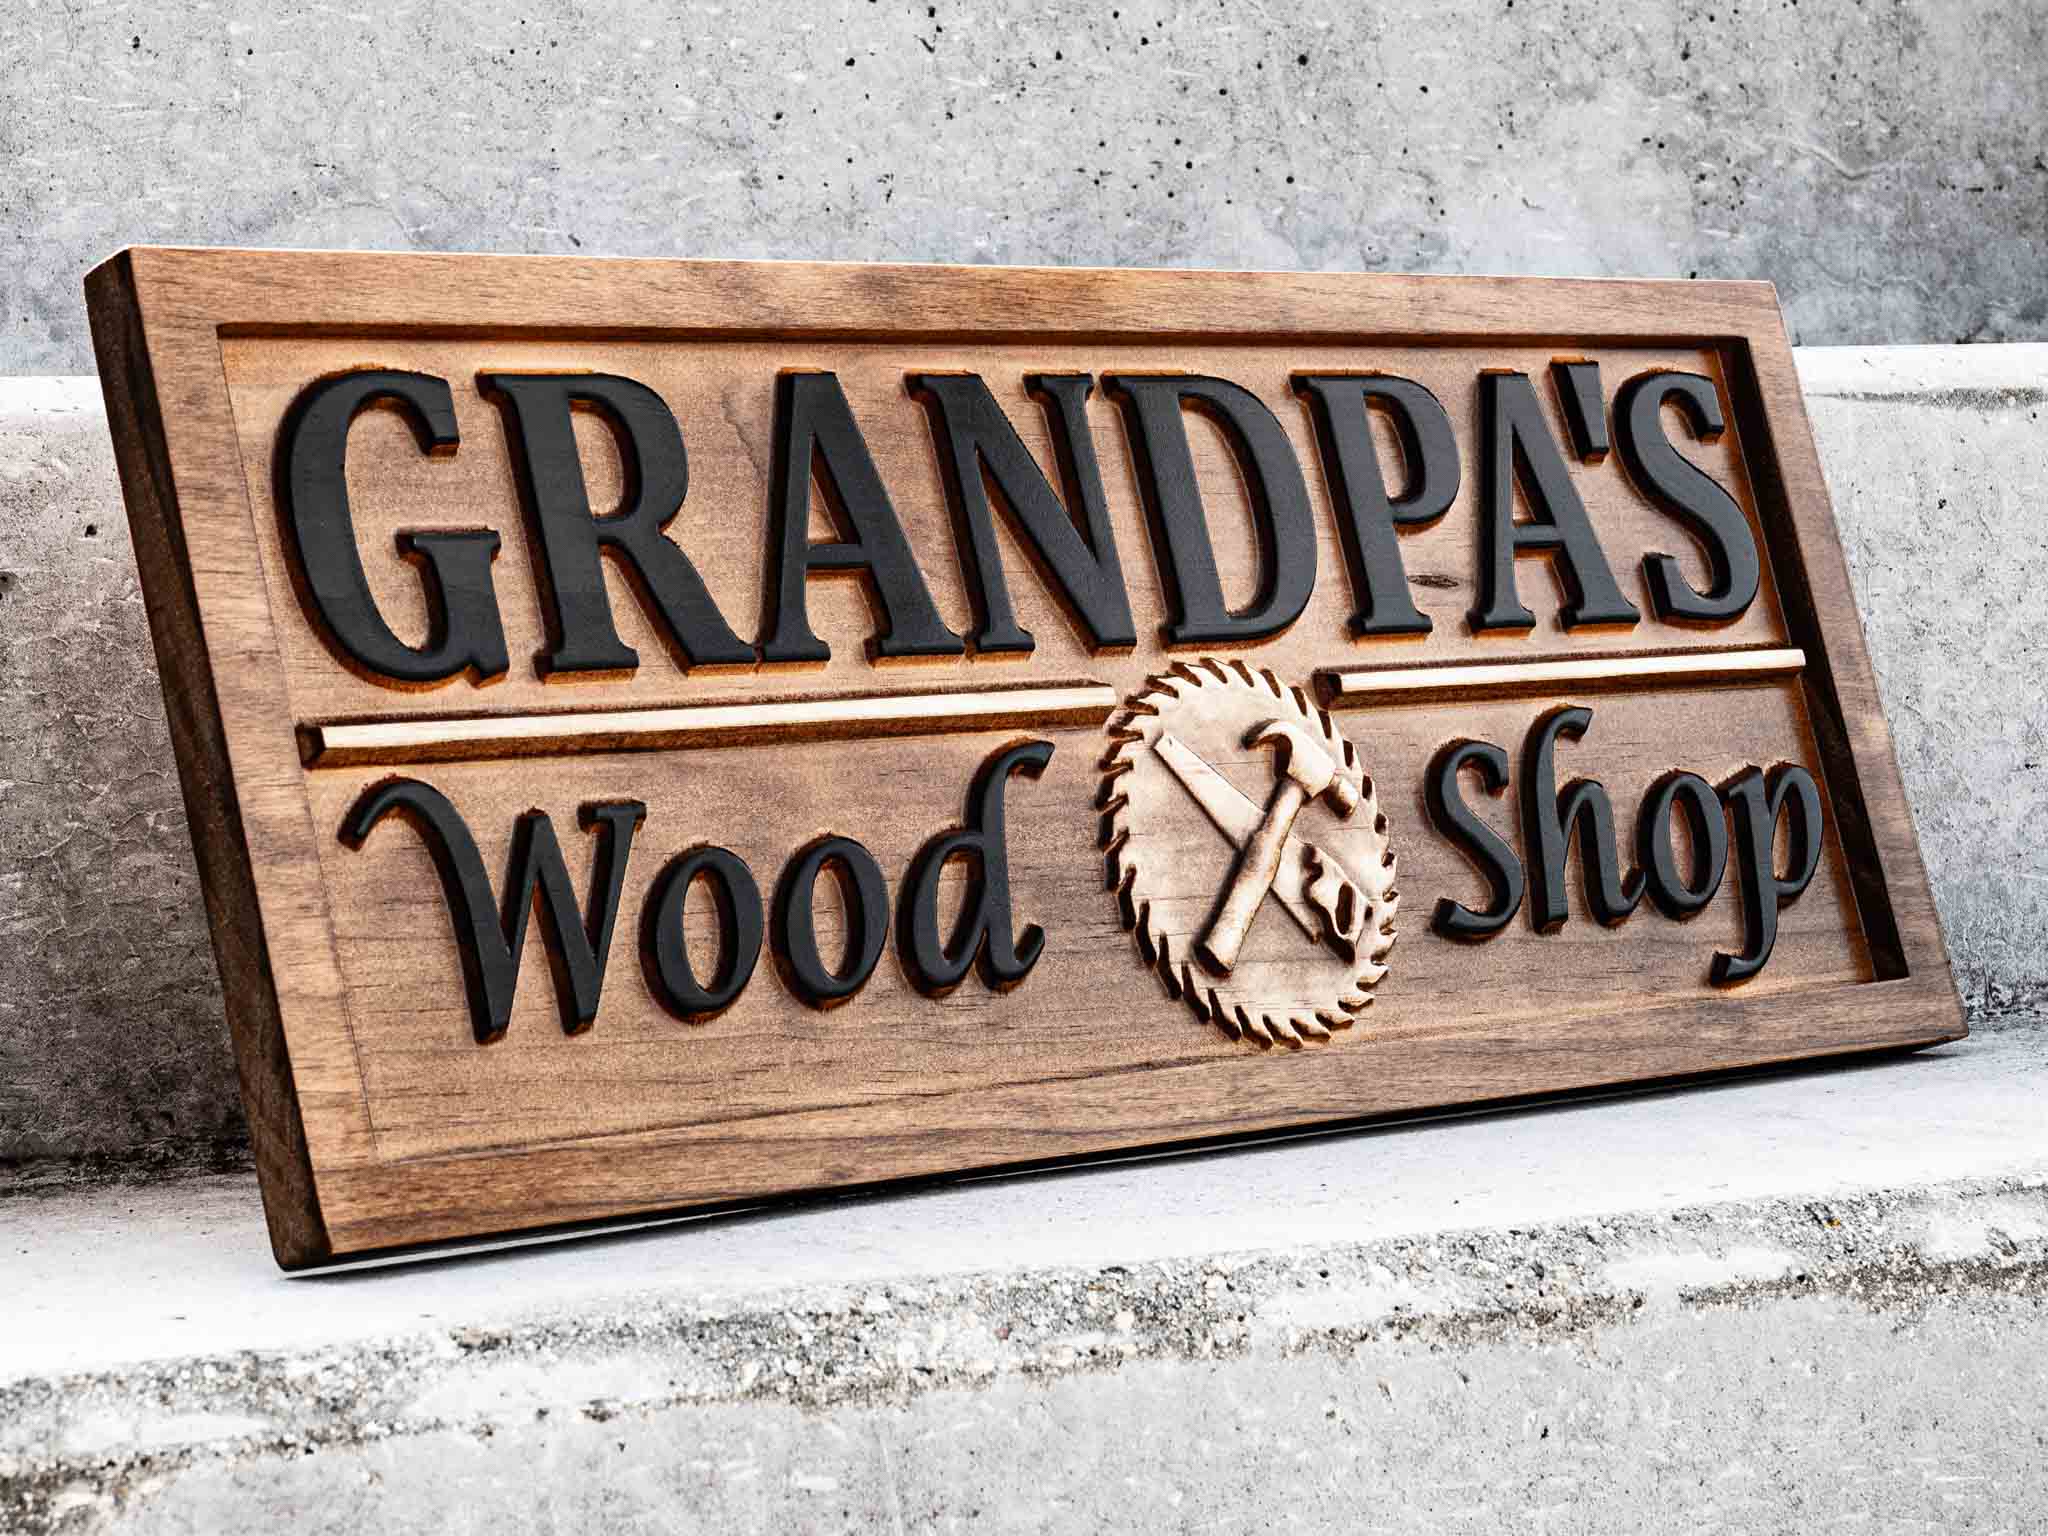
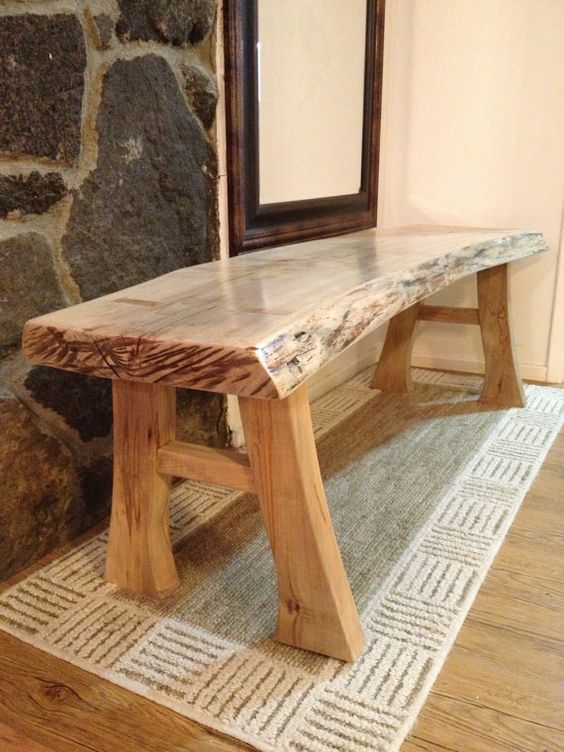
Easy and budget-friendly woodworking ideas for creating personalized wood crafts and home accents.

Showing posts with label Make. Show all posts

How to Choose the Right Beginner Woodworking Project for Your Skill Level

How to Choose the Right Beginner Woodworking Project for Your Skill Level

Choosing the Right Beginner Woodworking Project

Stepping into the world of woodworking can be exciting, but it can also feel overwhelming. With countless projects to choose from, it's crucial to select one that matches your skill level. Starting with a project that's too complex can lead to frustration and discouragement, while one that's too simple might not be satisfying enough. Here's a guide to help you pick the perfect beginner woodworking project.

Assessing Your Skill Level

Before you dive into project ideas, take a moment to honestly evaluate your woodworking skills. Do you have any prior experience, even basic DIY projects? Are you comfortable using hand tools like saws, hammers, and screwdrivers? If you're a complete novice, starting with the simplest projects is essential.

Beginner:

If you're a complete beginner, look for projects with straightforward designs and minimal cuts. Projects like simple shelves, birdhouses, or small wooden boxes are great options. These projects focus on basic hand tool skills and introduce you to woodworking fundamentals like measuring, cutting, and assembling.

Intermediate:

Once you've gained some experience, you can move on to slightly more complex projects. This could involve using power tools like drills, sanders, or table saws. Look for projects like small furniture pieces, cutting boards, or decorative items that require more precise cuts and joinery techniques.

Advanced:

If you're comfortable with most woodworking techniques, feel free to challenge yourself with intricate projects. This could involve building furniture with complex joinery, working with different wood species, or experimenting with finishing techniques.

Project Considerations

Beyond your skill level, consider these factors when choosing a project:

  • Time commitment: Some projects take hours or even days to complete. Choose one that fits your schedule and available time.
  • Materials: Research the cost and availability of the materials you need for the project. Consider using readily available woods and hardware.
  • Tools: Determine the tools you'll need for the project. If you don't have the necessary tools, you can consider renting or borrowing them.
  • Personal interest: Most importantly, choose a project that excites you! You'll be more motivated to complete it if you're genuinely interested in the final product.

Popular Beginner Woodworking Projects

Here are some classic beginner projects that are well-suited for woodworkers of all skill levels:

  • Simple Shelf: This project is perfect for beginners as it requires basic cuts and assembly techniques. You can create a shelf in various sizes and styles to suit your needs.
  • Birdhouse: Birdhouses are fun and functional projects that introduce basic joinery techniques. Choose a design that matches your skill level and enjoy watching birds visit your creation.
  • Wooden Box: Building a wooden box is a great way to practice basic woodworking skills. You can use various joinery techniques and customize the box with different finishes.
  • Cutting Board: Cutting boards are practical and versatile woodworking projects. Learn to cut and shape wood to create a beautiful and functional kitchen tool.
  • Small Table: If you're feeling adventurous, you can try building a small table. Choose a simple design with basic joinery techniques and enjoy the satisfaction of creating a piece of furniture.

Starting Your Woodworking Journey

Once you've chosen your project, it's time to gather your tools and materials. Don't hesitate to ask for help from more experienced woodworkers. There are also countless resources available online and in libraries that can provide guidance and inspiration. Remember, the key to success in woodworking is patience, practice, and a willingness to learn. Enjoy the journey and have fun creating!

Share:

Portable Wood Toolbox Organizers That Sell Well

Portable Wood Toolbox Organizers That Sell Well

Portable Wood Toolbox Organizers: The Ultimate Guide to Finding the Right Fit

Hey there, fellow tool enthusiasts! Whether you're a seasoned pro or just starting out, we all know the struggle of keeping our toolboxes organized. A cluttered toolbox can be a real pain, wasting precious time and making it hard to find the right tool when you need it. That's where portable wood toolbox organizers come in! These handy little helpers transform your toolbox into a well-oiled machine, making your tool-hunting days a thing of the past.

But with so many options out there, how do you choose the right organizer for your needs? Don't worry, we've got you covered! This comprehensive guide will walk you through everything you need to know about portable wood toolbox organizers, helping you find the perfect fit for your toolbox and your projects.

Why Choose a Portable Wood Toolbox Organizer?

First things first, let's talk about why wood toolbox organizers are a fantastic choice:

  • Durability: Wood is a sturdy and long-lasting material that can withstand the wear and tear of daily use. Unlike plastic organizers, wood won't crack or break easily, ensuring your investment lasts for years to come.
  • Customization: Many wood organizers come with customizable compartments and dividers, allowing you to tailor them to your specific tool collection. You can create the perfect setup for everything from screwdrivers and pliers to hammers and saws.
  • Aesthetics: Let's be honest, a well-organized toolbox looks darn good! Wood organizers bring a classic and professional aesthetic to your workspace, adding a touch of craftsmanship to your toolbox.
  • Portability: While wood organizers may be a bit heavier than their plastic counterparts, they are still easily transportable. Look for organizers with a built-in handle or the option to add one for easy carrying.

Types of Portable Wood Toolbox Organizers

Now, let's delve into the different types of wood toolbox organizers available:

1. Drawer Organizers

Drawer organizers are perfect for keeping your smaller tools, like screwdrivers, wrenches, and sockets, neatly organized. They typically feature multiple compartments and dividers, allowing you to separate your tools by size and type.

2. Tray Organizers

Tray organizers are a versatile option that can be used for both small and large tools. They often have deep compartments that can accommodate power tools, measuring tapes, and even hand saws.

3. Tool Caddy Organizers

Tool caddy organizers are ideal for keeping your most frequently used tools within easy reach. They are usually small and compact, making them perfect for adding to your toolbox or hanging from your workbench.

4. Customizable Organizers

If you're looking for the ultimate in organization, customizable organizers are the way to go. These organizers allow you to create a layout that perfectly suits your tool collection. Many come with adjustable dividers and compartments, making them incredibly versatile.

Factors to Consider When Choosing a Wood Toolbox Organizer

Now that you know about the different types of wood toolbox organizers, let's discuss some key factors to consider before making your purchase:

1. Size and Capacity

Measure your toolbox to ensure the organizer you choose will fit properly. Consider the size and quantity of your tools to determine the organizer's capacity.

2. Compartment Design

Think about the specific tools you need to organize. Do you need dedicated compartments for larger items like hammers and saws? How many smaller compartments do you need for screwdrivers, wrenches, and other hand tools?

3. Material and Construction

While wood is generally sturdy, look for organizers made from high-quality wood that is resistant to scratches and moisture. Pay attention to the joinery and construction of the organizer to ensure it is durable and built to last.

4. Budget

Portable wood toolbox organizers come in a wide range of prices. Set a budget and shop around to find the best value for your money. You can often find great deals on quality organizers without breaking the bank.

Tips for Maintaining Your Wood Toolbox Organizer

You've invested in a great wood organizer, now let's keep it looking and functioning its best:

  • Clean it Regularly: Dust and debris can accumulate in the compartments, making it harder to find your tools. Wipe down the organizer with a damp cloth to keep it clean and organized.
  • Apply a Protective Finish: For added protection, consider applying a sealant or wood finish to help prevent scratches, dents, and moisture damage.
  • Organize Regularly: Take a few minutes each week to reorganize your toolbox and ensure everything is in its proper place.

Commonly Asked Questions

Let's address some common questions about portable wood toolbox organizers:

Q: What is the best wood for toolbox organizers?

A: Some popular choices for wood toolbox organizers include pine, oak, maple, and cherry. These woods are durable, attractive, and relatively affordable.

Q: How do I clean a wood toolbox organizer?

A: Simply use a damp cloth to wipe down the organizer, making sure to dry it thoroughly afterwards. You can also use a mild soap solution if needed.

Q: Can I customize a wood toolbox organizer?

A: Yes, many wood toolbox organizers come with adjustable dividers and compartments that you can customize to fit your tool collection. You can also find organizers that allow you to add your own custom compartments and dividers.

We hope this guide has helped you gain a better understanding of portable wood toolbox organizers. With the right organizer, you can transform your toolbox into a well-organized and efficient tool-hunting haven. Happy organizing!

Share:

How to Sell Floating Shelves on Etsy and Other Platforms

How to Sell Floating Shelves on Etsy and Other Platforms

Unlocking the Power of Floating Shelves: A Guide to Selling on Etsy and Beyond

In the ever-evolving world of online retail, floating shelves have become a beloved staple for home décor enthusiasts. Their sleek, minimalist design and space-saving functionality make them a hot commodity, drawing in buyers seeking to enhance their living spaces. If you're a skilled craftsperson or a passionate DIYer with a knack for creating stylish and functional furniture, selling floating shelves online presents a lucrative opportunity. Let's delve into the strategies for establishing a successful online presence and attracting a steady stream of customers for your floating shelf creations.

Crafting Captivating Listings

The first step in any successful online venture is crafting enticing listings that pique buyer interest and effectively showcase your products. Your listings should be a compelling blend of captivating visuals, detailed descriptions, and strategic keywords.

Professional Photography is Key

High-quality photographs are the cornerstone of successful online sales. Invest in a decent camera or even your smartphone's camera, and ensure your shelves are photographed in a well-lit environment. Capture the shelves from various angles, highlighting their design, materials, and installation process. Don't hesitate to use props to showcase how the shelves would look in a real home setting.

Captivating Descriptions that Sell

Your product descriptions should be more than just a list of features. Tell a story about your shelves, emphasizing their benefits and why they're a valuable addition to any home. Highlight the materials used, the craftsmanship involved, and the unique selling points that set your shelves apart. Remember to include essential information like dimensions, weight capacity, and installation instructions.

Keywords for Discoverability

Strategically incorporating relevant keywords into your listings is vital for driving traffic to your products. Use tools like Etsy's Keyword Tool to identify popular search terms related to floating shelves. Include keywords in your product titles, descriptions, and tags to increase your visibility in search results.

Building a Strong Brand Presence

Beyond individual listings, creating a cohesive brand identity can establish you as a trusted seller and attract a loyal customer base.

Develop a Unique Brand Style

Think about the aesthetic you want to project. Are your shelves rustic, modern, minimalist, or eclectic? Develop a consistent visual theme across your listings, social media, and website (if applicable). Consider using consistent fonts, color palettes, and imagery to create a recognizable brand persona.

Engage with Your Audience

Building a community around your brand is crucial for fostering trust and loyalty. Engage with your customers on social media platforms, respond promptly to questions and feedback, and run contests or giveaways to create excitement around your brand.

Expanding Your Reach Beyond Etsy

While Etsy is a valuable platform for reaching niche audiences, diversifying your sales channels can expand your reach and tap into new customer segments.

Exploring Other Marketplaces

Platforms like Amazon Handmade, Facebook Marketplace, and Shopify offer alternative avenues for selling your products. Research each platform to determine which best aligns with your target market and business goals.

Direct Sales through Your Website

Consider creating your own website to establish a more personalized brand presence. This gives you greater control over your brand messaging, design, and customer experience. Additionally, you can avoid platform fees associated with marketplaces.

Social Media Marketing

Platforms like Instagram and Pinterest are perfect for showcasing visually appealing products like floating shelves. Create captivating content, leverage relevant hashtags, and run targeted ads to reach your ideal audience.

Standing Out from the Crowd

In a competitive online market, differentiating your offerings and delivering exceptional customer service are key to success.

Offer Customization Options

Allow customers to personalize their shelves by choosing from a variety of materials, finishes, sizes, and designs. This adds value and caters to individual preferences.

Provide Excellent Customer Support

Respond to inquiries promptly, address customer concerns professionally, and offer post-sale support. Going the extra mile for your customers builds trust and fosters repeat business.

Showcase Positive Reviews

Positive reviews from satisfied customers are powerful social proof. Encourage your buyers to leave feedback and prominently display their glowing testimonials on your listings and website.

Selling floating shelves online can be a rewarding experience, allowing you to share your creativity with the world and earn a sustainable income. By following these strategies, you can establish a strong brand presence, attract a loyal customer base, and achieve lasting success in the competitive world of online retail. Remember, success is a journey, not a destination. Continuously learn, adapt, and evolve to stay ahead of the curve and ensure the longevity of your floating shelf business.

Share:

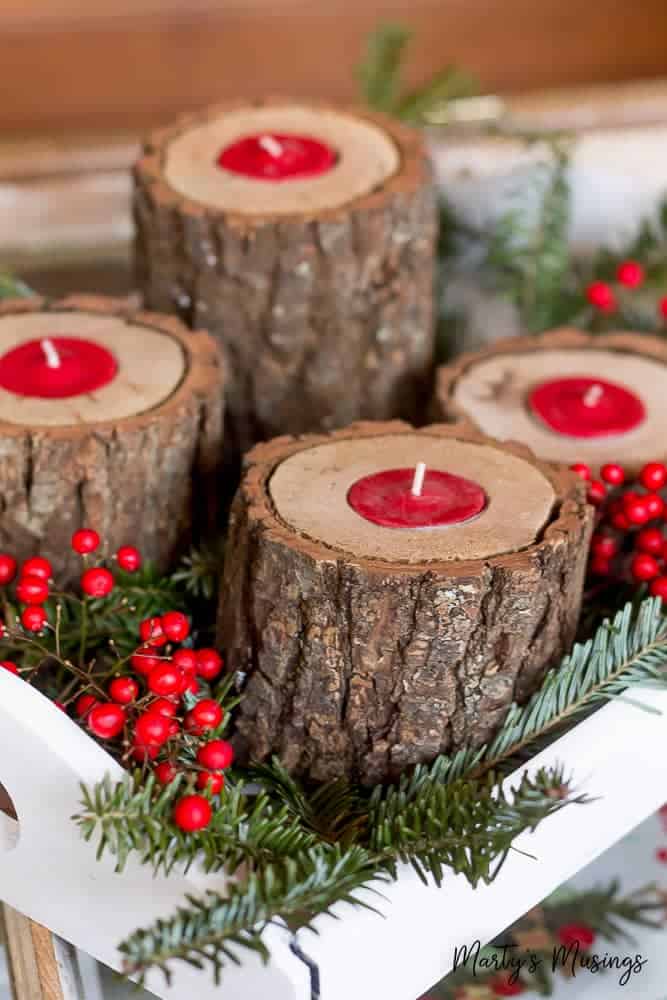
DIY Wooden Candle Holders to Complement Your Rustic or Farmhouse Decor

DIY Wooden Candle Holders to Complement Your Rustic or Farmhouse Decor

DIY Wooden Candle Holders to Complement Your Rustic or Farmhouse Decor

Rustic and farmhouse decor have become increasingly popular in recent years, with their warm, inviting, and natural aesthetic. A key element of this style is the use of wood, and incorporating wooden candle holders is a great way to add a touch of rustic charm to your home. Not only are they visually appealing, but they also offer a cozy and welcoming ambiance. This article will guide you through the creation of several DIY wooden candle holders, each with unique designs to complement your rustic or farmhouse decor.

Simple and Elegant: The Rustic Log Candle Holder

This project utilizes the natural beauty of wood to create a simple yet elegant candle holder.

Materials Needed:

  • A small log (approximately 6-8 inches in length)
  • A drill with a 1-inch drill bit
  • Sandpaper (medium and fine grit)
  • Wood stain or paint (optional)
  • Clear sealant (optional)
  • Tea lights or small votive candles

Instructions:

  1. Prepare the log: Clean any dirt or debris from the log's surface. Use sandpaper to smooth out any rough edges.
  2. Drill the candle cavity: Center the log on a flat surface and carefully drill a hole that's slightly larger than the diameter of your candle. The depth should accommodate the candle's height.
  3. Finish (optional): If desired, apply a wood stain or paint to the log to enhance its natural beauty or add a touch of color. Once dry, apply a clear sealant to protect the wood and enhance its longevity.
  4. Place the candle: Insert your tea light or votive candle into the drilled hole and enjoy the soft glow of the candle.

This simple candle holder is a versatile piece that can be placed on a mantel, coffee table, or side table to add a touch of warmth and charm to any room.

Rustic Elegance: The Wooden Slice Candle Holder

This design showcases the unique grain patterns of wood slices, creating a rustic and elegant candle holder.

Materials Needed:

  • A wooden slice (approximately 4-6 inches in diameter)
  • A drill with a 1-inch drill bit
  • Sandpaper (medium and fine grit)
  • Wood stain or paint (optional)
  • Clear sealant (optional)
  • Tea lights or small votive candles
  • Small metal ring or decorative wire (optional)

Instructions:

  1. Prepare the wooden slice: Sand the surface of the wooden slice to smooth out any rough edges. You can choose to leave the bark on for a more natural look.
  2. Drill the candle cavity: Center the wooden slice on a flat surface and carefully drill a hole that's slightly larger than the diameter of your candle. The depth should be deep enough to accommodate the candle's height.
  3. Finish (optional): If desired, apply a wood stain or paint to the slice to enhance its natural beauty or add a touch of color. Once dry, apply a clear sealant to protect the wood and enhance its longevity.
  4. Create a decorative handle (optional): If you prefer, you can add a small metal ring or decorative wire to the top of the wooden slice to create a handle. This allows for easy moving and placement.
  5. Place the candle: Insert your tea light or votive candle into the drilled hole and enjoy the soft glow of the candle.

This elegant candle holder can be displayed on a coffee table, mantel, or even hung on a wall. It complements any rustic or farmhouse decor beautifully.

Modern Rustic: The Pallet Wood Candle Holder

This contemporary design uses repurposed pallet wood to create a unique and eco-friendly candle holder.

Materials Needed:

  • Pallet wood planks
  • Saw
  • Sandpaper (medium and fine grit)
  • Wood glue
  • Clamps
  • Wood stain or paint (optional)
  • Clear sealant (optional)
  • Tea lights or votive candles

Instructions:

  1. Cut the pallet wood: Cut the pallet wood planks into desired sizes for your candle holder base and sides. For a simple design, you could create a rectangular box shape. Alternatively, use different plank lengths for a more rustic and uneven design.
  2. Assemble the base: Join the wood planks to create the base of the candle holder. Use wood glue and clamps to ensure a secure bond.
  3. Construct the sides: Attach the side planks to the base. Ensure the sides are tall enough to accommodate your chosen candle size.
  4. Finish (optional): Sand all the surfaces of the candle holder smooth. You can choose to leave the wood in its natural state, or apply a wood stain or paint for a different look.
  5. Seal (optional): Once the finish is dry, apply a clear sealant to protect the wood and enhance its longevity.
  6. Place the candle: Set your tea light or votive candle inside the candle holder. You can place the holder directly on a surface, or you can add legs or feet for a more stable design.

This contemporary rustic design adds a unique touch to any space, making it perfect for those seeking a modern take on farmhouse decor.

Tips for Success

Here are some tips for making successful DIY wooden candle holders:

  • Choose the right wood: Select wood types that are suitable for candle holders, such as hardwoods like oak, maple, or walnut. Softwoods like pine can be more prone to burning.
  • Safety first: When drilling holes, make sure to use safety glasses and avoid drilling too close to the edges of the wood to prevent splintering.
  • Get creative with designs: Experiment with different shapes, sizes, and finishes to create unique and personalized candle holders.
  • Prioritize fire safety: Always place candle holders on a stable, heat-resistant surface and never leave them unattended. Keep flammable materials away from the lit candle.

Making your own wooden candle holders is a fun and rewarding project that allows you to express your creativity while adding a touch of rustic charm to your home. The projects described above offer various design options, each with its own unique appeal. By following these instructions, you can craft stunning candle holders that complement your rustic or farmhouse decor perfectly.

Share:

How to Make and Sell Magazine Racks with Eco-Friendly Materials

How to Make and Sell Magazine Racks with Eco-Friendly Materials

Make and Sell Eco-Friendly Magazine Racks: A Guide to Sustainable Success

In a world increasingly conscious of environmental impact, creating and selling products with an eco-friendly ethos is not just a trend, but a necessity. Magazine racks are a common sight in homes, offices, and public spaces, but their traditional production often involves unsustainable materials like plastic and metal. By crafting your own magazine racks from recycled and reclaimed materials, you can tap into a growing demand for sustainable products, and contribute to a greener future.

Choosing Eco-Friendly Materials

The key to creating an eco-friendly magazine rack lies in selecting materials that are sustainable, recycled, or reclaimed. Consider these options:

Recycled Plastic

Plastic is a readily available material, but its disposal often poses environmental challenges. Using recycled plastic for your magazine racks allows you to give discarded materials a new life, reducing plastic waste and minimizing its environmental footprint.

Reclaimed Wood

Reclaimed wood is a fantastic option for eco-conscious furniture makers. By using wood salvaged from old buildings, barns, or pallets, you're reducing deforestation and giving materials a second chance.

Bamboo

Bamboo is a rapidly renewable resource, making it a sustainable choice for furniture and other products. Its natural beauty adds a unique touch to your magazine racks.

Cork

Cork is another excellent eco-friendly option. It is harvested from the bark of cork oak trees without harming the tree, making it a sustainable and renewable resource.

Design and Construction Techniques

Once you've chosen your materials, it's time to design and build your magazine racks. Consider these design elements:

Simplicity and Functionality

Design your magazine racks with simplicity in mind. Aim for a clean, functional design that can easily hold magazines and other publications.

Durability and Stability

Ensure that your magazine racks are sturdy and stable. Use strong materials and appropriate joinery techniques to create a durable product that will last.

Customization and Personalization

Offer your customers the option to personalize their magazine racks with different colors, finishes, and designs. This allows for greater individuality and customer satisfaction.

Marketing and Sales Strategies

To successfully market your eco-friendly magazine racks, consider these strategies:

Highlight Sustainability

Emphasize the eco-friendly aspects of your products in your marketing materials. Highlight the use of recycled, reclaimed, or renewable materials, and explain the environmental benefits of choosing your products.

Target the Right Audience

Focus your marketing efforts on individuals and businesses who value sustainability and are willing to pay a premium for eco-friendly products. Target customers who are conscious of their environmental impact and seek products that align with their values.

Engage in Local Events and Markets

Participate in local craft fairs, farmers' markets, and sustainability events to showcase your magazine racks and connect with potential customers. Direct interaction allows you to engage with customers and explain the unique aspects of your products.

Embrace Online Platforms

Utilize online marketplaces like Etsy and Shopify to reach a wider audience. Create a website or social media presence to promote your products and engage with potential customers.

Ethical Sourcing and Production

Beyond choosing eco-friendly materials, consider the ethical implications of your production processes. Source your materials from reputable suppliers who share your commitment to sustainability. Explore options for local sourcing to minimize transportation costs and environmental impact.

Conclusion: Building a Sustainable Business

Creating and selling eco-friendly magazine racks is a rewarding endeavor that combines creativity, sustainability, and entrepreneurship. By embracing eco-friendly materials, ethical sourcing, and sustainable production methods, you can build a successful business that contributes to a greener future. Remember to communicate your values and highlight the environmental benefits of your products, and you'll attract customers who are looking for sustainable solutions for their homes and offices.

Share:

DIY Wooden Storage Bins for Sustainable Home Decor

DIY Wooden Storage Bins for Sustainable Home Decor

DIY Wooden Storage Bins for Sustainable Home Decor

Tired of plastic bins cluttering your home? Craving a more natural and stylish way to organize your belongings? Look no further than DIY wooden storage bins! These handcrafted beauties offer a sustainable and charming alternative to mass-produced plastic containers. Not only will you create a unique and personalized look for your home, but you'll also be reducing waste and embracing a more eco-conscious approach to storage. Let's dive into the world of DIY wooden storage bins and unlock your creativity!

Choosing Your Wood

The type of wood you select will greatly influence the final look and feel of your bins. Consider factors like:

  • Durability: Hardwoods like oak, maple, or cherry offer excellent durability, perfect for heavier items.
  • Aesthetics: Softwoods like pine or cedar have a more rustic and natural appeal.
  • Budget: Price varies significantly depending on wood type.

Think about the intended use of the bins and choose a wood that complements your style and meets your practical needs.

Gathering Your Tools and Materials

Before you dive into building, gather the essential tools and materials. You'll need:

  • Wood: Cut to your desired dimensions.
  • Wood glue: For secure joints.
  • Clamps: To hold pieces together while glue dries.
  • Saw: To cut wood to size.
  • Sandpaper: For smoothing edges and surfaces.
  • Finishing supplies: Wood stain, paint, or oil to add a touch of personality.
  • Measuring tape: For accurate measurements.
  • Pencil: For marking cutting lines.

Step-by-Step Building Guide

Now, let's construct those stunning wooden storage bins. Here's a step-by-step guide to help you through the process:

Step 1: Planning and Cutting

Start by planning the dimensions of your bins. Consider the size and shape you desire, ensuring they fit your storage needs. Use a measuring tape and pencil to mark cutting lines on your wood. Carefully cut the pieces with your saw, ensuring precise cuts for a clean and professional finish.

Step 2: Assembling the Box

Apply a generous amount of wood glue to the edges where the sides and bottom panels meet. Clamp the pieces together firmly, allowing the glue to dry completely. For added stability, consider using screws or dowels to reinforce the joints.

Step 3: Sanding and Finishing

Once the glue has dried, sand the entire surface of your bin with sandpaper. This smoothes out any rough edges and prepares the wood for the finishing touch. You can choose to stain, paint, or oil the wood to achieve your desired look. If you opt for stain, apply it evenly across the surface. For paint, use a brush or roller to cover the entire bin. Let the finishing coat dry completely.

Step 4: Adding Handles (Optional)

If you'd like to make your bins easier to carry, add handles. Drill holes for the handles on opposite sides of the bin. Choose handles that complement your style and attach them securely to the bin. You can use metal, leather, or rope for a rustic touch.

Tips for Success

Here are a few additional tips to make your DIY experience smoother and more enjoyable:

  • Measure twice, cut once: Accuracy is key for a professional-looking result.
  • Use a level: Ensure all sides are level and aligned for even and attractive bins.
  • Wear safety glasses: Always protect your eyes when working with wood.
  • Allow for drying time: Give the glue and finishes ample time to dry before moving on to the next step.
  • Have fun! This project is a wonderful opportunity to express your creativity and customize your storage solutions.

Sustainable Storage Solutions

By creating your own wooden storage bins, you're taking a proactive step towards a more sustainable lifestyle. You're reducing waste by using natural materials and choosing a long-lasting alternative to plastic. You're also adding a personal touch to your home décor, creating pieces that reflect your unique style. So embrace your inner maker and get ready to enjoy the beauty and functionality of DIY wooden storage bins!

Share:

How to Build and Sell Jewelry Boxes with Unique Design Features

How to Build and Sell Jewelry Boxes with Unique Design Features

Building and Selling Jewelry Boxes with Unique Design Features

Jewelry boxes are not just for storing treasures; they can be beautiful works of art in their own right. With a little creativity and effort, you can build and sell jewelry boxes with unique design features that will capture the hearts (and wallets) of jewelry lovers everywhere. From incorporating sustainable materials to crafting intricate carvings, there are endless possibilities to explore.

Finding Your Niche

Before you start crafting, take a moment to think about your target audience. Who are you designing these boxes for? What kind of jewelry do they wear? What are their aesthetics? For example, if you're targeting young women who love bohemian styles, you might incorporate natural elements like wood and leather into your designs. For a more minimalist audience, clean lines and simple materials like metal and glass could be more appealing.

Identifying Market Trends

Staying up-to-date with current trends is essential. Explore online marketplaces like Etsy and Pinterest to see what types of jewelry boxes are popular. Look for emerging themes and styles to incorporate into your own designs. This will help you stand out from the crowd and attract a wider audience.

Crafting Your Unique Designs

Now comes the fun part: designing your jewelry boxes! Let your creativity flow and explore different options.

Incorporating Sustainable Materials

Sustainability is becoming increasingly important in all aspects of life, including the jewelry industry. Consider using recycled materials like reclaimed wood, upcycled fabrics, or even repurposed metal. Not only will this be environmentally friendly, but it can also add a unique and rustic touch to your designs.

Playing with Textures and Finishes

Add depth and dimension to your jewelry boxes by incorporating different textures and finishes. Use sandpaper to create a distressed look on wood, or try adding fabric lining for a soft and luxurious feel. Consider adding a layer of varnish or paint to protect your materials and enhance their appearance.

Embracing Intricate Carvings

If you're skilled with tools, you can add a touch of artistry to your designs with intricate carvings. Use a small carving knife or a specialized tool to create patterns, initials, or even miniature sculptures on the surface of the box. This can create a truly unique and personalized piece.

Experimenting with Colour and Pattern

Don't be afraid to experiment with different colours and patterns. You can paint the box itself, line the interior with patterned fabric, or even add decorative elements like ribbons or beads. Play with textures and colours to create visually appealing and unique pieces.

Marketing and Selling Your Creations

Now that you've created your stunning jewelry boxes, it's time to share them with the world! You can choose from a variety of online and offline marketing strategies:

Leveraging Social Media

Instagram, Pinterest, and Facebook are fantastic platforms for showcasing your unique jewelry boxes. Share high-quality photos and videos of your work, engage with potential customers, and participate in relevant hashtags to expand your reach.

Creating a Website or Etsy Shop

A website or Etsy shop provides a professional platform to sell your creations. Carefully curate your product listings with detailed descriptions, high-resolution images, and clear pricing. You can also use these platforms to highlight your unique design features and craftsmanship.

Participating in Craft Fairs and Markets

Attending local craft fairs and markets offers a direct connection with potential customers. This is a great opportunity to showcase your jewelry boxes in person and answer any questions buyers may have. Don't forget to bring business cards and promotional materials.

Pricing Your Jewelry Boxes

Pricing your jewelry boxes is a balancing act. You want to ensure you're covering your costs, while also remaining competitive in the market. Consider the following factors:

  • Material costs
  • Time spent crafting
  • Uniqueness of your design
  • Competitor pricing
  • Start with a price that reflects the value of your work and the materials used. You can always adjust your prices later based on customer feedback and market demand.

    Continuous Improvement

    The world of jewelry box design is constantly evolving. Embrace feedback from customers, keep an eye on current trends, and always strive to improve your craftsmanship. As you grow as a designer, your unique jewelry boxes will become even more sought-after and appreciated.

    Share:

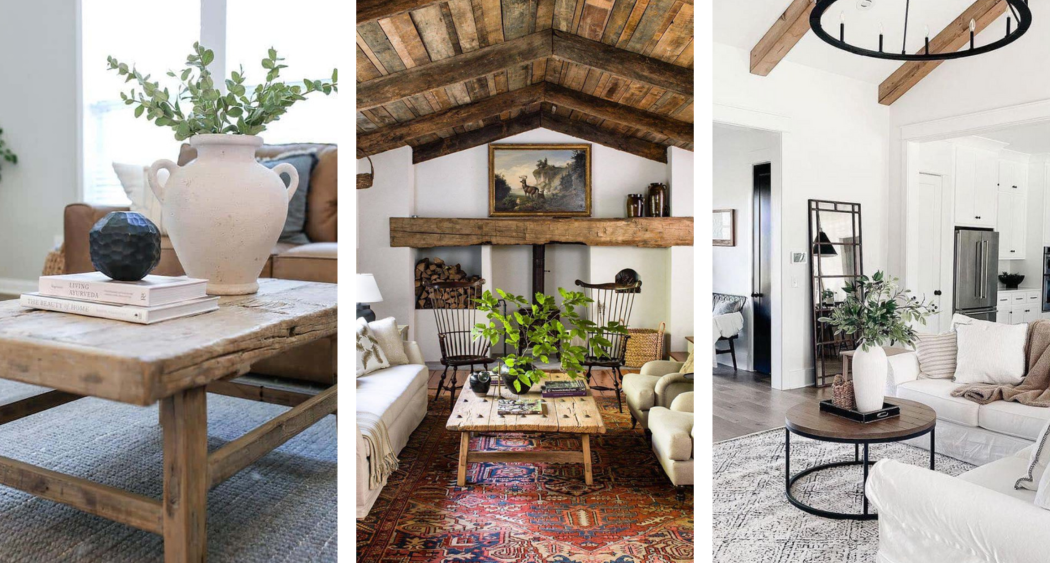
    How to Build Coffee Tables with a Farmhouse or Coastal Look

    How to Build Coffee Tables with a Farmhouse or Coastal Look

    How to Build Coffee Tables with a Farmhouse or Coastal Look: A Step-by-Step Guide

    Hey there, DIY enthusiasts! Are you looking to add a touch of charm and personality to your living room? Building your own coffee table is a fantastic way to do just that, and with a farmhouse or coastal style, you can create a piece that perfectly complements your home's aesthetic. In this guide, we'll walk you through the process of creating a coffee table that's both functional and visually appealing, and you'll be surprised at how simple it can be!

    Choosing Your Style: Farmhouse vs. Coastal

    First, let's decide on the style that best suits your taste:

    Farmhouse Charm

    A farmhouse coffee table exudes warmth and rustic elegance. Think distressed wood, chunky legs, and maybe even a touch of reclaimed materials. You can embrace the natural beauty of wood by leaving it unpainted or staining it in warm tones like brown, gray, or white.

    Coastal Breeze

    If you're drawn to the relaxed vibe of the coast, a coastal coffee table should be your go-to. Light colors, driftwood accents, and nautical details like rope or seashells create a calming atmosphere. You can use white paint, light blue tones, or even incorporate rope elements into your design.

    Materials and Tools You'll Need

    Now, let's gather the materials and tools you'll need for your coffee table project:

    • Wood: This is the foundation of your table! Choose lumber like pine, oak, or cedar based on your style preference and budget.
    • Screws: Go for wood screws in various sizes for securely attaching the table top, legs, and any additional supports.
    • Wood Glue: This will strengthen the joints and ensure your table is sturdy.
    • Sandpaper: You'll need a variety of grits to smooth out the wood and create a polished finish.
    • Stain or Paint: Choose your finish based on your desired style.
    • Polyurethane: This protects your table from scratches, stains, and water damage.
    • Measuring Tape and Pencil: Essential for accurate measurements and marking cuts.
    • Saw: A circular saw or a jigsaw will come in handy for cutting your wood to size.
    • Drill: Use a drill with a bit that matches your screw size for easy fastening.
    • Safety Glasses and Gloves: Protect your eyes and hands while working with tools and wood.

    Building Your Coffee Table: Step-by-Step Instructions

    Ready to get started? Let's build your coffee table! Here's a step-by-step guide to help you along the way:

    Step 1: Designing and Planning

    Before diving in, grab a piece of paper and a pencil. Sketch out your coffee table design, including the dimensions of the tabletop, legs, and any additional supports or shelves. Think about the overall size and shape you want, and consider the height that's comfortable for your living room.

    Step 2: Cutting the Wood

    Now, it's time to cut your wood to size. Using your saw, carefully cut the wood according to your plan. Remember to measure twice and cut once!

    Step 3: Assembling the Tabletop

    For a simple tabletop, you can use a single piece of wood. But if you're going for a larger or more intricate design, you can join multiple pieces together. Apply wood glue to the edges before fastening them with screws. Make sure to use a level to ensure the tabletop is even.

    Step 4: Attaching the Legs

    Once your tabletop is ready, it's time for the legs! Decide where you want to place them. For a farmhouse look, you might choose a more rustic, uneven placement. Coastal designs often call for a more symmetrical arrangement.

    Apply wood glue to the legs and attach them to the underside of the tabletop, using screws to reinforce the connection. Make sure to check that the legs are level and the table is stable.

    Step 5: Adding Details and Finishing Touches

    Time for the fun part! This is where you can really add personality to your table. Here are a few ideas:

    • Farmhouse: For a distressed farmhouse look, sand the edges of the wood to reveal the grain. You can even use a hammer to create small dents or chips in the wood for a more weathered appearance. Stain the table in a warm brown or gray tone.
    • Coastal: Whitewash the wood for a breezy, beachy feel. If you want to incorporate rope, attach it to the underside of the tabletop to create a unique border. Consider adding seashell accents or other nautical elements for a touch of whimsy.

    Step 6: Finishing and Sealing

    Sand your table down to smooth out any rough edges, then apply your chosen stain or paint. Make sure to follow the manufacturer's instructions for drying times. Once the paint or stain is dry, apply a coat of polyurethane to protect your coffee table from spills and scratches.

    Commonly Asked Questions

    Q: What is the best wood to use for a farmhouse or coastal coffee table?

    A: Pine is a great option for both styles due to its affordability and natural beauty. Oak offers durability and a rich grain, making it perfect for a farmhouse look. Cedar provides a natural aroma and resistance to moisture, which can be useful for coastal designs.

    Q: Can I use reclaimed wood for my coffee table?

    A: Absolutely! Reclaimed wood can add a touch of history and character to your farmhouse coffee table. Be sure to inspect the wood thoroughly before using it to ensure it is sound and safe.

    Q: How can I make my coffee table look more unique?

    A: There are endless possibilities for adding unique touches! Consider adding a decorative top, such as a piece of glass, tile, or metal. You can also incorporate metal accents, like iron legs or handles, for a more industrial feel. Don't be afraid to experiment and have fun with your design!

    Q: What if I don't have any woodworking experience?

    A: That's okay! There are plenty of resources available to help you learn the basics of woodworking. Start with simpler projects, and don't be afraid to ask for help if you need it. Remember, practice makes perfect, and you'll be building beautiful furniture in no time!

    Building a coffee table from scratch is a rewarding experience that allows you to create a piece of furniture that's uniquely yours. So, gather your tools, get creative, and enjoy the process of bringing your vision to life!

    Share:

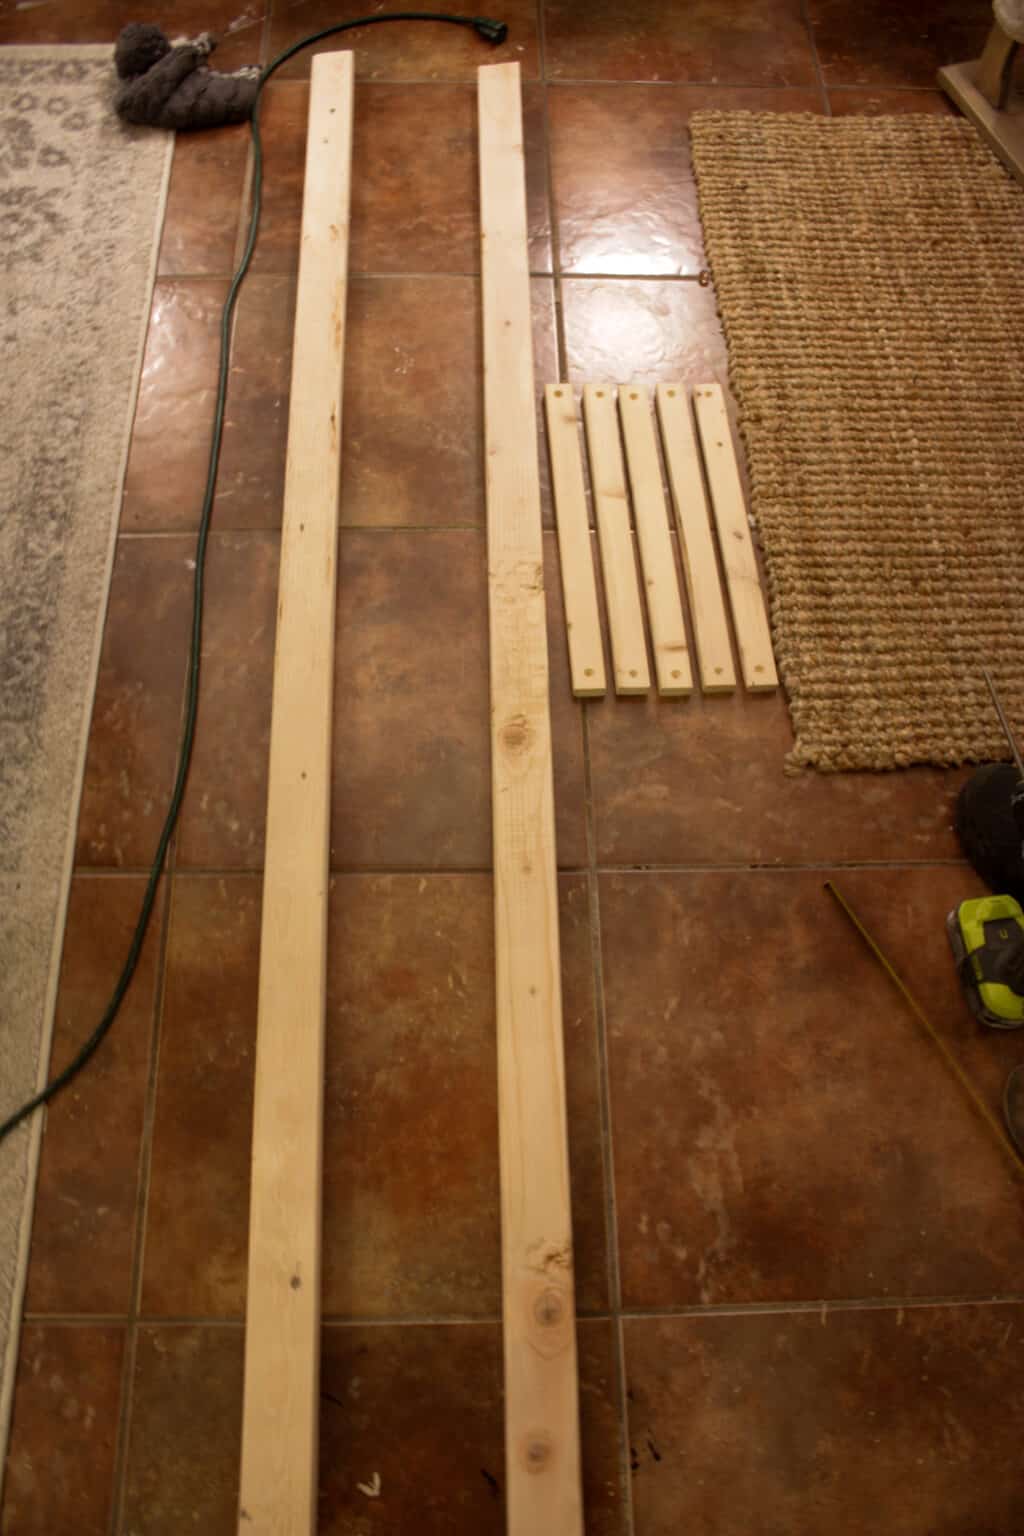
    How to Create Beautiful Blanket Ladders for Extra Income

    How to Create Beautiful Blanket Ladders for Extra Income

    Turning Blanket Ladders into Extra Income: A Cozy Side Hustle

    Hey there, crafty friends! Are you looking for a fun and creative way to earn some extra cash? Well, buckle up because we're diving into the world of blanket ladders, those adorable and practical additions to any home. Not only are they super stylish, but they're also a fantastic way to organize blankets, throws, and even towels, making them a hot commodity in the home decor market.

    Crafting blanket ladders for sale can be a rewarding and lucrative side hustle. It's a project that allows you to unleash your creativity, use up those leftover scraps of wood, and bring a touch of charm to someone's living space. So, let's get down to the nitty-gritty and explore how you can turn your love for DIY into a profitable venture!

    What You'll Need to Get Started

    Before we dive into the creative process, let's gather our essential supplies. Remember, this is just a starting point; you can always customize your materials based on your personal style and budget.

    Materials:

    • Wood: Choose sturdy wood like pine, oak, or cedar. You can use pre-cut boards or experiment with salvaged wood for a unique rustic look.
    • Hardware: You'll need screws, dowels (for the rungs), wood glue, and possibly wood stain or paint depending on your desired finish.
    • Tools: A jigsaw, drill, tape measure, level, and sandpaper will be your trusty companions.
    • Optional Extras: For a more polished look, consider adding finishing touches like a clear coat sealant, decorative hardware (like hooks or knobs), or even some personalized touches with stencils or paint.

    Crafting Your Blanket Ladder: Step by Step

    Now, let's get those creative juices flowing and build a beautiful blanket ladder!

    1. Design Your Ladder: Decide on the size, shape, and number of rungs you want. A standard blanket ladder is typically 4-5 feet tall, but you can customize it based on your space and the blankets you want to display. Sketch out a rough plan and measure your wood accordingly.
    2. Cut the Pieces: Using your jigsaw, carefully cut your wood to your desired dimensions. Be sure to use a straight edge and mark your measurements clearly. Remember, precise cuts are key to a beautiful and functional ladder.
    3. Assemble the Sides: Lay your side pieces flat, aligning them evenly. Attach them together with screws or glue, ensuring they are securely joined.
    4. Create the Rungs: Cut your dowels or wooden rungs to the desired length. Use wood glue to attach them to the sides. You can create a straight, even spacing between each rung, or let your creativity flow and experiment with different patterns. Ensure the rungs are aligned and flush with the sides.
    5. Sand and Finish: Once the glue has dried, use sandpaper to smooth out any rough edges. This will give your ladder a polished look and feel. Apply stain, paint, or sealant if desired. Let it dry completely before moving on to the next step.
    6. Hang Your Ladder: Finally, it's time to hang your masterpiece! You can use sturdy hooks, wall-mounted shelves, or even a simple D-ring and a rope. Make sure the chosen hanging method can support the weight of the ladder and your blankets.

    Turning Your Blanket Ladders into Income

    Now that you've mastered the craft, let's turn your creativity into a lucrative side hustle!

    Finding Your Market

    • Social Media: Instagram, Facebook, and Pinterest are fantastic platforms to showcase your creations. Post high-quality photos of your blanket ladders in different settings, highlighting their style and functionality.
    • Etsy and Other Online Marketplaces: Listing your ladders on online marketplaces like Etsy allows you to reach a wider audience and tap into a community of home decor enthusiasts.
    • Local Craft Fairs and Markets: Participating in local events allows you to directly connect with potential customers, showcase your craftsmanship, and even offer custom orders.

    Pricing Strategies

    Determining the right price for your blanket ladders is crucial. Consider the following factors:

    • Materials Costs: Factor in the cost of wood, hardware, stain, and any other supplies.
    • Time and Effort: Account for the hours you spend crafting, sanding, and finishing your ladders.
    • Market Research: Check what other sellers are charging for similar blanket ladders. This will help you gauge a competitive price point.
    • Value and Uniqueness: If you offer custom designs or unique finishes, you can justify a higher price point.

    Marketing Your Blanket Ladders

    To attract customers, you need to make your products stand out from the crowd. Consider these marketing strategies:

    • High-Quality Photos: Invest in good lighting and photography skills to showcase your ladders in the best light. Use different angles and settings to highlight their beauty and functionality.
    • Compelling Descriptions: Write engaging descriptions that highlight the features, benefits, and craftsmanship of your ladders. Use keywords that potential buyers are likely to search for.
    • Customer Testimonials: Encourage satisfied customers to leave reviews and share their experiences on your social media platforms or online marketplace listings.
    • Run Promotions: Offer special discounts, free shipping, or bundle deals to attract more customers. Consider partnering with other artisans or businesses for cross-promotional opportunities.

    Tips for Success

    Now that you're equipped with the tools and strategies, here are some tips to help you succeed in your blanket ladder side hustle:

    • Stay Organized: Keep your workspace tidy and your materials well-organized. This will help you work efficiently and avoid losing track of your supplies.
    • Focus on Quality: Create sturdy and well-made ladders that will last. Pay attention to details and strive for excellence in every piece you craft.
    • Be Patient: Building a successful side hustle takes time and effort. Don't expect to become an overnight sensation. Stay consistent, promote your work, and be patient with the process.
    • Stay Updated: Keep up with trends in home decor and adapt your designs accordingly. Be open to feedback from your customers and learn from their suggestions.
    • Have Fun! Remember that this is a side hustle you're passionate about. Embrace the creative process, enjoy experimenting with different designs, and most importantly, have fun!

    Commonly Asked Questions

    What are the best types of wood to use for blanket ladders?

    Pine, oak, and cedar are popular choices due to their durability and aesthetics. Pine is affordable and easy to work with, while oak offers a more sturdy and traditional look. Cedar adds a lovely scent and natural resistance to moisture.

    How can I add a personalized touch to my blanket ladders?

    There are many ways to add a personal touch! You can use stencils to paint designs, add decorative hardware like hooks or knobs, or incorporate salvaged or reclaimed wood for a unique rustic look. You can even offer custom orders with specific colors, sizes, and designs.

    What kind of paint or stain should I use?

    The choice depends on your desired look. Water-based paints are easy to apply and dry quickly. Oil-based paints offer a more durable finish. Wood stains can enhance the natural grain of the wood and create a warm and rustic feel. Be sure to test your chosen finish on a scrap piece of wood before applying it to your ladder.

    How do I price my blanket ladders?

    Start by factoring in your material costs, the time and effort you put into making each ladder, and the current market prices for similar items. Consider offering different tiers of pricing based on the complexity of the design, the type of wood used, and any additional embellishments. You can always adjust your prices based on your sales and customer feedback.

    I hope this guide has inspired you to embrace the world of blanket ladders and turn your creative passion into a profitable side hustle. Remember, with dedication, quality craftsmanship, and a touch of marketing magic, you can create beautiful and functional ladders that bring joy to homes and boost your income.

    Share:

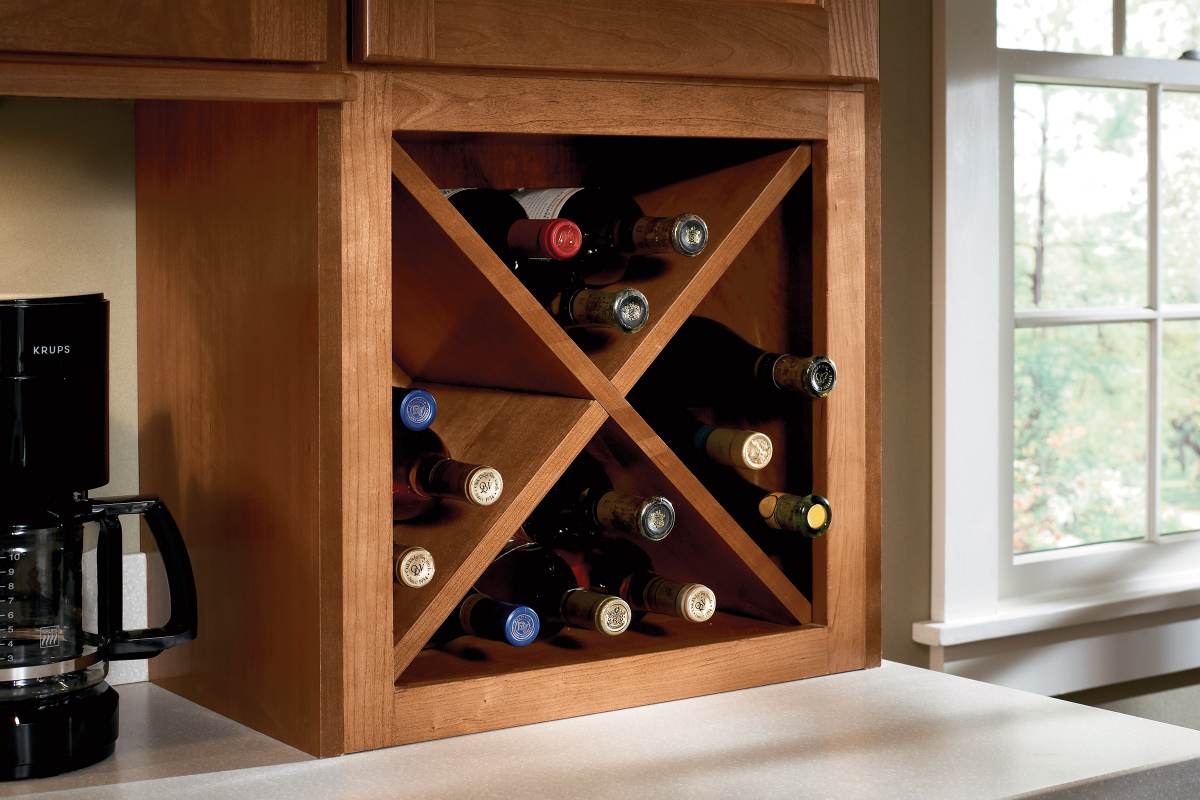
    Wine Rack Projects That Sell Like Hotcakes

    Wine Rack Projects That Sell Like Hotcakes

    Wine Rack Projects That Sell Like Hotcakes: A Guide to Creating Desirable and Profitable Wine Storage Solutions

    Are you looking for a woodworking project that combines practicality and elegance? Look no further than wine racks! These projects are not only functional, but also visually appealing, making them highly sought after by wine enthusiasts and homeowners alike. In this article, we'll delve into the world of wine rack projects, exploring popular designs, tips for crafting them, and marketing strategies to ensure your creations sell like hotcakes.

    Popular Wine Rack Designs

    There's a wine rack design for every taste and space. From simple and minimalist to intricate and ornate, the possibilities are endless. Here are some popular options to get your creative juices flowing:

    Classic Wall-Mounted Racks

    These are a timeless choice, offering efficient space utilization and a clean, contemporary look. Consider using a combination of different wood types for visual interest, such as walnut and maple. You can even add decorative elements like metal accents or a unique finish.

    Freestanding Wine Racks

    For larger wine collections, freestanding racks provide ample storage and can become a focal point in any room. Explore different shapes, sizes, and materials, such as reclaimed wood or metal. Adding casters for easy mobility is a great idea.

    Countertop Wine Racks

    These compact racks are perfect for smaller spaces and can be used for display or temporary storage. You can create unique designs using different wood species, curved edges, or even geometric shapes.

    Tips for Crafting High-Quality Wine Racks

    Crafting a beautiful and functional wine rack requires attention to detail and careful execution. Here are some valuable tips to keep in mind:

    • Choose high-quality wood: Opt for hardwoods like oak, walnut, maple, or cherry. These woods are durable, resistant to scratches, and offer a rich aesthetic appeal.
    • Precise cuts and joinery: Accurate measurements and strong joints are essential for a sturdy and visually pleasing rack. Utilize joinery techniques like mortise-and-tenon or dovetail for maximum strength and elegance.
    • Consider the wine bottles: Ensure the rack is designed to accommodate the different sizes and shapes of wine bottles. Factor in the bottle's diameter and the space needed for the cork.
    • Finish with care: Use a high-quality wood finish, such as oil, varnish, or wax, to protect the wood from moisture, stains, and wear. Experiment with different finishes to create unique looks.

    Marketing Your Wine Rack Creations

    Now that you've created stunning wine racks, it's time to get them in front of eager buyers. Here are some effective marketing strategies:

    • Online Marketplaces: Platforms like Etsy, Amazon Handmade, and Facebook Marketplace offer a wide reach and allow you to showcase your products with detailed descriptions and high-quality photos.
    • Social Media Marketing: Utilize Instagram, Pinterest, and Facebook to share beautiful images of your wine racks, behind-the-scenes glimpses of your crafting process, and customer testimonials.
    • Local Craft Fairs and Events: Participate in local craft fairs and events to connect with potential customers directly and showcase your work in person.
    • Collaborate with Retailers: Approach local wine shops, furniture stores, or home décor retailers to see if they're interested in carrying your wine racks.

    With the right combination of design, craftsmanship, and marketing, your wine rack creations can become a highly sought-after and profitable venture. Embrace your creativity, pay attention to detail, and enjoy the satisfaction of crafting functional art that people love.

    Share:

    Custom Wood Sign Projects That Shoppers Can't Resist

    Custom Wood Sign Projects That Shoppers Can't Resist

    Custom Wood Sign Projects That Shoppers Can't Resist

    In the realm of home décor, custom wood signs have emerged as a captivating trend, capturing the hearts and wallets of discerning shoppers. These handcrafted masterpieces offer a unique blend of artistry, personalization, and rustic charm, making them irresistible additions to any space. From welcoming entryway signs to whimsical kitchen décor, the possibilities are endless, allowing individuals to express their personal style and create a truly one-of-a-kind ambiance.

    The Allure of Custom Wood Signs

    The appeal of custom wood signs lies in their ability to transcend mere decoration, becoming cherished expressions of individuality. These signs are not merely mass-produced items; they are handcrafted pieces imbued with the artist's touch and the customer's vision. They tell stories, reflect passions, and create a sense of warmth and personality that is simply unmatched by mass-produced alternatives.

    Uniqueness and Personalization

    Unlike generic signs found in big-box stores, custom wood signs allow customers to tailor every aspect of their creation. From the choice of wood species and stain to the font, colors, and overall design, the possibilities are boundless. Shoppers can incorporate personal touches like family names, special dates, meaningful quotes, or even their favorite hobbies, making each sign a truly unique and irreplaceable treasure.

    Rustic Charm and Natural Beauty

    Wood itself possesses an inherent allure, exuding a timeless elegance and rustic charm that complements a wide range of décor styles. The natural grain patterns and variations in color add depth and character to each sign, creating a warm and inviting ambiance. This organic beauty harmonizes seamlessly with contemporary, farmhouse, and traditional interiors, enhancing the overall aesthetic appeal.

    Handcrafted Quality and Durability

    Custom wood signs are not mass-produced; they are meticulously crafted by skilled artisans who take pride in their work. Each sign is carefully designed, cut, sanded, stained, and finished by hand, ensuring a high level of quality and durability. This meticulous attention to detail ensures that these signs will stand the test of time, becoming treasured family heirlooms that can be passed down for generations.

    Popular Custom Wood Sign Projects

    The realm of custom wood signs is as diverse as the shoppers who commission them. Here are some of the most popular and sought-after projects that continue to captivate customers:

    Entryway Signs

    First impressions matter, and a custom entryway sign sets the tone for the entire home. Shoppers can personalize these signs with their family name, a welcoming message, or a decorative motif that reflects their style. From elegant farmhouse chic to rustic country charm, entryway signs instantly add a touch of warmth and personality to the front door.

    Kitchen Signs

    The kitchen is often the heart of the home, and custom wood signs can add a touch of whimsy and functionality to this bustling space. Popular kitchen signs include those featuring motivational quotes, recipe lists, or humorous sayings. These signs can be displayed on the wall, above the stove, or even hanging from a rustic rack. The options are endless, and they can be tailored to match any kitchen's design and personality.

    Bathroom Signs

    Bathrooms are a haven for relaxation and rejuvenation, and custom wood signs can enhance this peaceful atmosphere. Signs featuring inspirational quotes, spa-like imagery, or simple messages like "Relax" or "Peace" create a serene ambiance. These signs can be placed above the bathtub, on the vanity, or even hung on a towel rack.

    Bedroom Signs

    The bedroom is a sanctuary for rest and rejuvenation, and custom wood signs can add a personal touch to this intimate space. Signs featuring inspirational quotes, meaningful messages, or even just a simple "Welcome" message create a warm and inviting atmosphere. These signs can be displayed above the bed, on the nightstand, or even hung on the wall behind the headboard.

    Personalized Gifts

    Custom wood signs make exceptional gifts for birthdays, holidays, housewarming parties, and other special occasions. They are a thoughtful and personalized way to show your love and appreciation. Some popular personalized gift signs include those featuring family names, wedding dates, or meaningful quotes that reflect the recipient's personality or interests.

    Crafting Custom Wood Signs: Tips for Success

    For those interested in creating their own custom wood signs, here are some tips to ensure success:

    Choose the Right Wood

    Wood species like pine, cedar, and oak are popular choices for custom signs. Pine is a softwood that is easy to work with, while cedar has a pleasant aroma and natural resistance to decay. Oak is a hardwood that is known for its strength and durability. Consider the style of the sign and the desired aesthetic when selecting the wood.

    Design the Sign

    Start by sketching out the design on paper. Determine the size, shape, and layout of the sign. Consider the font, colors, and any decorative elements you want to incorporate. Use design software or online templates for inspiration and to refine your ideas.

    Prepare the Wood

    Sand the wood to create a smooth surface. Use a variety of grits to achieve the desired texture. If you are using stain, apply a coat of wood conditioner to ensure even absorption. Allow the wood to dry completely before moving on to the next step.

    Cut and Assemble

    Use a saw or jigsaw to cut the wood to the desired shape. If the sign is large, consider using a router to create decorative edges or to create a frame. If the sign has multiple parts, assemble them using wood glue and clamps. Allow the glue to dry completely before moving on to the next step.

    Apply Stain and Paint

    Apply the stain or paint to the wood using a brush, roller, or spray gun. Use multiple coats for a richer finish. If you are using multiple colors, allow each coat to dry completely before applying the next. Consider using a sealant to protect the sign from moisture and wear. Allow the sealant to dry completely before handling the sign.

    Finishing Touches

    Once the paint or stain is dry, add any embellishments you have planned. Use a stencil to create designs, or use stencils to write words or add lettering. Use a drill to create holes for hanging the sign.

    Conclusion

    Custom wood signs are more than just decorative pieces; they are expressions of individuality, cherished keepsakes, and unique additions to any home. Whether you're a seasoned crafter or a beginner just starting out, the world of custom wood signs offers endless opportunities to create something beautiful and meaningful. By following these tips, you can create stunning custom wood signs that will be treasured for years to come.

    Share:

    How to Finish Wooden Shoe Racks for a Professional Look

    How to Finish Wooden Shoe Racks for a Professional Look

    Finishing Wooden Shoe Racks for a Professional Look

    You’ve just built your own shoe rack, and you’re proud of your handiwork. But it’s missing that final touch to really make it stand out. Don’t worry, finishing your wooden shoe rack is a breeze! With a little patience and the right tools, you can easily achieve that polished, professional look you’re going for. Let’s dive into the world of finishing and learn how to turn your DIY project into a stunning piece of furniture.

    Getting Started: Prepping Your Shoe Rack

    Before you even think about grabbing the stain or paint, you need to prepare your shoe rack for a flawless finish. It’s like prepping your canvas before you start painting – the better the foundation, the better the final result.

    Sanding: Smoothing Things Out

    The first step is sanding, and believe me, it’s worth the effort. You want to get rid of any rough spots, imperfections, or unevenness left from your woodworking. Start with a coarser grit sandpaper (around 80 or 100 grit) to remove any major flaws. Then, gradually move to finer grits (like 120, 150, and 220) for a smooth, even surface.

    Remember, sanding with the grain is key. This means running your sandpaper along the direction of the wood’s natural pattern. Going against the grain can create scratches that will show through your finish. You can use a sanding block or a random orbit sander to help you achieve a uniform finish.

    Cleaning: Removing Dust and Debris

    After sanding, it’s time to clean up. You want to remove all the dust and debris that’s accumulated during the sanding process. A tack cloth or a slightly damp cloth will do the trick. Just be sure to let the wood dry completely before moving on to the next step.

    Choosing Your Finish: The Big Decision

    Now comes the fun part: choosing your finish. This is where you get to personalize your shoe rack and bring your vision to life. Here are a few popular options:

    Stain: Enhancing the Wood’s Natural Beauty

    Stains are great for highlighting the natural grain and color of your wood. There are countless stain colors to choose from, ranging from natural wood tones to deep, rich hues. They come in oil-based or water-based formulas. Oil-based stains tend to penetrate deeper and create a richer color, but they take longer to dry and can be messy. Water-based stains dry faster and are easier to clean up, but they may not penetrate as deeply. You can also create custom colors by mixing different stains together.

    Paint: Adding Color and Character

    If you’re looking for a bolder statement or want to cover up any imperfections, paint is the way to go. You can find paints in just about any color imaginable, and they come in a variety of finishes, from matte to gloss. For a more durable finish, consider using a paint specifically designed for furniture. Be sure to apply the paint in thin, even coats to avoid drips and runs.

    Polyurethane: Adding Protection and Shine

    After staining or painting your shoe rack, you’ll want to seal it with a protective finish like polyurethane. It creates a durable barrier that protects your wood from scratches, spills, and UV damage. Polyurethane comes in different finishes – gloss, semi-gloss, satin, and matte – so you can choose the level of shine you prefer. Polyurethane can be oil-based or water-based. Water-based dries faster and cleans up easier, but oil-based is generally considered more durable.

    Applying the Finish: Patience is Key

    Now comes the fun part – actually applying the finish! Remember, it’s all about technique and patience. Here are some tips to get you started:

    Applying Stain

    Use a natural-bristle brush, a cloth, or a foam brush to apply stain. Work in the direction of the wood grain for a uniform look. Apply a thin, even coat and let it dry completely before applying a second coat if necessary.

    Applying Paint

    Use a high-quality paint brush or a foam roller for a smooth finish. Start with a thin coat and let it dry completely before applying a second coat. If you’re using a brush, avoid overlapping strokes as this can lead to brush marks.

    Applying Polyurethane

    Apply polyurethane with a natural-bristle brush, a foam brush, or a cloth. Work in thin, even coats, going with the grain. Let each coat dry completely before applying the next. Remember, the key to a professional finish is to apply thin coats and allow them to dry completely before applying the next.

    Additional Tips for a Professional Look

    Here are a few more tips to help you achieve that professional finish:

  • Always wear gloves to protect your hands from stains, paint, and polyurethane.
  • Work in a well-ventilated area, especially when using oil-based products.
  • Clean up spills immediately to avoid staining.
  • Use a tack cloth or a slightly damp cloth to remove dust and debris before applying each coat.
  • Don’t rush the process. Allow each coat to dry completely before applying the next.
  • Don’t be afraid to experiment with different finishes to find what you like best.
  • Remember, the key to a professional finish is patience, practice, and attention to detail.

    Commonly Asked Questions

    Can I finish my shoe rack with just one coat?

    It depends on the finish you choose. Some finishes, like stain, may only require one coat, while others, like polyurethane, may need two or more coats for a durable finish.

    Can I use a spray gun to apply the finish?

    Yes, you can. A spray gun can give you a smoother, more even finish than a brush or a roller, but it requires more practice and setup.

    What if I mess up? Can I fix it?

    Don’t worry, mistakes happen! If you have any drips, runs, or imperfections, you can sand them down and reapply the finish. It's also a good idea to test the finish on a scrap piece of wood first to get the hang of it.

    Finishing your wooden shoe rack is a rewarding way to personalize your home decor. With the right preparation, tools, and techniques, you can achieve a stunning, professional finish that will make you proud for years to come. So go ahead, embrace the process, and let your creativity shine!

    Share:

    Budget-Friendly Outdoor Bench Projects That Are Easy to Build and Sell

    Budget-Friendly Outdoor Bench Projects That Are Easy to Build and Sell

    Build and Sell Budget-Friendly Outdoor Benches: A DIYer's Delight

    Hey there, crafty folks! Looking for a fun, profitable side hustle that doesn't require a huge investment? Look no further than building and selling outdoor benches. These are essential pieces for any backyard, patio, or park, and they're surprisingly easy to make. Let's dive into some budget-friendly designs that you can create and sell with minimal effort!

    Get Started with Simple Designs

    The best part? You don't need to be a seasoned carpenter to create attractive and functional benches. Start with simple, classic designs that are easy to replicate. You can always get more elaborate later once you've gained some experience.

    The Classic Straight Bench

    This one is a timeless classic for a reason: it's straightforward and adaptable. You can use 2x4s for the frame, and add a comfortable seat and back using pressure-treated lumber for durability.

  • Materials: 2x4s for the frame, pressure-treated lumber for the seat and back, screws, wood glue, outdoor paint or stain
  • Tools: Saw, drill, level, measuring tape, sander, paintbrush (optional)
  • Instructions:
  • Cut the lumber to size and assemble the frame using screws and wood glue.
  • Attach the seat and back boards to the frame, ensuring they're level and secure.
  • Sand the entire bench to smooth out any rough edges.
  • Apply a protective coat of paint or stain to enhance its durability and aesthetics.
  • Rustic Pallet Bench

    Give those old pallets a new life! Pallet benches offer a charming rustic look and are surprisingly sturdy. You can easily find pallets for free or for a minimal cost at local businesses.

  • Materials: Pallets (make sure they're treated for outdoor use), screws, wood glue, outdoor paint or stain (optional)
  • Tools: Saw, drill, hammer, level, measuring tape, sander (optional), paintbrush (optional)
  • Instructions:
  • Disassemble the pallet and clean it thoroughly.
  • Use screws and wood glue to attach the pallet boards to create a stable seating surface.
  • Optionally add a backrest using leftover pallet boards or other lumber.
  • Sand the bench for a smooth finish, and apply a paint or stain to your liking.
  • Boost Your Bench's Appeal

    Once you've mastered the basics, get creative! Here are a few ways to enhance your benches and attract buyers:

    Add Comfort and Style

  • Cushions and Pillows: These are an easy way to elevate your bench's comfort and aesthetics. Use outdoor-friendly fabric and add a pop of color or pattern.
  • Backrest Options: Instead of a simple back, experiment with curved backs, slatted backs, or even incorporating a trellis design for added visual interest.
  • Unique Seat Styles: Get outside the box! Consider a wide seat for lounging, a bench with built-in storage, or even a bench that converts into a table.
  • Decorative Touches: Embellish your benches with carved details, stencils, or artistic paint treatments to create one-of-a-kind pieces.
  • Market Your Benches for Success

    You've created amazing benches, now it's time to showcase them! Here are some strategies for selling your creations:

    Online Marketplaces

  • Etsy: A great platform for handmade goods.
  • Facebook Marketplace: Reach a local audience.
  • Craigslist: Another local option, often for bargain hunters.
  • Your Own Website or Social Media Pages: Build your own brand and connect directly with customers.
  • Local Markets and Events

    Get out there and meet potential buyers!

  • Craft Fairs: A great way to showcase your work and interact with customers.
  • Farmers' Markets: A good fit for rustic and natural-looking benches.
  • Community Events: Reach out to local organizers and see if you can set up a booth at festivals or neighborhood gatherings.
  • Pricing Your Benches

    This is crucial to your success! Consider the following factors when setting your prices:

  • Cost of Materials: Factor in the price of lumber, hardware, and any additional supplies.
  • Time and Labor: Calculate the amount of time you spent on the project, including design, construction, and finishing.
  • Competition: Research what other sellers are charging for similar benches in your area.
  • Value and Uniqueness: If your bench has unique features or exceptional craftsmanship, you can command a higher price.
  • Commonly Asked Questions

    Here are some questions you might have:

    What kind of wood is best for outdoor benches?

    Pressure-treated lumber is a good choice for outdoor use, as it resists rot and decay. Cedar, redwood, and teak are also naturally durable and weather-resistant options, but they can be more expensive.

    How do I protect my benches from the elements?

    Apply a high-quality outdoor paint or stain to seal the wood and prevent it from weathering too quickly. Reapply the finish every few years as needed.

    How much can I realistically earn?

    It depends on your materials, labor costs, and selling strategy. You could make a decent profit per bench, especially if you create unique and high-quality pieces. It's a great way to supplement your income and turn a hobby into a business.

    There you have it! Building and selling outdoor benches is a fulfilling side hustle that can be both profitable and enjoyable. Get creative, have fun, and watch your business grow!

    Share:

    DIY Tiered Plant Stands That Sell Fast and Easy to Make

    DIY Tiered Plant Stands That Sell Fast and Easy to Make

    DIY Tiered Plant Stands: Turn Your Greenery into a Hot Commodity

    Hey plant people! You know how much I love a good DIY project, especially when it comes to making my plant babies look their best. And what's better than a stylish plant stand? A tiered one, of course! Not only does it add a touch of whimsy to your indoor jungle, but it also maximizes your space, letting you showcase more of your leafy friends. The best part? Making these beauties is easier than you think! Get ready to unleash your inner crafter and whip up some plant stand magic.

    The Power of Tiered Plant Stands

    Let's face it, a well-designed plant stand can be the difference between a "meh" corner and a show-stopping botanical oasis. Tiered stands in particular are absolute game-changers. They offer a unique vertical display that can instantly elevate your plant game. Here's why they're so popular:

    • Space-Saving Superheroes: They're perfect for smaller spaces, allowing you to pack in more plants without sacrificing valuable floor real estate.
    • Eye-Catching Elegance: Tiered stands add visual interest and a touch of architectural flair, creating a stunning focal point in any room.
    • Height Advantage: They bring your plants to eye level, enhancing their beauty and making them stand out even more.
    • Versatile Style: You can customize them to match any decor, whether it's boho chic, farmhouse rustic, or modern minimalist.
    • Easy to Build: Most DIY tiered plant stands are surprisingly simple to put together, even if you're not a seasoned carpenter.

    Tiered Plant Stand Ideas That Sell Fast

    Okay, let's talk about the real deal: turning your DIY skills into a profitable side hustle. These plant stand ideas are guaranteed to fly off the shelves:

    Rustic Charm

    Embrace the natural beauty of wood with a tiered plant stand made from reclaimed pallets or salvaged lumber. This look is super trendy and adds a touch of farmhouse chic to any space. You can even personalize it with a natural wood finish, stain, or paint it in a muted color.

    Industrial Edge

    For a more modern and edgy vibe, create a tiered stand using metal pipes or repurposed metal pieces. Combine metal with wood accents for a cool contrast, and you'll have an industrial-inspired masterpiece that's guaranteed to turn heads.

    Macrame Magic

    If you're into boho vibes, macrame is your best friend. Create a stunning tiered stand using chunky rope and macrame techniques. It's a little more time-consuming, but the results are seriously worth it. Plus, it's a great way to showcase delicate hanging plants.

    Geometric Chic

    Embrace clean lines and minimalist elegance with a tiered stand made from geometric shapes. You can use wood, metal, or even acrylic for a modern look. Play with different sizes and angles to create a dynamic and eye-catching design.

    DIY Tiered Plant Stand Tutorials: Easy and Affordable

    Let's get down to the nitty-gritty! Here's a step-by-step guide to creating your own tiered plant stand. Don't worry, it's easier than you think! I'll break it down into three popular options:

    Wooden Tiered Plant Stand

    What You'll Need:

    • Wooden planks (different lengths for different tiers)
    • Wood glue
    • Screws
    • Drill
    • Sandpaper
    • Wood stain or paint (optional)

    Instructions:

    1. Cut your wooden planks to the desired lengths for each tier. You'll need three planks for a three-tiered stand.
    2. Use wood glue and screws to connect the planks together, creating a sturdy base for each tier.
    3. Once the glue dries, sand the edges and any rough spots for a smooth finish.
    4. Optional: Apply a wood stain or paint to your stand, adding a personal touch and protecting the wood.

    Metal Pipe Tiered Plant Stand

    What You'll Need:

    • Metal pipes (different lengths for different tiers)
    • Flanges (for connecting the pipes)
    • Screws
    • Drill
    • Wrenches

    Instructions:

    1. Cut the metal pipes to the desired lengths for each tier.
    2. Attach flanges to the ends of the pipes, creating a secure connection.
    3. Use screws to connect the pipes together, forming a stable tiered structure.

    Macrame Tiered Plant Stand

    What You'll Need:

    • Chunky rope (enough for each tier)
    • Wooden dowels (for the base of each tier)
    • Scissors
    • Macrame knots guide (online or book)

    Instructions:

    1. Use the macrame knots guide to learn basic macrame techniques like the square knot and lark's head knot.
    2. Create a base for each tier by wrapping the rope around the wooden dowel and securing it with knots.
    3. Attach the tiers together using macrame techniques, creating a cohesive and stunning design.

    Tips for Success

    Here are some pro tips to ensure your DIY tiered plant stands are both beautiful and sell fast:

    • Choose quality materials: Invest in durable and aesthetically pleasing wood, metal, or rope to create a stand that lasts.
    • Pay attention to detail: A smooth finish, precise cuts, and even knot spacing will make your stand look professional.
    • Offer customization: Allow buyers to choose the size, color, and style of their stand to personalize their purchase.
    • Take stunning photos: High-quality photos showcasing your plant stands in action will help them sell faster.
    • Set competitive prices: Research similar plant stands to determine fair pricing that attracts buyers.

    Commonly Asked Questions

    Here are some questions people often ask about DIY tiered plant stands:

    What are some good places to sell DIY tiered plant stands?

    You can sell your creations through online marketplaces like Etsy, Facebook Marketplace, or Instagram. Local craft fairs and plant swap events are also great options.

    How do I know what price to charge for my plant stands?

    Consider the cost of materials, the time it takes to create each stand, and the current market prices for similar products. Don't be afraid to price your creations fairly, reflecting the value you bring.

    What if I'm not a skilled crafter?

    Don't worry, there are plenty of simple plant stand designs out there! Start with something easy, like a basic wooden stand, and gradually build your skills.

    I hope this guide has inspired you to create your own amazing DIY tiered plant stands! Remember, practice makes perfect. So get creative, have fun, and watch your plant stand business bloom!

    Share:

    How to Make Stylish Birdhouses for Extra Income

    How to Make Stylish Birdhouses for Extra Income

    Turn Your Crafting Skills into Cash: Building Stylish Birdhouses for Extra Income

    Hey there, crafty friends! Ever dreamt of turning your love for DIY into a side hustle? Well, you're in luck! Birdhouses are not just homes for feathered friends; they're also a fantastic way to tap into a lucrative market. Imagine crafting beautiful, unique birdhouses and seeing them bring joy to nature lovers and homeowners alike. Ready to turn your passion into profit? Let's dive into the world of birdhouse building and discover how to make it your money-making masterpiece.

    Why Birdhouses Are a Winning Choice

    Let's be honest, who doesn't love the sound of birds singing in the morning? Birdhouses are more than just charming decorations; they're a gateway to attracting these delightful creatures to your own backyard. This makes them an incredibly popular purchase, especially for people who appreciate nature and the calming presence of birdsong. Plus, they're relatively easy to make, meaning you can get started without needing a ton of specialized equipment or skills.

    Finding Your Birdhouse Niche: It's All About Style

    The key to success is to find your niche – the specific style of birdhouses that sets you apart. Forget plain, boring wooden boxes! Think beyond the ordinary. Here are some ideas to spark your creative fire:

    The Classic Charm of Rustic Designs

    Embrace the beauty of natural materials like reclaimed wood, weathered bark, and twigs. Add touches of rustic charm with hand-painted signs, antique hardware, and even a tiny bird bath. These birdhouses are perfect for those who love a touch of nostalgia and a connection to the natural world.

    Modern and Minimalist Birdhouses: A Touch of Elegance

    For a contemporary feel, go for clean lines, sleek shapes, and bold geometric patterns. Think metal accents, painted geometric designs, and minimalist color palettes. These birdhouses are perfect for homes with a modern aesthetic.

    Whimsical Designs: Fun for the Whole Family

    Get creative! Turn your birdhouses into mini masterpieces with whimsical elements. Imagine fairy houses, miniature cottages, or even adorable animal characters. These charming designs are sure to capture the attention of families with children, adding a playful touch to their gardens.

    Essential Tools and Materials: Building Your Birdhouse Arsenal

    Before you dive into your first birdhouse build, gather the right tools and materials to make your crafting journey smooth. Here's what you'll need:

    • Woodworking Tools: A circular saw, jigsaw, drill, screwdriver, and hammer are essential for cutting, shaping, and assembling your birdhouse.
    • Measuring and Marking Tools: A tape measure, ruler, and pencil will help you achieve precise cuts and create accurate designs.
    • Wood: Choose wood that's durable and weather-resistant. Cedar, redwood, and pine are excellent options.
    • Paint and Finishes: Choose paints that are safe for birds and weatherproof. Consider using eco-friendly options.
    • Hardware: Screws, hinges, hooks, and decorative elements will help you secure your birdhouse and add unique touches.
    • Safety Gear: Don't forget about safety! Always wear safety glasses, a dust mask, and gloves while working.

    Crafting Your Masterpieces: Birdhouse Building Basics

    Now, let's break down the birdhouse building process into easy steps. Don't worry, you'll be a birdhouse pro in no time!

    1. Sketch Your Design: Before you start cutting, sketch your birdhouse design on paper. This will help you visualize the finished product and plan your cuts.
    2. Cut and Shape the Wood: Using your woodworking tools, carefully cut the wood according to your design. Make sure to create precise cuts for a clean and professional finish.
    3. Assemble the Base and Walls: Join the base pieces together, followed by the walls. Use wood glue and screws to secure the joints. Make sure to use sturdy construction methods that will withstand the elements.
    4. Add the Roof: Attach the roof to the walls, ensuring a secure fit. Use a small overhang to prevent rainwater from entering the birdhouse.
    5. Create the Entrance Hole: Carefully drill the entrance hole at the correct size and position. Research the specific bird species you're targeting to ensure you provide an appropriate entrance size.
    6. Add Decorative Touches: Now it's time to unleash your creativity! Paint your birdhouse, add decorative accents, or even craft a miniature bird feeder to attract your feathered guests.
    7. Finish and Seal: Apply a clear sealant to protect your birdhouse from weather damage and maintain its beauty.

    Marketing Your Birdhouses: Finding Your Flock of Customers

    Now that you've built some stunning birdhouses, it's time to get them in front of potential buyers. Here are some strategies for finding your flock of customers:

    • Local Craft Fairs and Markets: Craft fairs are an excellent way to connect with customers face-to-face and showcase your unique designs. You can also offer personalized birdhouses and custom orders.
    • Online Marketplaces: Platforms like Etsy and eBay offer a global audience for your birdhouses. Create high-quality photos and write captivating product descriptions to attract buyers.
    • Social Media Marketing: Use Instagram, Facebook, and Pinterest to showcase your birdhouses. Create engaging content, run contests, and use relevant hashtags to reach your target audience.
    • Local Garden Centers and Florists: Partner with local businesses that sell gardening supplies and plants. They can often display your birdhouses in their stores and recommend them to their customers.
    • Your Own Website: Create a simple website or online store to showcase your birdhouse collection and provide more information about your products.

    Setting Prices: Balancing Value and Profit

    Pricing your birdhouses is a balancing act. You want to charge a fair price that reflects the time, effort, and materials you put into each piece, but also make them attractive to buyers. Consider the following factors when setting your prices:

    • Materials Cost: Factor in the cost of wood, paint, hardware, and any other materials you use.
    • Time and Effort: Account for the time you spend designing, building, and finishing each birdhouse.
    • Market Research: Look at the prices of similar birdhouses on online marketplaces and in local stores. This will give you a sense of the current market value.
    • Value Proposition: Highlight your unique selling points, such as high-quality materials, intricate designs, or personalized touches.

    Tips for Success: Flying High with Your Birdhouse Business

    Here are some additional tips to help you soar with your birdhouse business:

    • Stay Up-to-Date: Keep an eye on trends in the birdhouse market and be open to incorporating new styles and designs.
    • Focus on Quality: Use high-quality materials and craftsmanship to create birdhouses that are durable and aesthetically pleasing.
    • Provide Excellent Customer Service: Respond promptly to inquiries, package your birdhouses carefully, and be attentive to any feedback.
    • Network and Collaborate: Connect with other crafters and businesses in your community. You can share resources, ideas, and even collaborate on projects.
    • Embrace Sustainability: Use eco-friendly materials and practices whenever possible to reduce your environmental impact and appeal to environmentally conscious customers.

    Frequently Asked Questions

    Here are some common questions about building and selling birdhouses:

    • What kind of wood is best for birdhouses? Cedar, redwood, and pine are excellent choices due to their durability and weather resistance. These woods naturally resist rot and insect damage, ensuring your birdhouses last for years.
    • What are some popular birdhouse designs? Popular birdhouse designs range from classic rustic styles to modern minimalist designs and whimsical fairy houses. Consider the preferences of your target market when choosing designs.
    • How much can I sell my birdhouses for? Prices vary widely depending on the size, complexity, materials, and unique features of the birdhouse. You can typically find birdhouses priced from $20 to $100 or more.
    • Where can I find customers for my birdhouses? Craft fairs, online marketplaces, garden centers, and social media are all excellent platforms for selling birdhouses. Connecting with local businesses and promoting your products online can expand your reach.

    So there you have it! Building and selling birdhouses can be a rewarding and profitable endeavor. Get creative, find your niche, and let your crafting skills take flight. Happy birdhouse building!

    Share:

    Creative and Functional Shoe Rack Designs for Busy Families

    Creative and Functional Shoe Rack Designs for Busy Families

    Creative and Functional Shoe Rack Designs for Busy Families

    In the daily whirlwind of family life, keeping things organized can feel like an uphill battle. One area that often gets overlooked is shoe storage. But a well-designed shoe rack isn't just about aesthetics; it's a practical solution that promotes order and saves valuable time. Imagine a tidy entryway where everyone knows where to find their shoes, eliminating the morning scramble and preventing a chaotic pile of footwear from taking over your home.

    This article will explore some innovative and functional shoe rack designs that cater to the needs of busy families. We'll delve into space-saving solutions, stylish options, and even DIY projects that can transform your entryway into a haven of organization.

    Space-Saving Solutions for Small Entryways

    For families living in smaller homes, every inch of space is precious. Shoe racks that maximize vertical space are essential.

    Over-the-Door Shoe Organizers

    These organizers hang over the back of your door, utilizing otherwise wasted space. They often feature multiple shelves or compartments to hold a variety of shoe sizes and styles. Their compact design makes them ideal for narrow entryways or even closets.

    Tiered Shoe Racks

    These racks are designed with multiple levels, allowing you to stack shoes vertically. The tiered design makes it easy to see all your shoes at a glance, while minimizing floor space. Look for options with adjustable tiers to accommodate different shoe heights.

    Stylish Shoe Racks That Add to Your Decor

    Who says shoe racks have to be boring? There are plenty of stylish options that can enhance your entryway's aesthetic.

    Industrial-Style Metal Racks

    Embrace the industrial trend with sleek, metal shoe racks. These often feature open shelving, allowing for easy ventilation and a modern, minimalist look. They can complement a variety of décor styles, from rustic to contemporary.

    Wooden Shoe Benches with Storage

    For a touch of warmth and functionality, consider a wooden shoe bench. These often have built-in storage compartments below the seating area, perfect for hiding shoes or other items. Choose a design that complements your existing furniture for a cohesive look.

    DIY Shoe Rack Projects for the Creative Family

    If you enjoy hands-on projects, building your own shoe rack can be a rewarding experience. You can personalize it to fit your specific needs and style.

    Repurposed Ladder Shoe Rack

    Give an old ladder a new life by transforming it into a stylish shoe rack. Simply paint the ladder in your desired color and use its rungs to display shoes. This adds a rustic charm to your entryway.

    Pallet Shoe Rack

    Wooden pallets can be easily repurposed into functional and unique shoe racks. Use screws or nails to attach the pallets to create a sturdy frame. You can paint or stain the pallets for a customized look.

    Tips for Organizing Your Shoe Rack

    Once you have your shoe rack, make the most of it by adopting these organization tips.

    • Categorize your shoes by type: Separate sneakers, sandals, dress shoes, and boots for easy access.
    • Utilize clear storage bins to store seasonal shoes or those you don't wear frequently.
    • Keep a small shoe cleaning kit nearby for quick touch-ups.

    By incorporating these creative and functional shoe rack designs, you can create a more organized and welcoming entryway. Remember, shoe storage doesn't have to be an afterthought. With the right solutions, you can turn your chaotic shoe collection into a beautiful and functional part of your home.

    Share:

    人気の投稿

    Powered by Blogger.