Easy and budget-friendly woodworking ideas for creating personalized wood crafts and home accents.

Eco-Friendly Wooden Blanket Ladders to Sell

Eco-Friendly Wooden Blanket Ladders to Sell

Cozy Up With Style: Build Your Own Wooden Blanket Ladder

Are you tired of your blankets cluttering up your living space? Do you dream of a chic and organized way to store your throw blankets, quilts, and other cozy necessities? Well, say hello to the wooden blanket ladder – the perfect solution for a functional and stylish storage solution that adds a touch of natural elegance to your home.

Forget about those bulky, boring shelves or unsightly storage bins! A wooden blanket ladder offers a charming and practical way to display your favorite blankets while keeping them readily accessible. It's not just about functionality, it's about adding a touch of warmth and personality to your living room, bedroom, or even your porch.

Ready to dive in and explore the world of wooden blanket ladders? Let's uncover the benefits, the different styles, and everything you need to know to choose the perfect ladder for your space!

Why Choose a Wooden Blanket Ladder?

More than just a storage solution, a wooden blanket ladder brings a unique blend of style, functionality, and sustainability to your home.

A Touch of Natural Charm

The warmth and beauty of natural wood bring a touch of rustic elegance to any space. It's a simple yet effective way to add a bit of character and personality to your living room, bedroom, or even your entryway. Think of it as a subtle, yet striking way to elevate the overall aesthetic of your home.

Versatile Styling

Wooden blanket ladders are incredibly versatile! Whether you're going for a farmhouse chic look, a modern minimalist vibe, or a cozy bohemian aesthetic, there's a ladder style that will perfectly complement your decor. You can even personalize it by adding your own touch with paint, stain, or decorative accents.

Functionality Meets Style

Beyond the visual appeal, wooden blanket ladders are incredibly practical. They keep your blankets neatly organized, easily accessible, and off the floor. It's a great way to reduce clutter and create a sense of order in your space. Plus, they're a great way to add some visual interest to your walls.

Eco-Friendly Choice

Choosing a wooden blanket ladder is a way to embrace sustainable living. Wood is a renewable resource, and choosing responsibly sourced wood ensures that you're making an eco-conscious decision. Plus, a well-made wooden ladder will last for years to come, minimizing your environmental impact.

Different Styles to Choose From

Ready to find the perfect ladder for your home? Here are some of the most popular styles:

Classic Ladder Style

The traditional ladder design is a timeless choice that works beautifully in a variety of settings. It typically features a simple, rectangular frame with rungs spaced evenly apart. This style is a great choice for minimalist or traditional decor.

Rustic Ladder Style

For a more rustic and natural look, opt for a ladder with a distressed finish or reclaimed wood. These ladders often feature uneven rungs or a more weathered aesthetic, adding a touch of vintage charm to your space.

Modern Ladder Style

For a more contemporary look, choose a ladder with sleek lines and a minimalist design. Look for ladders made from hardwoods like walnut or oak, often finished with a clear coat or a light stain.

Decorative Ladder Style

Want to add a personal touch? Consider a decorative ladder with unique accents, such as a woven rope or a metal top rail. These ladders often feature intricate details or carvings, adding a touch of artistic flair to your space.

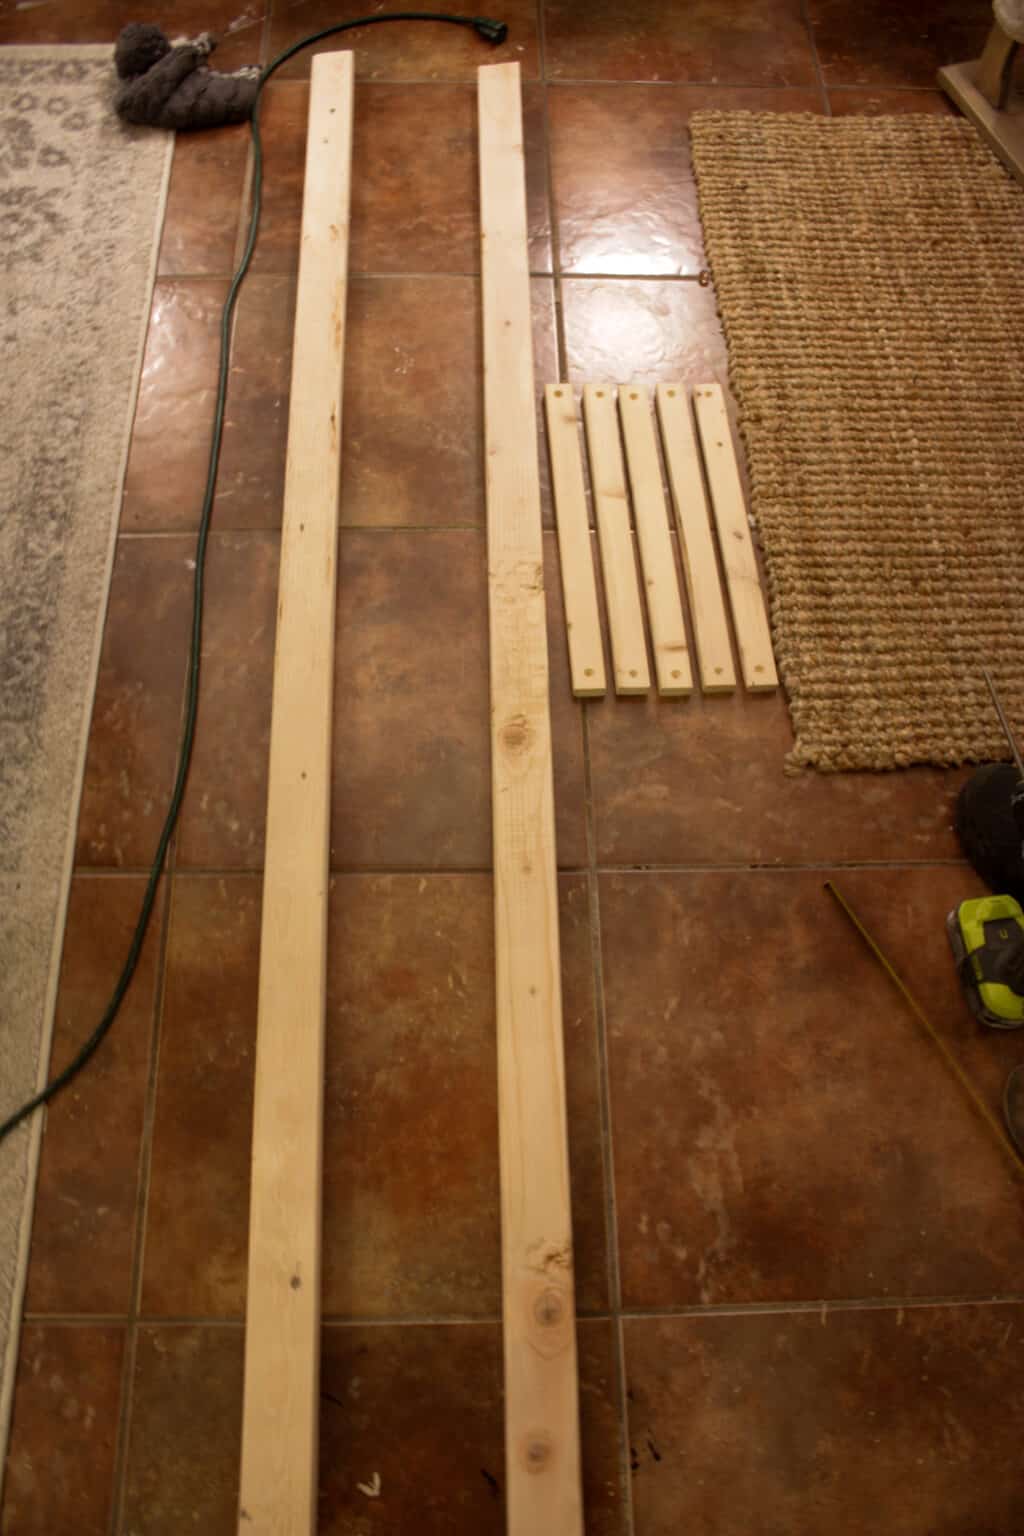
Crafting Your Own Wooden Blanket Ladder

Feeling crafty? You can build your own wooden blanket ladder! It's a fun and rewarding project that allows you to create a truly personalized piece for your home. Plus, you can customize it with your favorite wood species, stain, or paint to perfectly match your decor.

Here are some tips for crafting your own blanket ladder:

  • Choose a wood species that is durable and aesthetically pleasing. Oak, maple, and walnut are excellent options for their strength and beauty.
  • Purchase pre-cut lumber or have your lumberyard cut the pieces to your specifications.
  • Use wood glue and screws for a secure and durable construction.
  • Sand the wood to a smooth finish and apply a stain or paint for a personalized look.
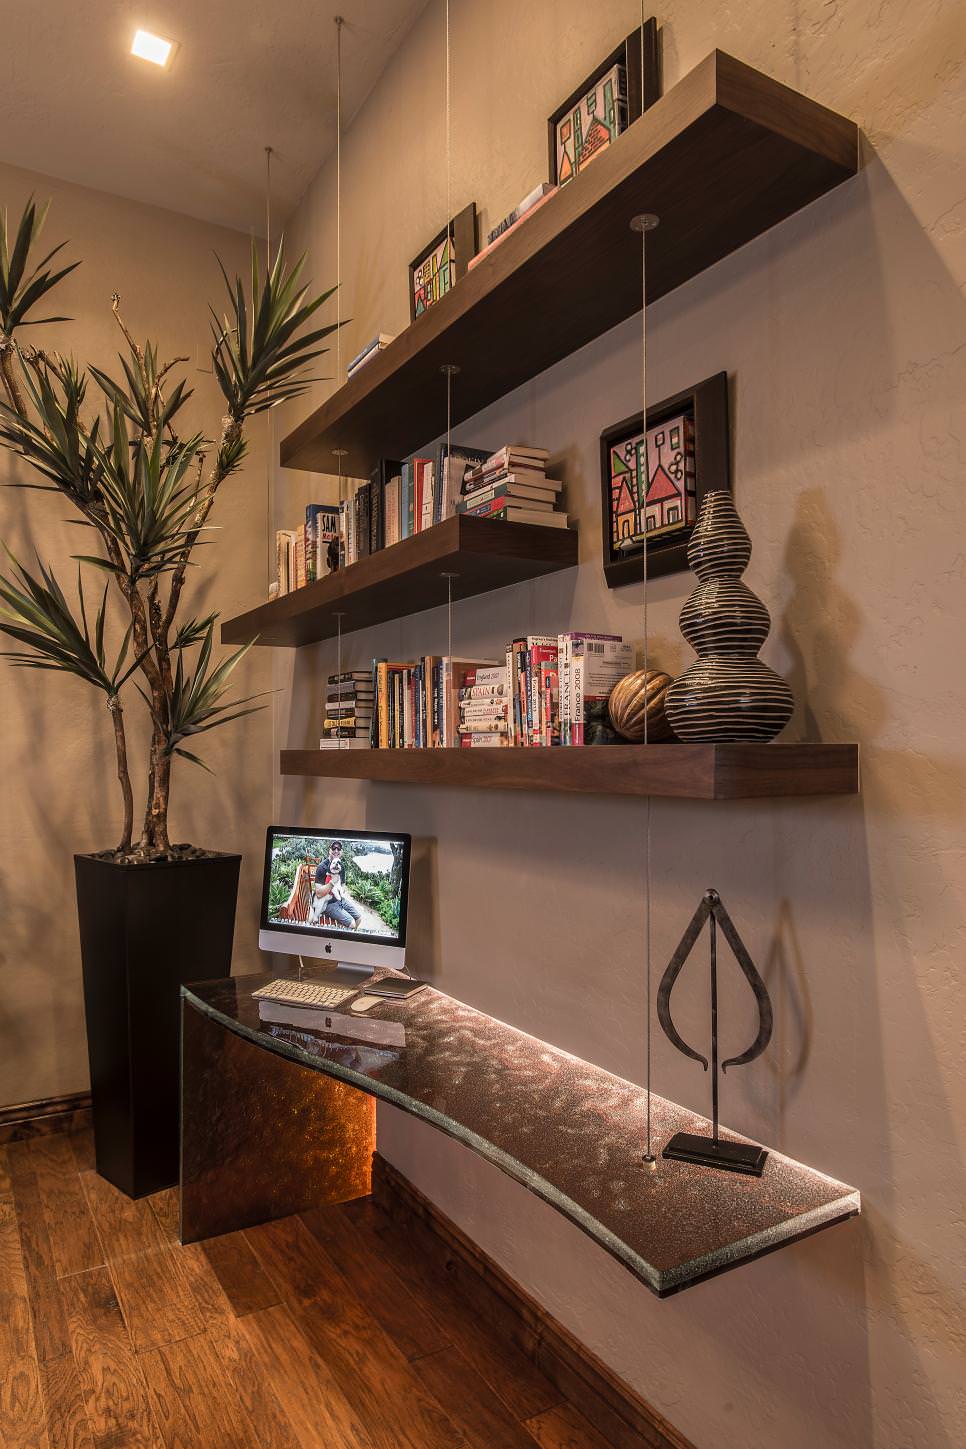
  • Finding the Right Spot For Your Ladder

    Once you've chosen your wooden blanket ladder, it's time to find the perfect spot for it. Here are some ideas:

  • Living Room: A blanket ladder can create a cozy and inviting focal point in your living room. Place it beside a sofa or armchair, or against a blank wall to add visual interest.
  • Bedroom: Use a blanket ladder to keep your bedding organized and within easy reach. Place it at the foot of the bed, or in a corner for a touch of rustic charm.
  • Entryway: A blanket ladder is a stylish way to store hats, scarves, and other accessories in your entryway. It adds a touch of personality to your home's first impression.
  • Bathroom: Store towels or robes on a blanket ladder for a spa-like experience in your bathroom.
  • Kitchen: Use a blanket ladder to store tea towels, pot holders, or even kitchen linens for a charming touch in your kitchen.
  • Caring for Your Wooden Blanket Ladder

    To keep your wooden blanket ladder looking its best, follow these simple care tips:

  • Dust Regularly: Use a soft cloth or duster to remove dust and debris from the ladder's surface.
  • Clean with a Mild Soap: For deeper cleaning, mix a mild soap with warm water and gently wipe down the ladder. Rinse with a damp cloth and dry thoroughly.
  • Avoid Harsh Chemicals: Avoid using harsh chemicals or abrasive cleaners on your wooden ladder. These can damage the finish and dull the wood's natural beauty.
  • Protect From Moisture: Keep your wooden ladder away from excessive moisture, as this can cause warping or damage.
  • Commonly Asked Questions

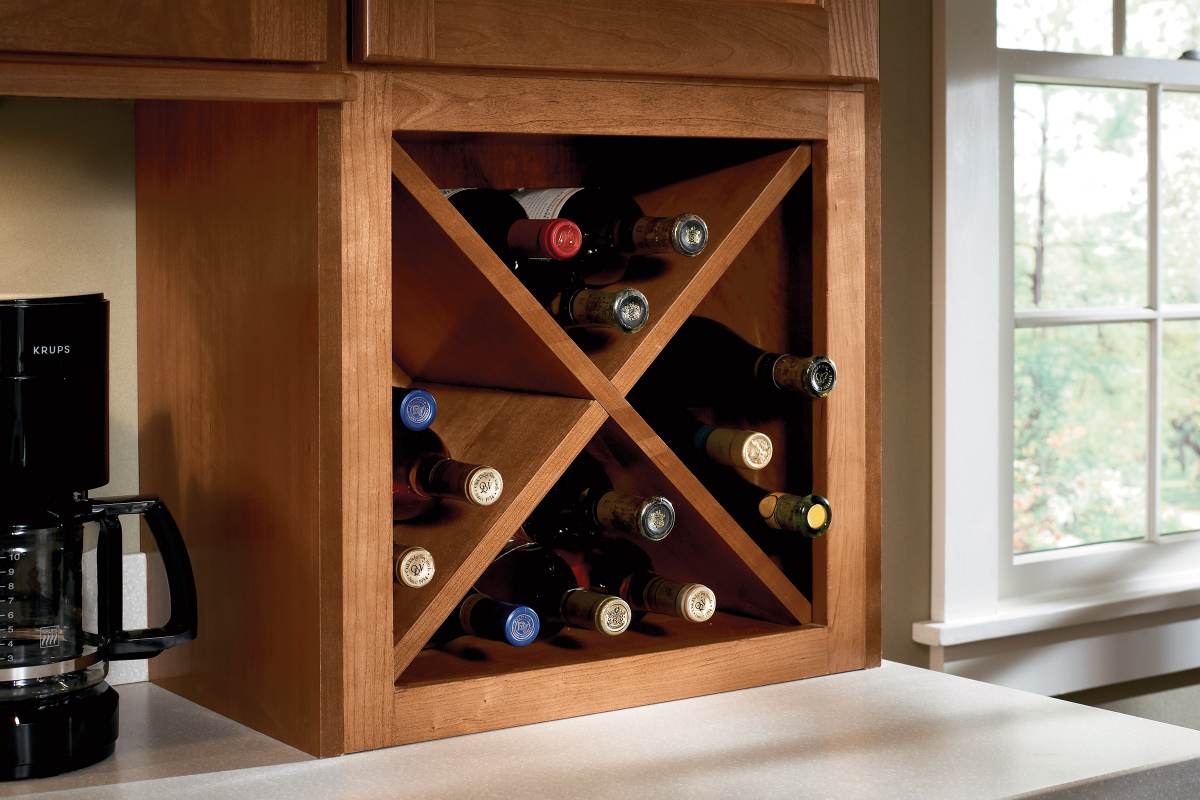
    Can I use a blanket ladder for anything other than blankets?

    Absolutely! Blanket ladders are versatile and can be used for a variety of storage purposes. Think of it as a stylish and functional way to organize almost anything!

    How much weight can a wooden blanket ladder hold?

    The weight capacity of a wooden blanket ladder depends on the materials and construction. Look for ladders made with sturdy wood and strong joints to ensure they can safely hold the weight of your belongings.

    Where can I buy a wooden blanket ladder?

    You can find wooden blanket ladders at a variety of home decor stores, furniture retailers, and online marketplaces. Many Etsy sellers offer handcrafted ladders, while larger retailers like Target and Walmart also carry affordable options.

    Can I customize a wooden blanket ladder?

    Yes! Many wooden blanket ladders can be easily customized with paint, stain, or other decorative elements. You can also add your own touch by incorporating unique hardware or by incorporating your own design elements.

    Ready to bring a touch of rustic charm and functional storage to your home? Embrace the beauty and versatility of a wooden blanket ladder! It's a practical and stylish way to keep your blankets organized while adding a touch of natural elegance to your space. Happy decorating!

    Share:

    10 Free Woodworking Plans for Beginners to Get Started

    10 Free Woodworking Plans for Beginners to Get Started

    10 Free Woodworking Plans for Beginners to Get Started

    Are you ready to dive into the rewarding world of woodworking but don't know where to begin? Don't worry, you're not alone. Many aspiring woodworkers feel overwhelmed by the sheer amount of information out there. But fear not! We've compiled a list of 10 free woodworking plans specifically tailored for beginners. These projects are designed to be simple, achievable, and will give you a solid foundation in basic woodworking techniques.

    1. Simple Wooden Shelf

    A shelf is an excellent first project because it's functional and relatively easy to build. You'll learn about cutting wood to size, using a drill press, and assembling pieces with screws or glue. Choose a design that suits your needs and space. For extra challenge, consider adding decorative elements like a shelf edge detail or a small drawer.

    2. Wooden Cutting Board

    This project allows you to experiment with different wood types and finishes. Start with a simple rectangular shape and gradually work your way up to more complex designs. You'll gain experience in sanding, applying oil finishes, and creating a smooth, food-safe surface.

    3. Wooden Planter Box

    Add a touch of greenery to your home with a handcrafted planter box. Choose a design that complements your outdoor space and pick wood species that are resistant to moisture and weather. You'll learn how to cut and join wood, as well as how to assemble a box structure.

    4. Wooden Picture Frame

    Frame your favorite photos or artwork with a custom-made frame. Select a simple design and experiment with different wood species and finishes. This project helps you practice basic woodworking techniques like cutting, joining, and sanding, while also allowing you to express your creativity.

    5. Wooden Coasters

    A set of wooden coasters is a great way to add a touch of personalization to your home décor. You can choose from various shapes and sizes, experiment with different wood stains and finishes, and even personalize them with laser etching or wood burning techniques. It's a fun and quick project that allows you to try out different tools and techniques.

    6. Wooden Birdhouse

    Attract feathered friends to your backyard with a charming birdhouse. This project involves cutting, joining, and assembling wood to create a safe and comfortable shelter for birds. You'll also learn about selecting appropriate wood types and making sure the house is properly vented and weatherproof.

    7. Wooden Jewelry Box

    Create a beautiful and functional jewelry box to store your precious treasures. This project involves cutting, joining, and assembling wood to create a box with a hinged lid and maybe even a small drawer. You'll also get to experiment with decorative techniques like inlaying, wood burning, or carving.

    8. Wooden Toy Train

    Bring out the inner child in you by building a wooden toy train. This project teaches you how to cut and join wood, create rounded edges with sanding, and assemble simple mechanisms like wheels and axles. The finished product will be a cherished heirloom for years to come.

    9. Wooden Mailbox

    Upgrade your mailbox with a custom-built wooden version. This project will introduce you to working with larger pieces of wood and using specialized tools like a table saw. You'll also learn about creating a weather-resistant finish and installing hardware for the mailbox.

    10. Wooden Step Stool

    A sturdy wooden step stool is a practical and useful addition to any home. This project will teach you how to cut and join wood to create a stable and durable structure. You'll also learn about using screws and glue for assembly and applying a protective finish.

    These are just a few ideas to get you started. There are countless free woodworking plans available online, offering a wide variety of projects for all skill levels. Don't be afraid to experiment, make mistakes, and most importantly, have fun!

    Share:

    How to Craft Wooden Outdoor Benches with a Farmhouse or Coastal Style

    How to Craft Wooden Outdoor Benches with a Farmhouse or Coastal Style

    Crafting Rustic Charm: Farmhouse and Coastal Style Wooden Outdoor Benches

    Imagine a serene outdoor space, where the gentle breeze carries the scent of blooming flowers, and the warm sunshine bathes you in its golden glow. In the heart of this tranquil haven sits a handcrafted wooden bench, its rustic charm adding a touch of timeless elegance to the surroundings. Whether you yearn for the cozy warmth of a farmhouse aesthetic or the breezy allure of a coastal retreat, building your own wooden bench offers a fulfilling DIY project that allows you to personalize your outdoor sanctuary.

    Embrace the Farmhouse Charm

    The farmhouse style exudes a sense of warmth, simplicity, and connection to nature. To capture this essence in your bench, consider using reclaimed wood. Its weathered patina and unique knots tell stories of its past, adding character and authenticity to the design. Look for woods like barnwood, oak, or pine, which possess the rugged beauty characteristic of farmhouse decor. To amplify the rustic feel, you can choose a natural wood finish or a light stain that allows the wood's grain to shine through. Alternatively, consider using a whitewash or chalk paint to create a distressed look that complements the farmhouse aesthetic.

    Essential Farmhouse Touches

  • Incorporate decorative hardware like iron brackets or rustic hinges for a touch of industrial flair.
  • Add a cozy cushion made from natural fabrics like burlap or linen to provide a comfortable seating experience.
  • Decorate the bench with a throw blanket and a few decorative plants or jars filled with dried flowers for a welcoming touch.
  • Embrace the Coastal Breeze

    Coastal style is synonymous with the carefree spirit of the sea. Its relaxed vibe and natural elements inspire a sense of tranquility and connection to the ocean. To capture this essence in your bench, select wood types known for their durability and resilience, like cedar or teak. These woods naturally withstand the elements, making them ideal for outdoor use. Opt for a light, airy color palette that complements the coastal ambiance. Pale blues, greens, or whites can create a serene and inviting atmosphere.

    Essential Coastal Accents

  • Incorporate rope details into the bench's design, perhaps as accents on the back or the legs, to evoke the nautical feel of the sea.
  • Use weathered or distressed finishes to create a sense of seaside charm, as if the bench has been kissed by the salty air and sun.
  • Add a splash of color with bright, nautical-themed cushions or throw pillows.
  • Building Your Bench: A Step-by-Step Guide

    Building a wooden bench is a rewarding experience, regardless of your skill level. Here's a simplified step-by-step guide to help you get started:

    Materials You'll Need:

  • Lumber (2x4s, 2x6s, or 2x8s, depending on the bench's size and style)
  • Wood screws or bolts
  • Wood glue
  • Saw (circular saw, miter saw, or hand saw)
  • Drill
  • Measuring tape
  • Level
  • Clamps
  • Sandpaper (various grits)
  • Wood stain or paint (optional)
  • Finish (polyurethane, varnish, or wax)
  • Instructions:

  • Plan your design: Decide on the dimensions, style, and any unique features you want to incorporate. Sketch a simple plan to guide your construction.
  • Cut the lumber: Measure and cut the lumber according to your design plan, ensuring all cuts are precise and accurate. Use a saw, miter saw, or hand saw for cutting the wood.
  • Assemble the frame: Attach the side rails and supports to create the bench's frame. Use wood glue and wood screws or bolts to secure the joints. Clamp the pieces together while the glue dries for a strong bond.
  • Add the seat and back: Cut and attach the seat and back boards to the frame. Ensure they are level and securely fastened.
  • Sand and finish: Sand the entire bench to smooth out any rough edges or imperfections. Apply a wood stain or paint, if desired, and follow with a protective finish like polyurethane, varnish, or wax.
  • Enjoy your creation: Place your handcrafted bench in your outdoor space, and bask in the satisfaction of creating a unique piece that reflects your style.
  • Building your own wooden bench offers an opportunity to unleash your creativity and create a custom piece that perfectly complements your outdoor haven. Embrace the rustic charm of a farmhouse style or the breezy allure of a coastal retreat, and let your bench become a testament to your personal style and woodworking skills. From crafting the frame to selecting the finish, each step in the process allows you to infuse your bench with your own unique touch.

    Share:

    Jewelry Box Designs That Will Beautify Any Bedroom and Sell Well

    Jewelry Box Designs That Will Beautify Any Bedroom and Sell Well

    Jewelry Box Designs That Will Beautify Any Bedroom and Sell Well

    Hey there, fellow jewelry lovers! We all know the struggle of finding the perfect place to store our precious baubles. A jewelry box isn't just about keeping things organized, it's an opportunity to add a touch of elegance and personality to your bedroom. But with so many designs out there, how do you choose one that's both beautiful and practical?

    Well, fear not! I'm here to spill the tea on the hottest jewelry box trends that'll make your heart skip a beat and your bedroom sparkle.

    The Timeless Appeal of Classic Designs

    Sometimes, the best designs are the ones that stand the test of time. Think vintage vibes and elegant simplicity.

    The Elegant Wooden Box

    This classic beauty is a timeless choice. Imagine a sleek, wooden box with a soft velvet lining. You can choose from rich, dark wood tones for a sophisticated look, or go for a lighter wood for a more airy and modern feel. This design screams "luxury" and will never go out of style.

    The Antique Jewelry Trunk

    Let's channel our inner explorer! Antique jewelry trunks are a fantastic way to add a touch of history and charm to your bedroom. Look for intricate carvings, brass accents, and a worn, vintage finish. Just imagine opening this beauty and revealing your prized possessions.

    Modern Jewelry Boxes: A Fusion of Form and Function

    If you're all about clean lines, minimalist aesthetics, and functionality, then modern jewelry boxes are calling your name.

    The Acrylic Beauty

    Say hello to transparency! Acrylic jewelry boxes are a modern take on the classic design. They offer a clear view of your collection, allowing you to showcase your favorite pieces. The sleek, minimalist design adds a contemporary touch to any bedroom.

    The Stackable System

    Who says you need to settle for just one box? Stackable jewelry boxes are perfect for organized souls who want to categorize their collection. Each tier can be dedicated to different types of jewelry, making it super easy to find what you're looking for.

    Unique Jewelry Box Ideas that Will Stand Out

    For those who want their jewelry box to be as unique as their style, there are endless possibilities! Let's dive into some wild and wonderful designs.

    The Travel-Inspired Jewelry Case

    Perfect for the jet-setting jewelry enthusiast! This design features a compact, travel-friendly case that's perfect for keeping your favorite pieces organized and safe on the go. Look for cases with compartments for earrings, rings, necklaces, and even a small mirror.

    The Jewelry Tree

    Bring a touch of nature into your bedroom! A jewelry tree is a unique and eye-catching way to display your necklaces and bracelets. This design is a beautiful blend of functionality and style. Choose a tree crafted from wood or metal to complement your bedroom décor.

    Factors to Consider When Choosing Your Jewelry Box

    Now that we've explored the endless possibilities, let's chat about the factors to consider when picking the perfect jewelry box.

    Size Matters

    It's all about finding the right fit. Think about the amount of jewelry you have and how much storage space you need. A small box might be perfect for a minimalist collection, while a larger box with multiple compartments is ideal for a jewelry enthusiast.

    Materials: Look for Quality

    Invest in a jewelry box that's made from quality materials that will last. Wood, metal, or acrylic are all great choices. Look for a lining that protects your jewelry from scratches and tarnishing, like soft velvet or satin.

    Style and Design: Reflect Your Personality

    This is where you get to let your personality shine! Choose a design that complements your bedroom décor and reflects your individual style. Do you love vintage vibes, modern minimalism, or something in between? There's a jewelry box out there for everyone.

    Tips for Designing a Jewelry Box That Will Sell

    Ready to unleash your inner entrepreneur and design a jewelry box that's destined to be a bestseller? Here's a little insider knowledge:

    • Target Your Audience: Who are you designing for? Millennials who love sleek, modern designs? Vintage enthusiasts? Knowing your target audience will help you create a product they'll adore.
    • Function and Functionality: A successful jewelry box is more than just a pretty face. It needs to be practical and easy to use. Make sure your design includes compartments for different types of jewelry and easy-to-access storage.
    • Durable Materials: Invest in quality materials that will withstand everyday use and keep your jewelry safe and secure. Think sturdy wood, durable metal, or scratch-resistant acrylic.
    • Add a Personal Touch: What sets your design apart? Consider adding unique touches, like intricate carvings, personalized engravings, or a pop of color.
    • Think Beyond the Box: Explore alternative designs like jewelry trees, travel-inspired cases, or stackable systems. Be creative and offer something unique that will capture customers' imaginations.

    Frequently Asked Questions

    What is the best material for a jewelry box?

    The best material depends on your personal preference and budget. Wood, metal, and acrylic are all popular choices. Wood offers a classic look and durability, metal adds a touch of elegance, and acrylic provides a modern and transparent design. Consider the type of jewelry you'll be storing and your desired aesthetic when making your choice.

    How do I choose the right size jewelry box?

    The size of your jewelry box should match the size of your jewelry collection. If you have a large collection, you'll need a larger box with multiple compartments. If you have a smaller collection, a smaller box might be more suitable. Think about how much space you have available and how many pieces of jewelry you need to store.

    What features should a jewelry box have?

    A great jewelry box should include features that make it easy to organize and protect your jewelry. Look for compartments for different types of jewelry, a soft lining to prevent scratches, and a secure lock to keep your valuables safe. Some boxes might also include a mirror or a travel-friendly design.

    Remember, choosing the right jewelry box is a personal journey. Take your time, explore your options, and choose a design that speaks to your heart and complements your unique style. And most importantly, enjoy the process of organizing your precious pieces!

    Share:

    How to Create Multi-Tier Wooden Shoe Racks for Extra Profit

    How to Create Multi-Tier Wooden Shoe Racks for Extra Profit

    Craft Your Way to Extra Profit: Building Multi-Tier Wooden Shoe Racks

    Hey there, fellow DIY enthusiasts and aspiring entrepreneurs! Are you looking for a profitable side hustle that combines creativity with practical skills? Well, you've come to the right place! Today, we're diving into the world of crafting multi-tier wooden shoe racks, a product that's in high demand and perfect for adding a touch of rustic charm to any home.

    Let's be real: everyone needs a place to store their shoes, and a well-made wooden shoe rack is both stylish and functional. Imagine this: you're whipping up these beauties in your workshop, and bam! – you've got a product ready to sell at local craft fairs, online marketplaces, or even directly to eager customers. Ready to roll up your sleeves and get started? Let's break down the process, step by step.

    Getting Started: Tools and Materials

    First things first, let's gather our tools and materials. Don't worry, you don't need a full-blown carpentry shop. Here's what you'll need to get you rolling:

    Tools

    • Circular saw or table saw
    • Measuring tape
    • Pencil
    • Drill with various drill bits
    • Sandpaper (various grits)
    • Safety glasses and dust mask
    • Wood glue
    • Clamps
    • Screwdriver or drill driver
    • Finishing nails or brads
    • Wood stain or paint (optional)
    • Polyurethane or varnish (optional)

    Materials

    • Wooden boards (pine, oak, or maple work well)
    • Screws or wood dowels
    • Optional: Decorative hardware (knobs, handles)

    Designing Your Dream Shoe Rack

    The fun part begins with design! Think about the size, shape, and style of shoe rack you want to create. Do you want a classic rectangular design, or something more unique? Consider the following:

    • Size: How many pairs of shoes will it hold?
    • Tiers: How many tiers do you want? A two-tier rack is great for smaller spaces, while a three or four-tier design can handle more footwear.
    • Shape: A simple rectangular design is easy to build, but you can also get creative with curves or angled shelves.
    • Style: Do you want a rustic, modern, or minimalist look? The wood choice, stain, and hardware will all play a part in determining the overall style.

    Sketching and Planning

    Once you've got a general idea, sketch out your design and note down the measurements. You can use graph paper or even just a plain piece of paper. This will help you visualize the final product and figure out how much material you'll need.

    Building the Shoe Rack: Step by Step

    Time to get our hands dirty! This is where the real magic happens. Follow these steps, and you'll be well on your way to a sturdy, beautiful shoe rack.

    1. Cutting the Boards

    • Measure and cut the boards according to your design. Be sure to use a saw guide for precise cuts.
    • Remember to consider the thickness of the wood when calculating your measurements.
    • Use a ruler or measuring tape to ensure all pieces are cut to the same length.

    2. Assembling the Base

    • Lay out the boards for your base. You can create a solid base by attaching two long boards together.
    • Secure them with wood glue and screws or dowels.
    • Use clamps to hold the pieces together while the glue dries.

    3. Creating the Shelves

    • Cut the boards for your shelves.
    • If you are making a multi-tier shoe rack, ensure that each shelf is the same length and width.
    • Sand the edges of the shelves to ensure they are smooth.

    4. Attaching the Shelves

    • Attach the shelves to the base using screws, dowels, or brackets.
    • Make sure the shelves are securely fastened and level.
    • Spacing between shelves should be enough to accommodate different shoe sizes.

    5. Adding Supports

    • For a more sturdy and attractive shoe rack, consider adding support legs or braces.
    • These can be made from wood blocks, metal rods, or decorative trim.
    • Secure them to the base and shelves using screws or glue.

    Finishing Touches: Time for the Aesthetics

    Alright, we're getting close to the finish line! Let's make your shoe rack a real eye-catcher.

    1. Sanding

    • Sand the entire surface of the shoe rack with fine-grit sandpaper.
    • This will create a smooth finish and remove any rough edges.
    • Pay attention to the corners and edges, as they're more prone to splinters.

    2. Staining or Painting (Optional)

    • This step is optional but highly recommended!
    • Choose a stain or paint color that complements your style and décor.
    • Apply the stain or paint evenly with a brush or cloth.
    • Let it dry completely before proceeding to the next step.

    3. Sealing (Optional)

    • To protect your shoe rack from spills and scratches, apply a coat of polyurethane or varnish.
    • Let the sealant dry completely before handling the rack.

    4. Decorative Hardware (Optional)

    • Want to add a touch of personality? Consider adding decorative knobs or handles to the shelves.
    • These can add a pop of color and make the rack even more unique.

    Marketing Your Shoe Racks: Sell, Sell, Sell!

    You've done the hard work, now it's time to reap the rewards! There are plenty of ways to market and sell your handmade shoe racks:

    • Craft Fairs and Markets: These events are a great way to connect with potential customers face-to-face and showcase your unique creations.
    • Online Marketplaces: Platforms like Etsy, Amazon Handmade, and Shopify offer a global audience and the ability to reach customers from the comfort of your own home.
    • Social Media Marketing: Instagram, Facebook, and Pinterest are excellent platforms for sharing photos of your shoe racks, building a following, and promoting your business.
    • Local Businesses: Reach out to local furniture stores, home décor shops, or even real estate agents who might be interested in selling your products.

    Commonly Asked Questions

    Q: What type of wood is best for shoe racks?

    A: Pine, oak, and maple are all popular choices for shoe racks. They are durable, relatively affordable, and easy to work with.

    Q: How much can I sell a shoe rack for?

    A: The price will depend on the size, complexity, and materials used. Research what similar shoe racks are selling for on online marketplaces and at craft fairs.

    Q: How do I prevent the wood from warping?

    A: Use kiln-dried wood to reduce the chance of warping. Also, ensure all joints are well glued and clamped during assembly.

    Q: Can I add a stain or paint to my shoe rack?

    A: Absolutely! Staining or painting can add a custom look and protect the wood.

    Ready to Get Started?

    That's it! You've got all the knowledge you need to start crafting multi-tier wooden shoe racks. Remember, practice makes perfect. Start with a simple design, and don't be afraid to experiment with different styles and techniques. With a little patience and creativity, you'll be turning out beautiful and functional shoe racks in no time!

    Good luck, and happy crafting!

    Share:

    How to Build Basic Woodworking Projects with These Free Beginner Plans

    How to Build Basic Woodworking Projects with These Free Beginner Plans

    How to Build Basic Woodworking Projects with Free Beginner Plans

    Hey there, woodworkers-to-be! Are you ready to unleash your inner craftsman and create some awesome stuff with wood? Maybe you've been eyeing up a new set of woodworking tools, or maybe you've got a pile of scrap lumber just begging to be transformed. Whatever your motivation, woodworking is a rewarding hobby that can be enjoyed by people of all skill levels. And the best part? You don't need a fancy workshop or a ton of expensive tools to get started. With a little creativity and some free beginner plans, you can build some amazing projects that will impress your friends and family (and maybe even yourself!).

    In this article, we're going to dive into the world of basic woodworking projects, using readily available free plans. We'll cover everything from choosing the right tools and materials to assembling your first masterpiece. So grab a cup of coffee, settle in, and let's get started!

    Choosing Your First Project

    The first step to any successful woodworking journey is choosing the right project. Don't go overboard and try to build a complex furniture piece right out of the gate. Start with something simple and manageable, like a birdhouse, a simple shelf, or even a wooden toy. This will help you build confidence and learn the basics of woodworking without getting overwhelmed.

    Here are some factors to consider when choosing your first project:

    • Your Skill Level: If you're brand new to woodworking, stick with projects that use basic cuts and simple joinery. As you gain experience, you can graduate to more challenging designs.
    • Time Commitment: Some projects can be completed in a few hours, while others may take several days. Choose a project that fits your available time and commitment level.
    • Materials and Tools: Make sure you have the necessary materials and tools for the project before you start. It's frustrating to get halfway through a project only to realize you're missing a critical tool or material.
    • Personal Interest: Most importantly, choose a project that you're excited about. Woodworking is a lot more fun when you're passionate about what you're building!

    Finding Free Woodworking Plans

    Now that you've chosen your project, it's time to find some free woodworking plans. There are countless resources available online, from dedicated woodworking websites to blogs and even social media platforms. Here are a few popular places to start your search:

    • Ana White: Ana White is a popular woodworking blogger who offers a vast library of free plans for everything from simple projects to intricate furniture pieces. Her website is a great resource for beginners and seasoned woodworkers alike.
    • Woodworking for Mere Mortals: This website is a treasure trove of free woodworking plans for beginners, featuring easy-to-follow instructions and clear diagrams. You'll find plans for everything from birdhouses to bookcases.
    • Pinterest: Pinterest is a great place to find inspiration for woodworking projects. Search for specific project ideas or browse boards curated by other woodworkers. You'll find plenty of free plans and tutorials.
    • YouTube: YouTube is another excellent resource for free woodworking plans and tutorials. Many woodworkers create videos demonstrating how to build specific projects, offering step-by-step instructions and helpful tips.

    Essential Woodworking Tools for Beginners

    To tackle basic woodworking projects, you don't need a workshop full of fancy tools. A few essential tools will get you started. Here's a list of must-haves for beginners:

    • Measuring Tape: Accuracy is key in woodworking. A reliable measuring tape is a must-have for ensuring your cuts are precise.
    • Hand Saw: A hand saw is a versatile tool that can be used for making basic cuts in wood. Choose a saw with a fine tooth count for smoother cuts.
    • Hammer: A hammer is essential for driving nails and securing joints. Get a claw hammer for easier nail removal.
    • Screwdriver: A screwdriver is essential for driving screws and assembling your project. Get a set with both Phillips and flathead bits for versatility.
    • Wood Glue: Wood glue is essential for bonding wood pieces together. Choose a high-quality glue that dries clear and creates a strong bond.
    • Sandpaper: Sandpaper is used to smooth out rough surfaces and give your project a finished look. Get a variety of grit sizes to address different sanding needs.
    • Safety Glasses: Always wear safety glasses when woodworking to protect your eyes from flying debris.
    • Work Gloves: Gloves protect your hands from splinters and injuries. Choose gloves that provide a good grip and are comfortable to wear.

    Getting Started with Your First Project

    You've chosen your project, found your free plans, and gathered your tools. Now it's time to get down to business! Here's a step-by-step guide to building your first woodworking project:

    1. Review the Plans Carefully

    Before you start cutting, make sure you understand the plans thoroughly. Read through each step carefully and familiarize yourself with the materials and techniques involved. Don't be afraid to ask for clarification if something isn't clear.

    2. Gather Your Materials

    Once you understand the plans, gather all the necessary materials. Make sure you have enough wood, hardware, and any other supplies you need. It's always a good idea to have some extra material on hand in case of mistakes or unforeseen needs.

    3. Prepare Your Workspace

    Set up a clean and organized workspace. Clear off any clutter and ensure you have adequate lighting. A well-lit workspace makes it easier to see what you're doing and helps prevent mistakes.

    4. Start Cutting

    Begin cutting the wood according to the plans. Measure twice, cut once, and always use a saw guide for straight cuts. Take your time and make sure your cuts are accurate. If you're not comfortable using a hand saw, you can always use a power saw, but make sure you know how to operate it safely.

    5. Assemble the Project

    Once you've cut all the pieces, you can start assembling your project. Refer to the plans for detailed instructions and follow them carefully. Use wood glue to bond the pieces together and let it dry completely before moving on.

    6. Sand and Finish

    After the glue has dried, sand down any rough edges and surfaces. Start with a coarse grit sandpaper and gradually work your way up to finer grits. You can then finish your project with paint, stain, or a clear sealant to enhance its appearance and protect it from the elements.

    Commonly Asked Questions

    Q: What if I make a mistake?

    Don't worry! Everyone makes mistakes in woodworking. If you make a mistake, don't be afraid to start over. You can always salvage the wood for another project or use it for practice cuts. The important thing is to learn from your mistakes and keep improving.

    Q: What's the best wood to use for beginner projects?

    Pine and softwoods are great choices for beginners because they are easy to work with and affordable. Hardwoods like oak and maple are more durable but can be more challenging to cut and work with.

    Q: How do I choose the right wood for my project?

    The type of wood you choose will depend on the project's purpose and design. Consider factors like durability, appearance, and cost. Research different types of wood and their characteristics to find the best fit for your project.

    Q: Where can I get help if I'm stuck?

    Don't be afraid to ask for help if you get stuck. There are many resources available online, including woodworking forums and YouTube channels. You can also ask for assistance from experienced woodworkers at your local lumberyard or woodworking store.

    Woodworking can be a challenging but rewarding hobby. Don't be afraid to get your hands dirty and experiment with different projects. With a little practice and dedication, you'll soon be creating beautiful and functional pieces that you'll be proud to show off. Happy woodworking!

    Share:

    How to Build Custom Wooden Lawn Chairs for Extra Income

    How to Build Custom Wooden Lawn Chairs for Extra Income

    Building Custom Wooden Lawn Chairs for Extra Income: A Comprehensive Guide

    In an era where people are increasingly seeking ways to enhance their outdoor spaces, the demand for comfortable and stylish lawn chairs has surged. Building custom wooden lawn chairs presents a compelling opportunity to generate extra income, tap into your creative potential, and contribute to a burgeoning market. This guide provides a comprehensive roadmap for crafting exceptional wooden lawn chairs, encompassing everything from design and materials to marketing and sales.

    Crafting a Winning Design

    The cornerstone of any successful lawn chair lies in its design. A well-conceived design will not only be aesthetically pleasing but also offer optimal comfort and durability. Consider the following:

    Ergonomics and Comfort:

    • Backrest Angle: A slight recline of 100-110 degrees provides comfort and supports the lumbar region.
    • Seat Depth and Height: Aim for a seat depth of 18-20 inches and a height that allows for comfortable leg positioning.
    • Armrests: Include armrests that are wide and slightly angled for optimal support.

    Style and Aesthetics:

    • Traditional or Modern: Decide on a design aesthetic that resonates with your target market. Traditional styles often feature intricate carvings and curves, while modern designs prioritize clean lines and simplicity.
    • Wood Species: Choose wood that complements your chosen style. Cedar, teak, and redwood offer natural durability and resistance to moisture, while maple, oak, and cherry provide beautiful grain patterns and strength.
    • Finishing Touches: Incorporate finishing touches like decorative hardware, stain colors, or hand-painted details to enhance the chair's appeal.

    Durability and Stability:

    • Joint Strength: Employ strong joinery techniques, such as mortise and tenon joints, to ensure stability and longevity.
    • Wood Thickness: Use appropriately thick wood to withstand weight and prevent warping.
    • Load Capacity: Design the chair to accommodate the weight of average adults, ensuring safety and durability.

    Selecting the Right Materials

    The materials you choose will significantly influence the chair's quality, durability, and visual appeal. Carefully evaluate the following:

    Wood Species:

    • Cedar: Known for its natural resistance to decay and insects, cedar is a popular choice for outdoor furniture. Its warm reddish-brown color adds a touch of rustic elegance.
    • Teak: Highly durable and naturally weather-resistant, teak is a premium wood option. Its rich golden-brown color and distinctive grain pattern make it a coveted material.
    • Redwood: Similar to cedar, redwood is naturally resistant to moisture and decay. Its deep reddish-brown hue adds a touch of warmth and vibrancy.
    • Hardwoods (Oak, Maple, Cherry): While not as naturally weather-resistant as cedar or teak, hardwoods like oak, maple, and cherry offer exceptional strength and beauty. They are suitable for indoor use or with proper protection for outdoor applications.

    Hardware and Fasteners:

    • Screws: Opt for high-quality screws designed for outdoor use, ideally made from stainless steel or coated with a corrosion-resistant finish.
    • Joints: Use durable, weather-resistant glue for wood joints, ensuring a secure and long-lasting bond.
    • Finishing Products: Choose durable finishes like exterior-grade stains or paints that provide protection against UV rays, moisture, and insects.

    Building Your Wooden Lawn Chairs

    Armed with a winning design and the right materials, you're ready to begin the building process. Here's a detailed breakdown of key steps:

    1. Cutting and Shaping the Wood:

    • Plan Your Cuts: Using your design plans, precisely measure and mark the wood for each piece.
    • Utilize Power Tools: Employ a table saw, chop saw, or circular saw to make precise cuts.
    • Sanding: Smooth all surfaces and edges with sandpaper to ensure a consistent finish.

    2. Assembling the Chair Frame:

    • Joinery Techniques: Utilize mortise and tenon joints, dowels, or pocket hole screws to create strong and durable connections.
    • Glue and Clamps: Apply a generous amount of exterior-grade glue to all joints and clamp them securely until the glue dries.
    • Check Alignment: Regularly check the alignment of the frame to ensure that all components are square and balanced.

    3. Attaching Seat and Backrest:

    • Shape Seat and Backrest: Cut and sand the wood for the seat and backrest, ensuring a comfortable curvature and thickness.
    • Securely Attach: Attach the seat and backrest to the frame using strong screws or dowels, ensuring a tight and stable fit.
    • Reinforce Joints: Consider using corner blocks or braces for added support and rigidity.

    4. Adding Armrests:

    • Shape Armrest Components: Cut and sand the wood for the armrests, ensuring a comfortable height and angle.
    • Attach Armrests to Frame: Use screws, dowels, or mortise and tenon joints to securely attach the armrests to the frame.
    • Ensure Comfortable Position: Carefully check the armrest height and angle to ensure a comfortable and natural resting position for the arms.

    5. Finishing Touches:

    • Sanding and Smoothing: Thoroughly sand all surfaces to remove any imperfections and create a smooth finish.
    • Applying Finish: Choose a durable, weather-resistant stain or paint that complements the chair's design and wood species. Apply multiple coats for optimal protection and durability.
    • Hardware and Accessories: Install decorative hardware, such as metal accents, or add accessories like cushions or seat pads for enhanced comfort.

    Marketing and Selling Your Custom Chairs

    With your handcrafted wooden lawn chairs complete, it's time to showcase your artistry and generate income. Consider these marketing strategies:

    1. Build an Online Presence:

    • Website or Portfolio: Create a website or online portfolio to showcase your chair designs, materials, and pricing. Include high-quality photos and descriptions highlighting the craftsmanship and unique features of your products.
    • Social Media Marketing: Utilize platforms like Instagram, Facebook, and Pinterest to promote your chairs, share behind-the-scenes glimpses of your craft, and engage with potential customers.
    • Online Marketplaces: List your chairs on popular online marketplaces like Etsy, Shopify, or Amazon Handmade, expanding your reach and exposure to a broader audience.

    2. Local Market Opportunities:

    • Craft Fairs and Festivals: Participate in local craft fairs and festivals to display your chairs, interact with potential customers, and gain valuable feedback.
    • Farmers' Markets: Set up a booth at local farmers' markets, tapping into a community-oriented audience interested in handcrafted goods.
    • Home Improvement Stores: Contact home improvement stores or garden centers about potential partnerships or consignment agreements.

    3. Network and Collaborate:

    • Connect with Interior Designers: Establish relationships with interior designers and home staging professionals who may recommend your custom chairs to clients.
    • Collaborate with Other Artisans: Partner with other artisans or craftspeople to cross-promote products and expand your customer base.
    • Join Industry Organizations: Network with other furniture makers through local woodworking clubs or industry organizations.

    Pricing Your Chairs

    Setting competitive pricing for your custom wooden lawn chairs requires careful consideration of various factors. Here's a guide to help you determine a fair and profitable price:

    1. Material Costs:

    • Wood: Calculate the cost of all wood materials, including any necessary treatments or coatings.
    • Hardware and Fasteners: Account for the cost of screws, glue, joints, and other hardware.
    • Finishing Products: Include the cost of stain, paint, or other finishing materials.

    2. Labor Costs:

    • Time Investment: Estimate the number of hours spent on each chair, including design, cutting, assembly, and finishing.
    • Hourly Rate: Determine a fair hourly rate for your labor, reflecting your skills and experience.
    • Overhead Costs: Account for overhead costs like rent, utilities, and tools.

    3. Market Analysis:

    • Competitor Pricing: Research the prices of similar chairs offered by other artisans or manufacturers.
    • Target Market: Consider the price range that your target market is willing to pay for handcrafted furniture.
    • Value Proposition: Highlight the unique features and craftsmanship of your chairs, justifying a premium price.

    Additional Tips for Success

    • Continuously Improve Your Skills: Invest in woodworking courses, workshops, or online tutorials to enhance your craft skills and stay abreast of new techniques.
    • Seek Feedback: Engage with customers and ask for feedback on your chairs to identify areas for improvement and cater to evolving preferences.
    • Offer Customizations: Consider offering customization options to enhance the appeal of your chairs and cater to individual customer needs.
    • Build a Strong Brand Identity: Develop a consistent brand name, logo, and marketing materials to create a distinctive presence in the market.
    • Provide Excellent Customer Service: Ensure prompt communication, address customer concerns, and offer a positive purchasing experience.

    Building custom wooden lawn chairs presents a rewarding opportunity to turn your passion into profit. By carefully crafting your designs, selecting quality materials, mastering the building process, and employing effective marketing strategies, you can establish a successful business that brings joy to customers and extra income to your endeavors.

    Share:

    Handmade Wooden Gifts for a Special Christmas

    Handmade Wooden Gifts for a Special Christmas

    Handcrafted Wooden Gifts for a Memorable Christmas

    In the spirit of the festive season, where cherished traditions and heartfelt connections reign supreme, there’s a certain magic that envelops handcrafted gifts. Amongst these, wooden gifts hold a special place, radiating warmth, longevity, and an undeniable charm. This Christmas, consider bestowing upon your loved ones the enduring beauty and personal touch of handmade wooden presents.

    The Timeless Appeal of Wooden Gifts

    Wood, a natural material deeply rooted in our history, carries an intrinsic allure. Its unique grain patterns, subtle variations in color, and the gentle caress of its texture evoke a sense of timelessness. This inherent charm makes wooden gifts not only visually appealing but also imbued with a sense of history and enduring value.

    Sustainability and Eco-consciousness

    In an era of increasing environmental awareness, choosing wooden gifts resonates with a commitment to sustainable practices. Wood is a renewable resource, and crafting with it aligns with responsible consumption. By opting for handmade wooden gifts, you contribute to a circular economy, where materials are valued and reused, minimizing waste and environmental impact.

    Uniqueness and Personalization

    The beauty of handmade wooden gifts lies in their individuality. Each piece is crafted with care, reflecting the artisan’s skill and dedication. This uniqueness makes them truly special, a testament to the thoughtfulness and effort invested. Furthermore, many wooden gifts can be personalized, adding a personal touch that deepens their meaning and makes them truly treasured keepsakes.

    A Curated Collection of Wooden Gift Ideas

    The possibilities for wooden gifts are as diverse as the individuals you wish to delight. From functional everyday essentials to decorative pieces that add a touch of warmth to any space, here are a few ideas to spark your imagination:

    For the Homebody: Cozy Wooden Accents

    • Hand-carved Wooden Candle Holders: Create a warm ambiance with uniquely crafted wooden candle holders, each with its own intricate design.
    • Rustic Wooden Serving Trays: Perfect for entertaining, these sturdy trays, perhaps adorned with engraved initials, will become cherished additions to any kitchen.
    • Wooden Wall Clocks: Add a touch of vintage charm to any room with a handcrafted wooden wall clock, a timeless piece that evokes a sense of tranquility.
    • Personalized Wooden Coasters: Small but thoughtful, these coasters, engraved with family names or special dates, are practical and stylish.

    For the Culinary Enthusiast: Wooden Kitchen Treasures

    • Wooden Cutting Boards: Made from durable hardwoods, these cutting boards are not only functional but also visually appealing, featuring unique grain patterns.
    • Wooden Spoons and Utensils: These handcrafted wooden spoons and utensils add a touch of rustic charm to any kitchen. They are also eco-friendly alternatives to plastic or metal utensils.
    • Wooden Wine Rack: A practical and stylish way to display and organize a wine collection.
    • Wooden Mortar and Pestle Set: Perfect for grinding spices and herbs, this traditional kitchen tool adds a touch of elegance to any countertop.

    For the Art Lover: Artistic Wooden Creations

    • Hand-painted Wooden Ornaments: Unique and whimsical, these ornaments, painted with intricate designs or personalized messages, add a touch of art to any Christmas tree.
    • Wooden Picture Frames: A timeless gift that allows you to display cherished memories. Choose from a variety of shapes and sizes, and personalize them with engraved messages.
    • Wooden Sculpture or Figurine: An enduring piece of art that will be appreciated for years to come. Select a sculpture that reflects the recipient's interests or passions.
    • Wooden Jewelry Box: A beautiful and practical way to store and organize jewelry.

    For the Nature Lover: Wooden Gifts Inspired by the Outdoors

    • Hand-crafted Wooden Birdhouse: A delightful gift for birdwatchers, this birdhouse, crafted from natural wood, will attract a variety of birds to their garden.
    • Wooden Planters: Perfect for indoor or outdoor plants, these handmade planters add a touch of rustic charm to any space.
    • Wooden Picnic Basket: An ideal gift for outdoor enthusiasts, this picnic basket, with its natural wood finish, is both practical and stylish.
    • Wooden Camping Gear: From personalized wooden camp mugs to wooden cutting boards, these durable and handcrafted items are perfect for outdoor adventures.

    Finding the Perfect Wooden Gift

    As you embark on your search for the perfect wooden gift, consider the recipient's taste, interests, and personality. Browse local craft fairs, artisan markets, and online shops dedicated to handcrafted items. Don't hesitate to ask questions and learn about the materials and techniques used by the artisans.

    Personalization and Customization

    Many artisans offer personalization options, such as engraving initials, dates, or special messages. This adds a unique touch that makes the gift even more meaningful.

    Adding a Personal Touch

    Beyond the gift itself, consider adding a personal touch with a handwritten card, a thoughtful poem, or a special keepsake that complements the wooden present.

    The Enduring Legacy of Wooden Gifts

    Handmade wooden gifts are more than just presents; they are tangible expressions of love, care, and appreciation. They are a testament to the enduring value of craftsmanship and the beauty of natural materials.

    This Christmas, embrace the tradition of handcrafted gifts and delight your loved ones with the warmth, charm, and timeless appeal of wooden treasures. These gifts will not only be appreciated at the moment but will also serve as cherished keepsakes for years to come, preserving the spirit of the holiday season long after the ornaments are packed away.

    Share:

    DIY Wooden Storage Bins for Kids' Rooms and Playrooms

    DIY Wooden Storage Bins for Kids' Rooms and Playrooms

    DIY Wooden Storage Bins for Kids' Rooms and Playrooms

    Tired of toys taking over your child's room? Are you constantly battling a sea of stuffed animals, building blocks, and art supplies? Fear not, crafty parents! We're going to dive into a fantastic DIY project that will transform your child's space and provide them with a sense of organization. We're talking about building your very own wooden storage bins! These charming and practical bins are perfect for storing all sorts of kid-friendly treasures, bringing order to the chaos and making clean-up time a breeze. Get ready to unleash your creativity, gather your tools, and let's create some storage magic!

    Choosing the Right Wood and Design

    First things first, let's choose the right wood for our storage bins. Plywood or pine are excellent options because they're readily available, easy to work with, and affordable. If you're looking for a more rustic vibe, consider using reclaimed wood. As for the design, let your imagination run wild! You can build simple rectangular bins or get creative with rounded edges or whimsical shapes. Remember to factor in the size of your child's room and the items you'll be storing. For smaller toys and trinkets, smaller bins are perfect, while larger bins can house bulky toys like stuffed animals or building blocks.

    Here are some design ideas to get you started:

    • Classic Rectangular Bins: These are easy to construct and provide ample storage space.
    • Rounded Edge Bins: Add a touch of softness and whimsy to your bins with rounded corners.
    • Open Top Bins: Ideal for showcasing toys and encouraging children to tidy up themselves.
    • Bins with Lids: Keep dust and clutter at bay with lids that can be easily lifted and closed.

    Gathering Your Tools and Materials

    Now, let's gather the essential tools and materials for our DIY project:

    Tools:

    • Saw (circular or jigsaw)
    • Measuring tape
    • Pencil
    • Drill
    • Screwdriver
    • Sandpaper
    • Safety glasses
    • Work gloves

    Materials:

    • Wood (plywood, pine, or reclaimed wood)
    • Wood glue
    • Wood screws
    • Handles (optional)
    • Paint or stain (optional)
    • Finishing oil or wax (optional)

    Building the Wooden Storage Bins

    Let's break down the construction process step-by-step:

    Step 1: Cut the Wood

    Using your saw, carefully cut the wood according to your chosen design. Measure twice, cut once to ensure precise dimensions. Make sure to wear safety glasses and gloves during this step.

    Step 2: Assemble the Bin

    Apply wood glue to the edges of the pieces and carefully join them together. Secure the joints using wood screws. For added strength, use wood glue and screws at each corner.

    Step 3: Sand and Finish

    Once the glue has dried, sand the entire surface of the bin to create a smooth finish. You can then paint or stain the bin according to your preference. If you're leaving the wood natural, apply a finishing oil or wax to protect it from scratches and moisture.

    Step 4: Add Handles (Optional)

    If you're adding handles, attach them securely to the sides of the bin using screws or glue.

    Enjoy Your New Storage Bins

    Congratulations! You've successfully created your own wooden storage bins. Now you can proudly display them in your child's room or playroom, providing a stylish and practical solution for organizing toys and belongings. Not only will your child's room feel more organized, but they'll also learn the importance of tidying up and putting things away.

    Share:

    How to Create Beautiful Blanket Ladders for Extra Income

    How to Create Beautiful Blanket Ladders for Extra Income

    Turning Blanket Ladders into Extra Income: A Cozy Side Hustle

    Hey there, crafty friends! Are you looking for a fun and creative way to earn some extra cash? Well, buckle up because we're diving into the world of blanket ladders, those adorable and practical additions to any home. Not only are they super stylish, but they're also a fantastic way to organize blankets, throws, and even towels, making them a hot commodity in the home decor market.

    Crafting blanket ladders for sale can be a rewarding and lucrative side hustle. It's a project that allows you to unleash your creativity, use up those leftover scraps of wood, and bring a touch of charm to someone's living space. So, let's get down to the nitty-gritty and explore how you can turn your love for DIY into a profitable venture!

    What You'll Need to Get Started

    Before we dive into the creative process, let's gather our essential supplies. Remember, this is just a starting point; you can always customize your materials based on your personal style and budget.

    Materials:

    • Wood: Choose sturdy wood like pine, oak, or cedar. You can use pre-cut boards or experiment with salvaged wood for a unique rustic look.
    • Hardware: You'll need screws, dowels (for the rungs), wood glue, and possibly wood stain or paint depending on your desired finish.
    • Tools: A jigsaw, drill, tape measure, level, and sandpaper will be your trusty companions.
    • Optional Extras: For a more polished look, consider adding finishing touches like a clear coat sealant, decorative hardware (like hooks or knobs), or even some personalized touches with stencils or paint.

    Crafting Your Blanket Ladder: Step by Step

    Now, let's get those creative juices flowing and build a beautiful blanket ladder!

    1. Design Your Ladder: Decide on the size, shape, and number of rungs you want. A standard blanket ladder is typically 4-5 feet tall, but you can customize it based on your space and the blankets you want to display. Sketch out a rough plan and measure your wood accordingly.
    2. Cut the Pieces: Using your jigsaw, carefully cut your wood to your desired dimensions. Be sure to use a straight edge and mark your measurements clearly. Remember, precise cuts are key to a beautiful and functional ladder.
    3. Assemble the Sides: Lay your side pieces flat, aligning them evenly. Attach them together with screws or glue, ensuring they are securely joined.
    4. Create the Rungs: Cut your dowels or wooden rungs to the desired length. Use wood glue to attach them to the sides. You can create a straight, even spacing between each rung, or let your creativity flow and experiment with different patterns. Ensure the rungs are aligned and flush with the sides.
    5. Sand and Finish: Once the glue has dried, use sandpaper to smooth out any rough edges. This will give your ladder a polished look and feel. Apply stain, paint, or sealant if desired. Let it dry completely before moving on to the next step.
    6. Hang Your Ladder: Finally, it's time to hang your masterpiece! You can use sturdy hooks, wall-mounted shelves, or even a simple D-ring and a rope. Make sure the chosen hanging method can support the weight of the ladder and your blankets.

    Turning Your Blanket Ladders into Income

    Now that you've mastered the craft, let's turn your creativity into a lucrative side hustle!

    Finding Your Market

    • Social Media: Instagram, Facebook, and Pinterest are fantastic platforms to showcase your creations. Post high-quality photos of your blanket ladders in different settings, highlighting their style and functionality.
    • Etsy and Other Online Marketplaces: Listing your ladders on online marketplaces like Etsy allows you to reach a wider audience and tap into a community of home decor enthusiasts.
    • Local Craft Fairs and Markets: Participating in local events allows you to directly connect with potential customers, showcase your craftsmanship, and even offer custom orders.

    Pricing Strategies

    Determining the right price for your blanket ladders is crucial. Consider the following factors:

    • Materials Costs: Factor in the cost of wood, hardware, stain, and any other supplies.
    • Time and Effort: Account for the hours you spend crafting, sanding, and finishing your ladders.
    • Market Research: Check what other sellers are charging for similar blanket ladders. This will help you gauge a competitive price point.
    • Value and Uniqueness: If you offer custom designs or unique finishes, you can justify a higher price point.

    Marketing Your Blanket Ladders

    To attract customers, you need to make your products stand out from the crowd. Consider these marketing strategies:

    • High-Quality Photos: Invest in good lighting and photography skills to showcase your ladders in the best light. Use different angles and settings to highlight their beauty and functionality.
    • Compelling Descriptions: Write engaging descriptions that highlight the features, benefits, and craftsmanship of your ladders. Use keywords that potential buyers are likely to search for.
    • Customer Testimonials: Encourage satisfied customers to leave reviews and share their experiences on your social media platforms or online marketplace listings.
    • Run Promotions: Offer special discounts, free shipping, or bundle deals to attract more customers. Consider partnering with other artisans or businesses for cross-promotional opportunities.

    Tips for Success

    Now that you're equipped with the tools and strategies, here are some tips to help you succeed in your blanket ladder side hustle:

    • Stay Organized: Keep your workspace tidy and your materials well-organized. This will help you work efficiently and avoid losing track of your supplies.
    • Focus on Quality: Create sturdy and well-made ladders that will last. Pay attention to details and strive for excellence in every piece you craft.
    • Be Patient: Building a successful side hustle takes time and effort. Don't expect to become an overnight sensation. Stay consistent, promote your work, and be patient with the process.
    • Stay Updated: Keep up with trends in home decor and adapt your designs accordingly. Be open to feedback from your customers and learn from their suggestions.
    • Have Fun! Remember that this is a side hustle you're passionate about. Embrace the creative process, enjoy experimenting with different designs, and most importantly, have fun!

    Commonly Asked Questions

    What are the best types of wood to use for blanket ladders?

    Pine, oak, and cedar are popular choices due to their durability and aesthetics. Pine is affordable and easy to work with, while oak offers a more sturdy and traditional look. Cedar adds a lovely scent and natural resistance to moisture.

    How can I add a personalized touch to my blanket ladders?

    There are many ways to add a personal touch! You can use stencils to paint designs, add decorative hardware like hooks or knobs, or incorporate salvaged or reclaimed wood for a unique rustic look. You can even offer custom orders with specific colors, sizes, and designs.

    What kind of paint or stain should I use?

    The choice depends on your desired look. Water-based paints are easy to apply and dry quickly. Oil-based paints offer a more durable finish. Wood stains can enhance the natural grain of the wood and create a warm and rustic feel. Be sure to test your chosen finish on a scrap piece of wood before applying it to your ladder.

    How do I price my blanket ladders?

    Start by factoring in your material costs, the time and effort you put into making each ladder, and the current market prices for similar items. Consider offering different tiers of pricing based on the complexity of the design, the type of wood used, and any additional embellishments. You can always adjust your prices based on your sales and customer feedback.

    I hope this guide has inspired you to embrace the world of blanket ladders and turn your creative passion into a profitable side hustle. Remember, with dedication, quality craftsmanship, and a touch of marketing magic, you can create beautiful and functional ladders that bring joy to homes and boost your income.

    Share:

    Floating Shelf Wood Projects for Your Living Room, Bedroom, and More

    Floating Shelf Wood Projects for Your Living Room, Bedroom, and More

    Floating Shelf Wood Projects for Your Living Room, Bedroom, and More

    Add a touch of modern elegance and functionality to your home with these DIY floating shelf wood projects. Perfect for displaying your favorite books, plants, and decorative items, floating shelves offer a sleek and minimalist aesthetic. This article will guide you through various floating shelf projects that you can create for your living room, bedroom, and beyond.

    Choosing the Right Wood for Your Floating Shelves

    Selecting the right wood is crucial for creating durable and visually appealing floating shelves. Here are some popular choices for floating shelf projects:

    • Pine: This softwood is lightweight and affordable, making it ideal for beginners. Its natural knots and grain patterns add rustic charm.
    • Maple: Known for its beautiful grain and durability, maple is a good choice for high-traffic areas. It can be stained or painted to achieve different finishes.
    • Walnut: This hardwood is prized for its rich dark brown color and unique grain patterns. It adds a luxurious touch to any space.
    • Cherry: Cherry wood has a warm reddish-brown tone and smooth texture. It ages beautifully over time, developing a rich patina.
    • Oak: Oak is a strong and durable hardwood with a distinct grain pattern. It's an excellent choice for heavy items.

    Consider the weight of the items you plan to display on your shelves when selecting the wood type. For lighter items, pine or maple would be suitable, while oak or walnut can handle heavier objects.

    Floating Shelf Projects for Your Living Room

    Your living room is the perfect place to showcase your personality and style. Floating shelves can add a touch of sophistication while providing functional storage space. Here are some living room floating shelf project ideas:

    Minimalist Floating Shelves

    Create a sleek and modern look with minimalist floating shelves. Use a simple design with clean lines and a natural wood finish. These shelves are perfect for displaying small decorative items, books, or a collection of plants.

    Floating Entertainment Center

    Replace bulky entertainment consoles with a series of floating shelves. This creates a more open and airy feel while offering ample space for your TV, gaming consoles, and accessories. Use sturdy wood and consider adding LED lighting for a modern touch.

    Floating Shelf Projects for Your Bedroom

    Transform your bedroom into a sanctuary of relaxation and style with these floating shelf ideas:

    Floating Nightstand

    Create a unique and space-saving nightstand with floating shelves. Install them beside your bed at the desired height for easy access to your books, phone, or a glass of water.

    Floating Wall-Mounted Bookshelves

    Maximize wall space and add visual interest with floating bookshelves. Use them to display your favorite books, creating a cozy reading nook in your bedroom.

    Floating Shelf Projects for Other Rooms

    Floating shelves are versatile and can be used throughout your home. Here are some project ideas for other rooms:

    Floating Shelves for the Kitchen

    Add extra storage and display space in your kitchen with floating shelves. They're perfect for holding spices, cookbooks, or decorative items. Choose a wood type that is resistant to moisture and heat.

    Floating Bathroom Shelves

    Create a spa-like ambiance in your bathroom with floating shelves. Use them to store towels, toiletries, and decorative items. Select a waterproof wood type that can withstand humidity.

    Floating Shelves for the Home Office

    Keep your home office organized and stylish with floating shelves. They can hold files, office supplies, and decorative items. Choose a wood type that complements your office decor.

    Conclusion

    Floating shelf wood projects are a great way to enhance your home's aesthetic and functionality. With these ideas and a little DIY spirit, you can create unique and stylish floating shelves for your living room, bedroom, kitchen, bathroom, and home office. Enjoy the process and have fun creating beautiful and practical additions to your home!

    Share:

    How to Build Wooden Key Holders with a Modern or Rustic Look

    How to Build Wooden Key Holders with a Modern or Rustic Look

    Build a Wooden Key Holder: A Modern or Rustic Touch

    Let's face it, keys are a necessary evil. We love them because they open up our homes, cars, and maybe even a secret stash of cookies, but we hate them because they're always getting lost. Enter the wooden key holder – a functional and stylish solution to the age-old problem of key chaos. Whether you lean towards sleek modern lines or rustic charm, building a wooden key holder is a DIY project that's surprisingly easy and incredibly rewarding.

    Think about it: this little project gives you the chance to unleash your creativity, add a personal touch to your home, and maybe even impress your friends with your newfound woodworking skills. Plus, the satisfaction of knowing you built something useful with your own hands is priceless. So, grab your tools, put on your favorite playlist, and let's get started!

    Choosing Your Style

    The first step in this exciting journey is to decide on the style of key holder you want to build. Do you want a sleek modern piece that complements your minimalist decor, or are you going for a rustic charm that adds a touch of warmth to your home?

    Modern Key Holder

    For a modern key holder, consider a clean and minimalist design. Think simple geometric shapes, smooth lines, and a neutral color palette. You might choose a rectangular piece of wood with a series of cutouts or grooves to hold your keys, or opt for a sleek, minimalist design that features a single hook or a magnetic strip. You could even try incorporating a unique material like metal or acrylic to add a touch of contrast.

    Rustic Key Holder

    If you're a fan of rustic charm, go for a design that embraces natural elements. Think about reclaimed wood with its unique knots and grain patterns, or incorporate a piece of driftwood for a beachy feel. You can add a distressed finish to create a worn and weathered look, or use a natural wood stain to enhance the wood's natural beauty. Consider incorporating a touch of rustic charm with leather straps, metal hooks, or a simple wooden peg design.

    Getting Started

    Now that you've chosen your style, let's gather our materials. You'll need:

    • Wood - Pine, oak, or even reclaimed wood work great. Choose a thickness that suits your design.
    • Wood glue
    • Screws or nails
    • Sandpaper - Different grits for smoothing and finishing
    • Wood stain (optional)
    • Polyurethane finish (optional)
    • Measuring tape
    • Pencil
    • Saw (hand saw, circular saw, or jigsaw)
    • Drill with bits
    • Clamps (optional)
    • Hooks, pegs, or magnetic strips (depending on your design)

    Building a Modern Key Holder

    Let's start with a modern design. For this project, we'll create a simple rectangular key holder with a series of cutouts for keys.

    1. Cut the Wood: Cut your chosen piece of wood to the desired size. This will be the base of your key holder.
    2. Mark the Cutouts: Measure and mark the locations for the cutouts on the wood. Aim for a space of about 1-1.5 inches between each cutout. You can make these slots wider at the bottom to make it easier to insert keys.
    3. Create the Cutouts: Using a jigsaw or a handsaw, carefully cut out the slots. Make sure to follow the lines you marked precisely for a clean, professional look.
    4. Sand the Wood: After you've cut the slots, sand the wood thoroughly with sandpaper. Start with coarser grit sandpaper and work your way up to a finer grit to achieve a smooth finish.
    5. Apply Finish: Apply a clear wood stain or a polyurethane finish for protection and a polished look. Allow the finish to dry completely before handling.
    6. Mount the Key Holder: Drill pilot holes into the back of the key holder and use screws or nails to mount it to the wall.

    Building a Rustic Key Holder

    Now let's create a rustic key holder using a combination of wood and leather straps. Here's a step-by-step guide:

    1. Choose Your Wood: Choose a rustic piece of wood with natural character like reclaimed wood, or a piece of driftwood. You can even use a rough-cut piece of lumber for a more organic look.
    2. Cut the Wood: Cut the wood to your desired size and shape. You can create a rectangular base or go for a more organic, free-form shape. You can use a hand saw or a circular saw.
    3. Sand the Wood: Sand the wood to smooth out any rough edges and create a rustic finish. You might want to leave some of the natural texture intact for a truly rustic look.
    4. Prepare Leather Straps: Cut two leather straps to the desired length. These will hold your keys. You can purchase leather straps or cut them yourself.
    5. Mount the Straps: Using leather punches, make holes at both ends of the leather straps. Use strong screws or nails to attach the leather straps to the back of the wooden base, ensuring the straps are positioned at a comfortable height.
    6. Finish the Wood: Apply a clear wood stain or a polyurethane finish to protect the wood and enhance its natural beauty. You might choose a dark stain to highlight the rustic character of the wood.

    Adding a Personal Touch

    Once you've got the basics down, it's time to make your key holder truly unique. Here are some ideas:

    • Incorporate Metal Hooks: Add a touch of industrial chic to your key holder by incorporating metal hooks. Choose hooks in different shapes and sizes for a personalized touch.
    • Embellish with Wood Burning: Add a decorative element to your key holder with wood burning. Use a wood burning tool to create simple designs, or use a stencil to create more complex patterns.
    • Add a Coat of Paint: If you prefer a bolder look, add a coat of paint to your key holder. Choose a color that complements your decor, or try using two or more colors to create a unique pattern.
    • Embellish with Decoupage: Add a touch of whimsy to your key holder by using decoupage. Cut out decorative paper, fabric, or even pictures and adhere them to the surface of your key holder using decoupage medium.

    Commonly Asked Questions

    Here are some frequently asked questions about building wooden key holders:

    • What kind of wood is best for key holders? Pine, oak, and maple are all good choices for key holders. Pine is a softwood that is easy to work with, while oak and maple are hardwoods that are more durable. You can also use reclaimed wood for a rustic look.
    • How do I attach the hooks or straps to the wood? You can use screws, nails, or glue to attach hooks or straps to the wood. Make sure to pre-drill holes for screws to prevent the wood from splitting.
    • How do I finish the wood? You can use wood stain, polyurethane, or a combination of both to finish the wood. Wood stain will change the color of the wood, while polyurethane will protect it from moisture and scratches.
    • How do I mount the key holder to the wall? You can use screws, nails, or adhesive hooks to mount the key holder to the wall. Be sure to choose fasteners that are appropriate for the type of wall you have.

    Building a wooden key holder is a simple yet satisfying project that will add a touch of personality and organization to your home. So, gather your tools, unleash your creativity, and enjoy the process of bringing your own unique key holder to life!

    Share:

    Build and Sell Functional Wine Racks for Small Spaces

    Build and Sell Functional Wine Racks for Small Spaces

    Build and Sell Functional Wine Racks for Small Spaces: A Side Hustle You Can Actually Do

    Hey there, wine lovers! Are you tired of seeing your precious bottles scattered around your kitchen? Do you yearn for a stylish and functional wine storage solution, but your space is limited? Well, you're not alone. A lot of people struggle to find the perfect spot for their wine collection, especially if they live in a smaller apartment or house. But what if I told you that you could not only solve this problem for yourself but also turn it into a profitable side hustle?

    That's right, building and selling functional wine racks for small spaces is a fantastic way to combine your love for wine with your creative talents and entrepreneurial spirit. In this guide, we'll explore everything you need to know to get started, from choosing the right materials to marketing your unique creations.

    Why Wine Racks for Small Spaces?

    The demand for space-saving wine storage solutions is steadily growing. People are looking for compact and stylish ways to display their bottles, whether they're avid collectors or just enjoy having a few bottles on hand for special occasions. This means there's a real market for you to tap into!

    Here's what makes wine racks for small spaces so appealing:

    • Practicality: These racks maximize vertical space, allowing you to store a lot of bottles without taking up valuable floor area.
    • Aesthetics: They can add a touch of elegance and sophistication to any kitchen, dining room, or bar area.
    • Versatility: They come in various styles and materials, allowing you to customize them to suit different tastes and décor.
    • Accessibility: Easy access to your wine collection means no more digging through cabinets or struggling to reach bottles on high shelves.

    In a world where people are constantly searching for smart and efficient solutions for their homes, a well-designed wine rack for small spaces ticks all the boxes.

    Getting Started: Tools and Materials

    Before you start building, gather your essential tools and materials. You can choose to work with wood, metal, or even reclaimed materials, depending on your budget and preferred style.

    Here's a basic list for a simple wooden wine rack:

    • Wood: Pine, oak, or cedar are popular choices due to their affordability and workability.
    • Saw: A circular saw or a miter saw will come in handy for making precise cuts.
    • Drill: Essential for creating holes for screws and dowels.
    • Screwdriver: For assembling the rack and securing components.
    • Sandpaper: To smooth out rough edges and give your rack a polished look.
    • Wood glue: For bonding wood pieces together.
    • Stain or paint: To protect your rack and add a personal touch.
    • Measuring tape: For accurate measurements and precise cutting.
    • Safety gear: Always wear safety glasses and gloves when using power tools.

    Design and Functionality: Think Small, Think Stylish

    Now, let's talk design. The beauty of building wine racks for small spaces lies in the creativity you can unleash. Get inspired by existing designs, but don't be afraid to experiment with your own ideas. Remember, your goal is to create something functional, beautiful, and compact.

    Here are some design ideas to consider:

    • Wall-mounted racks: These are perfect for maximizing floor space. They can be designed as simple shelves or incorporate decorative elements like metal accents or even glass inserts.
    • Corner racks: Utilize awkward corner spaces by creating a triangular rack that fits snugly.
    • Under-cabinet racks: Install racks below your kitchen cabinets to free up counter space.
    • Free-standing racks: Create a portable rack that can be moved around the room as needed. These can be designed with wheels for easy mobility.
    • Multi-functional racks: Consider combining a wine rack with other features like a wine glass holder or a small storage shelf.

    Don't forget to factor in the bottle dimensions and the number of bottles you want to store. You can create different-sized compartments to accommodate various bottle types, such as standard Bordeaux bottles, champagne bottles, or even larger magnums.

    Building and Finishing: From Rough Cuts to Polished Pieces

    Now comes the exciting part – actually building your wine racks!

    Here's a general process:

    • Plan and measure: Draw a detailed plan of your rack, including dimensions for each component.
    • Cut the wood: Using your saw, carefully cut the wood to the exact measurements you planned.
    • Assemble the frame: Glue and screw the pieces together to create the basic structure of your rack.
    • Add bottle supports: Create slots or shelves where the bottles will rest. Ensure they are properly spaced to prevent bottles from rolling or tipping.
    • Sand and finish: Sand the entire rack to smooth out any rough edges. Apply stain or paint to your desired finish.
    • Add decorative elements: If you like, you can add hardware, carvings, or other decorative touches to enhance the look of your rack.

    Remember, the more you practice, the better you'll become at building and finishing your wine racks. Don't be afraid to experiment with different techniques and materials to find what works best for you.

    Marketing Your Wine Racks: Getting the Word Out

    Now that you've created some beautiful and functional wine racks, it's time to get them in front of potential buyers. But how do you effectively market your creations?

    Here are some ideas to get you started:

    • Online marketplaces: Platforms like Etsy, Amazon Handmade, or Facebook Marketplace offer a wide audience for handcrafted products.
    • Social media: Create a dedicated Instagram or Facebook page showcasing your wine racks and highlighting their unique features. Don't forget to use relevant hashtags to reach a wider audience.
    • Local craft fairs and markets: Participate in local events where you can showcase your products in person and interact with potential customers.
    • Word-of-mouth: Spread the word to friends, family, and colleagues. Encourage them to share your creations with their network.
    • Collaborations: Reach out to local businesses like wine shops, restaurants, or interior design firms for potential partnerships and collaborations.

    Don't be afraid to get creative with your marketing approach. Offer discounts, bundle deals, or personalized options to attract buyers. The key is to make your wine racks stand out and showcase their value.

    Building a Brand and Expanding Your Business

    As your side hustle grows, consider building a brand around your wine racks. This can involve developing a unique name, logo, and style guide to create a consistent identity for your products.

    Here are some ideas to consider:

    • Brand name: Choose a catchy name that reflects your style and target audience. For example, "The Tiny Wine Rack" or "Crafted Wine Storage."
    • Logo: Create a visually appealing logo that represents your brand. It could feature a wine bottle, a grapevine, or a stylized image of a wine rack.
    • Website: A website is crucial for showcasing your products, sharing your story, and providing information about your brand. You can use platforms like Squarespace or Wix to create a professional online presence.
    • Customer service: Provide excellent customer service to build loyalty and encourage repeat business.

    With a strong brand, you can build a loyal customer base and expand your product line to include other related items like wine accessories, bar carts, or even home décor pieces.

    Commonly Asked Questions

    Here are some common questions that people have about starting this side hustle:

    Q: Do I need any special skills to build wine racks?

    A: Basic woodworking skills are helpful, but you can definitely learn as you go. Start with simple designs and gradually increase the complexity of your projects. There are tons of resources online and in libraries that can teach you everything you need to know.

    Q: How much can I expect to earn with this side hustle?

    A: The potential earnings depend on your pricing strategy, marketing efforts, and volume of sales. However, there's a good market for high-quality, unique wine racks, so you can earn a decent income if you're dedicated.

    Q: What if I don't have a lot of space for woodworking?

    A: You can start with smaller projects and gradually expand your workspace as you gain experience. Many projects can be completed with basic tools and a small workspace. You can also consider using materials that are easy to transport and work with, like lightweight woods or even recycled materials.

    Building and selling functional wine racks for small spaces is a rewarding side hustle that combines creativity, practicality, and a touch of elegance. With a little effort and dedication, you can turn your love for wine and woodworking into a profitable and fulfilling venture. So go ahead, unleash your inner artisan and start crafting those unique wine racks today!

    Share:

    Wine Rack Projects That Sell Like Hotcakes

    Wine Rack Projects That Sell Like Hotcakes

    Wine Rack Projects That Sell Like Hotcakes: A Guide to Creating Desirable and Profitable Wine Storage Solutions

    Are you looking for a woodworking project that combines practicality and elegance? Look no further than wine racks! These projects are not only functional, but also visually appealing, making them highly sought after by wine enthusiasts and homeowners alike. In this article, we'll delve into the world of wine rack projects, exploring popular designs, tips for crafting them, and marketing strategies to ensure your creations sell like hotcakes.

    Popular Wine Rack Designs

    There's a wine rack design for every taste and space. From simple and minimalist to intricate and ornate, the possibilities are endless. Here are some popular options to get your creative juices flowing:

    Classic Wall-Mounted Racks

    These are a timeless choice, offering efficient space utilization and a clean, contemporary look. Consider using a combination of different wood types for visual interest, such as walnut and maple. You can even add decorative elements like metal accents or a unique finish.

    Freestanding Wine Racks

    For larger wine collections, freestanding racks provide ample storage and can become a focal point in any room. Explore different shapes, sizes, and materials, such as reclaimed wood or metal. Adding casters for easy mobility is a great idea.

    Countertop Wine Racks

    These compact racks are perfect for smaller spaces and can be used for display or temporary storage. You can create unique designs using different wood species, curved edges, or even geometric shapes.

    Tips for Crafting High-Quality Wine Racks

    Crafting a beautiful and functional wine rack requires attention to detail and careful execution. Here are some valuable tips to keep in mind:

    • Choose high-quality wood: Opt for hardwoods like oak, walnut, maple, or cherry. These woods are durable, resistant to scratches, and offer a rich aesthetic appeal.
    • Precise cuts and joinery: Accurate measurements and strong joints are essential for a sturdy and visually pleasing rack. Utilize joinery techniques like mortise-and-tenon or dovetail for maximum strength and elegance.
    • Consider the wine bottles: Ensure the rack is designed to accommodate the different sizes and shapes of wine bottles. Factor in the bottle's diameter and the space needed for the cork.
    • Finish with care: Use a high-quality wood finish, such as oil, varnish, or wax, to protect the wood from moisture, stains, and wear. Experiment with different finishes to create unique looks.

    Marketing Your Wine Rack Creations

    Now that you've created stunning wine racks, it's time to get them in front of eager buyers. Here are some effective marketing strategies:

    • Online Marketplaces: Platforms like Etsy, Amazon Handmade, and Facebook Marketplace offer a wide reach and allow you to showcase your products with detailed descriptions and high-quality photos.
    • Social Media Marketing: Utilize Instagram, Pinterest, and Facebook to share beautiful images of your wine racks, behind-the-scenes glimpses of your crafting process, and customer testimonials.
    • Local Craft Fairs and Events: Participate in local craft fairs and events to connect with potential customers directly and showcase your work in person.
    • Collaborate with Retailers: Approach local wine shops, furniture stores, or home décor retailers to see if they're interested in carrying your wine racks.

    With the right combination of design, craftsmanship, and marketing, your wine rack creations can become a highly sought-after and profitable venture. Embrace your creativity, pay attention to detail, and enjoy the satisfaction of crafting functional art that people love.

    Share:

    DIY Wooden Floating Shelves: How to Create Floating Storage Spaces

    DIY Wooden Floating Shelves: How to Create Floating Storage Spaces

    DIY Wooden Floating Shelves: How to Create Floating Storage Spaces

    Tired of bulky bookshelves taking up valuable floor space? Want to add a touch of modern elegance to your home décor? Look no further than DIY wooden floating shelves! These versatile storage solutions offer a clean, contemporary aesthetic while maximizing your vertical space. Let's dive into the process of crafting your own floating shelves, transforming your walls into functional and stylish displays.

    Materials You'll Need

    Before you get started, gather the following materials. Having everything ready will make the process smoother and more enjoyable.

    • Wooden boards (select a thickness that suits your desired shelf depth)
    • Measuring tape
    • Pencil
    • Level
    • Saw (circular saw, miter saw, or hand saw)
    • Drill
    • Screwdriver or drill bit
    • Wood glue
    • Clamps
    • Sandpaper
    • Wood stain or paint (optional)
    • Brackets (choose the type based on your shelf size and weight)
    • Screws (matching the bracket type and wall material)
    • Stud finder

    Step-by-Step Guide

    Now, let's break down the process into manageable steps. Follow along, and you'll have your floating shelves up in no time.

    Step 1: Measure and Cut

    Start by measuring the desired length and width of your shelves. Mark the measurements on your wooden boards with a pencil. Use a saw to carefully cut the boards to the desired size. Make sure to cut the boards straight for a professional finish.

    Step 2: Sanding and Finishing

    Once your shelves are cut, take some time to sand them. Use a medium-grit sandpaper followed by a fine-grit sandpaper to create a smooth surface. If you plan on staining or painting your shelves, apply the chosen finish now. Let it dry thoroughly before proceeding.

    Step 3: Determine Bracket Placement

    Use a stud finder to locate the wall studs. Brackets should be attached to studs for maximum support. Mark the desired location of your shelves on the wall. Then, mark the placement of the brackets on the wall, making sure they align with the studs.

    Step 4: Install Brackets

    Drill pilot holes into the wall at the marked bracket locations. Be sure to use the correct drill bit size for your screws. Secure the brackets to the wall using screws. Use a level to ensure the brackets are installed straight.

    Step 5: Attach Shelves

    Slide your shelves onto the brackets. Secure them to the brackets using screws. Make sure the screws are long enough to securely attach the shelves to the brackets. Use wood glue for extra strength and stability.

    Step 6: Enjoy Your New Floating Shelves

    You've done it! You've successfully created your own stylish and functional floating shelves. Fill them with books, decorative items, plants, or anything else that brings you joy. Now stand back and admire your handiwork.

    Tips for Success

    • Pre-drill pilot holes in the wood to prevent splitting during screw insertion.
    • Use a level to ensure the shelves are installed straight and even.
    • If you're attaching the shelves to drywall, use wall anchors for added support.
    • Get creative with your shelf design! Use different wood types, shapes, or add decorative elements like moldings.
    • Make sure the brackets you choose can handle the weight of the items you'll be placing on the shelves.

    DIY floating shelves are an excellent way to add storage and style to any room. With a little time and effort, you can create beautiful and functional storage solutions that complement your home décor. So gather your tools, choose your materials, and get ready to create!

    Share:

    人気の投稿

    Blog Archive

    Powered by Blogger.

    ブログ アーカイブ