Easy and budget-friendly woodworking ideas for creating personalized wood crafts and home accents.

How to Make Floating Shelves That Are Perfect for Displaying Plants

How to Make Floating Shelves That Are Perfect for Displaying Plants

How to Make Floating Shelves That Are Perfect for Displaying Plants

Floating shelves are a fantastic way to add a touch of greenery to any space, creating a vibrant and refreshing atmosphere. Whether you have a small apartment or a spacious living room, these shelves offer a unique and stylish solution for showcasing your favorite plants. In this article, we'll walk you through the process of building your own floating shelves, making them perfect for displaying your beloved botanical companions.

Choosing the Right Materials

The first step in building your floating shelves is selecting the right materials. Here's what you'll need:

  • Wood planks: Select a wood type that's both sturdy and aesthetically pleasing. Some popular choices include pine, maple, or oak.
  • Brackets: These are essential for supporting the shelves. Look for brackets specifically designed for floating shelves, often made of metal or wood. They should be strong enough to hold the weight of your plants.
  • Screws: Choose screws that are long enough to securely fasten the brackets to the wall and the shelves to the brackets.
  • Sandpaper: You'll need sandpaper to smooth out the wood and create a polished finish.
  • Wood stain or paint: (Optional) Use these to add color and protect the wood from moisture and damage.
  • Measuring tape, level, and pencil: These are crucial for ensuring your shelves are perfectly aligned and level.
  • Drill: A drill with the appropriate drill bits is necessary for creating pilot holes and fastening screws.

Cutting and Preparing the Wood

With your materials gathered, it's time to cut the wood planks to your desired size. Carefully measure the length and width of the shelves you want to create. You can use a circular saw or a handsaw for this step. Once the wood is cut, use sandpaper to smooth out any rough edges and create a smooth surface for your plants.

Finishing Touches

To enhance the look and protect your shelves, you can apply a wood stain or paint. Select a color that complements your decor and brings out the beauty of your wood. Allow the stain or paint to dry completely before proceeding to the next step.

Installing the Brackets

Now comes the critical step of attaching the brackets to the wall. Choose a location that's stable and can support the weight of your shelves and plants. Using a level, mark the placement of the brackets on the wall. Then, use your drill to create pilot holes for the screws. This prevents the wood from splitting when you drive in the screws. Securely fasten the brackets to the wall with the appropriate screws.

Attaching the Shelves

With the brackets installed, you're ready to attach the shelves. Gently lift the shelves onto the brackets. Before fully securing the shelves, double-check that they are level and perfectly aligned. Once satisfied, use the remaining screws to attach the shelves to the brackets.

Adding the Finishing Touches

Your floating shelves are now ready to be adorned with your plant collection! Choose plants that complement the size and style of your shelves, and enjoy the beauty they bring to your space. You can experiment with different plant arrangements to create a unique and eye-catching display. Here are some extra tips:

  • Use a variety of plant sizes and shapes. Mix and match different types of plants to create visual interest.
  • Incorporate hanging plants. Create a cascading effect by hanging plants from the shelves.
  • Add decorative elements. Enhance the display with small decorative items like pebbles, ornaments, or small sculptures.
  • Consider lighting. Add LED lights to highlight the shelves and showcase your plants.

Creating floating shelves is a fun and rewarding project that allows you to display your plants in a stylish and modern way. With a little effort and a bit of creativity, you can transform your home into a lush green oasis, making it a more beautiful and inviting space for you and your plants.

Share:

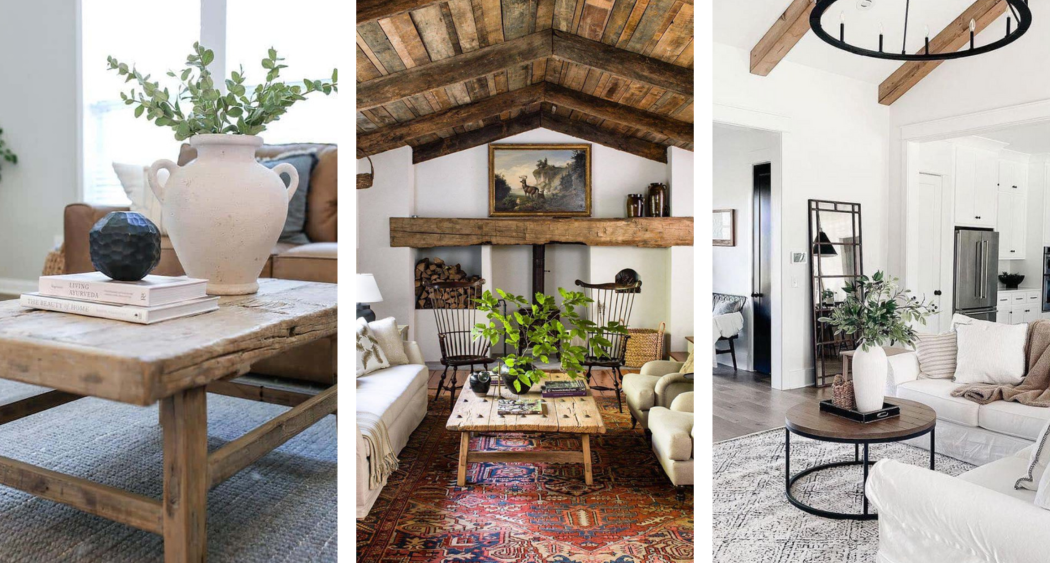
How to Build Coffee Tables with a Farmhouse or Coastal Look

How to Build Coffee Tables with a Farmhouse or Coastal Look

How to Build Coffee Tables with a Farmhouse or Coastal Look: A Step-by-Step Guide

Hey there, DIY enthusiasts! Are you looking to add a touch of charm and personality to your living room? Building your own coffee table is a fantastic way to do just that, and with a farmhouse or coastal style, you can create a piece that perfectly complements your home's aesthetic. In this guide, we'll walk you through the process of creating a coffee table that's both functional and visually appealing, and you'll be surprised at how simple it can be!

Choosing Your Style: Farmhouse vs. Coastal

First, let's decide on the style that best suits your taste:

Farmhouse Charm

A farmhouse coffee table exudes warmth and rustic elegance. Think distressed wood, chunky legs, and maybe even a touch of reclaimed materials. You can embrace the natural beauty of wood by leaving it unpainted or staining it in warm tones like brown, gray, or white.

Coastal Breeze

If you're drawn to the relaxed vibe of the coast, a coastal coffee table should be your go-to. Light colors, driftwood accents, and nautical details like rope or seashells create a calming atmosphere. You can use white paint, light blue tones, or even incorporate rope elements into your design.

Materials and Tools You'll Need

Now, let's gather the materials and tools you'll need for your coffee table project:

  • Wood: This is the foundation of your table! Choose lumber like pine, oak, or cedar based on your style preference and budget.
  • Screws: Go for wood screws in various sizes for securely attaching the table top, legs, and any additional supports.
  • Wood Glue: This will strengthen the joints and ensure your table is sturdy.
  • Sandpaper: You'll need a variety of grits to smooth out the wood and create a polished finish.
  • Stain or Paint: Choose your finish based on your desired style.
  • Polyurethane: This protects your table from scratches, stains, and water damage.
  • Measuring Tape and Pencil: Essential for accurate measurements and marking cuts.
  • Saw: A circular saw or a jigsaw will come in handy for cutting your wood to size.
  • Drill: Use a drill with a bit that matches your screw size for easy fastening.
  • Safety Glasses and Gloves: Protect your eyes and hands while working with tools and wood.

Building Your Coffee Table: Step-by-Step Instructions

Ready to get started? Let's build your coffee table! Here's a step-by-step guide to help you along the way:

Step 1: Designing and Planning

Before diving in, grab a piece of paper and a pencil. Sketch out your coffee table design, including the dimensions of the tabletop, legs, and any additional supports or shelves. Think about the overall size and shape you want, and consider the height that's comfortable for your living room.

Step 2: Cutting the Wood

Now, it's time to cut your wood to size. Using your saw, carefully cut the wood according to your plan. Remember to measure twice and cut once!

Step 3: Assembling the Tabletop

For a simple tabletop, you can use a single piece of wood. But if you're going for a larger or more intricate design, you can join multiple pieces together. Apply wood glue to the edges before fastening them with screws. Make sure to use a level to ensure the tabletop is even.

Step 4: Attaching the Legs

Once your tabletop is ready, it's time for the legs! Decide where you want to place them. For a farmhouse look, you might choose a more rustic, uneven placement. Coastal designs often call for a more symmetrical arrangement.

Apply wood glue to the legs and attach them to the underside of the tabletop, using screws to reinforce the connection. Make sure to check that the legs are level and the table is stable.

Step 5: Adding Details and Finishing Touches

Time for the fun part! This is where you can really add personality to your table. Here are a few ideas:

  • Farmhouse: For a distressed farmhouse look, sand the edges of the wood to reveal the grain. You can even use a hammer to create small dents or chips in the wood for a more weathered appearance. Stain the table in a warm brown or gray tone.
  • Coastal: Whitewash the wood for a breezy, beachy feel. If you want to incorporate rope, attach it to the underside of the tabletop to create a unique border. Consider adding seashell accents or other nautical elements for a touch of whimsy.

Step 6: Finishing and Sealing

Sand your table down to smooth out any rough edges, then apply your chosen stain or paint. Make sure to follow the manufacturer's instructions for drying times. Once the paint or stain is dry, apply a coat of polyurethane to protect your coffee table from spills and scratches.

Commonly Asked Questions

Q: What is the best wood to use for a farmhouse or coastal coffee table?

A: Pine is a great option for both styles due to its affordability and natural beauty. Oak offers durability and a rich grain, making it perfect for a farmhouse look. Cedar provides a natural aroma and resistance to moisture, which can be useful for coastal designs.

Q: Can I use reclaimed wood for my coffee table?

A: Absolutely! Reclaimed wood can add a touch of history and character to your farmhouse coffee table. Be sure to inspect the wood thoroughly before using it to ensure it is sound and safe.

Q: How can I make my coffee table look more unique?

A: There are endless possibilities for adding unique touches! Consider adding a decorative top, such as a piece of glass, tile, or metal. You can also incorporate metal accents, like iron legs or handles, for a more industrial feel. Don't be afraid to experiment and have fun with your design!

Q: What if I don't have any woodworking experience?

A: That's okay! There are plenty of resources available to help you learn the basics of woodworking. Start with simpler projects, and don't be afraid to ask for help if you need it. Remember, practice makes perfect, and you'll be building beautiful furniture in no time!

Building a coffee table from scratch is a rewarding experience that allows you to create a piece of furniture that's uniquely yours. So, gather your tools, get creative, and enjoy the process of bringing your vision to life!

Share:

How to Craft Wooden Benches for Small Apartments and Homes

How to Craft Wooden Benches for Small Apartments and Homes

Crafting Wooden Benches for Small Apartments and Homes: A Comprehensive Guide

In the realm of interior design, benches offer a versatile and space-saving solution, particularly for small apartments and homes. Their ability to serve as seating, storage, and decorative elements makes them an invaluable asset. This comprehensive guide delves into the art of crafting wooden benches, providing step-by-step instructions, design considerations, and expert tips for creating functional and aesthetically pleasing pieces for your living space.

Choosing the Right Wood for Your Bench

The choice of wood is paramount in determining the durability, aesthetics, and overall character of your bench. Consider the following factors:

Durability and Hardness

For high-traffic areas or benches that will be subjected to significant weight, opt for hardwoods like oak, maple, or walnut. These woods are known for their strength, resistance to wear and tear, and longevity.

Grain Pattern and Aesthetics

The grain pattern of wood can dramatically influence the visual appeal of your bench. Choose a wood with a grain that complements your existing décor. For a rustic look, consider knotty pine or reclaimed wood. For a more polished aesthetic, select smooth-grained woods like cherry or mahogany.

Availability and Cost

Wood prices can vary widely, so factor in your budget. Local lumberyards, online retailers, and specialty wood suppliers can offer a range of options. Consider exploring salvaged or reclaimed wood for a sustainable and budget-friendly approach.

Designing Your Wooden Bench

Once you have chosen your wood, it's time to design your bench. Consider the following aspects:

Dimensions and Shape

Determine the optimal dimensions of your bench based on the available space and desired seating capacity. You can choose from a variety of shapes, such as rectangular, square, curved, or even asymmetrical designs.

Style and Functionality

Do you envision a minimalist, contemporary bench or a more traditional, rustic piece? Consider the overall style of your home and integrate the bench seamlessly into your existing décor. Functionality is key; decide whether you want a simple seating bench, a bench with storage compartments, or a bench with a backrest.

Features and Details

Incorporate features and details to enhance the functionality and aesthetic appeal of your bench. These may include rounded edges for comfort, decorative carving, or built-in cup holders for added convenience. Consider adding a cushion for extra comfort and style.

Tools and Materials

To craft your wooden bench, you will need a range of tools and materials, including:

  • Wood (chosen based on your design)
  • Circular saw or table saw
  • Miter saw
  • Power drill and drill bits
  • Sandpaper (various grits)
  • Wood glue
  • Screws or nails
  • Clamps
  • Measuring tape and pencil
  • Safety glasses and hearing protection
  • Finishing materials (stain, paint, varnish, etc.)

Step-by-Step Construction Guide

Follow these steps to construct your wooden bench:

Step 1: Cut the Wood

Based on your design, use a circular saw or table saw to cut the wood to the required lengths and dimensions. Ensure accurate measurements and make smooth, clean cuts.

Step 2: Assemble the Frame

Use wood glue and screws or nails to assemble the frame of the bench. Securely attach the legs, supports, and seat boards. Employ clamps to hold the pieces together while the glue dries.

Step 3: Add Additional Features

If your design includes features like storage compartments or a backrest, construct and attach them to the frame using wood glue and screws. Ensure a secure and stable attachment.

Step 4: Sand the Bench

Once the bench is assembled, use sandpaper to smooth out any rough edges or imperfections. Begin with coarse-grit sandpaper and gradually transition to finer grits for a smooth finish.

Step 5: Finish the Bench

Apply a sealant or finish to protect the wood and enhance its appearance. Stain, paint, or varnish can be used according to your preference. Ensure even application and allow adequate drying time.

Tips for Crafting a Successful Wooden Bench

Here are some additional tips to ensure a successful bench-building project:

  • Plan your design thoroughly before starting.
  • Use high-quality materials and tools.
  • Take accurate measurements and cut the wood precisely.
  • Use clamps to secure joints while the glue dries.
  • Sand the bench thoroughly to create a smooth finish.
  • Apply a sealant or finish to protect the wood.
  • Consider adding decorative details like carving or embellishments.
  • Safety first! Wear appropriate safety gear when using power tools.

Conclusion

Crafting a wooden bench for your small apartment or home can be a rewarding experience. By following this comprehensive guide, you can create a functional and aesthetically pleasing piece that enhances your living space and serves as a testament to your creativity. Remember, patience and attention to detail are key to crafting a successful bench.

Share:

How to Start Selling Simple Wood Projects Online

How to Start Selling Simple Wood Projects Online

How to Start Selling Simple Wood Projects Online

In the digital age, crafting skills can be transformed into a successful online business. Selling simple wood projects online is a lucrative opportunity for individuals with woodworking abilities and an entrepreneurial spirit. This guide will provide a comprehensive overview of the steps involved in launching and growing your online woodworking business, covering everything from product selection to marketing and sales.

1. Product Selection

The foundation of any successful online business lies in offering high-quality, desirable products. When selecting wood projects to sell, consider the following factors:

1.1. Simplicity and Scalability

Begin with simple woodworking projects that can be efficiently produced. Simple projects, such as cutting boards, coasters, and small decorative items, require less time and resources to create, allowing you to focus on building your business. Ensure that your chosen projects can be scaled to meet increasing demand.

1.2. Target Audience

Identify your target audience and cater to their preferences. Research popular woodworking styles, trends, and demographics to determine what resonates with your potential customers. Consider specializing in a niche, such as farmhouse decor, rustic furniture, or modern minimalist designs.

1.3. Material Quality and Sustainability

Utilize high-quality, durable wood for your projects. Consumers appreciate sustainable and eco-friendly practices, so consider using reclaimed wood or certified sustainable lumber. Highlight the source and quality of your materials in your product descriptions to enhance customer trust and appeal.

1.4. Uniqueness and Personalization

Offer unique and personalized wood projects to stand out from the competition. Custom orders, engraved pieces, or personalized designs provide customers with a special touch and increase their value perception.

2. Building Your Online Presence

Establishing a strong online presence is crucial for attracting customers and generating sales. Utilize the following platforms and strategies:

2.1. Website and E-commerce Platform

Create a professional website with an e-commerce platform to showcase your products and facilitate online sales. Employ user-friendly website design, high-quality product images, detailed descriptions, and secure payment processing. Consider platforms like Shopify, Etsy, or WooCommerce for easy website creation and online store management.

2.2. Social Media Marketing

Utilize social media platforms like Instagram, Facebook, and Pinterest to promote your woodworking projects. Showcase your work through engaging photos and videos, share behind-the-scenes insights, and interact with potential customers. Use relevant hashtags to increase visibility and reach a wider audience.

2.3. Online Marketplaces

Expand your reach by listing your products on online marketplaces like Etsy, Amazon Handmade, and eBay. These platforms provide access to a vast customer base and built-in marketing features. Be sure to optimize your listings with relevant keywords and high-quality images.

3. Pricing and Profitability

Determining the right price for your woodworking projects is vital for profitability. Consider the following factors:

3.1. Material Costs

Calculate the cost of materials, including wood, hardware, finishes, and packaging. Factor in any discounts or bulk purchase savings.

3.2. Labor and Time

Estimate the time required to create each project and assign a fair hourly rate for your labor. Include the time spent on design, fabrication, finishing, and packaging.

3.3. Overhead Costs

Account for overhead costs, such as website hosting, marketing expenses, and insurance. These costs contribute to the overall cost of producing your woodworking projects.

3.4. Competition and Market Demand

Research competitor pricing and assess market demand for your products. Adjust your pricing based on the value you provide, the quality of your work, and the level of competition.

4. Production and Fulfillment

Efficiently producing and fulfilling orders is essential for customer satisfaction and business success. Consider the following processes:

4.1. Production Planning

Develop a production plan to ensure you can meet anticipated demand. Optimize your workflow, manage inventory, and allocate resources effectively to avoid production bottlenecks.

4.2. Quality Control

Implement strict quality control measures to ensure your woodworking projects meet high standards. Inspect materials, monitor production processes, and conduct final quality checks before shipping.

4.3. Packaging and Shipping

Package your woodworking projects professionally and securely to prevent damage during shipping. Choose appropriate packaging materials, use protective inserts, and label clearly with shipping information.

4.4. Customer Service

Provide excellent customer service to foster loyalty and positive reviews. Respond promptly to inquiries, address any concerns, and offer support throughout the customer journey.

5. Marketing and Sales

Marketing and sales efforts are crucial for attracting customers and driving revenue. Consider the following strategies:

5.1. Content Marketing

Create informative and engaging content, such as blog posts, videos, and tutorials, to educate and inspire potential customers. Share your knowledge of woodworking, highlight the benefits of your products, and showcase your craftsmanship.

5.2. Email Marketing

Build an email list and send regular newsletters to keep customers informed about new products, promotions, and events. Provide valuable content, exclusive offers, and personalized recommendations to nurture relationships.

5.3. Paid Advertising

Consider utilizing paid advertising platforms like Google Ads or social media ads to reach a wider audience. Target specific demographics, interests, and keywords to maximize your ad spend and generate leads.

5.4. Partnerships and Collaborations

Partner with other businesses, influencers, or bloggers in related industries to cross-promote your products. Collaborations can expand your reach, introduce you to new audiences, and generate valuable referrals.

6. Scaling and Growth

As your online woodworking business grows, consider strategies for scaling your operations and expanding your offerings:

6.1. Hiring and Delegation

Delegate tasks and hire additional help to manage the increased workload. Consider hiring assistants, contractors, or full-time employees to support production, marketing, and customer service.

6.2. Expanding Product Lines

Introduce new product lines or variations to cater to evolving customer preferences and diversify your revenue streams. Offer different wood types, finishes, sizes, and styles to attract a wider range of customers.

6.3. Wholesale and Retail Partnerships

Explore wholesale opportunities by selling your woodworking projects to retailers or distributors. This can significantly expand your customer base and increase your sales volume.

7. Legal and Business Considerations

Ensure you comply with legal requirements and establish a solid business foundation:

7.1. Business Registration

Register your business as a sole proprietorship, partnership, or corporation to protect your liability and establish legal standing.

7.2. Taxes and Insurance

Understand your tax obligations and obtain necessary insurance coverage, such as general liability and product liability insurance.

7.3. Intellectual Property Protection

Consider registering trademarks or copyrights for your unique designs or branding elements to protect your intellectual property.

Conclusion

Selling simple wood projects online is a rewarding and profitable venture. By carefully selecting products, building a strong online presence, pricing strategically, and employing effective marketing and sales strategies, you can turn your woodworking passion into a thriving online business. Embrace creativity, dedication, and a customer-centric approach to succeed in this exciting and growing market.


Share:

Wood Toolbox Organizers That Fit Any Tool Collection

Wood Toolbox Organizers That Fit Any Tool Collection

Wood Toolbox Organizers That Fit Any Tool Collection

A well-organized toolbox is a joy to behold. It's the difference between frantically searching for a screwdriver amidst a chaotic jumble of tools and effortlessly pulling out the exact tool you need in a matter of seconds. While a well-stocked toolbox is essential for any DIY enthusiast or professional, it's the organization that truly makes the difference. Enter the world of wood toolbox organizers - practical, durable, and customizable solutions to transform your toolbox from a tangled mess into a streamlined haven for your tools.

Why Choose Wood Toolbox Organizers?

Wood toolbox organizers offer a unique blend of durability, customization, and aesthetic appeal. Unlike plastic organizers that can crack or warp over time, wood organizers are built to last. Their natural beauty adds a touch of warmth and craftsmanship to your toolbox, making it more than just a storage space - it's a reflection of your dedication to quality and organization.

Durability and Longevity

Wood is known for its resilience and durability. Well-crafted wood organizers can withstand years of use, handling the wear and tear of heavy tools without cracking or breaking. Unlike flimsy plastic organizers, wood organizers provide a sturdy and reliable foundation for your tools.

Customization and Flexibility

Wood organizers offer unparalleled flexibility in terms of customization. You can tailor the size, shape, and compartments to fit your specific tool collection. Whether you have a vast array of tools or a more modest selection, you can create an organizer that perfectly accommodates your needs.

Aesthetic Appeal

Wood organizers bring a touch of natural elegance to your toolbox. The warm hues and grain patterns of wood add a touch of class and sophistication, elevating your toolbox from a mere storage space to a well-designed and functional element of your workspace.

Types of Wood Toolbox Organizers

The world of wood toolbox organizers is diverse, offering a range of options to suit every need and style. Let's explore some popular types:

DIY Kits

For those who enjoy a hands-on approach, DIY kits offer a satisfying way to create a custom wood organizer. These kits typically include pre-cut wood pieces, hardware, and instructions, guiding you through the assembly process. The advantage lies in the ability to personalize the design and size to match your specific requirements.

Pre-Made Organizers

If you prefer a ready-made solution, pre-made wood organizers are readily available. These organizers come in various sizes and configurations, catering to different tool collections. Look for organizers with durable construction, well-designed compartments, and features that enhance functionality.

Specialty Organizers

For specialized tool collections, such as woodworking tools or automotive tools, there are specialized organizers designed to accommodate specific requirements. These organizers may feature dedicated compartments for specific tools, ensuring maximum efficiency and organization.

Tips for Choosing and Using Wood Toolbox Organizers

When selecting a wood toolbox organizer, consider these crucial factors:

  • Size and Capacity: Measure your toolbox and the tools you need to store. Choose an organizer that fits comfortably and provides ample space for your collection.
  • Compartment Design: Opt for organizers with compartments that are the right size and shape for your tools. Avoid overly large or small compartments, as they can lead to wasted space or difficulty accessing tools.
  • Material Quality: Look for organizers made from high-quality wood that is durable and resistant to scratches and dents. Choose organizers with sturdy construction and well-finished surfaces.
  • Features and Functionality: Consider features such as dividers, trays, and drawers that can help you organize tools further and enhance accessibility.
  • Aesthetics: Choose an organizer that complements the style of your toolbox and workspace.

Once you have your wood toolbox organizer, follow these tips to maximize its potential:

  • Sort and Categorize: Divide your tools into logical categories, such as hand tools, power tools, measuring tools, and fasteners.
  • Label Compartments: Label each compartment to make it easy to find the tools you need.
  • Maintain Order: Keep your organizer clean and organized by putting tools back in their designated spots after use.

Investing in a wood toolbox organizer is an investment in efficiency, organization, and a touch of craftsmanship. It's a simple yet transformative step that can turn your toolbox from a cluttered mess into a well-ordered haven for your tools.

Share:

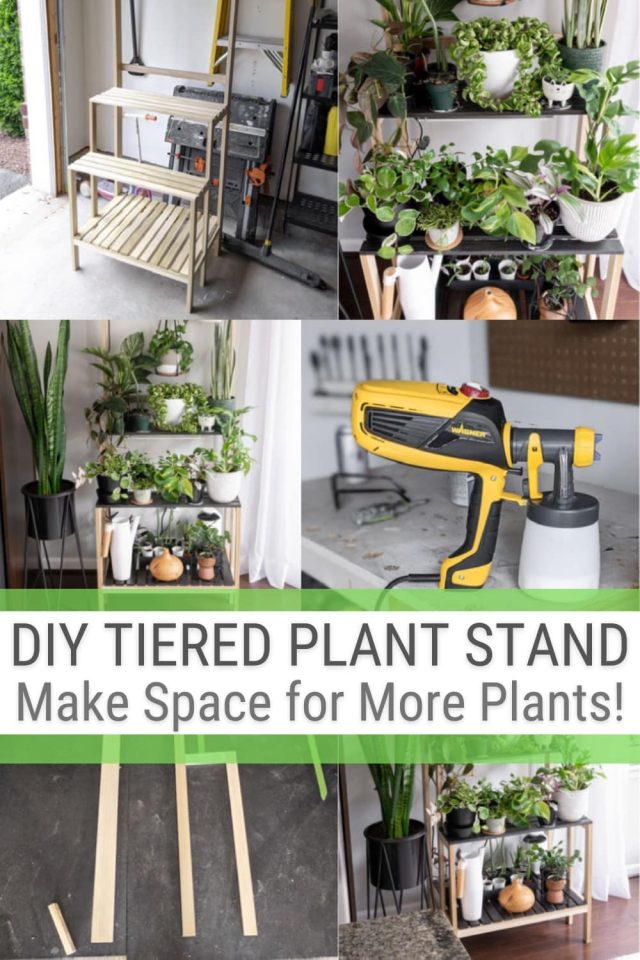
How to Add a Personalized Touch to Your Tiered Plant Stands

How to Add a Personalized Touch to Your Tiered Plant Stands

How to Add a Personalized Touch to Your Tiered Plant Stands

Tiered plant stands are a versatile and stylish way to showcase your indoor greenery. But beyond their functional purpose, they offer a fantastic canvas for expressing your personal style and creating a unique space that truly reflects your taste. This article will guide you through various techniques and ideas for adding a personalized touch to your tiered plant stands, transforming them from ordinary to extraordinary.

Embracing Color and Pattern

The most immediate way to personalize your plant stand is through color and pattern. The possibilities are endless, catering to every aesthetic preference. Here's how you can incorporate color and pattern:

Painting the Stand

A fresh coat of paint can completely change the look of your plant stand. Consider these options:

  • Solid Colors: Choose a vibrant hue that complements your decor, such as a bright teal, a calming sage green, or a classic white.
  • Two-Tone Color Schemes: Create a modern look by painting the tiers in contrasting colors.
  • Metallic Finishes: Gold, silver, or copper finishes can add a touch of elegance and sophistication.
  • Chalkboard Paint: Transform your plant stand into a writable surface, allowing you to jot down plant care reminders, inspirational quotes, or even whimsical messages.

Applying Wallpaper or Contact Paper

For a quick and easy makeover, consider using wallpaper or contact paper. These materials offer a wide range of patterns, textures, and colors, enabling you to create a bold statement or a subtle accent.

  • Geometric Patterns: Add visual interest with geometric patterns like stripes, chevrons, or polka dots.
  • Floral Prints: Embrace a classic and romantic vibe with delicate floral designs.
  • Textured Finishes: Create a tactile experience with textured wallpapers or contact papers that mimic brick, wood, or natural fibers.

Adding Decorative Elements

Beyond color and pattern, you can enhance your tiered plant stands with decorative elements that showcase your personality and interests.

Embellishing with Beads, Stones, or Shells

Create a unique and textural appeal by adhering beads, stones, or shells to the surface of your plant stand. These elements can be arranged in patterns, clusters, or scattered randomly for a more organic look.

  • Glass Beads: Add a touch of sparkle and light reflection with iridescent glass beads.
  • Natural Stones: Incorporate smooth river stones, polished pebbles, or rough-hewn rocks for a rustic and earthy feel.
  • Seashells: Bring the seaside into your home with a collection of seashells arranged in an eye-catching pattern.

Incorporating Fabric and Lace

Introduce a touch of softness and femininity with fabric and lace. Consider these ideas:

  • Fabric Wrap: Wrap the tiers of your plant stand with a beautiful fabric, such as linen, cotton, or burlap, secured with ribbon or twine.
  • Lace Trim: Add a delicate lace trim to the edges of the tiers, creating a refined and romantic look.
  • Fabric Flowers: Attach fabric flowers to the tiers for a charming and whimsical touch.

Utilizing Hardware and Findings

Enhance the visual appeal of your plant stand with hardware and findings. Here are some inspiring ideas:

  • Knobs and Handles: Add decorative knobs or handles to the tiers for a functional and stylish touch. Choose from a variety of materials and styles, such as ceramic, wood, or metal.
  • Metal Accents: Incorporate metal accents like small chains, decorative metal rings, or antique-looking keys to add a touch of industrial chic or vintage flair.
  • Pendant Lights: Suspend miniature pendant lights from the tiers, creating a warm and inviting ambiance, particularly in dimly lit corners.

Creating a Cohesive Theme

To elevate your personalized plant stand, consider choosing a theme that reflects your interests or decor style. Here are some theme ideas:

Bohemian Chic

Embrace a free-spirited vibe with bohemian decor. Paint the plant stand in earthy tones like terracotta or olive green. Adorn it with macrame, beads, feathers, and dried flowers.

Coastal Retreat

Transport yourself to the seaside with a coastal-themed plant stand. Paint it in a light blue or whitewash color. Decorate it with seashells, rope, driftwood, and nautical accents like anchors and stars.

Mid-Century Modern

Embrace the sleek and sophisticated style of mid-century modern. Paint the stand in a bold color like mustard yellow or forest green. Incorporate geometric patterns, metal accents, and minimalist décor.

Industrial Chic

Create a raw and edgy look with an industrial chic theme. Leave the plant stand in its natural wood finish or paint it in a dark gray or black. Decorate it with metal pipes, gears, and vintage industrial finds.

Tips for Adding Personality

Here are some additional tips to help you infuse your plant stand with your personal style:

  • Consider Your Decor: Match the style of your plant stand to your existing furniture and decor.
  • Embrace Imperfections: Don't be afraid to embrace a little imperfection. Distressed finishes, chipped paint, or mismatched elements can add character and charm.
  • Use Natural Elements: Incorporate natural elements like wood, stone, or dried flowers to create a sense of warmth and grounding.
  • Add Personal Touches: Include items that hold special meaning to you, such as a family heirloom, a favorite travel memento, or a cherished piece of art.

Ultimately, the key to personalizing your tiered plant stand is to experiment and have fun. Let your creativity flow and don't be afraid to mix and match different elements to create a unique and expressive piece that reflects your individual style.

Share:

Quick and Easy Wine Racks to Build and Sell for Profit

Quick and Easy Wine Racks to Build and Sell for Profit

Quick and Easy Wine Racks to Build and Sell for Profit

Hey there, fellow DIYers! Are you looking for a fun and profitable woodworking project? Look no further than building and selling wine racks. Wine racks are always in demand, especially with the growing popularity of home bars and wine cellars. Plus, they're relatively easy to build, even for beginners. You can make some good cash with a little time and effort. Let's dive into some quick and easy wine rack designs that are sure to sell!

Simple and Sleek: The Wall-Mounted Wine Rack

This classic design is a winner because it's easy to build, space-saving, and can be customized to fit any style.

Materials You'll Need:

  • Wood boards (pine, oak, or cedar are great choices)
  • Wood glue
  • Wood screws
  • Sandpaper
  • Wood stain or paint (optional)
  • Measuring tape
  • Saw (hand saw, circular saw, or jigsaw)
  • Drill
  • Level

Steps:

  1. Cut the wood to size. You'll need to cut the boards to the desired length for your wine rack. Consider the number of bottles you want to store and the size of your wall space.
  2. Assemble the shelves. Cut and assemble the shelves using wood glue and screws. Make sure the shelves are securely attached and level.
  3. Add support pieces. Cut and attach support pieces to the back of the shelves to create a sturdy base. Use a level to make sure everything is straight.
  4. Sand and finish. Smooth out any rough edges with sandpaper. Apply stain or paint to enhance the look and provide a protective finish. Let dry completely. You can use a clear coat to seal the wood and protect it from spills.
  5. Mount the rack. Choose a location on the wall and use a level to mark the position of the rack. Drill pilot holes for the screws and then attach the rack to the wall securely.

You can add more creative touches by using different wood types or adding decorative elements like metal brackets or a wine bottle holder.

Rustic Charm: The Wine Barrel Rack

Looking for something unique and eye-catching? A wine barrel rack adds a rustic charm to any setting.

Materials You'll Need:

  • Half wine barrel
  • Wood screws
  • Sandpaper
  • Wood stain or paint (optional)
  • Drill

Steps:

  1. Clean and prep the barrel. Remove any excess debris, and give the barrel a good scrub with soap and water. You can also use a wire brush to remove any stubborn dirt.
  2. Sand the barrel. Sand the barrel using sandpaper to smooth out any rough spots. This will make the barrel look more polished and help the finish adhere properly.
  3. Stain or paint (optional). You can stain or paint the barrel to create a custom look that fits your style. A natural wood finish can highlight the rustic look, while a painted barrel can add a pop of color.
  4. Drill holes for bottles. Mark the spots for your bottle holes and drill them with a drill bit that is slightly larger than the diameter of your wine bottles.

Remember to check the diameter of your wine bottles to ensure they fit snugly in the holes. You can also add a decorative piece to the top of the barrel for a more polished look.

Contemporary Style: The Stacked Wine Rack

This modern design is both stylish and functional. It's great for larger wine collections and adds a touch of sophistication to your home bar.

Materials You'll Need:

  • Wood boards (plywood, MDF, or hardwood)
  • Wood glue
  • Wood screws
  • Sandpaper
  • Wood stain or paint (optional)
  • Measuring tape
  • Saw (hand saw, circular saw, or jigsaw)
  • Drill
  • Level

Steps:

  1. Cut the wood to size. Cut the boards to create individual shelf units, making sure they're wide enough to accommodate your bottles and the desired stacking height.
  2. Create the bottle slots. Using a jigsaw or a drill with a special bit, create slots for your wine bottles in each shelf unit. Make sure the slots are wide enough for the bottles but not too loose.
  3. Assemble the units. Use wood glue and screws to connect the shelf units together. Securely attach them to form a stable and attractive stack. Be sure to check for levelness as you go.
  4. Sand and finish. Once the rack is assembled, sand any rough edges and apply a stain or paint (optional) to create a beautiful final look.

You can experiment with different wood types and finishes to create unique variations. A stacked wine rack can also be customized by adding a built-in bottle opener or a small storage space for glasses.

Tips for Success

Here are some tips to make your wine rack building and selling experience a profitable one:

  • Research your market. What kind of wine racks are in demand in your area? Visit local furniture stores and online marketplaces to get an idea of popular styles and price points.
  • Find quality materials at affordable prices. Shop around for wood and hardware at local lumber yards, online retailers, or even salvage yards for unique and cost-effective materials.
  • Focus on quality and craftsmanship. A well-built wine rack is a worthwhile investment. Use sturdy materials and take pride in your workmanship to create a product that people will appreciate.
  • Price competitively. Consider your costs, your time, and the market value when setting your prices. Offer competitive pricing, but don't undervalue your work.
  • Promote your products. Create a website, social media presence, or online marketplace listings to showcase your wine racks. Share photos of your work and highlight the unique features and craftsmanship.
  • Offer excellent customer service. Build positive relationships with your customers by responding promptly to inquiries, being helpful, and going the extra mile to ensure their satisfaction.

Frequently Asked Questions

Q: What kind of wood should I use for a wine rack?

You can use various woods, but pine, oak, and cedar are popular choices. Pine is relatively affordable and easy to work with. Oak is known for its durability and attractive grain patterns. Cedar is naturally insect-resistant and has a pleasant aroma.

Q: How do I finish my wine rack?

You can stain, paint, or use a clear coat to finish your wine rack. A clear coat will protect the wood and enhance its natural beauty. Stains add color and depth, while paints provide a vibrant finish. Choose a finish that complements the style and wood type.

Q: Where can I sell my wine racks?

You can sell your wine racks online on platforms like Etsy, Facebook Marketplace, Craigslist, or Amazon Handmade. You can also sell them locally at craft fairs, farmers markets, or consignment shops. You can even try selling them to local wineries or restaurants.

Q: How do I make my wine racks stand out from the competition?

Offer unique designs, use high-quality materials, focus on craftsmanship, and provide excellent customer service. You can also offer customization options, such as different wood types, finishes, or sizes. Get creative and showcase your personality in your work!

Building and selling wine racks is a great way to unleash your creativity, turn a profit, and add a touch of elegance to people's homes. So, get out there, grab your tools, and start crafting those beautiful wine racks! Good luck!

Share:

人気の投稿

Powered by Blogger.