Elevate Your Minimalist or Modern Home with DIY Floating Shelves
Hey there, design enthusiasts! Tired of bulky bookshelves cluttering your minimalist or modern space? Floating shelves are the perfect solution to seamlessly integrate storage and style. Not only are they visually appealing, but they also offer the flexibility to create a bespoke look that complements your unique aesthetic.
The best part? You don't need to shell out big bucks for fancy pre-made shelves. With a little DIY know-how and a few simple materials, you can craft stunning floating shelves that add a touch of elegance and functionality to your home.
Floating Shelf Styles for Every Space
Before diving into the construction process, let's talk about the different styles of floating shelves you can create. Here are a few ideas to spark your creativity:
Geometric Elegance
Embrace sharp angles and clean lines with geometric floating shelves. Think triangular shapes, rectangular shelves with beveled edges, or even hexagonal designs. These shelves add a touch of modern sophistication and can be customized to fit any corner or wall space.
Industrial Chic
For a rugged and contemporary look, incorporate industrial elements like exposed pipes, metal brackets, or reclaimed wood. These shelves are perfect for showcasing vintage finds, books, or minimalist decor.
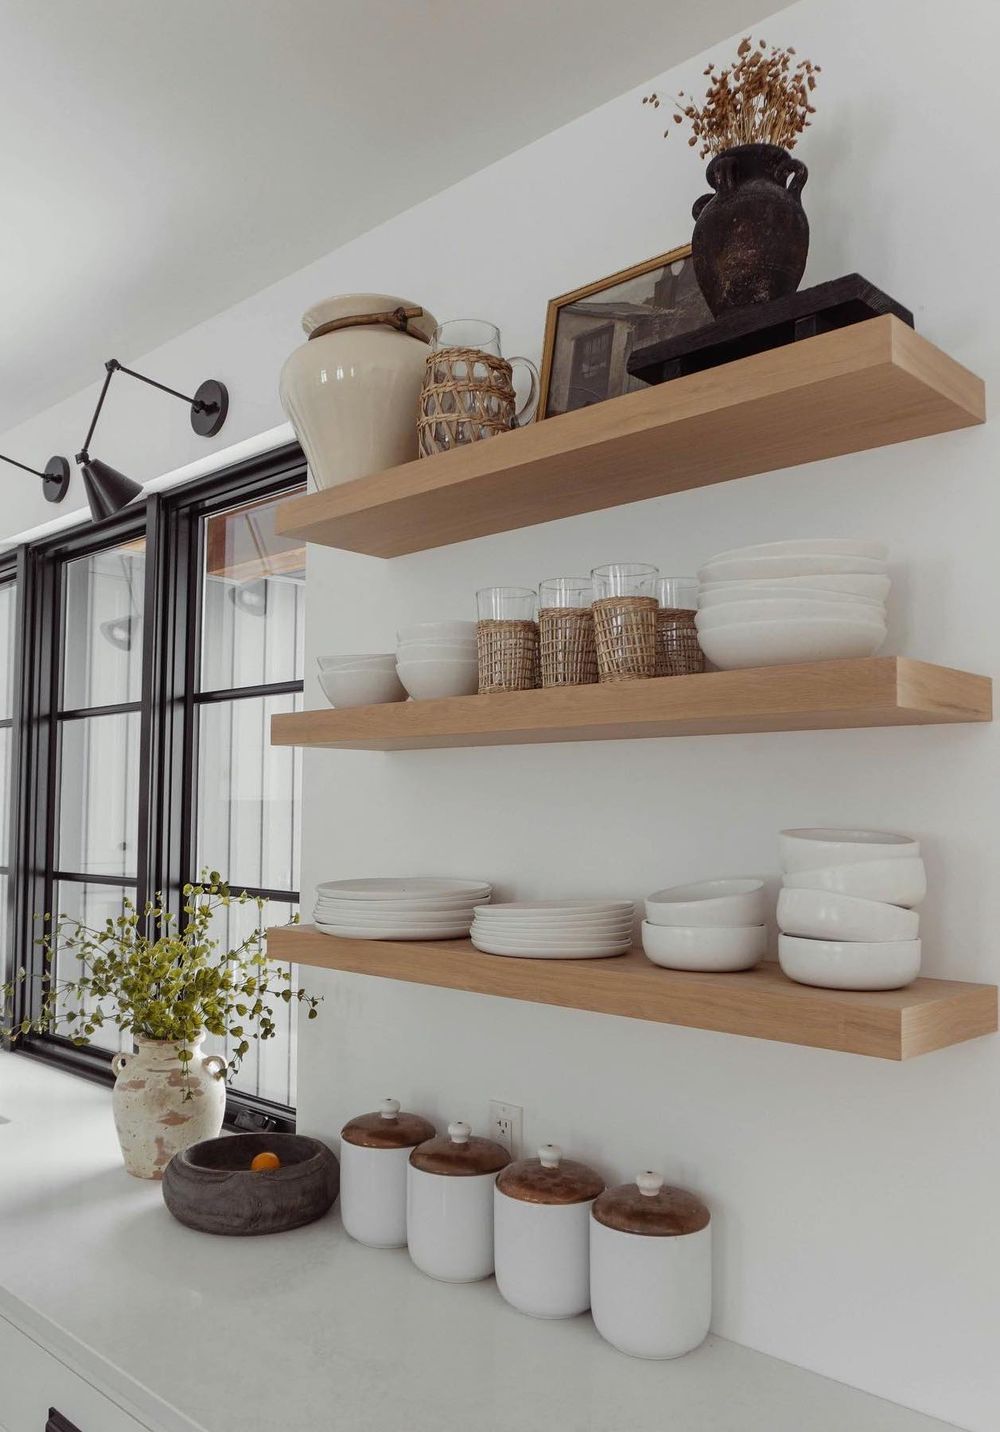
Minimalist Marvels
Keep it simple with minimalist floating shelves. Choose sleek, straightforward designs in neutral tones like white, black, or natural wood. These shelves offer a clean and uncluttered look, allowing your belongings to take center stage.
Essential Materials for Your DIY Project
Now, let's gather the essentials for your floating shelf adventure. Here's a list of materials you'll likely need:
- Wood: Choose a wood type that complements your style. Popular options include plywood, MDF, reclaimed wood, or even bamboo for a sustainable touch.
- Brackets: You can use L-brackets, shelf brackets, or even create custom brackets using metal piping or wood.
- Screws and Anchors: Choose screws that are long enough to securely hold your shelves in place. Use anchors if your walls are drywall or plaster.
- Wood Filler: For a smooth finish, use wood filler to cover any screw holes or imperfections in the wood.
- Sandpaper: Smooth out any rough edges and prepare the surface for painting or staining.
- Paint or Stain: This is entirely up to your personal preference and the style you're aiming for. Choose a color or stain that harmonizes with your existing decor.
- Measuring Tape, Level, and Pencil: These tools are essential for precise marking and placement of your shelves.
- Safety Glasses and Gloves: Always prioritize safety when working with tools.
Crafting Your Floating Shelves: A Step-by-Step Guide
Ready to bring your floating shelf vision to life? Follow these simple steps:
- Plan and Measure: Determine the size, shape, and number of shelves you'll create. Use a measuring tape to mark the exact location on your wall where you want to install your shelves. Make sure the placement is level for a polished look.
- Cut the Wood: Using a saw, carefully cut your wood to the desired dimensions. If you're working with plywood or MDF, be sure to cut with the grain for a clean, consistent cut.
- Install the Brackets: Mark the wall where you want to install your brackets. Use a drill to make pilot holes, then secure the brackets to the wall with the appropriate screws. Make sure the brackets are level and at the correct height for your shelves.
- Attach the Shelves: Place your shelves on the brackets and secure them with screws. Use wood filler to cover any screw holes for a seamless appearance. If you're using L-brackets, you can typically attach the shelves from underneath.
- Sand, Prime, and Finish: Sand your shelves to smooth out any rough edges. If you're painting, apply a primer before applying your chosen paint color. If you're staining, apply a wood stain for a natural and warm finish.
- Decorate and Enjoy! Finally, arrange your belongings and enjoy your beautiful new floating shelves. Get creative and let your personality shine through in your display.
Tips for Success
Here are a few extra tips to ensure your DIY floating shelves are a triumph:
- Practice Makes Perfect: If you're new to DIY projects, it's always a good idea to practice cutting and assembling your shelves on scrap wood before working with your final materials.
- Double-Check Your Measurements: Accuracy is key for a professional-looking finish. Take your time and double-check your measurements to ensure your shelves are properly aligned.
- Use Quality Materials: Invest in durable and high-quality materials for shelves that will last. A sturdy wood base and strong brackets are essential for long-term stability.
- Prioritize Safety: Always wear safety glasses and gloves when working with tools. Use a work surface that is stable and free of clutter.
- Don't Be Afraid to Get Creative: Floating shelves offer endless possibilities for design and customization. Have fun with it and let your imagination run wild!
Commonly Asked Questions
We've addressed some of the most common questions about DIY floating shelves. Let's dive into these FAQs:
What if my walls are drywall?
Drywall is a common wall material, and you'll need to use anchors to ensure your floating shelves are securely mounted. There are many types of anchors available, so choose ones that are appropriate for the weight of your shelves and the thickness of your drywall. Follow the instructions on the anchor packaging for proper installation.
How do I choose the right brackets?
The type of brackets you choose will depend on the weight of your shelves and the style you're going for. L-brackets are a common choice for lightweight shelves, while shelf brackets or custom-made brackets are better suited for heavier loads. Consider the thickness of your shelves and the material they're made from when choosing brackets.
What if my shelves aren't perfectly level?
A level is your best friend for this project. Use a level to ensure your brackets are installed at the same height and that your shelves are perfectly horizontal. If your shelves are slightly off, you can adjust them by adding shims or spacers underneath.
Can I use floating shelves for anything?
Absolutely! Floating shelves are incredibly versatile and can be used for a wide range of purposes. Here are a few ideas:
- Bookshelf: Showcase your favorite books or create a cozy reading nook.
- Display Shelf: Arrange decorative items, art pieces, or family photos.
- Kitchen Storage: Organize spices, cookbooks, or decorative plates.
- Bathroom Organizer: Store towels, toiletries, or decorative baskets.
- Bedroom Accent: Add a touch of style with nightstands, plant shelves, or jewelry organizers.
So, get ready to embrace the minimalist or modern aesthetic in your home with these DIY floating shelf ideas! Remember, the key is to choose materials that reflect your style and to have fun with the process. With a little creativity and effort, you can create a stunning and functional storage solution that elevates your space.


No comments:
Post a Comment
Note: Only a member of this blog may post a comment.