Easy and budget-friendly woodworking ideas for creating personalized wood crafts and home accents.

How to Craft Wooden Key Racks That Double as Wall Art

How to Craft Wooden Key Racks That Double as Wall Art

Craft Wooden Key Racks That Double as Wall Art

Transform your entryway from mundane to magnificent with a handcrafted wooden key rack that seamlessly blends function and aesthetics. This project is a perfect fusion of practicality and artistic expression, allowing you to create a unique and personalized piece that reflects your style. Let's embark on this exciting journey of crafting a beautiful and functional key rack that will be the envy of your guests.

Gathering Your Materials and Tools

Before you dive into this project, it's essential to gather the necessary materials and tools. This will ensure a smooth and enjoyable crafting experience. Here's what you'll need:

Materials

  • Wooden board (choose a wood type that complements your décor)
  • Wooden dowels or hooks (consider the size and number of keys you need to hang)
  • Wood glue
  • Wood stain or paint (to enhance the wood's natural beauty or create a vibrant look)
  • Sandpaper (different grits for smoothing and finishing)
  • Finishing oil or sealant (for protection and durability)
  • Screws or nails

Tools

  • Saw (to cut the wooden board and dowels to your desired length)
  • Drill (for pre-drilling holes for the dowels or hooks)
  • Measuring tape and pencil
  • Level (for ensuring the key rack is hung straight)
  • Hammer or screwdriver
  • Safety glasses (to protect your eyes)

Designing Your Key Rack Masterpiece

Now, let's unleash your creativity and design a key rack that reflects your unique style. Here are some ideas to ignite your inspiration:

Shape and Size

  • Rectangular: This classic shape offers a timeless and versatile design.
  • Round: A circular key rack adds a touch of whimsy and sophistication to your entryway.
  • Geometric: Explore the possibilities of triangles, squares, or even hexagonal key racks for a modern and edgy aesthetic.
  • Customized: Don't be afraid to experiment with unique shapes or even incorporate initials or meaningful symbols into your design.

Dowels or Hooks

  • Dowels: Create a rustic and charming look with dowels, and choose different diameters to add visual interest.
  • Hooks: Select decorative hooks to enhance the overall aesthetic of your key rack.

Finishing Touches

  • Wood Stain: Enhance the natural beauty of the wood by choosing a stain that complements your décor.
  • Paint: Add a splash of color and personality to your key rack with paint in your favorite hues.

Crafting Your Key Rack: Step by Step

Now, let's get our hands dirty and create your personalized key rack. Follow these steps carefully for a successful project:

  1. Cut the Wooden Board: Using a saw, cut the wooden board to your desired dimensions, ensuring the shape matches your design.
  2. Sand the Board: Smooth the edges and surface of the board using sandpaper, starting with coarser grits and progressing to finer grits for a polished finish.
  3. Mark Dowel or Hook Positions: Measure and mark the locations on the board where you want to install the dowels or hooks. Consider the size and spacing for optimal functionality.
  4. Pre-Drill Holes (If Needed): If using dowels, pre-drill holes slightly smaller than the dowel diameter to ensure smooth insertion.
  5. Attach Dowels or Hooks: Secure the dowels or hooks to the board using wood glue and screws or nails, ensuring they are firmly attached.
  6. Stain or Paint: Apply the stain or paint to the entire key rack, following the manufacturer's instructions for application and drying time.
  7. Apply Finishing Oil or Sealant (Optional): To protect your key rack from wear and tear, apply a finishing oil or sealant as per the manufacturer's instructions.
  8. Hang Your Key Rack: Carefully hang your completed key rack on the wall using a level to ensure it is straight.

Adding Personal Touches to Your Key Rack

With your key rack complete, it's time to add those unique touches that make it truly yours.

  • Embellishments: Consider adding decorative elements like metal accents, small ceramic tiles, or even engraved wooden plaques for a personalized look.
  • Custom Hooks: Choose hooks that reflect your interests, like animal silhouettes or whimsical shapes, for a playful touch.
  • Lighting: Enhance the visual appeal of your key rack with strategically placed accent lighting. This can highlight the wood grain or create a warm and inviting ambiance.
  • Wall Decor: Integrate the key rack into your entryway decor by incorporating complementary wall art, mirrors, or decorative plants for a cohesive and stylish aesthetic.

Conclusion

Congratulations! You have now created a functional and visually stunning wooden key rack that adds a touch of artistry to your entryway. This project showcases your creativity and DIY skills, leaving you with a piece that you'll proudly display for years to come. So, get ready to welcome guests with a charming and practical key rack that reflects your unique style.

Share:

How to Build Wooden Shoe Racks for Under-the-Bed Storage

How to Build Wooden Shoe Racks for Under-the-Bed Storage

Build Your Own Under-the-Bed Shoe Storage: A DIY Guide

Tired of shoe clutter taking over your entryway or bedroom? You're not alone! Many people struggle with shoe storage, especially if you're a sneakerhead or just have a lot of footwear. But what if I told you there's a simple and stylish solution right under your bed? That's right, building your own under-the-bed shoe racks is a fantastic way to maximize your space and keep those kicks organized. And the best part? It's a DIY project even beginners can tackle!

Ready to get started? Let's dive into the world of under-the-bed shoe rack building. We'll cover everything from choosing the right materials to assembling your new storage solution with step-by-step instructions. So, grab your tools and let's build!

Materials You'll Need

Before we get our hands dirty, let's gather all the necessary materials. You'll need:

  • Wood: Pine or plywood are great budget-friendly options, while hardwoods like oak or maple add durability and a classic touch. You'll need boards for the rack's frame and shelves. Think about how many shelves you need based on your shoe collection.
  • Wood Glue: This helps ensure sturdy and long-lasting connections.
  • Wood Screws: Choose screws that are long enough to penetrate through the boards and into the frame.
  • Screwdriver or Drill: Make sure you have a driver bit that matches your screw size.
  • Sandpaper: Sand the wood to create a smooth surface and prevent splinters.
  • Wood Stain or Paint (Optional): Personalize your shoe rack with a stain or paint that complements your decor.
  • Measuring Tape: Crucial for getting your measurements right.
  • Pencil: For marking cuts and assembly lines.
  • Safety Glasses: Protect your eyes from sawdust and flying debris.
  • Saw: Choose a saw that's comfortable to use and appropriate for the thickness of your wood. A circular saw or jigsaw is perfect for precise cuts.
  • Clamps: Help hold pieces together while gluing and screwing.

Tip: If you don't have all the necessary tools, consider renting them from a local hardware store. It's a great way to save money on expensive tools you might only use once.

Planning Your Shoe Rack Design

Now that you've gathered your materials, let's plan the perfect shoe rack for your needs. Think about:

  • Dimensions: Measure the space under your bed carefully to determine the width and depth of your shoe rack. Remember to leave some clearance for easy access and sliding the rack in and out.
  • Height: Consider the height of your shoes. You'll need enough vertical space for your tallest heels or boots.
  • Number of Shelves: How many shelves do you need to store your entire collection comfortably? More shelves mean more storage space, but it can also make the rack heavier and harder to move. Strike a balance based on your needs.
  • Style: Do you want a simple, minimalist design, or something more elaborate? You can add decorative touches like trim, molding, or decorative hardware. Let your creativity run wild!
  • Mobility: Do you want to be able to easily slide the rack in and out from under the bed? If so, consider adding casters to the bottom of the rack.

Step-by-Step Construction

Get ready to put your design into action! Here's a detailed guide for building your under-the-bed shoe rack:

1. Cut the Wood

  • Cut your wood boards to the desired dimensions according to your plan.
  • Use a measuring tape and pencil to mark your cuts precisely.
  • Double-check your measurements before making any cuts!

2. Build the Frame

  • Create the frame of your shoe rack by joining together the longer side pieces.
  • Align the boards with the edges flush and use wood glue and screws to secure them together.
  • Repeat this process for the shorter side pieces, creating a rectangular frame.
  • Use clamps to hold the boards in place while the glue dries.

3. Add the Shelves

  • Cut the shelf boards to the width of your frame.
  • Attach the shelves to the inside of the frame, using wood glue and screws to ensure stability.
  • Space the shelves according to your desired shoe storage needs.

4. Sand and Finish

  • Once the glue has dried completely, sand the entire surface of the shoe rack with sandpaper. This creates a smooth finish and removes any rough edges.
  • Apply wood stain or paint, if desired, to add color and protect the wood. Follow the manufacturer's instructions for application and drying time.

5. Optional: Add Casters

  • For added mobility, attach casters to the bottom of the shoe rack.
  • This will make it easier to slide the rack in and out from under the bed.

Tips for Success

Here are some helpful tips to make your under-the-bed shoe rack building experience smoother:

  • Plan ahead: Sketch out your shoe rack design before you start cutting wood. This will help you visualize the final product and prevent mistakes.
  • Measure twice, cut once: Accuracy is crucial in woodworking. Double-check your measurements before making any cuts to ensure the pieces fit together perfectly.
  • Use clamps: Clamps are essential for holding pieces together while gluing and screwing. They prevent the wood from shifting and ensure a strong bond.
  • Sand thoroughly: Thorough sanding is important for a smooth and splinter-free finish. Sand the entire surface of your shoe rack, paying special attention to the edges and corners.
  • Don't rush the drying time: Allow the glue to dry completely before moving on to the next step. This ensures a strong and lasting bond.
  • Have fun! Building a shoe rack can be a rewarding project. Enjoy the process, and don't be afraid to get creative.

Commonly Asked Questions

Here are some frequently asked questions about under-the-bed shoe racks:

How much does it cost to build a shoe rack?

The cost of building a shoe rack varies depending on the materials you choose. Pine and plywood are budget-friendly options, while hardwoods like oak or maple will be more expensive. You can expect to spend anywhere from $20 to $100 for materials, depending on your design and choice of wood.

What is the best type of wood to use for a shoe rack?

Pine and plywood are excellent choices for shoe racks because they are affordable, lightweight, and easy to work with. Hardwoods like oak or maple are more durable and resistant to scratches, but they are also more expensive. Ultimately, the best wood for your shoe rack depends on your budget and desired aesthetic.

Can I stain or paint a shoe rack?

Absolutely! Staining or painting a shoe rack is a great way to personalize it and match your décor. Choose a stain or paint color that complements your bedroom or entryway. You can also add decorative touches like stencils, trim, or molding.

How do I make a shoe rack more durable?

Use high-quality wood and hardware. Choose screws that are long enough to penetrate through the boards and into the frame. Apply wood glue liberally to create a strong bond between the pieces. And don't forget to sand thoroughly to prevent splinters and ensure a smooth finish.

Now that you have all the information you need, grab your tools, get creative, and start building your own under-the-bed shoe rack! It's a fun and rewarding project that will help you get organized and make the most of your space.

Share:

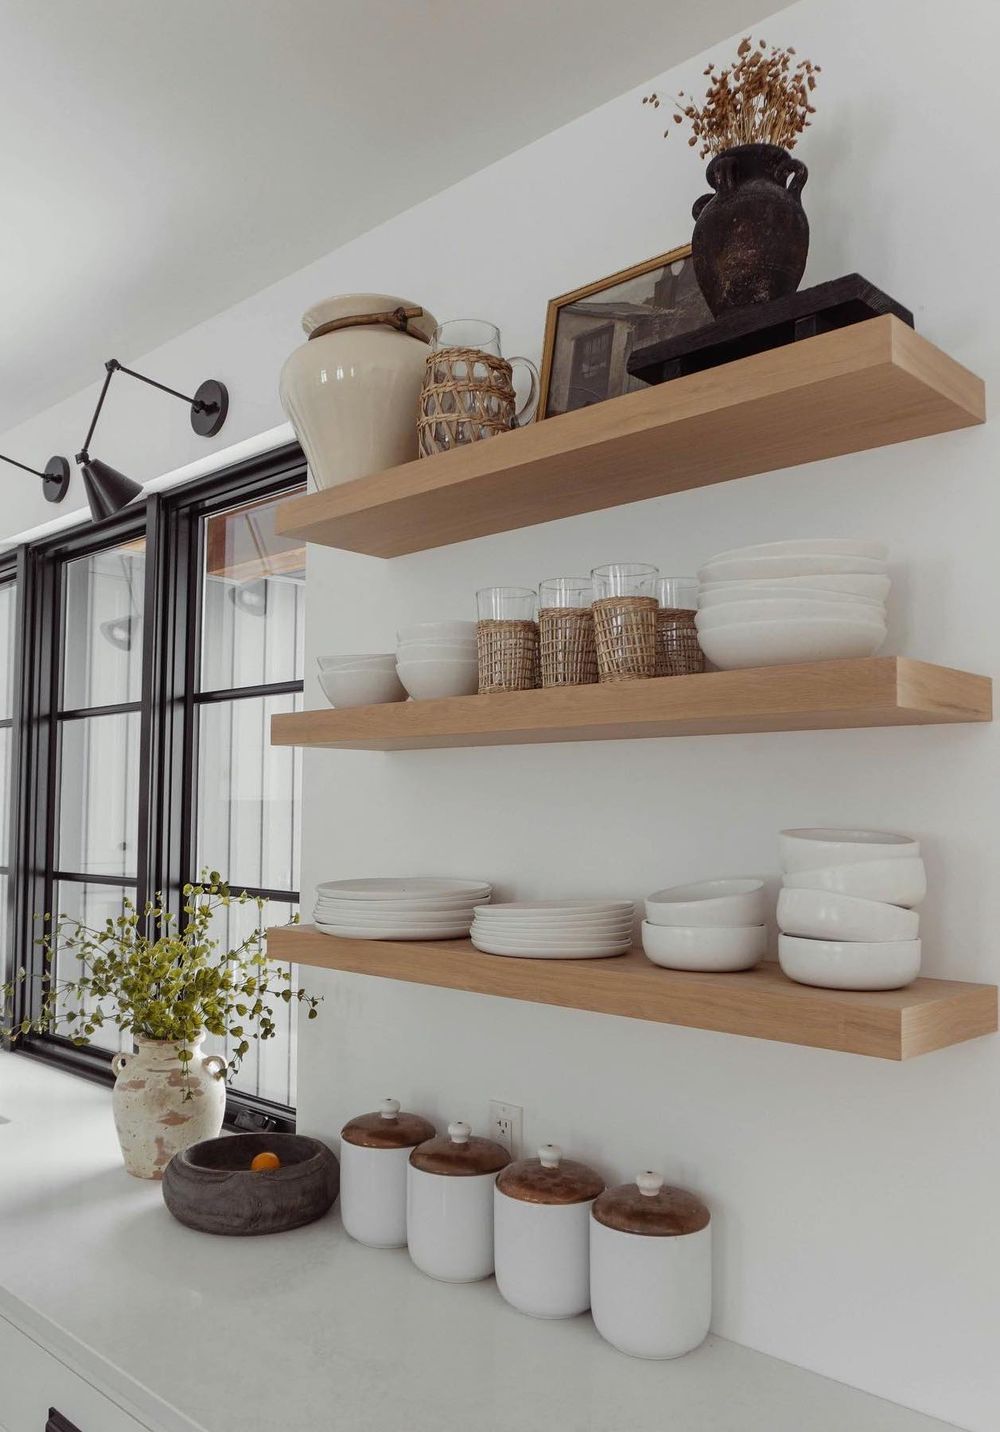
How to Build Floating Shelves for a Minimalist Look

How to Build Floating Shelves for a Minimalist Look

Building Floating Shelves for a Minimalist Look: A Step-by-Step Guide

Floating shelves are a fantastic way to add storage and visual interest to any room while maintaining a clean and minimalist aesthetic. They seamlessly blend into the wall, creating a sleek and modern look. Building your own floating shelves allows you to customize the size, materials, and finish to perfectly complement your decor. This guide will walk you through the process of creating stylish and functional floating shelves that add a touch of sophistication to your space.

Choosing the Right Materials

The first step is to select the materials that best suit your needs and design preferences. For a minimalist look, consider these options:

Wood

Wood is a classic choice for floating shelves, offering a natural warmth and versatility. Choose hardwoods like maple, cherry, or walnut for durability and a rich grain pattern. For a lighter, more modern feel, opt for lighter wood species such as birch or pine.

Metal

Metal shelves, especially in sleek finishes like brushed nickel or black powder coat, provide a contemporary and industrial vibe. Consider using steel or aluminum for durability and a minimalist appearance.

Other Materials

While less common, materials like acrylic or even concrete can be used to create unique floating shelves. Acrylic provides a transparent and modern look, while concrete offers a rustic and industrial feel. Choose materials based on the overall design of your room.

Planning and Measuring

Before you begin cutting and assembling, it’s crucial to plan and measure your shelf space. This ensures a perfect fit and a visually pleasing result.

  • Determine the shelf size and placement: Consider the size of your books, decorative items, and other belongings you want to display on the shelves. Measure the wall space and choose shelf sizes that are both functional and aesthetically pleasing. Leave enough space between shelves for items to be easily viewed and accessed.
  • Decide on the shelf depth: Most floating shelves range in depth from 6 to 12 inches. A shallower shelf works well for decorative items, while deeper shelves are suitable for books or other heavier items. Choose a depth that complements the scale of your wall and the overall room design.
  • Mark the shelf locations on the wall: Using a level and pencil, mark the desired positions for your shelves on the wall. Make sure the marks are accurate and aligned for a seamless look.

Cutting and Assembling the Shelf

Once you’ve planned your shelf placement, it’s time to cut and assemble the shelves. This process will vary slightly depending on the material you’ve chosen.

Cutting Wood Shelves

Use a saw, such as a circular saw or miter saw, to cut your wood to the desired dimensions. Remember to account for any brackets or supports that will be used to secure the shelf to the wall. Sand the edges of the cut wood to create a smooth finish.

Assembling Metal Shelves

Metal shelves may come pre-assembled or require simple assembly. Follow the manufacturer’s instructions for assembling the shelf components. If you’re creating a custom metal shelf, consider using a metal bending tool or seeking assistance from a metal fabrication professional.

Installing the Shelf Supports

The shelf supports are the hidden heroes of a floating shelf. They securely attach the shelf to the wall, ensuring stability and safety. There are various types of shelf supports, including metal brackets, L-brackets, and hidden support systems.

  • Choose the right supports: Select shelf supports that are strong enough to hold the weight of your items. If you are using heavier materials for your shelves, choose robust supports. Consider using multiple supports for longer shelves or shelves that will hold a heavy load.
  • Attach the supports to the wall: Use a stud finder to locate wall studs, which will provide the most secure anchoring for the shelf supports. If you are unable to attach the supports to studs, use heavy-duty anchors rated for the weight of the shelf and its contents. Align the supports with the marks you made on the wall, and secure them using screws or fasteners.

Finishing Touches

Once the shelf supports are securely in place, you can install the shelf. This typically involves simply sliding or attaching the shelf onto the supports.

Finishing Wood Shelves

If you are using wood, you can stain, paint, or varnish the shelves to create a desired finish. Consider sanding the shelves with progressively finer sandpaper before applying any finish for a smooth and professional look.

Finishing Metal Shelves

Metal shelves often have a pre-existing finish. If you want to customize the finish, you can use metal paint or other coatings. Ensure that the finish is compatible with the metal type.

Decorating Your Floating Shelves

Now that your floating shelves are installed, it’s time to showcase your personality and style with carefully chosen decorative elements.

Minimalist Decor Ideas

Remember, the key to a minimalist aesthetic is to create a clean, uncluttered, and visually appealing display.

  • Prioritize functionality: Choose items that serve a purpose, whether it’s storing books, displaying artwork, or showcasing your favorite collectibles.
  • Maintain a consistent color palette: A limited color scheme helps create a cohesive and calming look. Stick to neutral colors like black, white, gray, or earthy tones.
  • Use negative space effectively: Avoid overcrowding the shelves. Allow for visual breathing room by leaving some empty space between items.
  • Create a focal point: Highlight a single piece or grouping of items that draw attention to the shelves and add a touch of visual interest.

With a little planning and care, you can create a stylish and functional set of floating shelves that enhance your minimalist decor and create a space that is both beautiful and practical.

Share:

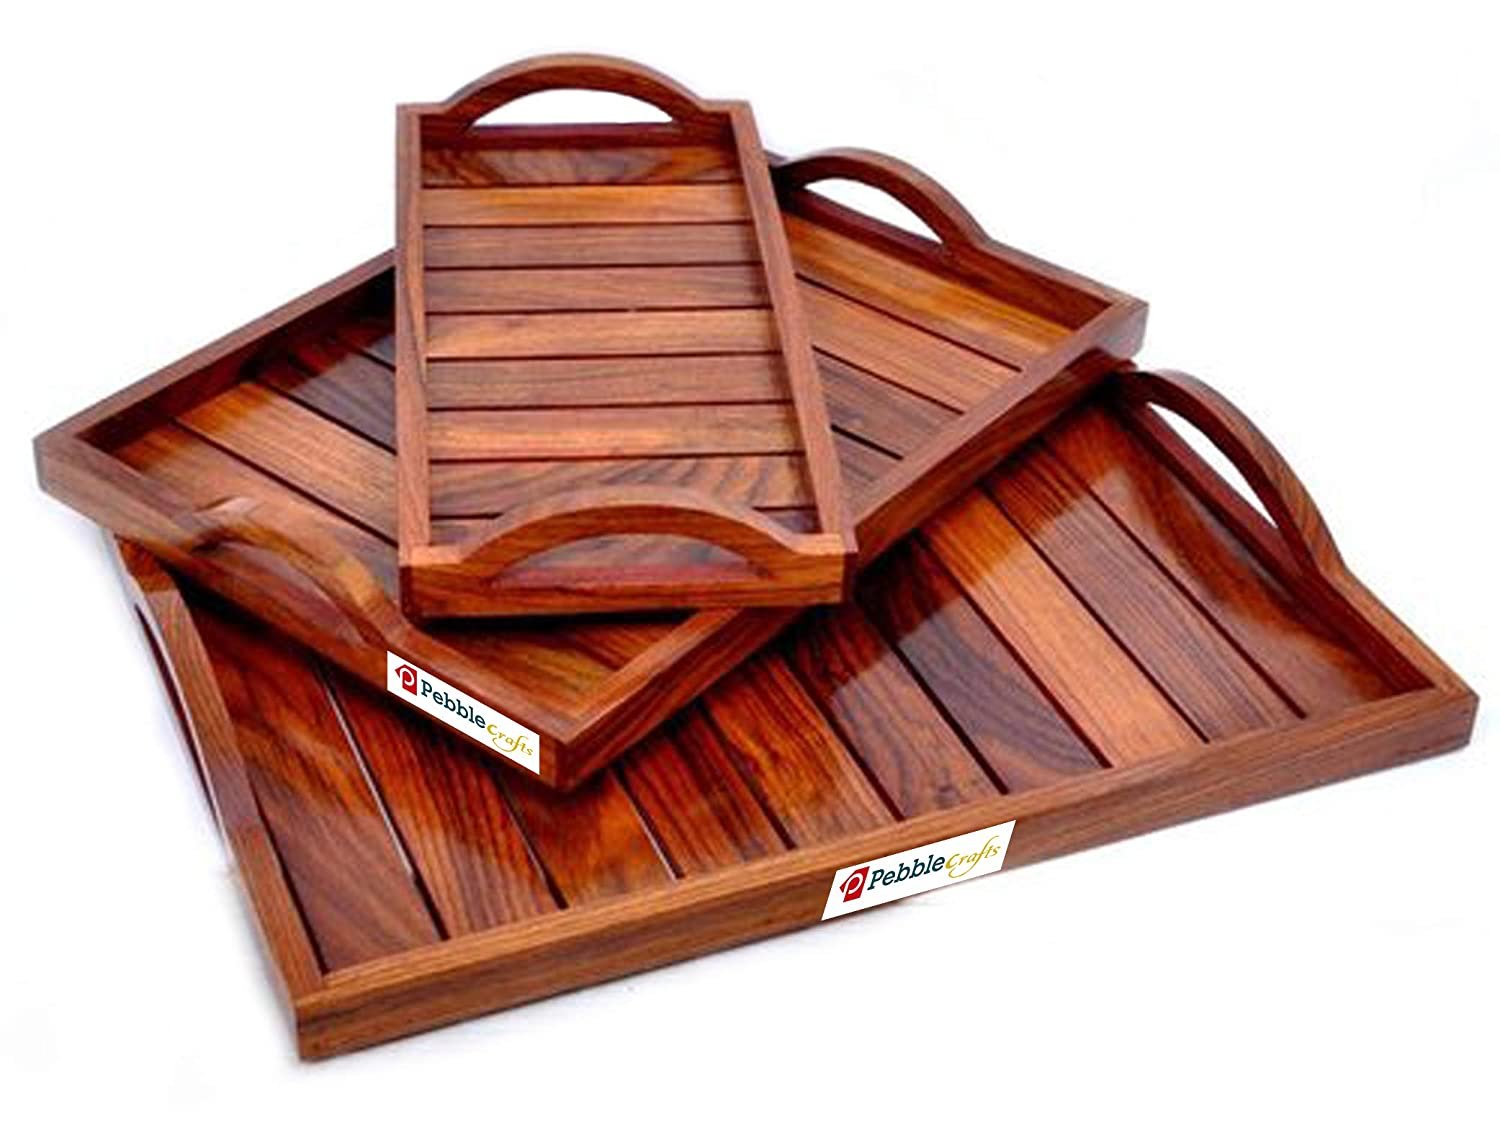
Wooden Serving Trays That Are Both Functional and Stylish

Wooden Serving Trays That Are Both Functional and Stylish

Wooden Serving Trays: Blending Functionality and Elegance

In the realm of culinary artistry, serving trays transcend mere utility. They emerge as canvases upon which to showcase culinary masterpieces, elevating dining experiences to new heights. Wooden serving trays, in particular, possess an inherent charm that seamlessly blends functionality with aesthetic appeal. Their warm, natural textures and timeless designs impart an air of sophistication to any setting. Whether adorning a formal dinner table or adding a touch of rustic charm to a casual gathering, these versatile pieces serve as the foundation for unforgettable moments.

A Symphony of Functionality and Style

Wooden serving trays embody the essence of practicality intertwined with elegance. Their robust construction ensures durability, capable of withstanding the weight of even the most elaborate culinary creations. The generous surface area provides ample space for a multitude of dishes, allowing for a cohesive and visually pleasing presentation. Whether serving appetizers, desserts, or a complete meal, wooden serving trays offer a stable and secure platform for transporting and showcasing culinary delights.

A Culinary Canvas

The smooth, even surface of a wooden serving tray serves as a blank canvas for culinary expression. It provides a neutral backdrop that allows the vibrant colors and intricate details of dishes to take center stage. The natural warmth of the wood enhances the visual appeal of food, creating a harmonious symphony of textures and hues.

Versatility in Design

Wooden serving trays are available in a multitude of shapes, sizes, and finishes, offering boundless possibilities for customization. From rectangular trays that exude classic elegance to oval trays that bring a touch of whimsy, there is a design to complement every taste and style. The choice of wood species, such as acacia, mango, or teak, influences the grain pattern and color, adding a unique character to each piece.

The Allure of Natural Beauty

The intrinsic appeal of wood lies in its natural beauty. Each piece of wood possesses a unique grain pattern and texture, making each serving tray a one-of-a-kind masterpiece. The warm hues and tactile quality of wood evoke a sense of comfort and sophistication, adding a touch of rustic charm to any setting. Whether polished to a high gloss or left with a natural finish, wooden serving trays bring a touch of organic elegance to the dining experience.

A Touch of Rustic Charm

For a more relaxed and informal setting, wooden serving trays with a rustic finish are ideal. These trays often retain the natural imperfections of the wood, showcasing knots and grain patterns that add character and warmth. Their unpolished aesthetic complements casual gatherings, adding a touch of earthy charm to the ambiance.

Sophisticated Elegance

When a touch of sophistication is desired, wooden serving trays with polished finishes are the perfect choice. These trays often feature smooth, sleek surfaces that reflect light, enhancing their elegant appearance. Their polished aesthetic complements formal dinners and upscale gatherings, creating a refined and sophisticated ambiance.

Functionality Beyond Serving

Wooden serving trays transcend their culinary purpose, embracing a multitude of applications throughout the home. Their versatility extends beyond the dining table, finding a place in various living spaces.

Home Décor Essentials

Wooden serving trays can transform into decorative accents, adding warmth and charm to any room. They can be styled with candles, flowers, or decorative objects, creating a visually captivating centerpiece for a coffee table or console. Their natural beauty complements a range of interior design styles, from farmhouse chic to modern minimalist.

Practical Solutions for Everyday Life

Wooden serving trays offer practical solutions for everyday tasks. They can be used to organize essentials in a bathroom or bedroom, providing a stylish and functional platform for toiletries, jewelry, or personal accessories. In a living room, they can serve as a convenient way to gather remote controls, magazines, or books, keeping clutter at bay.

Maintaining the Beauty of Wooden Serving Trays

To preserve the beauty and functionality of wooden serving trays, proper care and maintenance are essential.

Cleaning and Care

Wooden serving trays are generally easy to clean. For everyday cleaning, simply wipe them down with a damp cloth and mild soap. Avoid using harsh chemicals or abrasive cleaners, as they can damage the wood's finish. For more stubborn stains, a gentle wood cleaner can be used. After cleaning, dry the tray thoroughly to prevent warping.

Protecting the Finish

To prevent scratches and stains, apply a food-safe wood sealant or oil to the surface of the tray. Regular application of oil or sealant will help to maintain the tray's moisture balance and protect it from the elements. When not in use, store wooden trays in a cool, dry place, away from direct sunlight.

Conclusion

Wooden serving trays seamlessly merge functionality with style, adding a touch of warmth and elegance to any setting. Their natural beauty, durability, and versatility make them indispensable pieces for both culinary enthusiasts and home décor aficionados. Whether serving a gourmet meal or creating a cozy ambiance, wooden serving trays offer a timeless and enduring element of sophistication, elevating everyday moments to extraordinary experiences.

Share:

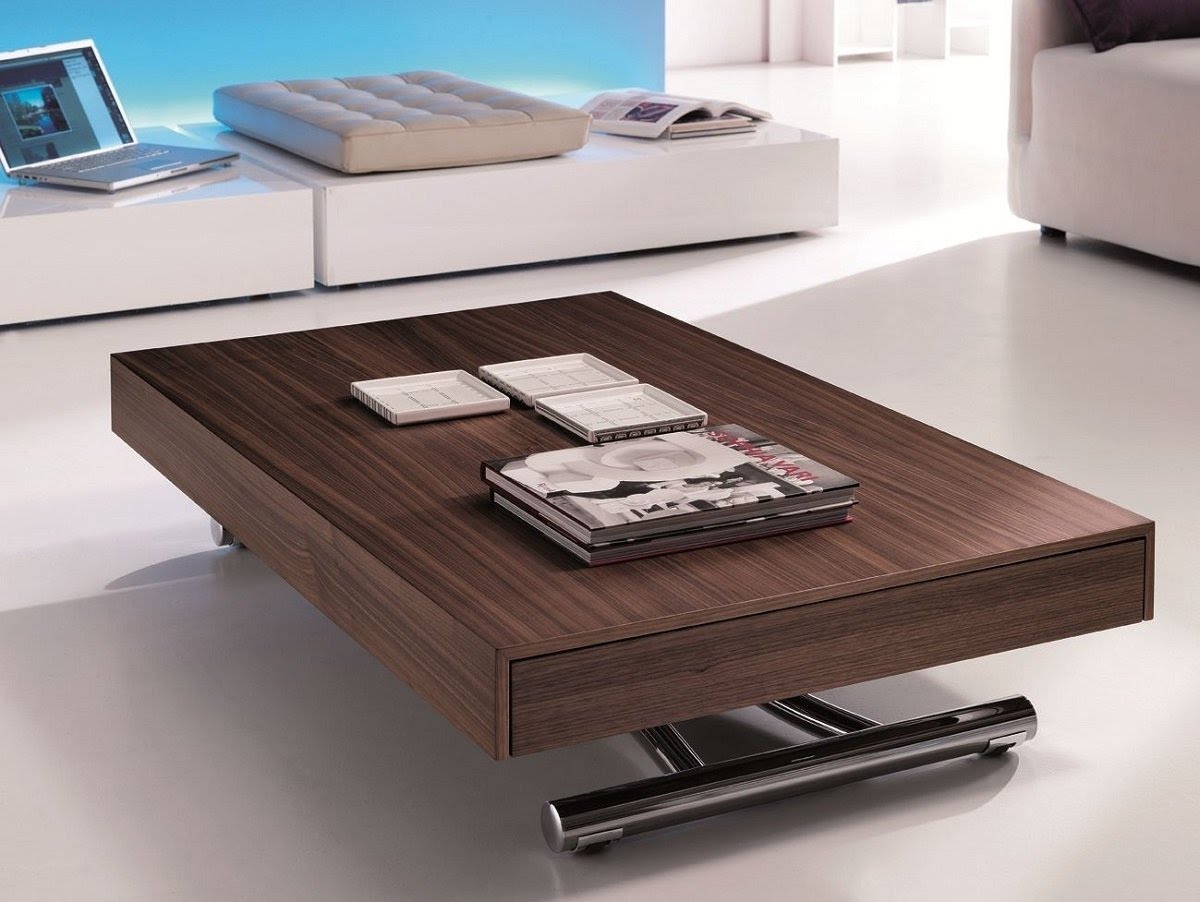
How to Build Coffee Tables with Adjustable Height for Versatility

How to Build Coffee Tables with Adjustable Height for Versatility

How to Build Coffee Tables with Adjustable Height for Versatility

A coffee table is a staple in any living room, but what if you could make it even more versatile? Imagine having a coffee table that can easily transform into a dining table, a desk for working from home, or a platform for a cozy movie night. With adjustable height, you can achieve all this and more.

Choosing the Right Materials

The first step is choosing the right materials for your adjustable coffee table. You can opt for a sturdy wood frame with a tabletop made from your choice of wood, glass, or even metal. For the adjustable mechanism, you can consider using:

  • Gas lift mechanisms: These are common in office chairs and provide smooth, effortless height adjustments.
  • Hand crank mechanisms: These offer a more budget-friendly option and are often seen in industrial furniture.
  • Telescoping legs: These provide simple adjustments but require more manual effort.

Building the Frame

Once you have your materials, you can start building the frame. Begin by cutting the wood pieces for the base to the desired dimensions. Use a drill to create pilot holes before inserting screws to prevent wood from splitting. Attach the tabletop to the frame with strong adhesives and screws. Ensure all joints are tight and secure for stability.

Installing the Adjustable Mechanism

The next step is to install the chosen adjustable mechanism. For gas lift mechanisms, you will need to attach a plate to the underside of the tabletop and another plate to the base frame. Insert the gas lift cylinder between these plates, ensuring it is securely attached. For hand crank mechanisms, attach the crank to the base frame and the lifting mechanism to the underside of the tabletop. For telescoping legs, attach the legs to the base frame, making sure they can extend and retract smoothly.

Adding Finishing Touches

After the frame and adjustable mechanism are complete, it's time to add the finishing touches. You can sand down any rough edges and apply stain or paint to your desired color and finish. For a more polished look, consider adding a protective coating like polyurethane or varnish.

Safety Tips

Remember to always prioritize safety while building your adjustable coffee table. Wear safety glasses, gloves, and appropriate clothing. Use tools properly and be cautious when working with power tools. Take breaks to avoid fatigue, and always double-check your measurements and connections before proceeding to the next step.

Enjoying Your Versatile Coffee Table

Once your adjustable coffee table is complete, you'll be able to enjoy its versatility. From coffee time to dinner parties, from working at home to movie nights, your new creation will seamlessly adapt to your needs. With a little effort and the right materials, you can build a coffee table that truly enhances your living space.

Share:

Profitable Wall Shelf Ideas for Beginners to Build and Sell

Profitable Wall Shelf Ideas for Beginners to Build and Sell

Profitable Wall Shelf Ideas for Beginners to Build and Sell

Are you looking for a fun and rewarding woodworking project that can also generate some extra income? Building and selling wall shelves is a great option for beginners, as it's relatively easy to learn and offers a wide range of customization possibilities. With a little creativity and effort, you can create beautiful and functional shelves that will appeal to a variety of customers.

The best part? You don't need a fancy workshop or expensive tools to get started. With basic woodworking skills and some readily available materials, you can craft stunning shelves that will enhance any home décor.

When it comes to wall shelves, the possibilities are endless. Here are a few popular styles that are always in demand:

Floating Shelves

Floating shelves are a modern and minimalist design that creates the illusion that the shelves are floating in mid-air. They're perfect for showcasing decorative items, books, or plants. You can build these shelves using simple materials like plywood, MDF, or reclaimed wood. Be sure to use sturdy brackets or hidden supports to ensure they are securely mounted.

Corner Shelves

Maximize space and add a touch of charm to your room with corner shelves. These shelves are ideal for fitting into tight corners, making them perfect for small apartments or rooms with limited wall space. You can create single or multi-tiered corner shelves, using wood, metal, or even acrylic to suit your style and the customer's preference.

Ladder Shelves

Ladder shelves offer a unique and rustic aesthetic that's perfect for adding character to any room. They can be made using reclaimed wood or new lumber, and they come in a variety of sizes and designs. You can create simple ladder shelves with a few horizontal rungs or add additional features like drawers or baskets for extra storage.

Industrial Shelves

Industrial shelves are a popular choice for those who appreciate a modern, edgy style. These shelves often feature exposed metal brackets or pipes, paired with wood or metal shelves for a raw and functional look. You can experiment with different metal finishes and wood stains to create unique industrial designs.

Tips for Success

Here are some tips to help you succeed in building and selling profitable wall shelves:

  • Identify your target market. Who are you trying to reach with your shelves? Are you targeting home décor enthusiasts, minimalist shoppers, or those seeking rustic charm?
  • Research your competitors. See what other sellers are offering and identify any gaps in the market that you can fill. Consider offering unique designs or using sustainable materials to stand out.
  • Create a strong brand identity. Develop a consistent look and feel for your business, including a logo, website, and social media presence. This will help customers recognize and remember your brand.
  • Take high-quality photos. Showcase your shelves in well-lit, attractive settings to entice potential buyers. Consider hiring a professional photographer if needed.
  • Price your shelves competitively. Research your costs and consider your time and effort when setting your prices. Offer discounts for bulk orders or seasonal promotions.
  • Provide excellent customer service. Respond promptly to inquiries, offer personalized recommendations, and handle any issues promptly. Building positive relationships with customers is key for long-term success.

Marketing Your Shelves

Once you have built your shelves, it's time to get them in front of potential buyers. Here are some effective marketing strategies:

  • Online marketplaces. Sell your shelves on popular platforms like Etsy, Amazon Handmade, and Facebook Marketplace. These platforms offer a large audience of potential customers.
  • Social media. Promote your shelves on Instagram, Pinterest, and Facebook using eye-catching photos and videos. Share behind-the-scenes content of your crafting process to build excitement and engagement.
  • Local craft fairs and markets. Connect with customers in person and showcase your shelves at local craft fairs and markets. This is a great opportunity to build relationships and gather feedback.
  • Collaborate with other businesses. Partner with local home décor stores, interior designers, or bloggers to promote your shelves. You can offer discounts or special promotions for their customers.
  • Word-of-mouth marketing. Encourage satisfied customers to leave reviews and share their experiences with others. Positive word-of-mouth can be very effective for spreading the word about your business.

Building and selling wall shelves can be a fulfilling and profitable venture for beginners. With a little creativity, dedication, and these tips, you can create a thriving business that allows you to share your passion for woodworking with the world.

Share:

How to Turn Wood into Beautiful Works of Art: Creative Project Ideas

How to Turn Wood into Beautiful Works of Art: Creative Project Ideas

Turning Wood into Beautiful Works of Art: Creative Project Ideas

Wood, a natural material with inherent beauty and versatility, has been a source of inspiration for artists and craftspeople for centuries. Its warm tones, intricate grain patterns, and unique textures lend themselves to a wide range of artistic expressions. From intricate carvings to elegant furniture, the possibilities for transforming wood into stunning works of art are endless.

This article delves into the captivating world of wood art, exploring various techniques and creative project ideas that allow you to harness the beauty of this timeless material. Whether you are a seasoned woodworker or a curious beginner, this guide will provide you with inspiration and practical guidance to embark on your artistic journey.

Understanding the Properties of Wood

Before delving into specific projects, it is essential to understand the characteristics of different wood species. Each type of wood possesses unique qualities that influence its suitability for certain applications. Here are some key factors to consider:

Grain Pattern

The grain pattern is the arrangement of wood fibers, creating distinctive lines and textures. Some woods exhibit straight, even grain, while others feature intricate swirls, knots, or figure. The grain pattern significantly influences the visual appeal and aesthetic of the final piece.

Hardness and Durability

The hardness of wood refers to its resistance to scratching, denting, and wear. Hardwoods, such as oak, maple, and walnut, are known for their durability and strength, making them ideal for furniture, flooring, and structural applications. Softer woods, like pine and cedar, are easier to carve and work with, suitable for decorative items and crafts.

Color and Finish

Wood comes in a wide spectrum of colors, ranging from light browns and yellows to rich reds and dark browns. The natural color can be enhanced or altered through staining, painting, or varnishing. The choice of finish depends on the desired aesthetic and the project's functionality.

Essential Tools and Techniques for Woodworking

To create captivating wood art, you will need a set of essential tools and a basic understanding of woodworking techniques. Here are some fundamental elements:

Hand Tools

  • Saw: Used for cutting wood to size, available in various types, including hand saws, jigsaw, and scroll saw.
  • Chisel and Mallet: For shaping and carving wood.
  • Plane: Used for smoothing and leveling wood surfaces.
  • Sandpaper: For smoothing and finishing wood surfaces.
  • Clamps: For holding pieces of wood securely together during assembly.

Power Tools

  • Drill: For creating holes in wood.
  • Router: For shaping and cutting precise contours.
  • Belt Sander: For sanding large areas quickly and efficiently.
  • Table Saw: For accurate crosscutting and ripping wood.

Techniques

  • Carving: Using chisels and other tools to shape and sculpt wood.
  • Turning: Shaping wood on a lathe to create cylindrical or round forms.
  • Intarsia: Inlaying different wood pieces to create complex designs.
  • Marquetry: Similar to intarsia, but using veneers to create intricate patterns.
  • Pyrography: Burning designs into wood using a heated tool.

Creative Wood Art Project Ideas

Once you have a grasp of the basic tools and techniques, it's time to unleash your creativity and explore the limitless possibilities of wood art. Here are some inspiring project ideas for different skill levels:

Beginner Projects

  • Simple Wooden Ornaments: Cut out shapes like stars, hearts, or snowflakes from plywood and decorate them with paint, stain, or decoupage.
  • Wooden Picture Frame: Construct a basic frame using simple miter cuts and joinery techniques. Personalize it with a unique finish or decorative accents.
  • Wooden Coasters: Cut circular or square pieces of wood and embellish them with laser engraving, paint, or decoupage for a personalized touch.

Intermediate Projects

  • Wooden Wall Clock: Design and build a unique clock using wood for the casing and hands. You can incorporate various wood types, carvings, or intarsia techniques.
  • Wooden Birdhouse: Create a charming birdhouse for your garden using basic carpentry skills and a creative design. You can use a variety of wood types and finishes.
  • Wooden Cutting Board: Construct a sturdy and beautiful cutting board using hardwoods like maple or walnut. Incorporate decorative elements like inlays or edge details.

Advanced Projects

  • Wooden Sculpture: Utilize carving or turning techniques to create intricate and expressive sculptures. Choose a wood species that complements your design and style.
  • Wooden Furniture Piece: Design and build a unique furniture piece, such as a chair, table, or bookshelf. Explore advanced joinery techniques and use high-quality hardwoods for durability and longevity.
  • Wooden Musical Instrument: Challenge yourself by building a musical instrument like a guitar, ukulele, or dulcimer. This project requires precision, woodworking skills, and knowledge of acoustics.

Safety Precautions

Woodworking involves using sharp tools and power equipment, so safety is paramount. Always wear appropriate safety gear, including eye protection, hearing protection, and dust masks. Never operate machinery without proper training and instructions. Follow safety guidelines for handling tools, using power equipment, and working with wood dust. Remember, safety should always be your top priority when working with wood.

Conclusion

Turning wood into beautiful works of art is a rewarding and fulfilling endeavor. By understanding the properties of wood, mastering basic tools and techniques, and unleashing your creativity, you can create stunning and enduring pieces that reflect your artistic vision. Whether you choose to explore simple projects or delve into more complex endeavors, woodworking offers a world of possibilities for expressing yourself through the beauty of natural materials.

Share:

人気の投稿

Powered by Blogger.