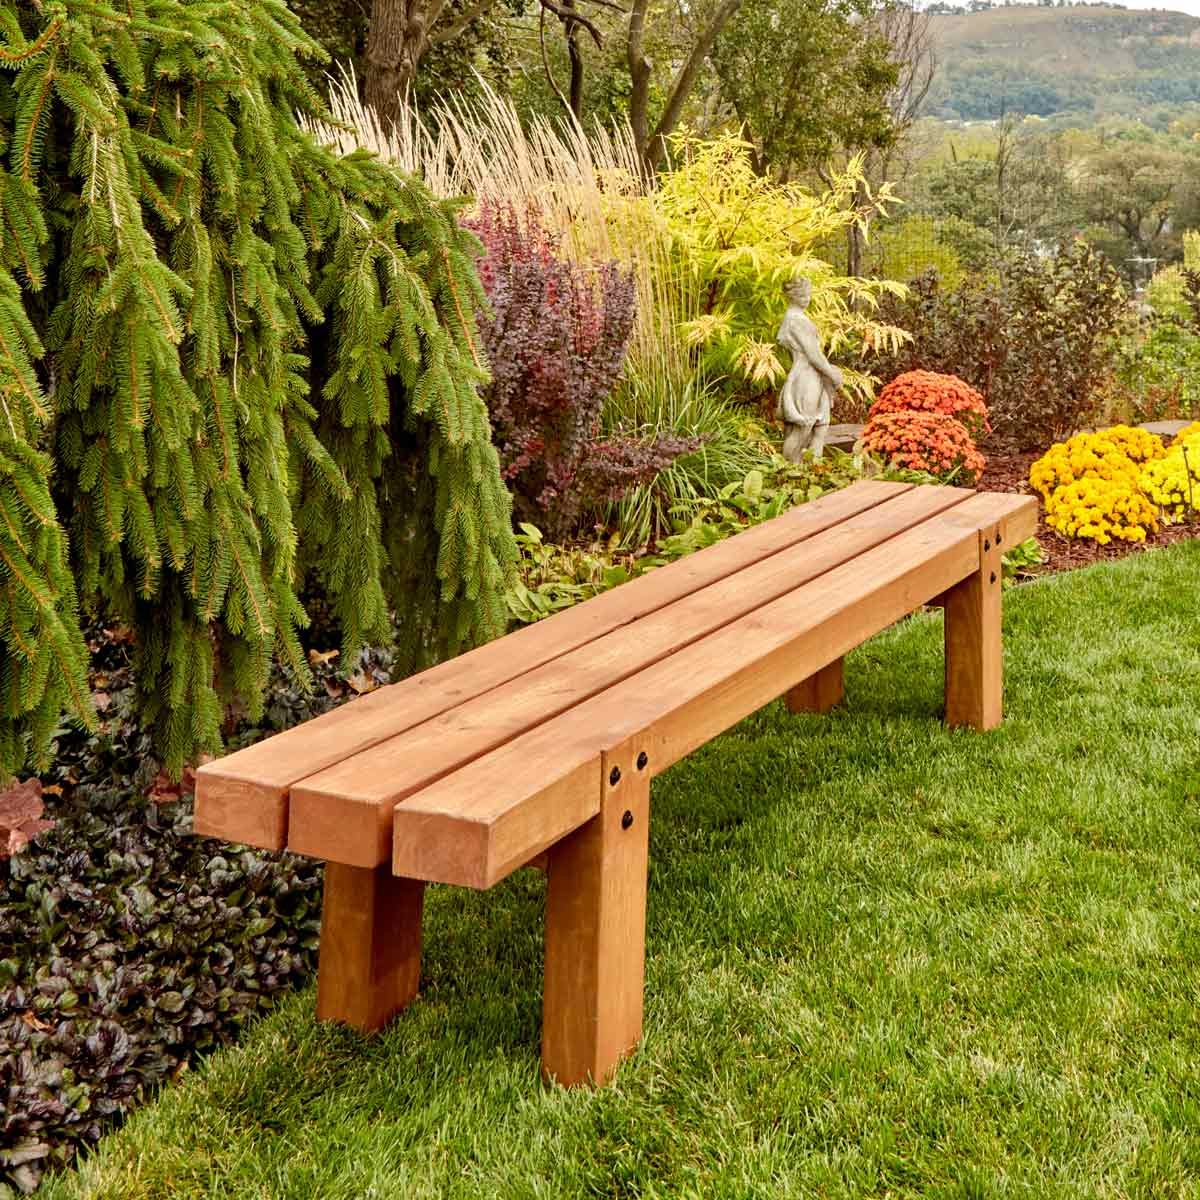
Easy and budget-friendly woodworking ideas for creating personalized wood crafts and home accents.

How to Build Wooden Projects That Are Both Beautiful and Functional

How to Build Wooden Projects That Are Both Beautiful and Functional

Crafting Beauty and Utility: Building Stunning and Functional Wooden Projects

The allure of woodworking lies in its ability to transform raw materials into objects of both beauty and practicality. Whether you're a seasoned craftsman or a curious beginner, the journey of creating a functional wooden piece is deeply rewarding. This article guides you through the process, emphasizing design considerations and practical techniques to ensure your projects are not only visually appealing but also serve their intended purpose effectively.

Designing for Both Form and Function

The foundation of any successful woodworking project rests on thoughtful design. Don't rush into construction before meticulously planning every detail. Consider the project's intended use: Will it be a sturdy coffee table, a delicate jewelry box, or a robust garden bench? This dictates material selection, joinery techniques, and overall aesthetic. Sketch your design from multiple angles, experimenting with different dimensions and styles. Digital design tools can also be invaluable, allowing for precise measurements and 3D visualizations before you ever touch a piece of wood.

Prioritizing Functionality

Functionality should never be an afterthought. A beautiful piece that is impractical is ultimately a failure. Ask yourself: How will this item be used? Where will it be placed? What stresses will it endure? For example, a coffee table needs a strong, stable base capable of supporting weight, while a jewelry box requires intricate details and secure compartments. Thoroughly addressing these questions early ensures a final product that truly serves its purpose.

Embracing Aesthetics

While functionality is crucial, don't underestimate the power of aesthetics. The beauty of wood lies in its natural grain and variations in color. Highlight these qualities by selecting appropriate finishes and joinery methods. Consider the overall style: Do you prefer clean, modern lines or rustic, handcrafted charm? Choose a finish that complements the wood and the project's intended setting. A simple oil finish can enhance the wood's natural beauty, while a more elaborate stain or paint can achieve a specific aesthetic.

Choosing the Right Materials and Tools

The success of your project heavily relies on selecting the appropriate materials and tools. Different wood species possess unique properties: some are harder and more durable, others softer and easier to carve. Consider the wood's grain, density, and resistance to moisture. For example, oak is ideal for furniture due to its strength and durability, while pine is a popular choice for less demanding projects due to its affordability and ease of working. Gather all necessary tools before commencing the project. Invest in quality tools, as they significantly improve accuracy, precision, and overall safety.

Essential Tools for Success

Beginners should start with a basic tool kit that includes:

  • Measuring tape and square
  • Hand saw or circular saw
  • Chisels and mallets
  • Sandpaper (various grits)
  • Clamps
  • Safety glasses and dust mask

As your skills progress, you can gradually expand your tool collection.

Mastering Essential Woodworking Techniques

Proficiency in fundamental woodworking techniques significantly impacts the final product's quality. Accurate measuring and cutting are paramount. Practice your cuts on scrap wood before working on your actual project. Learn various joinery methods, such as mortise and tenon, dowel joints, or biscuit joints, each offering unique strength and aesthetic appeal. Pay close attention to detail during assembly, ensuring all components align precisely and securely. A well-executed joinery is as crucial to functionality as it is to the project's visual appeal.

The Importance of Finishing Touches

Finishing is the final, yet crucial, step. Proper finishing protects the wood from moisture and wear, enhancing its durability and beauty. Sanding is essential to achieve a smooth surface. Start with coarser grits and progressively move to finer grits for a polished finish. Apply your chosen finish according to the manufacturer's instructions, ensuring even coverage and avoiding drips or runs. Allow sufficient drying time between coats.

By carefully considering design, selecting appropriate materials and tools, and mastering fundamental woodworking techniques, you can confidently create wooden projects that are both beautiful and functional, pieces that you'll cherish for years to come.

Share:

Wooden Coffee Tables with Functional Features Like Movable Tops or Extending Surfaces

Wooden Coffee Tables with Functional Features Like Movable Tops or Extending Surfaces

Wooden Coffee Tables with Functional Features: Expanding Your Living Space

In the realm of interior design, coffee tables play a pivotal role in defining the ambiance and functionality of a living room. While aesthetics are paramount, practical features can elevate a coffee table from a mere centerpiece to an indispensable element. Wooden coffee tables, renowned for their timeless elegance and durability, often incorporate ingenious features that enhance their utility and versatility. These innovative designs cater to modern lifestyles, seamlessly blending style with practicality.

Movable Tops: Unlocking Flexibility

Movable tops are a game-changer for coffee tables, offering unmatched flexibility and adaptability. Imagine effortlessly transforming your coffee table into a convenient work surface, a casual dining area, or a platform for displaying cherished items. The ability to move the top allows for a dynamic and functional space that can be readily adjusted to suit your needs.

Work from Home Essentials

With a movable top, your coffee table can double as a makeshift desk. Lift the top to a comfortable working height, revealing a spacious surface for your laptop, files, and other essentials. This feature is particularly beneficial for homeowners who work from home or need a dedicated space for creative projects.

Casual Dining Solutions

For impromptu gatherings or cozy meals, a coffee table with a movable top provides a convenient dining option. Simply raise the top and voila! You have a table perfect for enjoying snacks, board games, or light meals with friends and family.

Flexible Display Options

Movable tops also enhance display possibilities. Raise the top to create a tiered effect, showcasing decorative items, books, or plants in an eye-catching manner. This feature allows you to personalize your space and showcase your style.

Extending Surfaces: Expanding Your Horizons

Coffee tables with extending surfaces are ideal for homes where space is at a premium. These ingenious designs provide additional tabletop area when needed, seamlessly transitioning from a compact coffee table to a larger dining table. The extension mechanism is usually hidden, preserving the sleek aesthetics of the table when not in use.

Accommodating Guests with Ease

Having guests over for dinner? Simply extend the coffee table to create a larger dining surface, easily accommodating additional guests without compromising on comfort. This feature eliminates the need for separate dining tables, saving valuable space and maximizing the versatility of your living room.

Multifunctional Spaces

Extending surfaces are perfect for open-plan living spaces where the line between living and dining areas is blurred. When not in use as a dining table, the extended surface can serve as a workspace, a display area, or a casual gathering spot.

Beyond the Basics: Functional Touches

Beyond movable tops and extending surfaces, wooden coffee tables often incorporate other functional features that enhance their utility. These include:

  • Built-in Storage: Drawers, shelves, or hidden compartments offer discreet storage for remotes, magazines, or other essentials, keeping your living room clutter-free.
  • Integrated Outlets: Some coffee tables come equipped with built-in outlets for charging your devices, providing a convenient power source without the need for messy cords.
  • Wheels: Coffee tables with wheels are easy to reposition, allowing you to rearrange your living room layout effortlessly.
  • Lift-Top Mechanisms: Similar to movable tops, lift-top mechanisms allow you to raise the table to a comfortable working height, providing a versatile surface for working, dining, or displaying items.

Wooden coffee tables with functional features offer an exceptional blend of style and practicality. Whether you seek a movable top for adaptable living or an extending surface for guest-ready dining, these innovative designs are sure to enhance the functionality and aesthetics of your living space. By incorporating these features, you can create a dynamic and versatile living room that caters to your evolving needs.

Share:

Portable Wood Toolbox Organizers That Sell Well

Portable Wood Toolbox Organizers That Sell Well

Portable Wood Toolbox Organizers: The Ultimate Guide to Finding the Right Fit

Hey there, fellow tool enthusiasts! Whether you're a seasoned pro or just starting out, we all know the struggle of keeping our toolboxes organized. A cluttered toolbox can be a real pain, wasting precious time and making it hard to find the right tool when you need it. That's where portable wood toolbox organizers come in! These handy little helpers transform your toolbox into a well-oiled machine, making your tool-hunting days a thing of the past.

But with so many options out there, how do you choose the right organizer for your needs? Don't worry, we've got you covered! This comprehensive guide will walk you through everything you need to know about portable wood toolbox organizers, helping you find the perfect fit for your toolbox and your projects.

Why Choose a Portable Wood Toolbox Organizer?

First things first, let's talk about why wood toolbox organizers are a fantastic choice:

  • Durability: Wood is a sturdy and long-lasting material that can withstand the wear and tear of daily use. Unlike plastic organizers, wood won't crack or break easily, ensuring your investment lasts for years to come.
  • Customization: Many wood organizers come with customizable compartments and dividers, allowing you to tailor them to your specific tool collection. You can create the perfect setup for everything from screwdrivers and pliers to hammers and saws.
  • Aesthetics: Let's be honest, a well-organized toolbox looks darn good! Wood organizers bring a classic and professional aesthetic to your workspace, adding a touch of craftsmanship to your toolbox.
  • Portability: While wood organizers may be a bit heavier than their plastic counterparts, they are still easily transportable. Look for organizers with a built-in handle or the option to add one for easy carrying.

Types of Portable Wood Toolbox Organizers

Now, let's delve into the different types of wood toolbox organizers available:

1. Drawer Organizers

Drawer organizers are perfect for keeping your smaller tools, like screwdrivers, wrenches, and sockets, neatly organized. They typically feature multiple compartments and dividers, allowing you to separate your tools by size and type.

2. Tray Organizers

Tray organizers are a versatile option that can be used for both small and large tools. They often have deep compartments that can accommodate power tools, measuring tapes, and even hand saws.

3. Tool Caddy Organizers

Tool caddy organizers are ideal for keeping your most frequently used tools within easy reach. They are usually small and compact, making them perfect for adding to your toolbox or hanging from your workbench.

4. Customizable Organizers

If you're looking for the ultimate in organization, customizable organizers are the way to go. These organizers allow you to create a layout that perfectly suits your tool collection. Many come with adjustable dividers and compartments, making them incredibly versatile.

Factors to Consider When Choosing a Wood Toolbox Organizer

Now that you know about the different types of wood toolbox organizers, let's discuss some key factors to consider before making your purchase:

1. Size and Capacity

Measure your toolbox to ensure the organizer you choose will fit properly. Consider the size and quantity of your tools to determine the organizer's capacity.

2. Compartment Design

Think about the specific tools you need to organize. Do you need dedicated compartments for larger items like hammers and saws? How many smaller compartments do you need for screwdrivers, wrenches, and other hand tools?

3. Material and Construction

While wood is generally sturdy, look for organizers made from high-quality wood that is resistant to scratches and moisture. Pay attention to the joinery and construction of the organizer to ensure it is durable and built to last.

4. Budget

Portable wood toolbox organizers come in a wide range of prices. Set a budget and shop around to find the best value for your money. You can often find great deals on quality organizers without breaking the bank.

Tips for Maintaining Your Wood Toolbox Organizer

You've invested in a great wood organizer, now let's keep it looking and functioning its best:

  • Clean it Regularly: Dust and debris can accumulate in the compartments, making it harder to find your tools. Wipe down the organizer with a damp cloth to keep it clean and organized.
  • Apply a Protective Finish: For added protection, consider applying a sealant or wood finish to help prevent scratches, dents, and moisture damage.
  • Organize Regularly: Take a few minutes each week to reorganize your toolbox and ensure everything is in its proper place.

Commonly Asked Questions

Let's address some common questions about portable wood toolbox organizers:

Q: What is the best wood for toolbox organizers?

A: Some popular choices for wood toolbox organizers include pine, oak, maple, and cherry. These woods are durable, attractive, and relatively affordable.

Q: How do I clean a wood toolbox organizer?

A: Simply use a damp cloth to wipe down the organizer, making sure to dry it thoroughly afterwards. You can also use a mild soap solution if needed.

Q: Can I customize a wood toolbox organizer?

A: Yes, many wood toolbox organizers come with adjustable dividers and compartments that you can customize to fit your tool collection. You can also find organizers that allow you to add your own custom compartments and dividers.

We hope this guide has helped you gain a better understanding of portable wood toolbox organizers. With the right organizer, you can transform your toolbox into a well-organized and efficient tool-hunting haven. Happy organizing!

Share:

Simple Floating Shelves Projects for Beginners to Try

Simple Floating Shelves Projects for Beginners to Try

Simple Floating Shelves Projects for Beginners to Try

Hey there, DIY enthusiasts! Are you looking for a fun and easy way to add some personality and functionality to your home? Look no further than floating shelves! These versatile and stylish shelves are a perfect project for beginners, and with a little bit of time and effort, you can create a stunning addition to any room. So grab your tools, put on your favorite playlist, and let's get started!

Choosing the Right Materials

Before you dive into the construction, it's crucial to choose the right materials for your floating shelves. You'll need to decide on the following:

Wood Type

The wood you choose will determine the overall look and feel of your shelves. Some popular options include:

  • Pine: This softwood is affordable, easy to work with, and readily available. It's perfect for beginners.
  • Oak: A strong and durable hardwood that adds a classic and rustic look. It's a bit more expensive than pine.
  • Maple: A beautiful hardwood with a distinctive grain pattern. It's known for its durability and resistance to scratches.
  • Plywood: A versatile and cost-effective option that comes in various thicknesses and finishes. It's great for creating sturdy and stable shelves.

Hardware

You'll need the following hardware for your floating shelves:

  • Shelf Brackets: These come in various styles and materials. Choose brackets that are strong enough to support the weight of your items and complement your chosen wood.
  • Screws: Make sure the screws are long enough to securely attach the brackets to the wall and the shelves to the brackets.
  • Level: A level will ensure your shelves are perfectly straight and horizontal.
  • Measuring Tape: Measure twice, cut once! A measuring tape is essential for precise cutting and placement.

Simple Floating Shelf Projects

Now that you have your materials ready, let's explore some easy and beginner-friendly floating shelf projects:

Basic Floating Shelf

This is the most straightforward project and a great starting point for beginners. You'll only need a single piece of wood and a pair of shelf brackets.

  1. Measure and Cut: Measure the desired length of your shelf and cut the wood to size using a saw.
  2. Mark Bracket Positions: Decide where you want to place your shelf on the wall and mark the bracket positions using a pencil. Remember to consider the weight of the items you'll be placing on the shelf.
  3. Install Brackets: Use a level to make sure the brackets are straight and secure them to the wall using screws.
  4. Attach Shelf: Place the shelf on top of the brackets and screw it in place.

Floating Shelf with a Decorative Edge

For a more visually appealing touch, try adding a decorative edge to your floating shelf. This can be achieved using a router, a jigsaw, or even a hand saw. You can choose from various edge profiles, such as a rounded edge, a chamfered edge, or a beveled edge.

Floating Shelf with Storage

Add some extra functionality to your floating shelf by incorporating storage solutions. You can create a shelf with a built-in drawer, a hidden compartment, or even a secret cubby. Simply create a box-like structure behind the shelf and attach it to the wall.

Floating Shelf with a Geometric Design

If you're looking for a modern and stylish touch, try creating a floating shelf with a geometric design. Use a router to cut intricate patterns or use a jigsaw to create a unique shape. You can create a geometric shelf in the shape of a triangle, a hexagon, or any other shape you desire.

Tips for Success

Here are some tips to ensure your floating shelf projects are a success:

  • Use a Level: Don't underestimate the importance of a level! Ensure your shelves are straight and horizontal for a professional finish.
  • Pre-drill Holes: Pre-drilling holes in the wood before screwing it in will prevent the wood from splitting.
  • Sand Smooth: Always sand your wood smooth after cutting and before staining or painting to eliminate any rough edges.
  • Protect the Wood: Apply a sealant or a finish to protect the wood from moisture, scratches, and stains.
  • Have Fun! Remember, it's all about creating something you love. Don't be afraid to experiment and personalize your project.

Commonly Asked Questions

Here are some frequently asked questions about floating shelves:

What is the weight limit for floating shelves?

The weight limit depends on the type of wood, the size of the shelf, and the strength of the brackets. It's always best to consult the manufacturer's guidelines or choose brackets rated for heavier loads.

What are the best wall anchors for floating shelves?

The best wall anchors depend on the type of wall material you're working with. For drywall, toggle bolts or plastic anchors are good options. For concrete or brick walls, use masonry anchors.

How do I clean floating shelves?

You can clean floating shelves using a soft cloth and a mild cleaning solution. Avoid harsh chemicals or abrasive cleaners that could damage the finish.

With these simple projects and helpful tips, you'll be well on your way to creating stunning floating shelves that elevate your home's style and functionality. Happy crafting!

Share:

DIY Floating Shelf Ideas for a Minimalist or Modern Interior

DIY Floating Shelf Ideas for a Minimalist or Modern Interior

Elevate Your Minimalist or Modern Home with DIY Floating Shelves

Hey there, design enthusiasts! Tired of bulky bookshelves cluttering your minimalist or modern space? Floating shelves are the perfect solution to seamlessly integrate storage and style. Not only are they visually appealing, but they also offer the flexibility to create a bespoke look that complements your unique aesthetic.

The best part? You don't need to shell out big bucks for fancy pre-made shelves. With a little DIY know-how and a few simple materials, you can craft stunning floating shelves that add a touch of elegance and functionality to your home.

Floating Shelf Styles for Every Space

Before diving into the construction process, let's talk about the different styles of floating shelves you can create. Here are a few ideas to spark your creativity:

Geometric Elegance

Embrace sharp angles and clean lines with geometric floating shelves. Think triangular shapes, rectangular shelves with beveled edges, or even hexagonal designs. These shelves add a touch of modern sophistication and can be customized to fit any corner or wall space.

Industrial Chic

For a rugged and contemporary look, incorporate industrial elements like exposed pipes, metal brackets, or reclaimed wood. These shelves are perfect for showcasing vintage finds, books, or minimalist decor.

Minimalist Marvels

Keep it simple with minimalist floating shelves. Choose sleek, straightforward designs in neutral tones like white, black, or natural wood. These shelves offer a clean and uncluttered look, allowing your belongings to take center stage.

Essential Materials for Your DIY Project

Now, let's gather the essentials for your floating shelf adventure. Here's a list of materials you'll likely need:

  • Wood: Choose a wood type that complements your style. Popular options include plywood, MDF, reclaimed wood, or even bamboo for a sustainable touch.
  • Brackets: You can use L-brackets, shelf brackets, or even create custom brackets using metal piping or wood.
  • Screws and Anchors: Choose screws that are long enough to securely hold your shelves in place. Use anchors if your walls are drywall or plaster.
  • Wood Filler: For a smooth finish, use wood filler to cover any screw holes or imperfections in the wood.
  • Sandpaper: Smooth out any rough edges and prepare the surface for painting or staining.
  • Paint or Stain: This is entirely up to your personal preference and the style you're aiming for. Choose a color or stain that harmonizes with your existing decor.
  • Measuring Tape, Level, and Pencil: These tools are essential for precise marking and placement of your shelves.
  • Safety Glasses and Gloves: Always prioritize safety when working with tools.

Crafting Your Floating Shelves: A Step-by-Step Guide

Ready to bring your floating shelf vision to life? Follow these simple steps:

  1. Plan and Measure: Determine the size, shape, and number of shelves you'll create. Use a measuring tape to mark the exact location on your wall where you want to install your shelves. Make sure the placement is level for a polished look.
  2. Cut the Wood: Using a saw, carefully cut your wood to the desired dimensions. If you're working with plywood or MDF, be sure to cut with the grain for a clean, consistent cut.
  3. Install the Brackets: Mark the wall where you want to install your brackets. Use a drill to make pilot holes, then secure the brackets to the wall with the appropriate screws. Make sure the brackets are level and at the correct height for your shelves.
  4. Attach the Shelves: Place your shelves on the brackets and secure them with screws. Use wood filler to cover any screw holes for a seamless appearance. If you're using L-brackets, you can typically attach the shelves from underneath.
  5. Sand, Prime, and Finish: Sand your shelves to smooth out any rough edges. If you're painting, apply a primer before applying your chosen paint color. If you're staining, apply a wood stain for a natural and warm finish.
  6. Decorate and Enjoy! Finally, arrange your belongings and enjoy your beautiful new floating shelves. Get creative and let your personality shine through in your display.

Tips for Success

Here are a few extra tips to ensure your DIY floating shelves are a triumph:

  • Practice Makes Perfect: If you're new to DIY projects, it's always a good idea to practice cutting and assembling your shelves on scrap wood before working with your final materials.
  • Double-Check Your Measurements: Accuracy is key for a professional-looking finish. Take your time and double-check your measurements to ensure your shelves are properly aligned.
  • Use Quality Materials: Invest in durable and high-quality materials for shelves that will last. A sturdy wood base and strong brackets are essential for long-term stability.
  • Prioritize Safety: Always wear safety glasses and gloves when working with tools. Use a work surface that is stable and free of clutter.
  • Don't Be Afraid to Get Creative: Floating shelves offer endless possibilities for design and customization. Have fun with it and let your imagination run wild!

Commonly Asked Questions

We've addressed some of the most common questions about DIY floating shelves. Let's dive into these FAQs:

What if my walls are drywall?

Drywall is a common wall material, and you'll need to use anchors to ensure your floating shelves are securely mounted. There are many types of anchors available, so choose ones that are appropriate for the weight of your shelves and the thickness of your drywall. Follow the instructions on the anchor packaging for proper installation.

How do I choose the right brackets?

The type of brackets you choose will depend on the weight of your shelves and the style you're going for. L-brackets are a common choice for lightweight shelves, while shelf brackets or custom-made brackets are better suited for heavier loads. Consider the thickness of your shelves and the material they're made from when choosing brackets.

What if my shelves aren't perfectly level?

A level is your best friend for this project. Use a level to ensure your brackets are installed at the same height and that your shelves are perfectly horizontal. If your shelves are slightly off, you can adjust them by adding shims or spacers underneath.

Can I use floating shelves for anything?

Absolutely! Floating shelves are incredibly versatile and can be used for a wide range of purposes. Here are a few ideas:

  • Bookshelf: Showcase your favorite books or create a cozy reading nook.
  • Display Shelf: Arrange decorative items, art pieces, or family photos.
  • Kitchen Storage: Organize spices, cookbooks, or decorative plates.
  • Bathroom Organizer: Store towels, toiletries, or decorative baskets.
  • Bedroom Accent: Add a touch of style with nightstands, plant shelves, or jewelry organizers.

So, get ready to embrace the minimalist or modern aesthetic in your home with these DIY floating shelf ideas! Remember, the key is to choose materials that reflect your style and to have fun with the process. With a little creativity and effort, you can create a stunning and functional storage solution that elevates your space.

Share:

How to Sell Floating Shelves on Etsy and Other Platforms

How to Sell Floating Shelves on Etsy and Other Platforms

Unlocking the Power of Floating Shelves: A Guide to Selling on Etsy and Beyond

In the ever-evolving world of online retail, floating shelves have become a beloved staple for home décor enthusiasts. Their sleek, minimalist design and space-saving functionality make them a hot commodity, drawing in buyers seeking to enhance their living spaces. If you're a skilled craftsperson or a passionate DIYer with a knack for creating stylish and functional furniture, selling floating shelves online presents a lucrative opportunity. Let's delve into the strategies for establishing a successful online presence and attracting a steady stream of customers for your floating shelf creations.

Crafting Captivating Listings

The first step in any successful online venture is crafting enticing listings that pique buyer interest and effectively showcase your products. Your listings should be a compelling blend of captivating visuals, detailed descriptions, and strategic keywords.

Professional Photography is Key

High-quality photographs are the cornerstone of successful online sales. Invest in a decent camera or even your smartphone's camera, and ensure your shelves are photographed in a well-lit environment. Capture the shelves from various angles, highlighting their design, materials, and installation process. Don't hesitate to use props to showcase how the shelves would look in a real home setting.

Captivating Descriptions that Sell

Your product descriptions should be more than just a list of features. Tell a story about your shelves, emphasizing their benefits and why they're a valuable addition to any home. Highlight the materials used, the craftsmanship involved, and the unique selling points that set your shelves apart. Remember to include essential information like dimensions, weight capacity, and installation instructions.

Keywords for Discoverability

Strategically incorporating relevant keywords into your listings is vital for driving traffic to your products. Use tools like Etsy's Keyword Tool to identify popular search terms related to floating shelves. Include keywords in your product titles, descriptions, and tags to increase your visibility in search results.

Building a Strong Brand Presence

Beyond individual listings, creating a cohesive brand identity can establish you as a trusted seller and attract a loyal customer base.

Develop a Unique Brand Style

Think about the aesthetic you want to project. Are your shelves rustic, modern, minimalist, or eclectic? Develop a consistent visual theme across your listings, social media, and website (if applicable). Consider using consistent fonts, color palettes, and imagery to create a recognizable brand persona.

Engage with Your Audience

Building a community around your brand is crucial for fostering trust and loyalty. Engage with your customers on social media platforms, respond promptly to questions and feedback, and run contests or giveaways to create excitement around your brand.

Expanding Your Reach Beyond Etsy

While Etsy is a valuable platform for reaching niche audiences, diversifying your sales channels can expand your reach and tap into new customer segments.

Exploring Other Marketplaces

Platforms like Amazon Handmade, Facebook Marketplace, and Shopify offer alternative avenues for selling your products. Research each platform to determine which best aligns with your target market and business goals.

Direct Sales through Your Website

Consider creating your own website to establish a more personalized brand presence. This gives you greater control over your brand messaging, design, and customer experience. Additionally, you can avoid platform fees associated with marketplaces.

Social Media Marketing

Platforms like Instagram and Pinterest are perfect for showcasing visually appealing products like floating shelves. Create captivating content, leverage relevant hashtags, and run targeted ads to reach your ideal audience.

Standing Out from the Crowd

In a competitive online market, differentiating your offerings and delivering exceptional customer service are key to success.

Offer Customization Options

Allow customers to personalize their shelves by choosing from a variety of materials, finishes, sizes, and designs. This adds value and caters to individual preferences.

Provide Excellent Customer Support

Respond to inquiries promptly, address customer concerns professionally, and offer post-sale support. Going the extra mile for your customers builds trust and fosters repeat business.

Showcase Positive Reviews

Positive reviews from satisfied customers are powerful social proof. Encourage your buyers to leave feedback and prominently display their glowing testimonials on your listings and website.

Selling floating shelves online can be a rewarding experience, allowing you to share your creativity with the world and earn a sustainable income. By following these strategies, you can establish a strong brand presence, attract a loyal customer base, and achieve lasting success in the competitive world of online retail. Remember, success is a journey, not a destination. Continuously learn, adapt, and evolve to stay ahead of the curve and ensure the longevity of your floating shelf business.

Share:

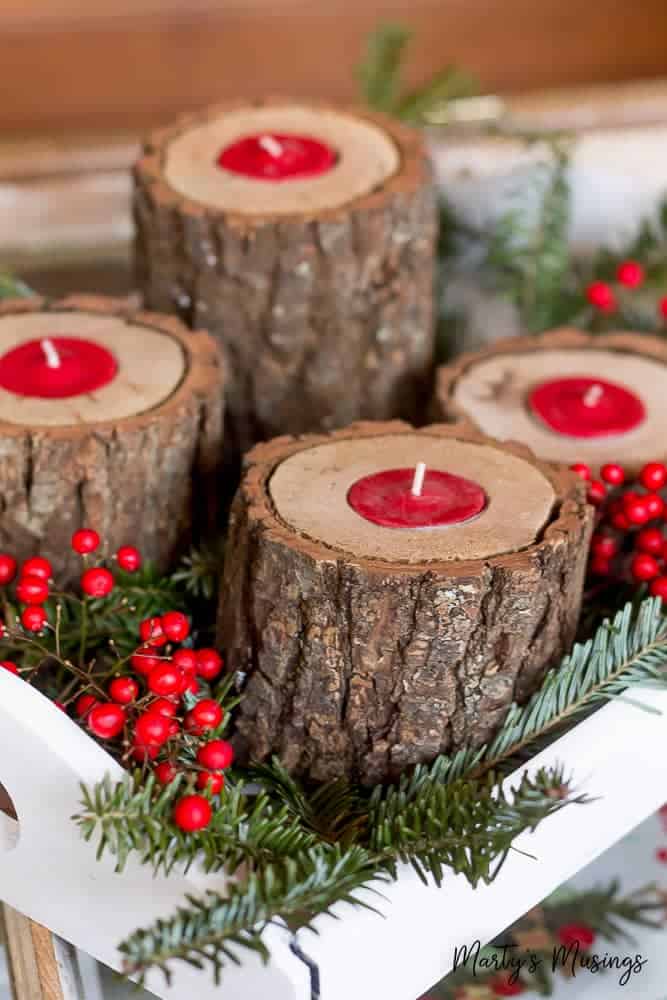
DIY Wooden Candle Holders to Complement Your Rustic or Farmhouse Decor

DIY Wooden Candle Holders to Complement Your Rustic or Farmhouse Decor

DIY Wooden Candle Holders to Complement Your Rustic or Farmhouse Decor

Rustic and farmhouse decor have become increasingly popular in recent years, with their warm, inviting, and natural aesthetic. A key element of this style is the use of wood, and incorporating wooden candle holders is a great way to add a touch of rustic charm to your home. Not only are they visually appealing, but they also offer a cozy and welcoming ambiance. This article will guide you through the creation of several DIY wooden candle holders, each with unique designs to complement your rustic or farmhouse decor.

Simple and Elegant: The Rustic Log Candle Holder

This project utilizes the natural beauty of wood to create a simple yet elegant candle holder.

Materials Needed:

  • A small log (approximately 6-8 inches in length)
  • A drill with a 1-inch drill bit
  • Sandpaper (medium and fine grit)
  • Wood stain or paint (optional)
  • Clear sealant (optional)
  • Tea lights or small votive candles

Instructions:

  1. Prepare the log: Clean any dirt or debris from the log's surface. Use sandpaper to smooth out any rough edges.
  2. Drill the candle cavity: Center the log on a flat surface and carefully drill a hole that's slightly larger than the diameter of your candle. The depth should accommodate the candle's height.
  3. Finish (optional): If desired, apply a wood stain or paint to the log to enhance its natural beauty or add a touch of color. Once dry, apply a clear sealant to protect the wood and enhance its longevity.
  4. Place the candle: Insert your tea light or votive candle into the drilled hole and enjoy the soft glow of the candle.

This simple candle holder is a versatile piece that can be placed on a mantel, coffee table, or side table to add a touch of warmth and charm to any room.

Rustic Elegance: The Wooden Slice Candle Holder

This design showcases the unique grain patterns of wood slices, creating a rustic and elegant candle holder.

Materials Needed:

  • A wooden slice (approximately 4-6 inches in diameter)
  • A drill with a 1-inch drill bit
  • Sandpaper (medium and fine grit)
  • Wood stain or paint (optional)
  • Clear sealant (optional)
  • Tea lights or small votive candles
  • Small metal ring or decorative wire (optional)

Instructions:

  1. Prepare the wooden slice: Sand the surface of the wooden slice to smooth out any rough edges. You can choose to leave the bark on for a more natural look.
  2. Drill the candle cavity: Center the wooden slice on a flat surface and carefully drill a hole that's slightly larger than the diameter of your candle. The depth should be deep enough to accommodate the candle's height.
  3. Finish (optional): If desired, apply a wood stain or paint to the slice to enhance its natural beauty or add a touch of color. Once dry, apply a clear sealant to protect the wood and enhance its longevity.
  4. Create a decorative handle (optional): If you prefer, you can add a small metal ring or decorative wire to the top of the wooden slice to create a handle. This allows for easy moving and placement.
  5. Place the candle: Insert your tea light or votive candle into the drilled hole and enjoy the soft glow of the candle.

This elegant candle holder can be displayed on a coffee table, mantel, or even hung on a wall. It complements any rustic or farmhouse decor beautifully.

Modern Rustic: The Pallet Wood Candle Holder

This contemporary design uses repurposed pallet wood to create a unique and eco-friendly candle holder.

Materials Needed:

  • Pallet wood planks
  • Saw
  • Sandpaper (medium and fine grit)
  • Wood glue
  • Clamps
  • Wood stain or paint (optional)
  • Clear sealant (optional)
  • Tea lights or votive candles

Instructions:

  1. Cut the pallet wood: Cut the pallet wood planks into desired sizes for your candle holder base and sides. For a simple design, you could create a rectangular box shape. Alternatively, use different plank lengths for a more rustic and uneven design.
  2. Assemble the base: Join the wood planks to create the base of the candle holder. Use wood glue and clamps to ensure a secure bond.
  3. Construct the sides: Attach the side planks to the base. Ensure the sides are tall enough to accommodate your chosen candle size.
  4. Finish (optional): Sand all the surfaces of the candle holder smooth. You can choose to leave the wood in its natural state, or apply a wood stain or paint for a different look.
  5. Seal (optional): Once the finish is dry, apply a clear sealant to protect the wood and enhance its longevity.
  6. Place the candle: Set your tea light or votive candle inside the candle holder. You can place the holder directly on a surface, or you can add legs or feet for a more stable design.

This contemporary rustic design adds a unique touch to any space, making it perfect for those seeking a modern take on farmhouse decor.

Tips for Success

Here are some tips for making successful DIY wooden candle holders:

  • Choose the right wood: Select wood types that are suitable for candle holders, such as hardwoods like oak, maple, or walnut. Softwoods like pine can be more prone to burning.
  • Safety first: When drilling holes, make sure to use safety glasses and avoid drilling too close to the edges of the wood to prevent splintering.
  • Get creative with designs: Experiment with different shapes, sizes, and finishes to create unique and personalized candle holders.
  • Prioritize fire safety: Always place candle holders on a stable, heat-resistant surface and never leave them unattended. Keep flammable materials away from the lit candle.

Making your own wooden candle holders is a fun and rewarding project that allows you to express your creativity while adding a touch of rustic charm to your home. The projects described above offer various design options, each with its own unique appeal. By following these instructions, you can craft stunning candle holders that complement your rustic or farmhouse decor perfectly.

Share:

How to Make and Sell Magazine Racks with Eco-Friendly Materials

How to Make and Sell Magazine Racks with Eco-Friendly Materials

Make and Sell Eco-Friendly Magazine Racks: A Guide to Sustainable Success

In a world increasingly conscious of environmental impact, creating and selling products with an eco-friendly ethos is not just a trend, but a necessity. Magazine racks are a common sight in homes, offices, and public spaces, but their traditional production often involves unsustainable materials like plastic and metal. By crafting your own magazine racks from recycled and reclaimed materials, you can tap into a growing demand for sustainable products, and contribute to a greener future.

Choosing Eco-Friendly Materials

The key to creating an eco-friendly magazine rack lies in selecting materials that are sustainable, recycled, or reclaimed. Consider these options:

Recycled Plastic

Plastic is a readily available material, but its disposal often poses environmental challenges. Using recycled plastic for your magazine racks allows you to give discarded materials a new life, reducing plastic waste and minimizing its environmental footprint.

Reclaimed Wood

Reclaimed wood is a fantastic option for eco-conscious furniture makers. By using wood salvaged from old buildings, barns, or pallets, you're reducing deforestation and giving materials a second chance.

Bamboo

Bamboo is a rapidly renewable resource, making it a sustainable choice for furniture and other products. Its natural beauty adds a unique touch to your magazine racks.

Cork

Cork is another excellent eco-friendly option. It is harvested from the bark of cork oak trees without harming the tree, making it a sustainable and renewable resource.

Design and Construction Techniques

Once you've chosen your materials, it's time to design and build your magazine racks. Consider these design elements:

Simplicity and Functionality

Design your magazine racks with simplicity in mind. Aim for a clean, functional design that can easily hold magazines and other publications.

Durability and Stability

Ensure that your magazine racks are sturdy and stable. Use strong materials and appropriate joinery techniques to create a durable product that will last.

Customization and Personalization

Offer your customers the option to personalize their magazine racks with different colors, finishes, and designs. This allows for greater individuality and customer satisfaction.

Marketing and Sales Strategies

To successfully market your eco-friendly magazine racks, consider these strategies:

Highlight Sustainability

Emphasize the eco-friendly aspects of your products in your marketing materials. Highlight the use of recycled, reclaimed, or renewable materials, and explain the environmental benefits of choosing your products.

Target the Right Audience

Focus your marketing efforts on individuals and businesses who value sustainability and are willing to pay a premium for eco-friendly products. Target customers who are conscious of their environmental impact and seek products that align with their values.

Engage in Local Events and Markets

Participate in local craft fairs, farmers' markets, and sustainability events to showcase your magazine racks and connect with potential customers. Direct interaction allows you to engage with customers and explain the unique aspects of your products.

Embrace Online Platforms

Utilize online marketplaces like Etsy and Shopify to reach a wider audience. Create a website or social media presence to promote your products and engage with potential customers.

Ethical Sourcing and Production

Beyond choosing eco-friendly materials, consider the ethical implications of your production processes. Source your materials from reputable suppliers who share your commitment to sustainability. Explore options for local sourcing to minimize transportation costs and environmental impact.

Conclusion: Building a Sustainable Business

Creating and selling eco-friendly magazine racks is a rewarding endeavor that combines creativity, sustainability, and entrepreneurship. By embracing eco-friendly materials, ethical sourcing, and sustainable production methods, you can build a successful business that contributes to a greener future. Remember to communicate your values and highlight the environmental benefits of your products, and you'll attract customers who are looking for sustainable solutions for their homes and offices.

Share:

DIY Wooden Storage Bins for Sustainable Home Decor

DIY Wooden Storage Bins for Sustainable Home Decor

DIY Wooden Storage Bins for Sustainable Home Decor

Tired of plastic bins cluttering your home? Craving a more natural and stylish way to organize your belongings? Look no further than DIY wooden storage bins! These handcrafted beauties offer a sustainable and charming alternative to mass-produced plastic containers. Not only will you create a unique and personalized look for your home, but you'll also be reducing waste and embracing a more eco-conscious approach to storage. Let's dive into the world of DIY wooden storage bins and unlock your creativity!

Choosing Your Wood

The type of wood you select will greatly influence the final look and feel of your bins. Consider factors like:

  • Durability: Hardwoods like oak, maple, or cherry offer excellent durability, perfect for heavier items.
  • Aesthetics: Softwoods like pine or cedar have a more rustic and natural appeal.
  • Budget: Price varies significantly depending on wood type.

Think about the intended use of the bins and choose a wood that complements your style and meets your practical needs.

Gathering Your Tools and Materials

Before you dive into building, gather the essential tools and materials. You'll need:

  • Wood: Cut to your desired dimensions.
  • Wood glue: For secure joints.
  • Clamps: To hold pieces together while glue dries.
  • Saw: To cut wood to size.
  • Sandpaper: For smoothing edges and surfaces.
  • Finishing supplies: Wood stain, paint, or oil to add a touch of personality.
  • Measuring tape: For accurate measurements.
  • Pencil: For marking cutting lines.

Step-by-Step Building Guide

Now, let's construct those stunning wooden storage bins. Here's a step-by-step guide to help you through the process:

Step 1: Planning and Cutting

Start by planning the dimensions of your bins. Consider the size and shape you desire, ensuring they fit your storage needs. Use a measuring tape and pencil to mark cutting lines on your wood. Carefully cut the pieces with your saw, ensuring precise cuts for a clean and professional finish.

Step 2: Assembling the Box

Apply a generous amount of wood glue to the edges where the sides and bottom panels meet. Clamp the pieces together firmly, allowing the glue to dry completely. For added stability, consider using screws or dowels to reinforce the joints.

Step 3: Sanding and Finishing

Once the glue has dried, sand the entire surface of your bin with sandpaper. This smoothes out any rough edges and prepares the wood for the finishing touch. You can choose to stain, paint, or oil the wood to achieve your desired look. If you opt for stain, apply it evenly across the surface. For paint, use a brush or roller to cover the entire bin. Let the finishing coat dry completely.

Step 4: Adding Handles (Optional)

If you'd like to make your bins easier to carry, add handles. Drill holes for the handles on opposite sides of the bin. Choose handles that complement your style and attach them securely to the bin. You can use metal, leather, or rope for a rustic touch.

Tips for Success

Here are a few additional tips to make your DIY experience smoother and more enjoyable:

  • Measure twice, cut once: Accuracy is key for a professional-looking result.
  • Use a level: Ensure all sides are level and aligned for even and attractive bins.
  • Wear safety glasses: Always protect your eyes when working with wood.
  • Allow for drying time: Give the glue and finishes ample time to dry before moving on to the next step.
  • Have fun! This project is a wonderful opportunity to express your creativity and customize your storage solutions.

Sustainable Storage Solutions

By creating your own wooden storage bins, you're taking a proactive step towards a more sustainable lifestyle. You're reducing waste by using natural materials and choosing a long-lasting alternative to plastic. You're also adding a personal touch to your home décor, creating pieces that reflect your unique style. So embrace your inner maker and get ready to enjoy the beauty and functionality of DIY wooden storage bins!

Share:

How to Build and Sell Jewelry Boxes with Unique Design Features

How to Build and Sell Jewelry Boxes with Unique Design Features

Building and Selling Jewelry Boxes with Unique Design Features

Jewelry boxes are not just for storing treasures; they can be beautiful works of art in their own right. With a little creativity and effort, you can build and sell jewelry boxes with unique design features that will capture the hearts (and wallets) of jewelry lovers everywhere. From incorporating sustainable materials to crafting intricate carvings, there are endless possibilities to explore.

Finding Your Niche

Before you start crafting, take a moment to think about your target audience. Who are you designing these boxes for? What kind of jewelry do they wear? What are their aesthetics? For example, if you're targeting young women who love bohemian styles, you might incorporate natural elements like wood and leather into your designs. For a more minimalist audience, clean lines and simple materials like metal and glass could be more appealing.

Identifying Market Trends

Staying up-to-date with current trends is essential. Explore online marketplaces like Etsy and Pinterest to see what types of jewelry boxes are popular. Look for emerging themes and styles to incorporate into your own designs. This will help you stand out from the crowd and attract a wider audience.

Crafting Your Unique Designs

Now comes the fun part: designing your jewelry boxes! Let your creativity flow and explore different options.

Incorporating Sustainable Materials

Sustainability is becoming increasingly important in all aspects of life, including the jewelry industry. Consider using recycled materials like reclaimed wood, upcycled fabrics, or even repurposed metal. Not only will this be environmentally friendly, but it can also add a unique and rustic touch to your designs.

Playing with Textures and Finishes

Add depth and dimension to your jewelry boxes by incorporating different textures and finishes. Use sandpaper to create a distressed look on wood, or try adding fabric lining for a soft and luxurious feel. Consider adding a layer of varnish or paint to protect your materials and enhance their appearance.

Embracing Intricate Carvings

If you're skilled with tools, you can add a touch of artistry to your designs with intricate carvings. Use a small carving knife or a specialized tool to create patterns, initials, or even miniature sculptures on the surface of the box. This can create a truly unique and personalized piece.

Experimenting with Colour and Pattern

Don't be afraid to experiment with different colours and patterns. You can paint the box itself, line the interior with patterned fabric, or even add decorative elements like ribbons or beads. Play with textures and colours to create visually appealing and unique pieces.

Marketing and Selling Your Creations

Now that you've created your stunning jewelry boxes, it's time to share them with the world! You can choose from a variety of online and offline marketing strategies:

Leveraging Social Media

Instagram, Pinterest, and Facebook are fantastic platforms for showcasing your unique jewelry boxes. Share high-quality photos and videos of your work, engage with potential customers, and participate in relevant hashtags to expand your reach.

Creating a Website or Etsy Shop

A website or Etsy shop provides a professional platform to sell your creations. Carefully curate your product listings with detailed descriptions, high-resolution images, and clear pricing. You can also use these platforms to highlight your unique design features and craftsmanship.

Participating in Craft Fairs and Markets

Attending local craft fairs and markets offers a direct connection with potential customers. This is a great opportunity to showcase your jewelry boxes in person and answer any questions buyers may have. Don't forget to bring business cards and promotional materials.

Pricing Your Jewelry Boxes

Pricing your jewelry boxes is a balancing act. You want to ensure you're covering your costs, while also remaining competitive in the market. Consider the following factors:

  • Material costs
  • Time spent crafting
  • Uniqueness of your design
  • Competitor pricing
  • Start with a price that reflects the value of your work and the materials used. You can always adjust your prices later based on customer feedback and market demand.

    Continuous Improvement

    The world of jewelry box design is constantly evolving. Embrace feedback from customers, keep an eye on current trends, and always strive to improve your craftsmanship. As you grow as a designer, your unique jewelry boxes will become even more sought-after and appreciated.

    Share:

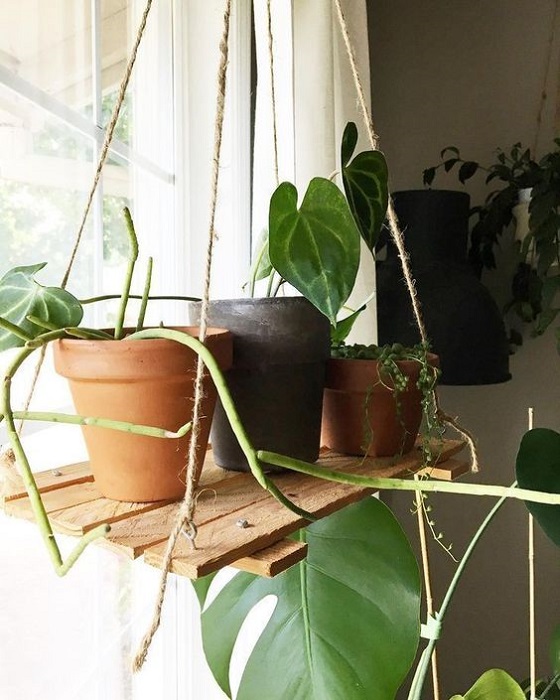
    How to Make Floating Shelves That Are Perfect for Displaying Plants

    How to Make Floating Shelves That Are Perfect for Displaying Plants

    How to Make Floating Shelves That Are Perfect for Displaying Plants

    Floating shelves are a fantastic way to add a touch of greenery to any space, creating a vibrant and refreshing atmosphere. Whether you have a small apartment or a spacious living room, these shelves offer a unique and stylish solution for showcasing your favorite plants. In this article, we'll walk you through the process of building your own floating shelves, making them perfect for displaying your beloved botanical companions.

    Choosing the Right Materials

    The first step in building your floating shelves is selecting the right materials. Here's what you'll need:

    • Wood planks: Select a wood type that's both sturdy and aesthetically pleasing. Some popular choices include pine, maple, or oak.
    • Brackets: These are essential for supporting the shelves. Look for brackets specifically designed for floating shelves, often made of metal or wood. They should be strong enough to hold the weight of your plants.
    • Screws: Choose screws that are long enough to securely fasten the brackets to the wall and the shelves to the brackets.
    • Sandpaper: You'll need sandpaper to smooth out the wood and create a polished finish.
    • Wood stain or paint: (Optional) Use these to add color and protect the wood from moisture and damage.
    • Measuring tape, level, and pencil: These are crucial for ensuring your shelves are perfectly aligned and level.
    • Drill: A drill with the appropriate drill bits is necessary for creating pilot holes and fastening screws.

    Cutting and Preparing the Wood

    With your materials gathered, it's time to cut the wood planks to your desired size. Carefully measure the length and width of the shelves you want to create. You can use a circular saw or a handsaw for this step. Once the wood is cut, use sandpaper to smooth out any rough edges and create a smooth surface for your plants.

    Finishing Touches

    To enhance the look and protect your shelves, you can apply a wood stain or paint. Select a color that complements your decor and brings out the beauty of your wood. Allow the stain or paint to dry completely before proceeding to the next step.

    Installing the Brackets

    Now comes the critical step of attaching the brackets to the wall. Choose a location that's stable and can support the weight of your shelves and plants. Using a level, mark the placement of the brackets on the wall. Then, use your drill to create pilot holes for the screws. This prevents the wood from splitting when you drive in the screws. Securely fasten the brackets to the wall with the appropriate screws.

    Attaching the Shelves

    With the brackets installed, you're ready to attach the shelves. Gently lift the shelves onto the brackets. Before fully securing the shelves, double-check that they are level and perfectly aligned. Once satisfied, use the remaining screws to attach the shelves to the brackets.

    Adding the Finishing Touches

    Your floating shelves are now ready to be adorned with your plant collection! Choose plants that complement the size and style of your shelves, and enjoy the beauty they bring to your space. You can experiment with different plant arrangements to create a unique and eye-catching display. Here are some extra tips:

    • Use a variety of plant sizes and shapes. Mix and match different types of plants to create visual interest.
    • Incorporate hanging plants. Create a cascading effect by hanging plants from the shelves.
    • Add decorative elements. Enhance the display with small decorative items like pebbles, ornaments, or small sculptures.
    • Consider lighting. Add LED lights to highlight the shelves and showcase your plants.

    Creating floating shelves is a fun and rewarding project that allows you to display your plants in a stylish and modern way. With a little effort and a bit of creativity, you can transform your home into a lush green oasis, making it a more beautiful and inviting space for you and your plants.

    Share:

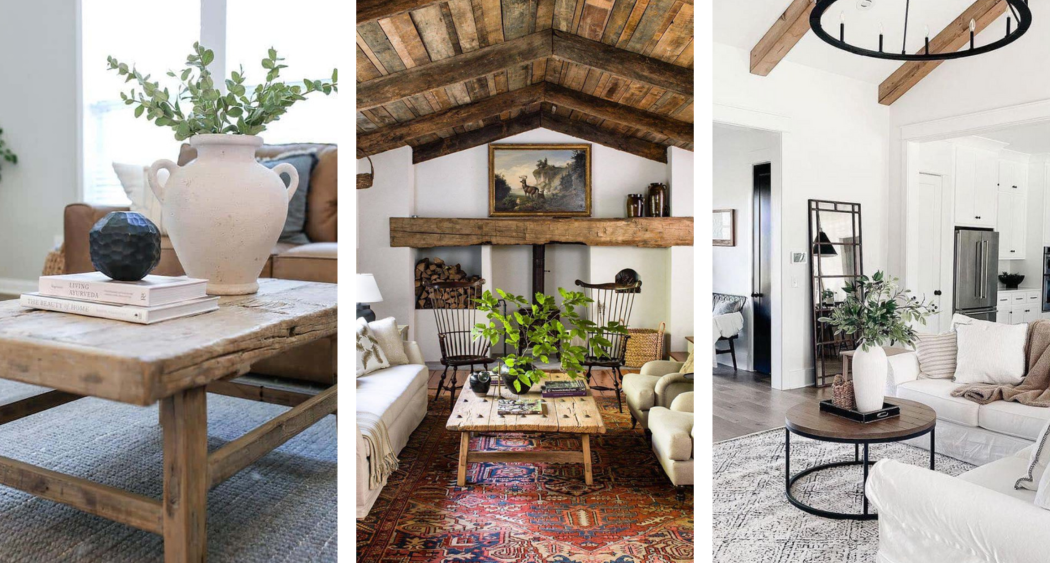
    How to Build Coffee Tables with a Farmhouse or Coastal Look

    How to Build Coffee Tables with a Farmhouse or Coastal Look

    How to Build Coffee Tables with a Farmhouse or Coastal Look: A Step-by-Step Guide

    Hey there, DIY enthusiasts! Are you looking to add a touch of charm and personality to your living room? Building your own coffee table is a fantastic way to do just that, and with a farmhouse or coastal style, you can create a piece that perfectly complements your home's aesthetic. In this guide, we'll walk you through the process of creating a coffee table that's both functional and visually appealing, and you'll be surprised at how simple it can be!

    Choosing Your Style: Farmhouse vs. Coastal

    First, let's decide on the style that best suits your taste:

    Farmhouse Charm

    A farmhouse coffee table exudes warmth and rustic elegance. Think distressed wood, chunky legs, and maybe even a touch of reclaimed materials. You can embrace the natural beauty of wood by leaving it unpainted or staining it in warm tones like brown, gray, or white.

    Coastal Breeze

    If you're drawn to the relaxed vibe of the coast, a coastal coffee table should be your go-to. Light colors, driftwood accents, and nautical details like rope or seashells create a calming atmosphere. You can use white paint, light blue tones, or even incorporate rope elements into your design.

    Materials and Tools You'll Need

    Now, let's gather the materials and tools you'll need for your coffee table project:

    • Wood: This is the foundation of your table! Choose lumber like pine, oak, or cedar based on your style preference and budget.
    • Screws: Go for wood screws in various sizes for securely attaching the table top, legs, and any additional supports.
    • Wood Glue: This will strengthen the joints and ensure your table is sturdy.
    • Sandpaper: You'll need a variety of grits to smooth out the wood and create a polished finish.
    • Stain or Paint: Choose your finish based on your desired style.
    • Polyurethane: This protects your table from scratches, stains, and water damage.
    • Measuring Tape and Pencil: Essential for accurate measurements and marking cuts.
    • Saw: A circular saw or a jigsaw will come in handy for cutting your wood to size.
    • Drill: Use a drill with a bit that matches your screw size for easy fastening.
    • Safety Glasses and Gloves: Protect your eyes and hands while working with tools and wood.

    Building Your Coffee Table: Step-by-Step Instructions

    Ready to get started? Let's build your coffee table! Here's a step-by-step guide to help you along the way:

    Step 1: Designing and Planning

    Before diving in, grab a piece of paper and a pencil. Sketch out your coffee table design, including the dimensions of the tabletop, legs, and any additional supports or shelves. Think about the overall size and shape you want, and consider the height that's comfortable for your living room.

    Step 2: Cutting the Wood

    Now, it's time to cut your wood to size. Using your saw, carefully cut the wood according to your plan. Remember to measure twice and cut once!

    Step 3: Assembling the Tabletop

    For a simple tabletop, you can use a single piece of wood. But if you're going for a larger or more intricate design, you can join multiple pieces together. Apply wood glue to the edges before fastening them with screws. Make sure to use a level to ensure the tabletop is even.

    Step 4: Attaching the Legs

    Once your tabletop is ready, it's time for the legs! Decide where you want to place them. For a farmhouse look, you might choose a more rustic, uneven placement. Coastal designs often call for a more symmetrical arrangement.

    Apply wood glue to the legs and attach them to the underside of the tabletop, using screws to reinforce the connection. Make sure to check that the legs are level and the table is stable.

    Step 5: Adding Details and Finishing Touches

    Time for the fun part! This is where you can really add personality to your table. Here are a few ideas:

    • Farmhouse: For a distressed farmhouse look, sand the edges of the wood to reveal the grain. You can even use a hammer to create small dents or chips in the wood for a more weathered appearance. Stain the table in a warm brown or gray tone.
    • Coastal: Whitewash the wood for a breezy, beachy feel. If you want to incorporate rope, attach it to the underside of the tabletop to create a unique border. Consider adding seashell accents or other nautical elements for a touch of whimsy.

    Step 6: Finishing and Sealing

    Sand your table down to smooth out any rough edges, then apply your chosen stain or paint. Make sure to follow the manufacturer's instructions for drying times. Once the paint or stain is dry, apply a coat of polyurethane to protect your coffee table from spills and scratches.

    Commonly Asked Questions

    Q: What is the best wood to use for a farmhouse or coastal coffee table?

    A: Pine is a great option for both styles due to its affordability and natural beauty. Oak offers durability and a rich grain, making it perfect for a farmhouse look. Cedar provides a natural aroma and resistance to moisture, which can be useful for coastal designs.

    Q: Can I use reclaimed wood for my coffee table?

    A: Absolutely! Reclaimed wood can add a touch of history and character to your farmhouse coffee table. Be sure to inspect the wood thoroughly before using it to ensure it is sound and safe.

    Q: How can I make my coffee table look more unique?

    A: There are endless possibilities for adding unique touches! Consider adding a decorative top, such as a piece of glass, tile, or metal. You can also incorporate metal accents, like iron legs or handles, for a more industrial feel. Don't be afraid to experiment and have fun with your design!

    Q: What if I don't have any woodworking experience?

    A: That's okay! There are plenty of resources available to help you learn the basics of woodworking. Start with simpler projects, and don't be afraid to ask for help if you need it. Remember, practice makes perfect, and you'll be building beautiful furniture in no time!

    Building a coffee table from scratch is a rewarding experience that allows you to create a piece of furniture that's uniquely yours. So, gather your tools, get creative, and enjoy the process of bringing your vision to life!

    Share:

    How to Craft Wooden Benches for Small Apartments and Homes

    How to Craft Wooden Benches for Small Apartments and Homes

    Crafting Wooden Benches for Small Apartments and Homes: A Comprehensive Guide

    In the realm of interior design, benches offer a versatile and space-saving solution, particularly for small apartments and homes. Their ability to serve as seating, storage, and decorative elements makes them an invaluable asset. This comprehensive guide delves into the art of crafting wooden benches, providing step-by-step instructions, design considerations, and expert tips for creating functional and aesthetically pleasing pieces for your living space.

    Choosing the Right Wood for Your Bench

    The choice of wood is paramount in determining the durability, aesthetics, and overall character of your bench. Consider the following factors:

    Durability and Hardness

    For high-traffic areas or benches that will be subjected to significant weight, opt for hardwoods like oak, maple, or walnut. These woods are known for their strength, resistance to wear and tear, and longevity.

    Grain Pattern and Aesthetics

    The grain pattern of wood can dramatically influence the visual appeal of your bench. Choose a wood with a grain that complements your existing décor. For a rustic look, consider knotty pine or reclaimed wood. For a more polished aesthetic, select smooth-grained woods like cherry or mahogany.

    Availability and Cost

    Wood prices can vary widely, so factor in your budget. Local lumberyards, online retailers, and specialty wood suppliers can offer a range of options. Consider exploring salvaged or reclaimed wood for a sustainable and budget-friendly approach.

    Designing Your Wooden Bench

    Once you have chosen your wood, it's time to design your bench. Consider the following aspects:

    Dimensions and Shape

    Determine the optimal dimensions of your bench based on the available space and desired seating capacity. You can choose from a variety of shapes, such as rectangular, square, curved, or even asymmetrical designs.

    Style and Functionality

    Do you envision a minimalist, contemporary bench or a more traditional, rustic piece? Consider the overall style of your home and integrate the bench seamlessly into your existing décor. Functionality is key; decide whether you want a simple seating bench, a bench with storage compartments, or a bench with a backrest.

    Features and Details

    Incorporate features and details to enhance the functionality and aesthetic appeal of your bench. These may include rounded edges for comfort, decorative carving, or built-in cup holders for added convenience. Consider adding a cushion for extra comfort and style.

    Tools and Materials

    To craft your wooden bench, you will need a range of tools and materials, including:

    • Wood (chosen based on your design)
    • Circular saw or table saw
    • Miter saw
    • Power drill and drill bits
    • Sandpaper (various grits)
    • Wood glue
    • Screws or nails
    • Clamps
    • Measuring tape and pencil
    • Safety glasses and hearing protection
    • Finishing materials (stain, paint, varnish, etc.)

    Step-by-Step Construction Guide

    Follow these steps to construct your wooden bench:

    Step 1: Cut the Wood

    Based on your design, use a circular saw or table saw to cut the wood to the required lengths and dimensions. Ensure accurate measurements and make smooth, clean cuts.

    Step 2: Assemble the Frame

    Use wood glue and screws or nails to assemble the frame of the bench. Securely attach the legs, supports, and seat boards. Employ clamps to hold the pieces together while the glue dries.

    Step 3: Add Additional Features

    If your design includes features like storage compartments or a backrest, construct and attach them to the frame using wood glue and screws. Ensure a secure and stable attachment.

    Step 4: Sand the Bench

    Once the bench is assembled, use sandpaper to smooth out any rough edges or imperfections. Begin with coarse-grit sandpaper and gradually transition to finer grits for a smooth finish.

    Step 5: Finish the Bench

    Apply a sealant or finish to protect the wood and enhance its appearance. Stain, paint, or varnish can be used according to your preference. Ensure even application and allow adequate drying time.

    Tips for Crafting a Successful Wooden Bench

    Here are some additional tips to ensure a successful bench-building project:

    • Plan your design thoroughly before starting.
    • Use high-quality materials and tools.
    • Take accurate measurements and cut the wood precisely.
    • Use clamps to secure joints while the glue dries.
    • Sand the bench thoroughly to create a smooth finish.
    • Apply a sealant or finish to protect the wood.
    • Consider adding decorative details like carving or embellishments.
    • Safety first! Wear appropriate safety gear when using power tools.

    Conclusion

    Crafting a wooden bench for your small apartment or home can be a rewarding experience. By following this comprehensive guide, you can create a functional and aesthetically pleasing piece that enhances your living space and serves as a testament to your creativity. Remember, patience and attention to detail are key to crafting a successful bench.

    Share:

    How to Start Selling Simple Wood Projects Online

    How to Start Selling Simple Wood Projects Online

    How to Start Selling Simple Wood Projects Online

    In the digital age, crafting skills can be transformed into a successful online business. Selling simple wood projects online is a lucrative opportunity for individuals with woodworking abilities and an entrepreneurial spirit. This guide will provide a comprehensive overview of the steps involved in launching and growing your online woodworking business, covering everything from product selection to marketing and sales.

    1. Product Selection

    The foundation of any successful online business lies in offering high-quality, desirable products. When selecting wood projects to sell, consider the following factors:

    1.1. Simplicity and Scalability

    Begin with simple woodworking projects that can be efficiently produced. Simple projects, such as cutting boards, coasters, and small decorative items, require less time and resources to create, allowing you to focus on building your business. Ensure that your chosen projects can be scaled to meet increasing demand.

    1.2. Target Audience

    Identify your target audience and cater to their preferences. Research popular woodworking styles, trends, and demographics to determine what resonates with your potential customers. Consider specializing in a niche, such as farmhouse decor, rustic furniture, or modern minimalist designs.

    1.3. Material Quality and Sustainability

    Utilize high-quality, durable wood for your projects. Consumers appreciate sustainable and eco-friendly practices, so consider using reclaimed wood or certified sustainable lumber. Highlight the source and quality of your materials in your product descriptions to enhance customer trust and appeal.

    1.4. Uniqueness and Personalization

    Offer unique and personalized wood projects to stand out from the competition. Custom orders, engraved pieces, or personalized designs provide customers with a special touch and increase their value perception.

    2. Building Your Online Presence

    Establishing a strong online presence is crucial for attracting customers and generating sales. Utilize the following platforms and strategies:

    2.1. Website and E-commerce Platform

    Create a professional website with an e-commerce platform to showcase your products and facilitate online sales. Employ user-friendly website design, high-quality product images, detailed descriptions, and secure payment processing. Consider platforms like Shopify, Etsy, or WooCommerce for easy website creation and online store management.

    2.2. Social Media Marketing

    Utilize social media platforms like Instagram, Facebook, and Pinterest to promote your woodworking projects. Showcase your work through engaging photos and videos, share behind-the-scenes insights, and interact with potential customers. Use relevant hashtags to increase visibility and reach a wider audience.

    2.3. Online Marketplaces

    Expand your reach by listing your products on online marketplaces like Etsy, Amazon Handmade, and eBay. These platforms provide access to a vast customer base and built-in marketing features. Be sure to optimize your listings with relevant keywords and high-quality images.

    3. Pricing and Profitability

    Determining the right price for your woodworking projects is vital for profitability. Consider the following factors:

    3.1. Material Costs

    Calculate the cost of materials, including wood, hardware, finishes, and packaging. Factor in any discounts or bulk purchase savings.

    3.2. Labor and Time

    Estimate the time required to create each project and assign a fair hourly rate for your labor. Include the time spent on design, fabrication, finishing, and packaging.

    3.3. Overhead Costs

    Account for overhead costs, such as website hosting, marketing expenses, and insurance. These costs contribute to the overall cost of producing your woodworking projects.

    3.4. Competition and Market Demand

    Research competitor pricing and assess market demand for your products. Adjust your pricing based on the value you provide, the quality of your work, and the level of competition.

    4. Production and Fulfillment

    Efficiently producing and fulfilling orders is essential for customer satisfaction and business success. Consider the following processes:

    4.1. Production Planning

    Develop a production plan to ensure you can meet anticipated demand. Optimize your workflow, manage inventory, and allocate resources effectively to avoid production bottlenecks.

    4.2. Quality Control

    Implement strict quality control measures to ensure your woodworking projects meet high standards. Inspect materials, monitor production processes, and conduct final quality checks before shipping.

    4.3. Packaging and Shipping

    Package your woodworking projects professionally and securely to prevent damage during shipping. Choose appropriate packaging materials, use protective inserts, and label clearly with shipping information.

    4.4. Customer Service

    Provide excellent customer service to foster loyalty and positive reviews. Respond promptly to inquiries, address any concerns, and offer support throughout the customer journey.

    5. Marketing and Sales

    Marketing and sales efforts are crucial for attracting customers and driving revenue. Consider the following strategies:

    5.1. Content Marketing

    Create informative and engaging content, such as blog posts, videos, and tutorials, to educate and inspire potential customers. Share your knowledge of woodworking, highlight the benefits of your products, and showcase your craftsmanship.

    5.2. Email Marketing

    Build an email list and send regular newsletters to keep customers informed about new products, promotions, and events. Provide valuable content, exclusive offers, and personalized recommendations to nurture relationships.

    5.3. Paid Advertising

    Consider utilizing paid advertising platforms like Google Ads or social media ads to reach a wider audience. Target specific demographics, interests, and keywords to maximize your ad spend and generate leads.

    5.4. Partnerships and Collaborations

    Partner with other businesses, influencers, or bloggers in related industries to cross-promote your products. Collaborations can expand your reach, introduce you to new audiences, and generate valuable referrals.

    6. Scaling and Growth

    As your online woodworking business grows, consider strategies for scaling your operations and expanding your offerings:

    6.1. Hiring and Delegation

    Delegate tasks and hire additional help to manage the increased workload. Consider hiring assistants, contractors, or full-time employees to support production, marketing, and customer service.

    6.2. Expanding Product Lines

    Introduce new product lines or variations to cater to evolving customer preferences and diversify your revenue streams. Offer different wood types, finishes, sizes, and styles to attract a wider range of customers.

    6.3. Wholesale and Retail Partnerships

    Explore wholesale opportunities by selling your woodworking projects to retailers or distributors. This can significantly expand your customer base and increase your sales volume.

    7. Legal and Business Considerations

    Ensure you comply with legal requirements and establish a solid business foundation:

    7.1. Business Registration

    Register your business as a sole proprietorship, partnership, or corporation to protect your liability and establish legal standing.

    7.2. Taxes and Insurance

    Understand your tax obligations and obtain necessary insurance coverage, such as general liability and product liability insurance.

    7.3. Intellectual Property Protection

    Consider registering trademarks or copyrights for your unique designs or branding elements to protect your intellectual property.

    Conclusion

    Selling simple wood projects online is a rewarding and profitable venture. By carefully selecting products, building a strong online presence, pricing strategically, and employing effective marketing and sales strategies, you can turn your woodworking passion into a thriving online business. Embrace creativity, dedication, and a customer-centric approach to succeed in this exciting and growing market.

    Share:

    Wood Toolbox Organizers That Fit Any Tool Collection

    Wood Toolbox Organizers That Fit Any Tool Collection

    Wood Toolbox Organizers That Fit Any Tool Collection

    A well-organized toolbox is a joy to behold. It's the difference between frantically searching for a screwdriver amidst a chaotic jumble of tools and effortlessly pulling out the exact tool you need in a matter of seconds. While a well-stocked toolbox is essential for any DIY enthusiast or professional, it's the organization that truly makes the difference. Enter the world of wood toolbox organizers - practical, durable, and customizable solutions to transform your toolbox from a tangled mess into a streamlined haven for your tools.

    Why Choose Wood Toolbox Organizers?

    Wood toolbox organizers offer a unique blend of durability, customization, and aesthetic appeal. Unlike plastic organizers that can crack or warp over time, wood organizers are built to last. Their natural beauty adds a touch of warmth and craftsmanship to your toolbox, making it more than just a storage space - it's a reflection of your dedication to quality and organization.

    Durability and Longevity

    Wood is known for its resilience and durability. Well-crafted wood organizers can withstand years of use, handling the wear and tear of heavy tools without cracking or breaking. Unlike flimsy plastic organizers, wood organizers provide a sturdy and reliable foundation for your tools.

    Customization and Flexibility

    Wood organizers offer unparalleled flexibility in terms of customization. You can tailor the size, shape, and compartments to fit your specific tool collection. Whether you have a vast array of tools or a more modest selection, you can create an organizer that perfectly accommodates your needs.

    Aesthetic Appeal

    Wood organizers bring a touch of natural elegance to your toolbox. The warm hues and grain patterns of wood add a touch of class and sophistication, elevating your toolbox from a mere storage space to a well-designed and functional element of your workspace.

    Types of Wood Toolbox Organizers

    The world of wood toolbox organizers is diverse, offering a range of options to suit every need and style. Let's explore some popular types:

    DIY Kits

    For those who enjoy a hands-on approach, DIY kits offer a satisfying way to create a custom wood organizer. These kits typically include pre-cut wood pieces, hardware, and instructions, guiding you through the assembly process. The advantage lies in the ability to personalize the design and size to match your specific requirements.

    Pre-Made Organizers

    If you prefer a ready-made solution, pre-made wood organizers are readily available. These organizers come in various sizes and configurations, catering to different tool collections. Look for organizers with durable construction, well-designed compartments, and features that enhance functionality.

    Specialty Organizers

    For specialized tool collections, such as woodworking tools or automotive tools, there are specialized organizers designed to accommodate specific requirements. These organizers may feature dedicated compartments for specific tools, ensuring maximum efficiency and organization.

    Tips for Choosing and Using Wood Toolbox Organizers

    When selecting a wood toolbox organizer, consider these crucial factors:

    • Size and Capacity: Measure your toolbox and the tools you need to store. Choose an organizer that fits comfortably and provides ample space for your collection.
    • Compartment Design: Opt for organizers with compartments that are the right size and shape for your tools. Avoid overly large or small compartments, as they can lead to wasted space or difficulty accessing tools.
    • Material Quality: Look for organizers made from high-quality wood that is durable and resistant to scratches and dents. Choose organizers with sturdy construction and well-finished surfaces.
    • Features and Functionality: Consider features such as dividers, trays, and drawers that can help you organize tools further and enhance accessibility.
    • Aesthetics: Choose an organizer that complements the style of your toolbox and workspace.

    Once you have your wood toolbox organizer, follow these tips to maximize its potential:

    • Sort and Categorize: Divide your tools into logical categories, such as hand tools, power tools, measuring tools, and fasteners.
    • Label Compartments: Label each compartment to make it easy to find the tools you need.
    • Maintain Order: Keep your organizer clean and organized by putting tools back in their designated spots after use.

    Investing in a wood toolbox organizer is an investment in efficiency, organization, and a touch of craftsmanship. It's a simple yet transformative step that can turn your toolbox from a cluttered mess into a well-ordered haven for your tools.

    Share:

    How to Add a Personalized Touch to Your Tiered Plant Stands

    How to Add a Personalized Touch to Your Tiered Plant Stands

    How to Add a Personalized Touch to Your Tiered Plant Stands

    Tiered plant stands are a versatile and stylish way to showcase your indoor greenery. But beyond their functional purpose, they offer a fantastic canvas for expressing your personal style and creating a unique space that truly reflects your taste. This article will guide you through various techniques and ideas for adding a personalized touch to your tiered plant stands, transforming them from ordinary to extraordinary.

    Embracing Color and Pattern

    The most immediate way to personalize your plant stand is through color and pattern. The possibilities are endless, catering to every aesthetic preference. Here's how you can incorporate color and pattern:

    Painting the Stand

    A fresh coat of paint can completely change the look of your plant stand. Consider these options:

    • Solid Colors: Choose a vibrant hue that complements your decor, such as a bright teal, a calming sage green, or a classic white.
    • Two-Tone Color Schemes: Create a modern look by painting the tiers in contrasting colors.
    • Metallic Finishes: Gold, silver, or copper finishes can add a touch of elegance and sophistication.
    • Chalkboard Paint: Transform your plant stand into a writable surface, allowing you to jot down plant care reminders, inspirational quotes, or even whimsical messages.

    Applying Wallpaper or Contact Paper

    For a quick and easy makeover, consider using wallpaper or contact paper. These materials offer a wide range of patterns, textures, and colors, enabling you to create a bold statement or a subtle accent.

    • Geometric Patterns: Add visual interest with geometric patterns like stripes, chevrons, or polka dots.
    • Floral Prints: Embrace a classic and romantic vibe with delicate floral designs.
    • Textured Finishes: Create a tactile experience with textured wallpapers or contact papers that mimic brick, wood, or natural fibers.

    Adding Decorative Elements

    Beyond color and pattern, you can enhance your tiered plant stands with decorative elements that showcase your personality and interests.

    Embellishing with Beads, Stones, or Shells

    Create a unique and textural appeal by adhering beads, stones, or shells to the surface of your plant stand. These elements can be arranged in patterns, clusters, or scattered randomly for a more organic look.

    • Glass Beads: Add a touch of sparkle and light reflection with iridescent glass beads.
    • Natural Stones: Incorporate smooth river stones, polished pebbles, or rough-hewn rocks for a rustic and earthy feel.
    • Seashells: Bring the seaside into your home with a collection of seashells arranged in an eye-catching pattern.

    Incorporating Fabric and Lace

    Introduce a touch of softness and femininity with fabric and lace. Consider these ideas:

    • Fabric Wrap: Wrap the tiers of your plant stand with a beautiful fabric, such as linen, cotton, or burlap, secured with ribbon or twine.
    • Lace Trim: Add a delicate lace trim to the edges of the tiers, creating a refined and romantic look.
    • Fabric Flowers: Attach fabric flowers to the tiers for a charming and whimsical touch.

    Utilizing Hardware and Findings

    Enhance the visual appeal of your plant stand with hardware and findings. Here are some inspiring ideas:

    • Knobs and Handles: Add decorative knobs or handles to the tiers for a functional and stylish touch. Choose from a variety of materials and styles, such as ceramic, wood, or metal.
    • Metal Accents: Incorporate metal accents like small chains, decorative metal rings, or antique-looking keys to add a touch of industrial chic or vintage flair.
    • Pendant Lights: Suspend miniature pendant lights from the tiers, creating a warm and inviting ambiance, particularly in dimly lit corners.

    Creating a Cohesive Theme

    To elevate your personalized plant stand, consider choosing a theme that reflects your interests or decor style. Here are some theme ideas:

    Bohemian Chic

    Embrace a free-spirited vibe with bohemian decor. Paint the plant stand in earthy tones like terracotta or olive green. Adorn it with macrame, beads, feathers, and dried flowers.

    Coastal Retreat

    Transport yourself to the seaside with a coastal-themed plant stand. Paint it in a light blue or whitewash color. Decorate it with seashells, rope, driftwood, and nautical accents like anchors and stars.

    Mid-Century Modern

    Embrace the sleek and sophisticated style of mid-century modern. Paint the stand in a bold color like mustard yellow or forest green. Incorporate geometric patterns, metal accents, and minimalist décor.

    Industrial Chic

    Create a raw and edgy look with an industrial chic theme. Leave the plant stand in its natural wood finish or paint it in a dark gray or black. Decorate it with metal pipes, gears, and vintage industrial finds.

    Tips for Adding Personality

    Here are some additional tips to help you infuse your plant stand with your personal style:

    • Consider Your Decor: Match the style of your plant stand to your existing furniture and decor.
    • Embrace Imperfections: Don't be afraid to embrace a little imperfection. Distressed finishes, chipped paint, or mismatched elements can add character and charm.
    • Use Natural Elements: Incorporate natural elements like wood, stone, or dried flowers to create a sense of warmth and grounding.
    • Add Personal Touches: Include items that hold special meaning to you, such as a family heirloom, a favorite travel memento, or a cherished piece of art.

    Ultimately, the key to personalizing your tiered plant stand is to experiment and have fun. Let your creativity flow and don't be afraid to mix and match different elements to create a unique and expressive piece that reflects your individual style.

    Share:

    Quick and Easy Wine Racks to Build and Sell for Profit

    Quick and Easy Wine Racks to Build and Sell for Profit

    Quick and Easy Wine Racks to Build and Sell for Profit

    Hey there, fellow DIYers! Are you looking for a fun and profitable woodworking project? Look no further than building and selling wine racks. Wine racks are always in demand, especially with the growing popularity of home bars and wine cellars. Plus, they're relatively easy to build, even for beginners. You can make some good cash with a little time and effort. Let's dive into some quick and easy wine rack designs that are sure to sell!

    Simple and Sleek: The Wall-Mounted Wine Rack

    This classic design is a winner because it's easy to build, space-saving, and can be customized to fit any style.

    Materials You'll Need:

    • Wood boards (pine, oak, or cedar are great choices)
    • Wood glue
    • Wood screws
    • Sandpaper
    • Wood stain or paint (optional)
    • Measuring tape
    • Saw (hand saw, circular saw, or jigsaw)
    • Drill
    • Level

    Steps:

    1. Cut the wood to size. You'll need to cut the boards to the desired length for your wine rack. Consider the number of bottles you want to store and the size of your wall space.
    2. Assemble the shelves. Cut and assemble the shelves using wood glue and screws. Make sure the shelves are securely attached and level.
    3. Add support pieces. Cut and attach support pieces to the back of the shelves to create a sturdy base. Use a level to make sure everything is straight.
    4. Sand and finish. Smooth out any rough edges with sandpaper. Apply stain or paint to enhance the look and provide a protective finish. Let dry completely. You can use a clear coat to seal the wood and protect it from spills.
    5. Mount the rack. Choose a location on the wall and use a level to mark the position of the rack. Drill pilot holes for the screws and then attach the rack to the wall securely.

    You can add more creative touches by using different wood types or adding decorative elements like metal brackets or a wine bottle holder.

    Rustic Charm: The Wine Barrel Rack

    Looking for something unique and eye-catching? A wine barrel rack adds a rustic charm to any setting.

    Materials You'll Need:

    • Half wine barrel
    • Wood screws
    • Sandpaper
    • Wood stain or paint (optional)
    • Drill

    Steps:

    1. Clean and prep the barrel. Remove any excess debris, and give the barrel a good scrub with soap and water. You can also use a wire brush to remove any stubborn dirt.
    2. Sand the barrel. Sand the barrel using sandpaper to smooth out any rough spots. This will make the barrel look more polished and help the finish adhere properly.
    3. Stain or paint (optional). You can stain or paint the barrel to create a custom look that fits your style. A natural wood finish can highlight the rustic look, while a painted barrel can add a pop of color.
    4. Drill holes for bottles. Mark the spots for your bottle holes and drill them with a drill bit that is slightly larger than the diameter of your wine bottles.

    Remember to check the diameter of your wine bottles to ensure they fit snugly in the holes. You can also add a decorative piece to the top of the barrel for a more polished look.

    Contemporary Style: The Stacked Wine Rack

    This modern design is both stylish and functional. It's great for larger wine collections and adds a touch of sophistication to your home bar.

    Materials You'll Need:

    • Wood boards (plywood, MDF, or hardwood)
    • Wood glue
    • Wood screws
    • Sandpaper
    • Wood stain or paint (optional)
    • Measuring tape
    • Saw (hand saw, circular saw, or jigsaw)
    • Drill
    • Level

    Steps:

    1. Cut the wood to size. Cut the boards to create individual shelf units, making sure they're wide enough to accommodate your bottles and the desired stacking height.
    2. Create the bottle slots. Using a jigsaw or a drill with a special bit, create slots for your wine bottles in each shelf unit. Make sure the slots are wide enough for the bottles but not too loose.
    3. Assemble the units. Use wood glue and screws to connect the shelf units together. Securely attach them to form a stable and attractive stack. Be sure to check for levelness as you go.
    4. Sand and finish. Once the rack is assembled, sand any rough edges and apply a stain or paint (optional) to create a beautiful final look.

    You can experiment with different wood types and finishes to create unique variations. A stacked wine rack can also be customized by adding a built-in bottle opener or a small storage space for glasses.

    Tips for Success

    Here are some tips to make your wine rack building and selling experience a profitable one:

    • Research your market. What kind of wine racks are in demand in your area? Visit local furniture stores and online marketplaces to get an idea of popular styles and price points.
    • Find quality materials at affordable prices. Shop around for wood and hardware at local lumber yards, online retailers, or even salvage yards for unique and cost-effective materials.
    • Focus on quality and craftsmanship. A well-built wine rack is a worthwhile investment. Use sturdy materials and take pride in your workmanship to create a product that people will appreciate.
    • Price competitively. Consider your costs, your time, and the market value when setting your prices. Offer competitive pricing, but don't undervalue your work.
    • Promote your products. Create a website, social media presence, or online marketplace listings to showcase your wine racks. Share photos of your work and highlight the unique features and craftsmanship.
    • Offer excellent customer service. Build positive relationships with your customers by responding promptly to inquiries, being helpful, and going the extra mile to ensure their satisfaction.

    Frequently Asked Questions

    Q: What kind of wood should I use for a wine rack?

    You can use various woods, but pine, oak, and cedar are popular choices. Pine is relatively affordable and easy to work with. Oak is known for its durability and attractive grain patterns. Cedar is naturally insect-resistant and has a pleasant aroma.

    Q: How do I finish my wine rack?

    You can stain, paint, or use a clear coat to finish your wine rack. A clear coat will protect the wood and enhance its natural beauty. Stains add color and depth, while paints provide a vibrant finish. Choose a finish that complements the style and wood type.

    Q: Where can I sell my wine racks?

    You can sell your wine racks online on platforms like Etsy, Facebook Marketplace, Craigslist, or Amazon Handmade. You can also sell them locally at craft fairs, farmers markets, or consignment shops. You can even try selling them to local wineries or restaurants.

    Q: How do I make my wine racks stand out from the competition?

    Offer unique designs, use high-quality materials, focus on craftsmanship, and provide excellent customer service. You can also offer customization options, such as different wood types, finishes, or sizes. Get creative and showcase your personality in your work!

    Building and selling wine racks is a great way to unleash your creativity, turn a profit, and add a touch of elegance to people's homes. So, get out there, grab your tools, and start crafting those beautiful wine racks! Good luck!

    Share:

    人気の投稿

    Blog Archive

    Powered by Blogger.

    ブログ アーカイブ